
Looking for a fun way to bring a little Grinchmas personality to your Christmas tree? These Grinch ornaments DIY ideas are easy to customize, inexpensive to make, and suitable for everyone from beginners to experienced crafters.
You do not need a Cricut to make a cute Grinch ornament. A clear plastic ornament, green filler, paint pens, and a red heart can create a simple decoration in very little active crafting time. If you have a Cricut, you can take the same basic idea further with vinyl faces, names, phrases, and coordinated designs.
This guide starts with the easiest Grinch ornament for beginners, then covers glitter ornaments, Cricut and no-Cricut options, kids’ crafts, personalized ornaments, budget ideas, bulk production, design tips, and solutions to common problems.
Easy Grinch Ornament DIY: The Best Beginner Project
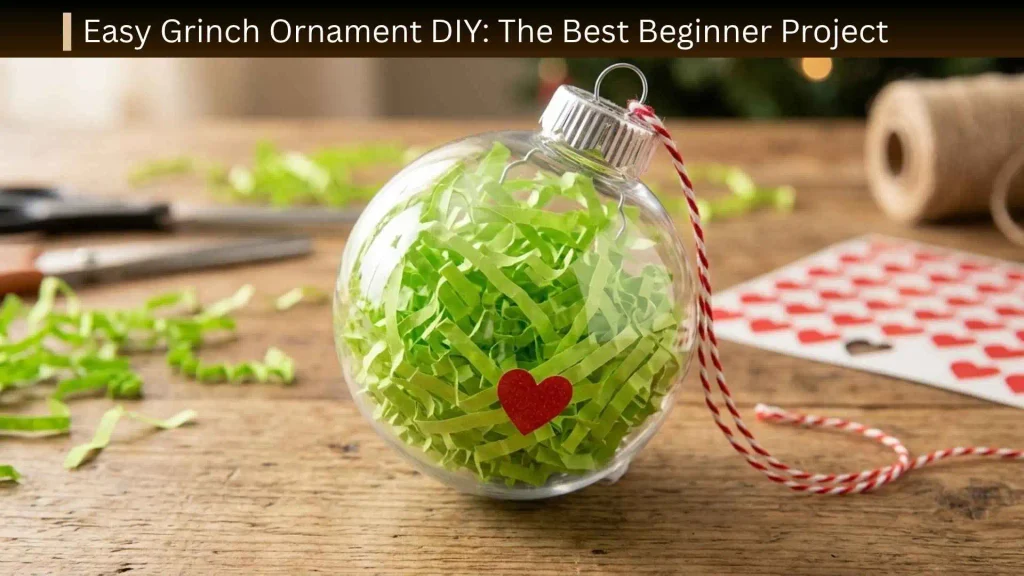
If this is your first time making a Grinch ornament, start with a clear plastic ornament filled with green craft materials.
It is forgiving, inexpensive, and easy to personalize. You can use pom-poms, paper shred, feathers, or another lightweight green filler. Clear ornaments are also versatile because you can change the contents without changing the basic design. Similar clear-ball Grinch projects use fillers such as pom-poms, feathers, and paper shred.
Easy Grinch Ornament at a Glance
| Feature | Details |
| Difficulty | Easy |
| Best for | Beginners, families, kids with adult help |
| Cricut required | No |
| Main ornament | Clear plastic ornament |
| Main colors | Green, yellow, black, red, white |
| Active crafting time | About 15–20 minutes |
| Best filler | Green pom-poms or paper |
| Best feature | Easy to customize |
| Good for gifts | Yes |
| Good for bulk making | Yes |
The exact time depends on the materials you choose and whether paint or adhesive needs additional drying time.
Materials You Need
For one simple Grinch ornament, gather:
- 1 clear plastic Christmas ornament
- Green pom-poms, paper shred, or green feathers
- Yellow paint pen
- Black paint pen or permanent marker
- White paint pen
- Red felt, craft foam, paper, or a heart sticker
- Ribbon or twine
- Ornament hook, if needed
- Optional hot glue
- Optional green ribbon or faux-fur trim
You can substitute several of these supplies. For example, paper can replace pom-poms, craft foam can replace felt, and paint pens can replace vinyl.
Safety: Use plastic ornaments when crafting with young children. Keep hot glue, sharp scissors, craft blades, glass ornaments, and tiny embellishments away from children who cannot safely handle them.
How to Make the Grinch Ornament
Start by removing the metal or plastic cap from the clear ornament.
Add your green filler. Do not pack the ornament too tightly because you still want the face to be visible from the outside.
Replace the cap and hold the ornament by its hanging loop.
Now create the face.
Use yellow paint to make two slightly uneven eyes. Let the yellow dry before adding the black pupils.
Add the eyebrows and nose.
Next, draw the Grinch’s recognizable crooked smile. It does not need to be perfectly symmetrical. In fact, a slightly imperfect expression can make a handmade ornament look more playful.
Finish with a red heart near the bottom of the ornament.
Once everything is completely dry, attach a ribbon or ornament hook.
Easy Substitutions
You do not need to stop your project because one supply is missing.
| Instead of this | Try this |
| Green pom-poms | Green tissue paper |
| Green feathers | Green yarn |
| Red felt | Red cardstock |
| Vinyl | Paint pen |
| Craft foam | Thick paper |
| Ribbon | Twine or yarn |
| Clear plastic ornament | Flat wood ornament |
| Loose glitter | Green paper filler |
This is especially useful when making ornaments with children because you can use materials already in your craft drawer.
Why This Method Is So Beginner-Friendly
The biggest advantage is that you do not have to create a complicated three-dimensional Grinch figure.
The green filler provides the color.
The eyes and smile provide the character.
The red heart provides the recognizable Christmas detail.
That means even a simple ornament can immediately look like a Grinch-themed decoration.
More Grinch Ornaments DIY Ideas
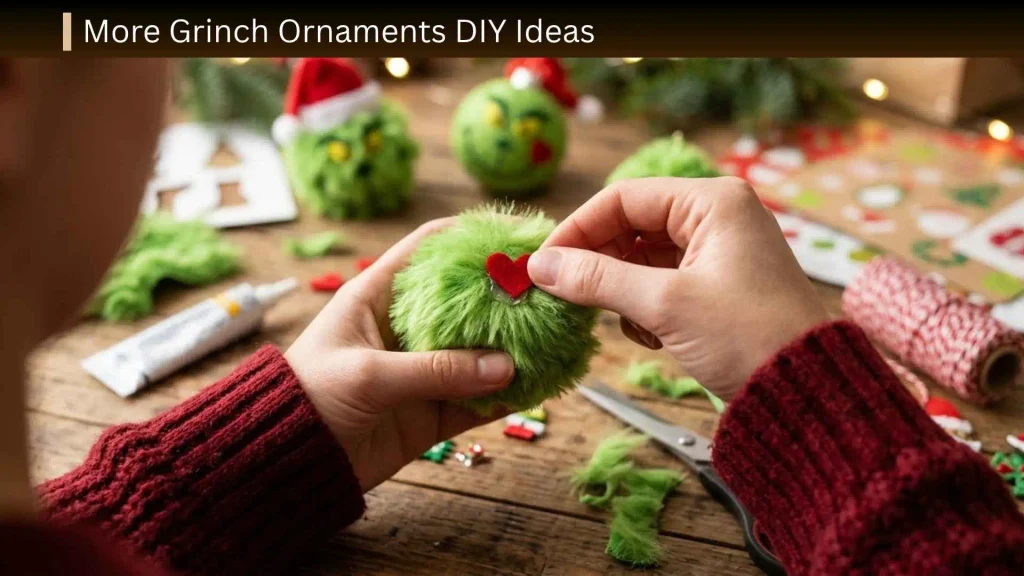
Once you understand the basic design, you can change the materials and style to create completely different ornaments.
Glitter Grinch Ornament
A glitter ornament is a good choice if you want something bright and sparkly.
Clear plastic or glass ornaments can be coated on the inside with an appropriate finish and then covered with fine glitter. Existing glitter ornament tutorials commonly use a coating-and-glitter method, followed by exterior vinyl or other decorations.
For a Grinch version, use green glitter for the interior and add the face to the outside.
The result is particularly attractive when Christmas tree lights reflect against the glitter.
Important: Glitter can create a lot of cleanup. If you are crafting with young children or making dozens of ornaments, green paper or pom-poms may be easier to manage.
Grinch Heart Ornament
Instead of focusing on the Grinch’s face, make the heart the main feature.
Use a red heart made from:
- Felt
- Craft foam
- Cardstock
- Vinyl
- Painted wood
- A ready-made sticker
Attach the heart to a green ornament or place it inside a clear ornament.
For a sentimental version, add a name or year underneath it.
This design works especially well for family trees because it captures the warm side of the Grinch theme rather than relying only on the character’s facial expression.
Grinch Handprint Ornament
A handprint ornament makes a wonderful keepsake for children.
Trace the child’s hand onto green cardstock and cut it out.
Turn the handprint into a Grinch-inspired character by adding:
- Googly eyes
- A red heart
- Black facial details
- White trim
- A ribbon hanger
Write the child’s name and the Christmas year on the back.
This idea can become more meaningful over time because you can compare handprints from different Christmases.
Wood Grinch Ornament
Flat wood ornaments are especially convenient because you are working on a relatively flat surface.
Paint the wood green, then add the face using paint pens.
Another option is to attach printed artwork to the wood and seal it with a suitable craft finish. Printed designs on flat wood circles are also used in budget-friendly Grinch ornament projects.
Wood is a good choice if you want:
- Rustic Christmas décor
- Farmhouse-style ornaments
- Easy storage
- Flat ornaments
- A surface that is easier to decorate than a round ball
Air-Dry Clay Grinch Ornament
For a more handmade look, use air-dry clay.
Roll the clay flat and cut it into a simple ornament shape.
Create the Grinch-inspired face with small pieces of clay or paint it after the clay has dried.
Before the clay completely hardens, make a small hole near the top for ribbon.
This option takes longer than a clear ornament, but the finished piece can feel more like a handmade keepsake.
Personalized Grinch Ornament
Personalization can turn an ordinary craft into a Christmas gift.
Add:
- A child’s name
- Family name
- Christmas year
- Pet’s name
- Teacher’s name
- First Christmas
- Short Christmas message
For a clean design, place the name on the back and keep the Grinch face on the front.
If you’re making ornaments for several family members, use the same basic design but change the name and year.
Grinch Ornaments Without a Cricut
You can make excellent Grinch ornaments without owning a cutting machine.
In fact, a no-Cricut method can be easier for someone who only wants to make a few ornaments.
Paint-Pen Grinch Ornament
Paint pens are one of the simplest alternatives to vinyl.
Use:
- Yellow for eyes
- Black for pupils and facial lines
- White for highlights
- Red for the heart
- Green for additional details
Draw the larger shapes first.
Let each layer dry before adding small details.
If your first attempt does not look perfect, do not worry. The Grinch’s exaggerated expression means that slightly uneven eyebrows or a crooked smile can actually suit the design.
Paper Grinch Ornament
Paper is one of the cheapest ways to make Christmas ornaments.
Draw or print simple Grinch-inspired shapes and attach them to:
- Cardstock
- Wood circles
- Craft foam
- Heavy paper
- Recycled cardboard
Add ribbon at the top.
This method is particularly useful when you need a large quantity of ornaments for a classroom, party, or children’s craft activity.
Pom-Pom Grinch Ornament
Fill a clear ornament with green pom-poms.
Then add a red heart and a simple face.
This version is especially useful for younger children because the basic design does not require detailed cutting.
If small pieces are a choking hazard for the children involved, have an adult complete that portion or choose larger craft components.
Grinch Ornaments With Cricut
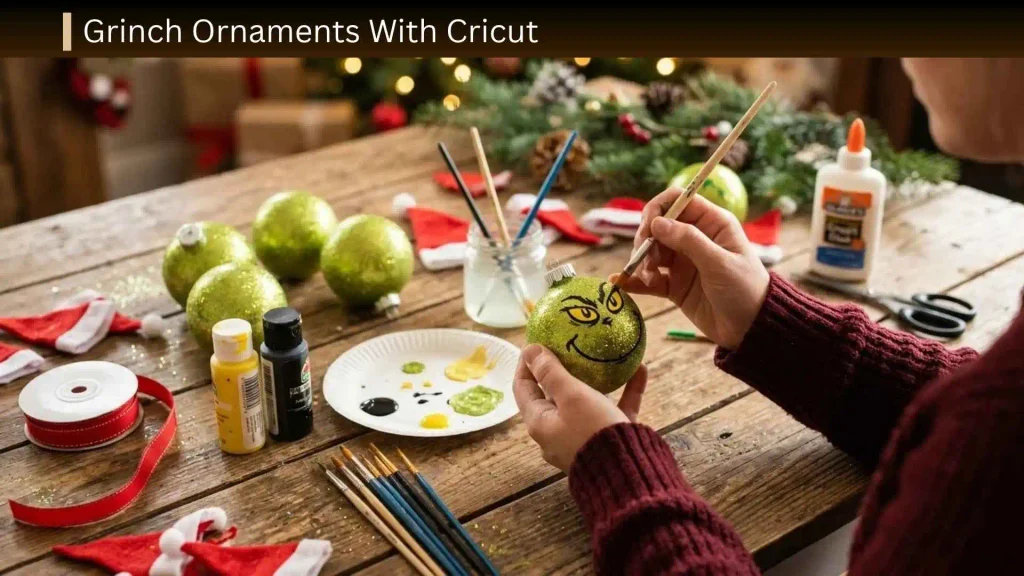
A Cricut can make the decorating stage faster and more consistent, especially when making multiple ornaments.
You can use adhesive vinyl for:
- Eyes
- Mouth
- Nose
- Names
- Hearts
- Short phrases
- Decorative shapes
Cricut-based Grinch ornament projects commonly use adhesive vinyl applied to clear ornaments, while some designs combine vinyl with glitter-filled ornaments.
Best Materials for a Cricut Grinch Ornament
A basic Cricut setup may include:
- Cutting machine
- Permanent adhesive vinyl
- Transfer tape
- Weeding tool
- Scraper
- Clear ornament
- Green filler
- Red vinyl or felt
- Ribbon
You do not necessarily need multiple vinyl colors for every design. A simple black facial design combined with a physical red heart can reduce the number of layers you need to align.
How to Apply Vinyl to a Round Ornament
Round ornaments are more difficult than flat surfaces because vinyl wants to remain flat while the ornament curves away from it.
Clean the ornament first so dirt and oils do not interfere with adhesion.
Cut your design at a manageable size.
Weed the unwanted vinyl.
Apply transfer tape.
Position the design slowly.
Instead of pressing the entire design down at once, work from the center toward the edges.
For strongly curved surfaces, dividing the transfer material into smaller sections or adding relief cuts can make it easier to conform to the ornament. This is a commonly recommended approach in glitter-ornament tutorials.
How to Fix Wrinkled Vinyl
If the vinyl wrinkles, do not immediately press harder.
Carefully lift the affected section.
Smooth it again from the center outward.
If the design is simply too large for the curve, resize it.
For particularly rounded ornaments, a smaller face can look better and be easier to apply than a large face that reaches around the sides.
When to Choose a Flat Ornament Instead
If your priority is perfect vinyl placement, a flat disc-style ornament is easier than a fully round ball.
This is an important choice before you begin.
Choose a round ornament when you want a classic Christmas-ball appearance.
Choose a flat ornament when you want easier vinyl application and more precise lettering.
Easy Grinch Ornaments for Kids
The best children’s Christmas crafts are not necessarily the most complicated ones.
Kids usually enjoy choosing colors, adding decorations, and making their own design decisions.
Grinch Crafts for Younger Children
For younger children, keep the activity simple.
Good choices include:
- Green pom-pom ornaments
- Paper Grinch faces
- Sticker ornaments
- Handprint Grinch ornaments
- Large felt hearts
- Pre-cut foam shapes
An adult can prepare the difficult parts beforehand.
For example, cut the hearts and facial pieces before the craft begins, then let children choose where to place them.
Grinch Crafts for Older Kids
Older children can handle more detailed projects with supervision.
Try:
- Paint-pen ornaments
- Wood ornaments
- Simple vinyl designs
- Personalized ornaments
- Air-dry clay
- Glitter ornaments
Let them create different facial expressions rather than insisting that every ornament look identical.
Safety Tips for Kids’ Ornament Crafts
Risk: broken glass. Mitigation: use plastic ornaments for children.
Risk: hot glue burns. Mitigation: have an adult operate the glue gun.
Risk: small craft pieces. Mitigation: use larger components with younger children and supervise the activity.
Risk: paint or adhesive fumes. Mitigation: use products according to their labels and work in an appropriately ventilated area.
Cheap Grinch Ornaments on a Budget
You do not need specialty craft supplies to make a Grinch-themed tree.
The most economical approach is to choose a simple base and repeat the same design.
Dollar-Store-Style Grinch Ornament
Look for inexpensive:
- Clear ornaments
- Wood blanks
- Green craft foam
- Red ribbon
- Paint
- Pom-poms
- Cardstock
You can also reuse materials you already own.
A plain green ornament can become a Grinch ornament simply by adding eyes, a smile, and a red heart.
How to Make 10 Grinch Ornaments Cheaply
Do not create ten completely different designs.
Choose one basic template.
For example:
Base: clear plastic ornament
Filler: green paper
Face: black and yellow paint
Heart: red cardstock
Hanger: ribbon
Then buy supplies according to the total number of ornaments.
This reduces waste and makes the assembly process much faster.
How to Make 10–20 Grinch Ornaments at Once
Making ornaments in batches is very different from making one ornament.
The biggest time saver is to work like an assembly line.
Prepare All Materials First
Before decorating anything, organize:
- Ornaments
- Green filler
- Hearts
- Paint pens
- Vinyl
- Ribbon
- Hooks
- Packaging
Keep each item in its own container.
Work One Step at a Time
Instead of completing ornament number one from beginning to end, do the same task across the entire batch.
For example:
- Fill every ornament.
- Add all the hearts.
- Paint all yellow eyes.
- Add all black details.
- Add ribbons.
- Inspect the ornaments.
- Package them.
This reduces repeated setup and cleanup.
Keep Batch Designs Simple
If you’re making 20 ornaments, avoid designs with dozens of tiny pieces.
A recognizable Grinch face needs only a few strong features.
A simple design also makes handmade ornaments look more consistent.
Grinch Ornament Design Tips
A homemade ornament can look polished without being complicated.
Keep the Face Proportional
The eyes should be large enough to recognize from a distance.
The mouth should have enough space around it so it does not blend into the other details.
The heart should be visible without covering the face.
Use a Limited Color Palette
A simple Grinch palette works well:
- Green
- Red
- Yellow
- Black
- White
You can add gold or silver if you want more sparkle, but too many colors may weaken the themed appearance.
Add Texture Carefully
Texture can make an ornament more interesting.
Try:
- Faux fur
- Ribbon
- Feathers
- Pom-poms
- Glitter
- Raised foam
Choose one or two textured elements rather than covering the entire ornament.
Personalize the Back
If the front is already busy, put the personalization on the back.
For example:
Emma — Christmas 2026
This keeps the Grinch face as the focal point while still creating a keepsake.
Grinch Ornament Mistakes to Avoid
Knowing what not to do can save more time than another tutorial.
Making the Vinyl Too Large
A large design can become difficult to apply to a round ornament.
Start smaller if you’re unsure.
Painting Too Many Details at Once
Trying to create the entire face with one wet layer can lead to smudging.
Build the design gradually.
Skipping Surface Cleaning
Dirt and oils can interfere with vinyl adhesion and paint application.
Clean the outside before decorating.
Using Too Much Glitter
More glitter does not necessarily mean a better ornament.
Excess glitter can clump or obscure the design.
Hanging the Ornament Too Soon
Paint and adhesives may look dry before they are fully cured.
Follow the product’s recommended drying or curing time before handling the ornament heavily.
Making Every Ornament Identical
If you’re making a handmade collection, small variations can make the set feel more personal.
Try different expressions, hearts, names, or ribbons while keeping the main colors consistent.
Grinch Ornament Troubleshooting
Why Is My Vinyl Wrinkling?
The ornament may be too curved for the size of your design.
Try a smaller design, work in sections, or use relief cuts in the transfer material.
Why Does My Paint Look Uneven?
The surface may not have been properly prepared, or the paint layer may be too thick.
Use thin layers and allow each one to dry before adding another.
Why Does My Glitter Look Patchy?
The interior coating may not have reached every part of the ornament.
Rotate the ornament slowly while distributing the coating and then add glitter gradually.
Why Does My Grinch Face Look Crooked?
The face may have been applied without checking the ornament’s center.
Before permanently attaching vinyl or painting details, hold the ornament upright and decide exactly where the face should sit.
Why Does My Ornament Look Too Busy?
You may have too many competing elements.
Remove one or two decorations and let the Grinch face become the main focal point.
How to Choose the Right Grinch Ornament
Not sure which project is best for you?
Use this quick guide.
| If you want… | Choose… |
| The easiest project | Green pom-pom ornament |
| A kid-friendly craft | Paper or plastic ornament |
| A sparkly look | Glitter ornament |
| A Cricut project | Vinyl Grinch face |
| No Cricut | Paint-pen ornament |
| A rustic look | Wood ornament |
| A keepsake | Handprint ornament |
| A personalized gift | Name + Grinch face |
| A cheap project | Paper or foam ornament |
| 20+ ornaments | Simple clear ornaments |
| A premium look | Flat ornament with clean vinyl |
Grinch-Themed Christmas Tree Ideas

Once you have several handmade ornaments, you can build an entire Grinch-inspired Christmas tree.
Use a combination of:
- Green ornaments
- Red hearts
- Red bows
- Green ribbon
- White accents
- Grinch faces
- Personalized ornaments
- Handmade wood decorations
- Whimsical Christmas signs
The trick is not to make every decoration look exactly the same.
Use the same basic color palette while varying the shapes and materials.
This creates a coordinated tree without making it look repetitive.
Grinch Ornaments as Handmade Christmas Gifts
DIY ornaments are easy to turn into small Christmas gifts.
Make one for:
- A teacher
- Grandparent
- Parent
- Child
- Friend
- Neighbor
- Coworker
- Family member
A personalized name and year can make a simple ornament feel much more intentional.
For a teacher gift, for example, a Grinch ornament with the teacher’s name on the back can be both inexpensive and personal. Personalized Grinch ornaments have also been used as teacher and family gifts in existing DIY projects.
How to Store Handmade Grinch Ornaments
Give your ornaments proper storage after Christmas.
For fragile pieces, wrap each ornament individually.
Use:
- Tissue paper
- Bubble wrap for delicate items
- Small cardboard dividers
- Ornament storage boxes
- Reused gift boxes
Keep painted ornaments away from heavy objects that could scratch their surfaces.
For glitter ornaments, store them upright or in individual compartments when possible so the exterior decoration does not rub against other pieces.
Label the box Grinch Ornaments so you can find your themed decorations quickly next Christmas.
Frequently Asked Questions
What is the easiest Grinch ornament DIY?
A clear plastic ornament filled with green pom-poms or paper and decorated with a simple painted Grinch face is one of the easiest choices. It does not require a Cricut and can be adapted for children or adults.
Can I make Grinch ornaments without a Cricut?
Yes. Paint pens, markers, stickers, felt, cardstock, craft foam, and hand-drawn designs can all be used instead of vinyl.
What can I put inside a clear Grinch ornament?
Green pom-poms, paper shred, feathers, and glitter are common choices. Pick the filler according to the look you want and how messy you want the project to be. Clear-ball Grinch projects commonly use different green fillers to create the character’s color.
How do I put vinyl on a round ornament?
Clean the ornament, keep the design reasonably small, and apply the vinyl gradually. If the surface is strongly curved, dividing the transfer material into smaller sections or adding relief cuts can make application easier.
Are plastic or glass ornaments better for Grinch crafts?
Plastic is generally the more practical choice for children, classrooms, parties, and bulk crafting because it is less fragile. Glass can be attractive for adult projects but requires more careful handling.
What is the cheapest way to make Grinch ornaments?
Paper, cardstock, craft foam, inexpensive wood blanks, and basic paint are among the easiest ways to keep costs down. If you’re making several ornaments, choose one simple design and buy materials for the complete batch rather than making every ornament different.
Can I make Grinch ornaments with kids?
Yes. Use plastic ornaments and large craft materials for younger children. Older kids can try painting, wood ornaments, simple vinyl, and other more detailed projects with appropriate adult supervision.
How can I make Grinch ornaments in bulk?
Use an assembly-line method. Complete one task for every ornament before moving to the next task. Keep the design simple and prepare all supplies before starting.
How do I make a Grinch ornament look professional?
Keep the face centered, use a limited color palette, avoid overcrowding the design, clean the ornament before applying decorations, and allow paints and adhesives to dry properly.
Can I personalize a Grinch ornament?
Yes. Add a name, family name, year, pet name, or short Christmas message. For a cleaner design, put the personalization on the back.
What should I do if my Grinch ornament looks too plain?
Add one focal detail rather than many decorations. A red heart, textured ribbon, small bow, glitter accent, or personalized name can give the ornament more character without making it cluttered.
Conclusion
Making Grinch ornaments DIY style can be as simple or detailed as you want.
For beginners, a clear plastic ornament filled with green pom-poms and decorated with a simple face is an excellent starting point. If you love sparkle, choose a glitter-filled version. If you have a Cricut, vinyl can give you clean faces and personalized lettering. For children, paper, felt, stickers, and plastic ornaments make the process easier and safer.
The most important thing is to choose a project that matches your time, materials, and skill level.
If you’re making one special ornament, spend more time on the details. If you’re making 10 or 20, simplify the design and work in batches. And if you’re creating an entire Grinchmas tree, mix different textures, shapes, and handmade designs instead of making every ornament identical.
The result does not need to be perfect. A slightly crooked smile, handmade heart, or unique facial expression can be exactly what makes a DIY Grinch ornament feel special.