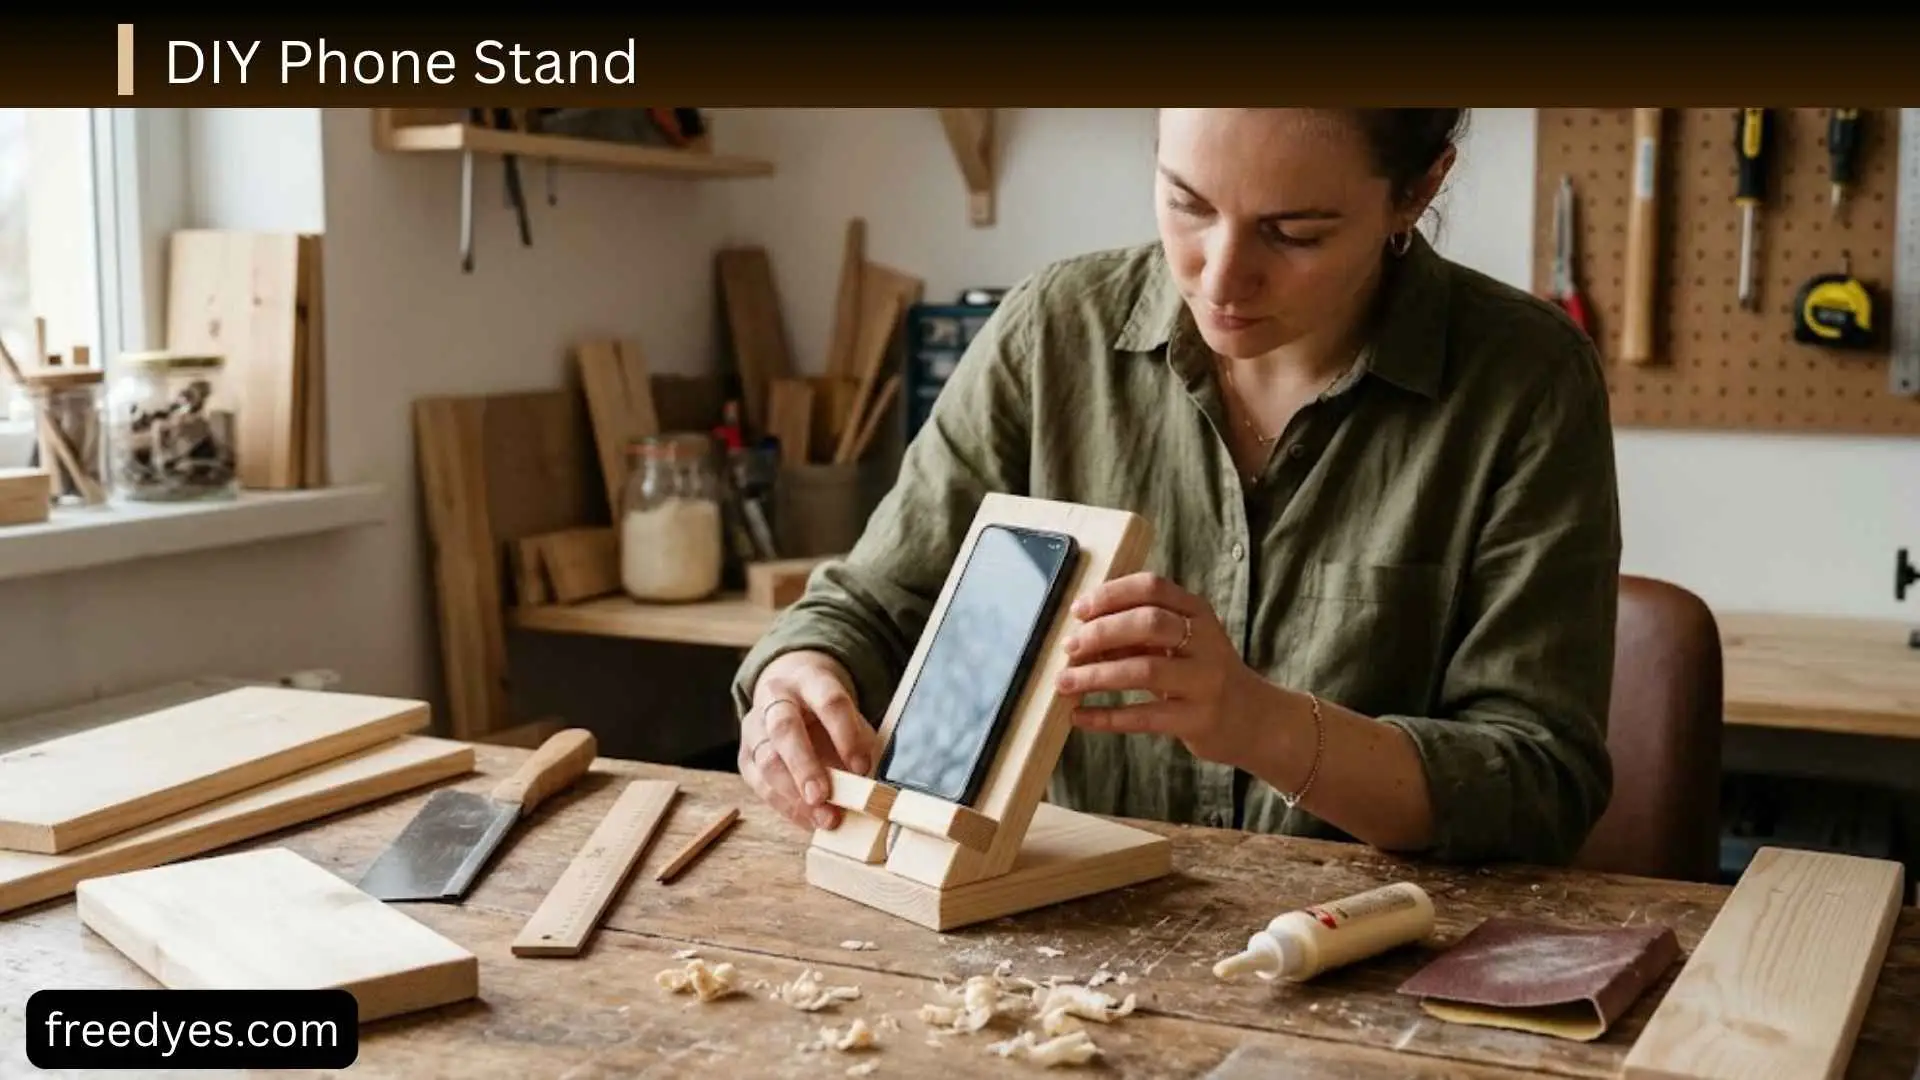
Have you ever picked up your phone during a video call or while watching a tutorial and wished it could stand on its own? I know I have, and I quickly realized that I didn’t need to spend money on an expensive accessory. I am always looking for simple DIY projects that solve everyday problems, and a DIY phone stand is one of the easiest and most useful ones you can make.
In this guide, I am going to show you creative, budget-friendly ways to build a DIY phone stand using materials you probably already have at home. Whether I am working, studying, cooking, or relaxing with my favorite videos, a homemade phone stand keeps my device secure and my hands free. By the end of this article, you will have several easy ideas to create a sturdy phone stand that fits your style and needs.
DIY Phone Stand Ideas at a Glance
Choosing the right design first can save you from making something that looks good but does not work well.
| DIY phone stand | Difficulty | Tools | Best use | Charging |
| Cardboard stand | Easy | Scissors or craft knife | Desk, videos, recipes | Yes |
| Folded cardstock stand | Very easy | None or scissors | Travel, temporary use | Limited |
| Binder clip stand | Very easy | None | Office or emergency use | Yes |
| Popsicle-stick stand | Easy | Glue, scissors or craft knife | Craft projects | Depends on design |
| Scrap-wood stand | Intermediate | Saw, sandpaper | Permanent desk stand | Yes |
| LEGO-style stand | Very easy | None | Adjustable holder | Yes |
| Recycled packaging stand | Easy | Scissors or knife | Budget projects | Depends on design |
If you want the best all-around beginner project, start with cardboard. It is inexpensive, easy to modify, and useful for testing your dimensions before committing to wood or another permanent material.
What Makes a Good DIY Phone Stand?
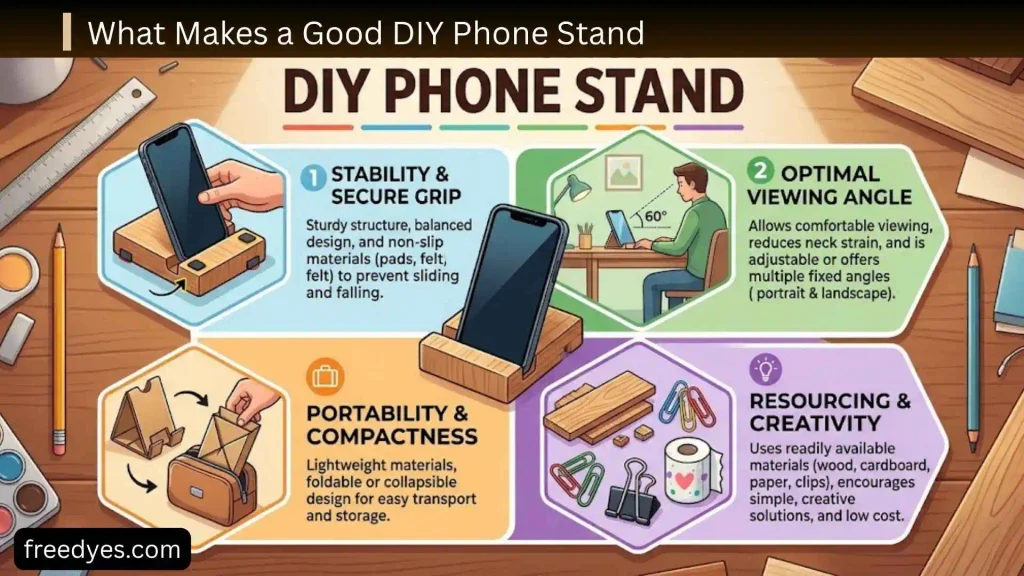
A phone stand does not need to be complicated, but it should solve a few basic problems.
It should stay upright
The base needs enough depth and width to resist tipping when you touch the screen.
A stand that supports the phone perfectly while sitting untouched may still fail when you tap, swipe, or connect a charging cable.
It should stop the phone from sliding
A small front ledge gives the lower edge of the phone something to rest against.
The ledge should hold the phone securely without covering too much of the screen.
It should support your normal phone case
Always design around the phone as you actually use it.
If you normally use a rugged case, wallet case, ring holder, or other accessory, measure the phone with that accessory attached.
It should allow the viewing angle you need
A phone stand used for watching videos may need a different angle from one used for reading notifications or making video calls.
It should leave room for the charging cable when necessary
If you want to charge the phone while it is standing, plan the cable opening before cutting the material.
How to Choose the Right DIY Phone Stand
Your best design depends less on how the stand looks and more on how you plan to use it.
Choose cardboard for the easiest project
Cardboard is ideal if you want something inexpensive and easy to change.
It is also excellent for prototyping because you can make a version, test it, and adjust the shape before making a permanent stand.
Corrugated cardboard gets much of its structural strength from its fluted inner layer, so the direction and number of layers can affect how rigid a piece feels.
Choose wood for long-term use
A wooden phone holder is a better choice when you want something durable and decorative.
Scrap wood can be particularly useful because a small offcut may be enough for a compact stand. Wooden phone-holder designs can also incorporate a dedicated charging opening.
Choose cardstock when portability matters
A folded cardstock holder can be lightweight and easy to carry.
It is useful for travel, temporary workspaces, or situations where you do not want to carry a bulky stand.
Choose craft sticks for a creative project
Popsicle sticks are inexpensive and easy to arrange into different shapes.
They are particularly suitable for children, classrooms, craft projects, or decorative desk accessories.
Choose modular building bricks for adjustability
LEGO-style bricks let you experiment with width, height, and viewing angle without permanently attaching the pieces.
This is useful when you want a stand that can be redesigned for another phone later.
How to Make the Easiest DIY Cardboard Phone Stand
For most beginners, a cardboard stand is the best place to start.
The basic design has:
- A base
- A back support
- A front ledge
- Optional side braces
- An opening for the charging cable
Some existing cardboard phone-holder projects use separate base, support, and ledge components; the important improvement is to size those parts around the phone and case you actually use rather than relying on one fixed pattern.
Materials
You will need:
- Corrugated cardboard
- Pencil
- Ruler
- Scissors or a craft knife
- Glue or strong tape
- Your phone
- Your phone case, if you normally use one
Optional:
- Sandpaper for cleaning rough cardboard edges
- Decorative paper
- Paint
- Washi tape
- Felt or rubber pads
If using a craft knife, work on a suitable cutting surface and use appropriate adult supervision where necessary.
Step 1: Measure your phone
Measure the phone with its case installed.
Record:
- Width
- Height
- Thickness
Also check where the charging port is located.
You do not need the stand to fit the phone tightly. In fact, a little clearance makes it easier to insert and remove the device.
Step 2: Decide how you will use the stand
Before cutting the cardboard, decide whether you want to use the phone:
- Vertically
- Horizontally
- While charging
- With a thick case
- For video calls
- For watching videos
If you want both portrait and landscape orientation, make the supporting area wide enough to accommodate both positions.
Step 3: Make the base
Create a rectangular cardboard base that is noticeably deeper than the phone is thick.
The base is responsible for preventing the stand from tipping forward or backward.
For a lightweight phone, a single layer may be sufficient for a prototype.
For heavier phones or large cases, use two layers of corrugated cardboard glued together.
Step 4: Make the back support
Cut a second rectangular piece that will support the rear of the phone.
It should be tall enough to support a substantial portion of the phone without interfering with the camera or buttons.
Tilt the support backward slightly rather than placing it perfectly vertical.
Step 5: Add the front ledge
Cut a narrow strip for the bottom edge.
The purpose of the ledge is simply to prevent the phone from sliding forward.
It does not need to be excessively tall.
A very tall front lip can hide part of the screen and make it harder to operate the phone.
Step 6: Connect the support to the base
Position the back support against the base at your preferred viewing angle.
Use glue or strong tape to attach it.
If the joint bends when you press the phone against it, add triangular cardboard braces along the sides.
Step 7: Add the charging opening
Place your phone on the stand.
Connect the charging cable.
Look at exactly where the cable needs to pass through the base or front support.
Mark that location and cut a small opening.
Do not make the opening unnecessarily large. A smaller opening generally leaves more material supporting the structure.
Step 8: Test the stand
Put the phone on the stand.
Then test:
- Portrait orientation
- Landscape orientation
- Touching the screen
- Connecting the charger
- Removing the phone
- Using it with the case installed
If the stand moves, fix the structure before decorating it.
Simple DIY Cardboard Phone Stand Measurements
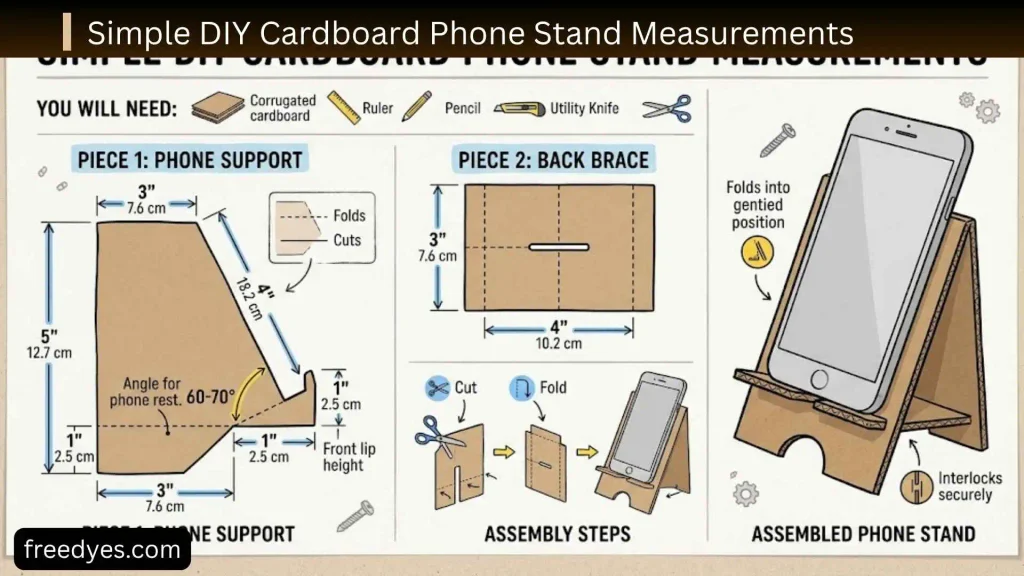
There is no single perfect size because phones and cases vary.
Instead of copying a universal measurement, use your phone as the reference.
A useful approach is:
Phone width + a little clearance = minimum support width
Phone thickness + case clearance = minimum slot or resting-space requirement
Longer or heavier phone = more base depth
For a simple prototype, you can also start with a base approximately the width of the phone and make it deeper than the phone’s thickness, then enlarge it if the stand feels unstable.
One educational cardboard design, for example, uses a phone-sized base with additional back-support and front-ledge pieces, demonstrating why the proportions should be built around the device rather than treated as arbitrary decoration.
How to Make a Cardboard Phone Stand Stronger
If the first version bends or collapses, don’t throw it away.
Try these improvements.
Double the base
Glue two pieces of cardboard together.
Make sure the corrugation is arranged consistently and allow the adhesive to bond properly.
Add triangular side braces
Cut two small triangles and attach one to each side where the back support meets the base.
These braces can significantly reduce movement at the joint.
Reinforce the front ledge
If the ledge bends under the phone’s weight, add another layer behind it.
Use stronger cardboard
A rigid shipping box is generally more suitable for structural parts than thin cereal-box cardboard.
Shorten unsupported sections
If a long piece of cardboard flexes, add a brace rather than simply adding more glue.
DIY Phone Stand Without Tools
Not every phone stand project needs scissors, glue, or woodworking equipment.
If you need something immediately, these are some of the simplest approaches.
Folded paper or cardstock phone stand
Use thick cardstock if possible.
Fold it into three functional areas:
- A bottom support
- A rear section
- A front retaining edge
The folds create the structure.
If ordinary printer paper collapses under the phone’s weight, fold multiple layers together or switch to cardstock.
Binder clip phone stand
Large binder clips can create a quick temporary holder.
Arrange the clips so the phone rests against their bodies while the handles help create the support structure.
This is best considered a temporary solution rather than a polished permanent stand.
LEGO-style phone stand
Build a wide base first.
Then create:
- Two side supports
- A rear support
- A small front ledge
The major advantage is adjustability.
If your phone does not sit correctly, move the pieces rather than rebuilding the entire stand.
DIY Phone Stand With Popsicle Sticks
Popsicle sticks can be turned into a small phone holder using a base, rear support, front ledge, and reinforcing pieces.
Materials
- Popsicle or craft sticks
- Suitable craft glue
- Ruler
- Pencil
- Sandpaper
- Optional paint
Build the base
Place several sticks side by side.
Glue them into a flat platform.
Allow the adhesive to set before putting weight on the structure.
Build the back support
Create a second panel from craft sticks.
Attach it to the base at a slight angle.
Use additional sticks as braces where the two sections meet.
Add the phone ledge
Attach one or more sticks across the lower front edge.
Make sure the ledge is high enough to retain the phone but not so high that it blocks the screen.
Test before decorating
Put your phone on the stand.
Tap the screen.
If the structure flexes or shifts, add reinforcement before painting it.
DIY Wooden Phone Stand
A wooden phone stand is a good option if you want something that can stay on your desk for years.
Scrap wood can work particularly well for a compact design, and dedicated charging openings can be incorporated into the holder.
Option 1: Wooden slot stand
A simple wooden block can hold a phone in a slot cut into the top.
The slot needs to accommodate:
- Phone thickness
- Case thickness
- A little insertion clearance
The slot should not be so tight that you have to force the phone into it.
Option 2: Wooden angled stand
Instead of cutting a slot, build:
- A flat wooden base
- An angled rear support
- A small front lip
This design can be more forgiving when you use different phone cases.
Sand the edges
Sand every surface that the phone, your hands, or furniture will contact.
Sharp edges are uncomfortable and can scratch surfaces.
Add a charging channel
A small opening at the bottom allows the charging cable to reach the phone while it remains on the stand.
Some wooden phone-holder designs deliberately provide extra clearance around the charging connector because connector sizes vary.
DIY Phone Stand for Charging
A charging-friendly stand needs more than a random hole.
Check the connector first
Plug the charging cable into the phone.
Place the phone on the stand.
Observe where the connector meets the stand.
That is where your opening needs to be.
Leave cable clearance
The cable should enter without being sharply bent or squeezed against the stand.
Prevent cable tension
Leave enough slack in the cable that pulling on the cord does not move the phone.
If the cable constantly pushes the phone forward, the stand may need a larger opening or a different cable route.
Test with your actual cable
Different charging cables have different connector housings.
A hole that fits one cable may be too narrow for another.
DIY Phone Stand for Thick Phone Cases
A stand designed for a bare phone may fail when a protective case is installed.
Measure the complete phone
Do not remove the case while measuring if you normally keep it on.
Measure the thickness of:
Phone + case + any permanent accessory
Avoid an overly narrow slot
If you are making a wooden slot stand, give the phone enough clearance to slide in without force.
Consider a front-lip design
An angled support with a separate front ledge can be more flexible than a narrow slot because it does not require the entire phone thickness to fit into one opening.
DIY Phone Stand for Landscape Mode
A phone holder that works vertically may not automatically work horizontally.
When the phone is placed sideways:
- The support width becomes more important.
- The front ledge must support the lower edge.
- The phone’s center of gravity changes relative to the base.
- The charging-port location may change.
If landscape viewing matters, test the stand in both orientations before finalizing it.
A wider base and lower center of gravity are simple ways to improve resistance to tipping.
DIY Phone Stand for Video Calls
A video-call stand has slightly different requirements from a basic viewing stand.
Keep the camera unobstructed
Check the front camera position before adding a tall front lip or side brace.
Raise the phone if necessary
A very low phone can create an awkward camera angle.
A small raised platform can bring the camera closer to eye level.
Keep the stand stable
Video calls often last longer than ordinary phone use, so the stand should not shift easily if you touch the screen.
Leave room for charging
Video calls can consume significant battery power, making a charging opening particularly useful.
DIY Phone Stand for Watching Videos
For videos, the most important features are:
- Comfortable viewing angle
- Stable base
- Secure front lip
- Clear screen
- Optional charging access
An angled back support generally works better than a completely upright phone because it reduces the chance that a small touch will push the device backward.
DIY Phone Stand for a Desk
A desk stand should occupy enough space to remain stable without becoming a large desktop accessory.
Consider adding:
- Non-slip feet
- Cable routing
- A small accessory tray
- A slot for earbuds
- A place for a charging cable
If your desk is very small, a vertical design may save more space than a wide horizontal holder.
DIY Phone Stand for the Kitchen
A phone stand can be useful for recipes, timers, cooking videos, and hands-free viewing.
For kitchen use, keep the stand away from:
- Open flames
- Hot pans
- Direct steam
- Sinks
- Areas where food or liquids are likely to splash
Cardboard may be suitable for occasional dry use, but it is not a good choice where it will regularly get wet.
For frequent kitchen use, a more durable material such as properly finished wood or another moisture-tolerant material may be preferable.
DIY Phone Stand for Bedside Use
A bedside stand should have a broad, stable base because it may be bumped during the night.
A charging opening is especially useful here.
You can also make a small cable-management notch so the charger stays in roughly the same location when you remove the phone.
Avoid a design with tiny loose parts that can easily fall behind the bed.
How to Make a DIY Phone Stand More Stable
Stability is one of the most important differences between a decorative phone holder and a genuinely useful one.
Increase the base depth
If the phone tips backward, make the base deeper.
Widen the base
A narrow base can become unstable when the phone is placed horizontally.
Lower the center of gravity
Keep heavier structural material closer to the bottom.
Reduce the support angle if necessary
If the phone is leaning too far backward, adjust the support.
Add side braces
Triangular braces are particularly useful for cardboard and craft-stick projects.
Add non-slip feet
Small rubber or silicone pads can help prevent sliding on smooth desks.
Felt can also help protect furniture, although it may not provide as much grip as a suitable rubberized material.
How to Measure Your Phone for a DIY Stand
Measure the phone in the condition in which you plan to use it.
Record:
Width
This helps determine the minimum width of the supporting area.
Height
This helps you determine how much of the phone should be supported by the rear section.
Thickness
This matters most for slots and narrow holders.
Case thickness
Measure the entire assembly rather than assuming the case adds only a negligible amount.
Charging-port location
Mark where the connector sits when the phone is resting naturally.
Camera location
Make sure the rear support or side structure does not obstruct the camera if you plan to take photos while the phone is mounted.
How to Make a DIY Phone Stand Template
A template makes repeated builds much easier.
For a basic cardboard design, create separate outlines for:
- Base
- Back support
- Front ledge
- Side braces
- Charging opening
Write the part name directly on each template piece.
Also mark:
- Fold lines
- Cut lines
- Glue areas
- Cable opening
- Phone contact area
Make your template adjustable
Instead of creating one fixed template, measure the phone and use those measurements as variables.
For example:
Support width = phone width + clearance
Slot width = phone thickness + case thickness + insertion clearance
This makes the template more useful if you change phones later.
How to Make a DIY Phone Stand Look Better
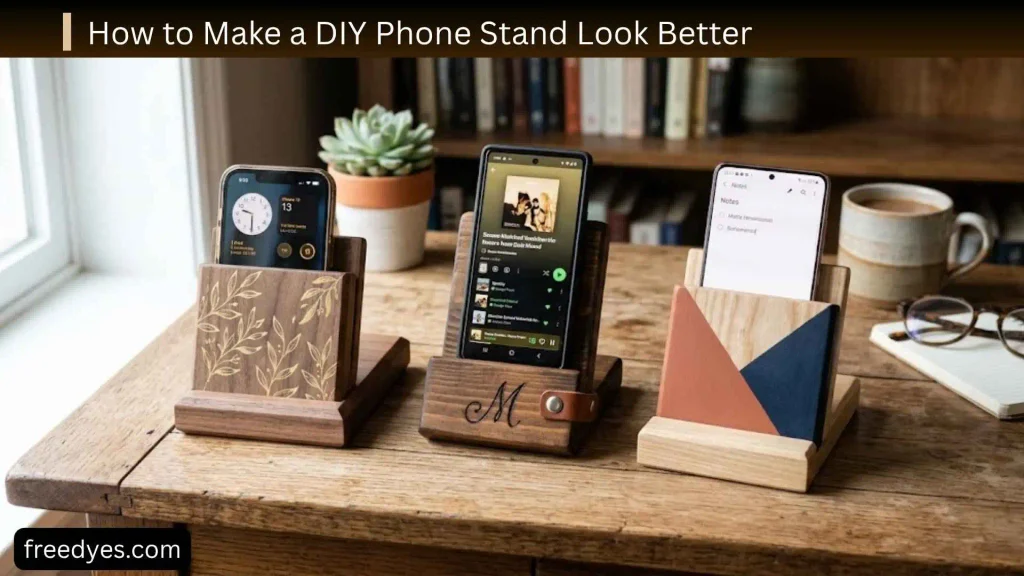
Function comes first, but a few finishing details can make a homemade stand look much more polished.
Clean the edges
Straight cuts make a surprisingly big difference.
Hide cardboard printing
Cover recycled cardboard with decorative paper, paint, or another suitable covering.
Use one consistent color
A simple single-color finish often looks cleaner than too many competing patterns.
Sand wooden edges
Smooth edges make a small wooden project look more professional.
Hide glue marks
Use enough adhesive for strength without leaving large visible blobs.
Add a simple design
A small geometric pattern, painted stripe, initials, or minimalist shape can personalize the stand without overwhelming it.
DIY Phone Stand Troubleshooting
Even a simple project can have problems. Fortunately, most are easy to fix.
My phone keeps sliding forward
The front ledge may be too low or the support angle may be too steep.
Try raising the ledge slightly or adjusting the back support.
My stand keeps falling backward
The base may not be deep enough.
Increase its depth or add a rear brace.
My cardboard bends
Add another layer of cardboard or reinforce the weak area with triangular supports.
The stand moves when I tap the screen
Increase the base width or add non-slip feet.
Also check whether the joints are flexing.
My phone fits without the case but not with it
Redesign the support around the complete phone-and-case thickness.
Avoid forcing the device into a tight slot.
My charging cable pushes the phone out
The cable opening may be too narrow or incorrectly positioned.
Make the opening larger or reroute the cable so it enters naturally.
My phone falls when I turn it sideways
Increase the width of the support and base.
Test the center of gravity in landscape orientation.
The front lip blocks the screen
Reduce its height.
The lip only needs to stop the phone from sliding.
The wooden slot is too tight
Do not force the phone into it.
Increase the slot width gradually and test the fit with the actual case.
The glue joint keeps breaking
The adhesive may not be suitable for the materials, or the joint may be carrying too much force.
Reinforce the joint mechanically where practical and follow the adhesive manufacturer’s instructions for curing and bonding.
Common DIY Phone Stand Mistakes
Designing for the phone instead of the phone case
This is one of the easiest mistakes to make.
If the case is part of your everyday setup, include it when measuring.
Making the base too small
A tiny base may save material but create an unstable stand.
Making the front lip too tall
The phone should be secure without losing access to the screen.
Forgetting landscape mode
If you might watch videos horizontally, test that position before finishing the project.
Cutting the charging hole too early
First place the actual phone and cable where they will be used.
Then mark the opening.
Decorating before testing
Paint and decorative covering can make modifications more difficult.
Test the structure first.
Using weak cardboard for the main support
Thin paperboard may work for a very light phone, but heavier devices generally benefit from corrugated cardboard or reinforced layers.
Ignoring the camera
A support can accidentally block the camera even if the phone appears securely held.
DIY Phone Stand Ideas Using Household Items
If you want to build something without purchasing supplies, look around the house for materials that already have useful structural properties.
Possible options include:
- Shipping-box cardboard
- Cereal-box cardboard for prototypes
- Binder clips
- Cardstock
- Craft sticks
- Building bricks
- Scrap wood
- Sturdy packaging
- Unused folders
The important question is not whether a material is unusual.
It is whether it can provide:
support + stability + a safe resting surface.
Best DIY Phone Stand by Goal
Best for beginners
Cardboard
It is easy to cut, inexpensive, and simple to modify.
Best for a permanent desk stand
Wood
It offers better durability and can be finished to match furniture.
Best without tools
Folded cardstock or binder clips
These can be made with little or no equipment.
Best for children
Popsicle sticks or cardboard
They offer plenty of opportunities for decorating and experimenting with shapes.
Best for charging
A cardboard or wooden design with a dedicated cable opening
Build the cable route into the stand rather than trying to squeeze the cable around the finished holder.
Best for customization
LEGO-style bricks
The dimensions can be changed easily.
Best for a quick emergency solution
Binder clips
They require almost no preparation.
DIY Phone Stand vs. Buying a Phone Holder
Making your own phone stand makes the most sense when you want:
- A low-cost project
- A customized size
- A particular viewing angle
- A recycled-material project
- A craft activity
- A holder designed around your phone case
A commercial stand may be more appropriate if you need:
- Precise angle adjustment
- Folding portability
- Mechanical height adjustment
- A very small footprint
- Specialized mounting features
The purpose of DIY is not necessarily to make something more sophisticated than a manufactured product. The goal is to make something that fits your particular use.
Frequently Asked Questions About DIY Phone Stands
What is the easiest DIY phone stand?
A cardboard stand is one of the easiest because the material is inexpensive and easy to cut. A basic design needs only a base, angled support, and front ledge.
How do I make a phone stand without glue?
Try a folded cardstock design, binder clips, LEGO-style bricks, or a carefully designed slot-based cardboard holder.
A friction-fit design can also work when the material and dimensions are appropriate.
How do I make a phone stand without cardboard?
You can use wood, popsicle sticks, cardstock, binder clips, building bricks, or suitable recycled materials.
What is the best material for a DIY phone stand?
For temporary projects, cardboard is convenient. For long-term use, wood is generally a better choice. Craft sticks work well for decorative projects.
How do I make a phone stand with cardboard?
Create a stable base, angled rear support, and front ledge. Reinforce the joint between the base and support, then add a charging opening if needed.
How do I make a phone stand for charging?
Place the phone on the stand with the actual charging cable connected. Mark where the cable needs to pass through, then cut an opening that provides enough clearance without weakening the structure unnecessarily.
Can a DIY phone stand hold a phone horizontally?
Yes. Make sure the supporting surface and base are wide enough for landscape orientation. Always test both portrait and landscape positions before finishing the stand.
How do I make a phone stand for a thick case?
Measure the phone with its case installed. An angled back-support design with a separate front lip can be more forgiving than a narrow slot.
How do I stop a cardboard phone stand from collapsing?
Use thicker or doubled cardboard, reinforce the base-to-support joint, add triangular braces, and increase the base depth if the stand tips.
What angle should a DIY phone stand be?
There is no universal perfect angle. Choose an angle that gives you a comfortable view while keeping the phone stable. Test it from your normal sitting position rather than choosing an angle based only on appearance.
How wide should a phone stand be?
The support should be wide enough to keep the phone stable in both orientations you plan to use. If you want landscape viewing, design for that position rather than making the holder only as wide as the phone’s narrowest dimension.
Can I make a phone stand from popsicle sticks?
Yes. Build a rigid base, angled back support, front ledge, and reinforcing braces. Test the structure before decorating it.
Can I make a DIY phone stand for video calls?
Yes. Make sure the front camera remains unobstructed, position the phone at a useful height, and provide enough stability that touching the screen does not move the device.
Final Thoughts
A DIY phone stand does not need to be complicated to be useful. The strongest designs usually come down to a few simple principles: create a stable base, support the phone at a comfortable angle, prevent it from sliding, and leave enough clearance for the case and charging cable.
If you want the quickest project, start with cardboard. If you want a long-lasting desk accessory, try scrap wood. For a craft project, popsicle sticks are a flexible choice, while cardstock and binder clips are useful when you need a stand without many tools.
The biggest improvement you can make is to design around your actual phone rather than copying a fixed size. Measure the phone with its case, check the charging port, test portrait and landscape orientations, and try the stand before decorating it.
A successful homemade phone stand is not the one with the most complicated shape. It is the one that stays stable, holds your phone securely, gives you the viewing angle you need, and works naturally with the way you use your device.
For a website aiming to compete in search, the same principle applies to the article itself: useful details matter more than simply making the page longer. Google recommends people-first content that is original, comprehensive, trustworthy, and substantially useful compared with other search results.