
I am always amazed at how much a new countertop can transform a kitchen, bathroom, laundry room, or workspace without requiring a complete renovation. If you are searching for DIY countertop ideas, I am here to show you that creating a beautiful, durable, and budget-friendly countertop is easier than you might think. Whether I am updating an old laminate surface, pouring concrete, installing butcher block, or giving existing countertops a fresh new finish with paint or epoxy, there are countless creative options to fit different budgets, skill levels, and design styles.
In this guide, I am sharing the best DIY countertop ideas that can help you refresh your space while saving money. You will discover practical tips, step-by-step inspiration, common mistakes to avoid, and expert advice to help you choose the right countertop project for your home. By the end, I am confident you will have the inspiration and knowledge needed to create a countertop that looks stylish, functions well, and adds lasting value to your space.
DIY Countertop Ideas at a Glance
Here are some of the most useful options to consider:
| DIY countertop idea | Best for | Difficulty | Main advantage | Main consideration |
| Butcher block | Kitchens and islands | Medium | Warm, natural appearance | Needs appropriate finishing and moisture care |
| Plywood | Budget custom projects | Medium | Affordable and customizable | Edges and finish require attention |
| Laminate | Practical kitchens | Medium | Many styles and easy cleaning | Fabrication requires accurate cutting |
| Painted countertop | Existing laminate makeovers | Easy to Medium | Changes appearance without full replacement | Surface preparation and curing matter |
| Tile | Decorative counters | Medium | Many colors and patterns | Grout requires maintenance |
| Concrete | Modern custom designs | Advanced | Highly customizable | Heavy and labor-intensive |
| Reclaimed wood | Rustic spaces | Medium | Character and uniqueness | Wood must be properly prepared and protected |
| Old door | Small counters and islands | Medium | Reuses existing material | Dimensions may limit the design |
| Countertop film | Temporary or renter-friendly updates | Easy | Fast cosmetic transformation | Usually less durable than a permanent surface |
| Epoxy-style finish | Dramatic makeovers | Medium to Advanced | Can create decorative effects | Preparation and application are critical |
There is no single “best” DIY countertop. A straight island is a very different project from an L-shaped kitchen with a sink cutout.
For example, current installation guidance describes butcher block as approachable for DIYers while also emphasizing careful measuring, templating, cutting, finishing, and installation.
How to Choose the Best DIY Countertop Idea
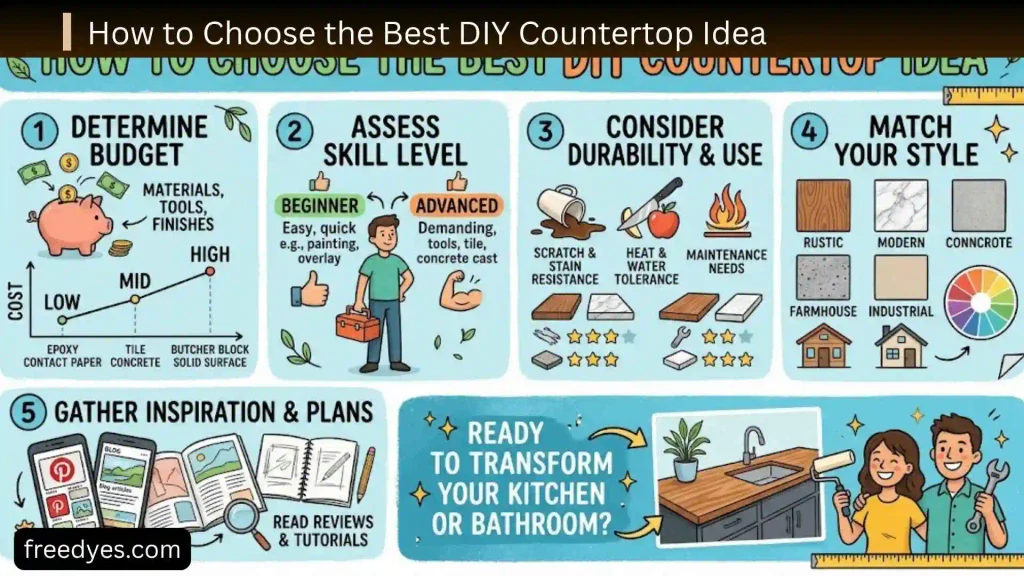
Before buying materials, decide whether you are building a new countertop, replacing an existing one, or simply changing the appearance of the current surface.
Decide Whether You Need a Replacement or a Makeover
If the existing countertop is structurally sound, a full replacement may not be necessary.
You may be able to:
- Paint or refinish it
- Add a suitable overlay
- Apply countertop film
- Add a decorative surface
- Replace only an island countertop
- Reseal or restore an existing wood surface
A makeover is particularly useful when the cabinets are in good condition but the countertop makes the room look old.
Recent renovation advice also highlights painting, overlays, peel-and-stick coverings, refinishing, and updating surrounding features as alternatives to complete countertop replacement.
Consider Water Exposure
A countertop beside a kitchen or bathroom sink experiences much more moisture than a decorative desk or laundry folding surface.
Ask:
- Will water sit on the surface?
- Is there a sink cutout?
- Will the countertop be exposed to humidity?
- Can the material swell or absorb water?
- Does the finish need periodic maintenance?
This is particularly important with wood-based materials.
Consider Heat Exposure
A material may look suitable for a kitchen but still require protection from hot cookware.
Do not assume that a decorative coating, painted finish, adhesive film, or wood surface can tolerate direct heat simply because it is marketed for countertops.
Use trivets or heat protection when the product instructions call for it.
Think About Maintenance
A countertop is not just a design feature. It is a working surface.
Before choosing a material, ask how often you are willing to:
- Clean it
- Reseal it
- Refinish it
- Protect it from water
- Repair small scratches
- Maintain grout
- Reapply a wood finish
If you want minimal maintenance, a completely different material may make more sense than the one with the most attractive DIY appearance.
Match the Project to Your Tools
A simple countertop makeover may need only basic tools.
A custom countertop may require:
- Circular saw
- Jigsaw
- Router
- Sander
- Clamps
- Straightedge
- Drill
- Measuring tools
- Specialized cutting equipment
Buying or renting tools can significantly change the real cost of a “cheap” countertop project.
Best DIY Countertop Ideas
DIY Butcher Block Countertop
Butcher block is one of the most popular DIY countertop choices because it adds warmth and can work with both traditional and modern kitchens.
It is especially attractive for:
- Kitchen islands
- Straight countertop runs
- Breakfast bars
- Coffee stations
- Workspaces
- Rustic kitchens
- Modern kitchens that need warmth
A straight island is generally a simpler project than a long L-shaped countertop because there are fewer joints and complicated cuts.
Current installation guidance recommends measuring cabinets at multiple points and using a template, particularly when walls are irregular or several pieces need to be joined.
Is Butcher Block Beginner-Friendly?
It can be, but “DIY-friendly” does not mean “mistake-proof.”
A simple replacement with a straight edge is considerably easier than:
- An L-shaped countertop
- Multiple countertop sections
- A complicated sink opening
- An irregular wall
- A waterfall edge
- Several seams
Measure carefully before making the first cut.
Butcher Block Around a Sink
The sink area deserves extra attention because repeated moisture can damage wood if it is not properly finished and maintained.
Pay particular attention to:
- The sink opening
- Exposed cut edges
- Faucet holes
- Standing water
- The seal around the sink
- The finish recommended for the intended use
For food-preparation surfaces, use a finish appropriate for food contact and follow the manufacturer’s instructions. Current butcher-block guidance discusses food-safe finishing options for food-prep applications.
Butcher Block Overhang
Overhang should not be treated as a universal number that works for every project.
Your design should account for:
- Cabinet construction
- Seating
- Countertop thickness
- Material weight
- Support
- Traffic around the island
- The manufacturer’s recommendations
If people will sit at the island, make sure the countertop and cabinet structure can safely support the intended overhang.
DIY Plywood Countertop
Plywood is one of the most interesting choices for a budget-conscious DIYer.
Instead of buying a traditional finished countertop, you can create a custom surface from suitable plywood and then finish the edges and surface to achieve a more intentional look.
Plywood works particularly well for:
- Laundry rooms
- Workshops
- Desks
- Craft rooms
- Utility rooms
- Kitchen islands
- Budget-conscious countertop projects
How to Make Plywood Look Finished
The exposed edge is one of the most important design decisions.
You can emphasize the layered plywood appearance or cover it with:
- Hardwood edging
- Wood veneer
- Suitable edge banding
- A contrasting trim
- Paint
- Laminate
A cleanly finished edge can make inexpensive material look much more intentional.
Plywood Countertop Finish Ideas
Depending on the application, possibilities include:
- Clear finishes
- Paint
- Suitable countertop coatings
- Laminate
- Veneer
The important consideration is not just appearance but whether the chosen finish is appropriate for moisture, cleaning, heat, and food-contact requirements.
DIY Laminate Countertop
Laminate remains a practical option when you want a countertop that is relatively easy to clean and available in many patterns.
It can work particularly well when you want the appearance of:
- Stone
- Marble
- Concrete
- Wood
- Solid colors
- Modern patterns
There is an important distinction between installing a pre-made laminate countertop and fabricating laminate yourself.
A pre-finished countertop can be much simpler.
Fabricating laminate over a substrate requires more precision because you have to cut, bond, trim, and finish the material properly.
DIY Painted Countertop Ideas
Painting is one of the most accessible ways to transform an existing countertop when the underlying surface is still sound.
Popular looks include:
- Faux marble
- Faux granite
- Solid white
- Charcoal gray
- Soft neutral tones
- Concrete-inspired finishes
- Stone-inspired patterns
How to Paint a Countertop
A typical project involves:
- Thoroughly cleaning the countertop
- Removing grease and residue
- Repairing appropriate surface imperfections
- Scuffing or preparing the surface as required by the coating system
- Applying primer when specified
- Applying the countertop coating
- Adding decorative effects if desired
- Applying the required protective finish
- Allowing the surface to cure completely
- Returning the countertop to normal use according to the product instructions
Do not confuse “dry” with “fully cured.” A coating can feel dry while still needing additional time before it can handle normal countertop use.
DIY Concrete Countertop
Concrete is appealing when you want a custom, modern countertop that does not look like a standard off-the-shelf product.
It can be shaped and colored to suit the design, which makes it attractive for:
- Modern kitchens
- Islands
- Bathroom vanities
- Industrial interiors
- Custom spaces
But concrete is not the easiest DIY countertop.
You need to think about:
- Building accurate forms
- Reinforcement
- Mixing
- Pouring
- Finishing
- Curing
- Sealing
- Weight
- Workspace
The fabrication process can also be messy and physically demanding.
Is a DIY Concrete Countertop Worth It?
Concrete makes sense when customization is a priority and you are comfortable with a more advanced project.
It is less appealing when your priority is:
- Quick installation
- Minimal mess
- Lightweight material
- Simple cutting
- A low-risk beginner project
The material can be beautiful, but it should not be presented as an effortless weekend makeover.
DIY Tile Countertop
Tile can create a highly decorative countertop with almost unlimited pattern possibilities.
You can use:
- Large-format tile
- Small-format tile
- Mosaic designs
- Neutral ceramic styles
- Patterned tile
- Stone-look tile
The major drawback is grout.
Grout lines can require more cleaning and maintenance than a continuous surface.
If you choose tile, plan the layout before installation so that awkward cuts are minimized and the edges look intentional.
DIY Reclaimed Wood Countertop
Reclaimed wood can give a kitchen, laundry room, or island a unique rustic character.
Before using reclaimed boards, inspect them carefully and prepare them properly.
Look for:
- Loose nails
- Screws
- Splits
- Rot
- Warping
- Contamination
- Uneven thickness
Do not treat reclaimed wood as ready-to-use simply because it looks attractive.
DIY Countertop From an Old Door
An old solid door can become a creative countertop or island surface.
This works particularly well when:
- The door is wide enough
- The thickness suits the project
- The material is structurally sound
- You want a rustic or vintage look
It can be especially effective for:
- Kitchen islands
- Laundry rooms
- Workstations
- Home bars
- Craft spaces
Measure the door carefully before designing the base around it.
DIY Epoxy Countertop Ideas
Epoxy-style countertop finishes can create dramatic visual effects, including:
- Marble-inspired designs
- Stone effects
- Metallic appearances
- Deep glossy surfaces
- Layered colors
However, epoxy projects are highly dependent on surface preparation, mixing, application conditions, and the product system.
Follow the manufacturer’s instructions exactly rather than treating every epoxy product as interchangeable.
DIY Countertop With Peel-and-Stick Covering
Countertop film or contact paper is one of the quickest ways to change the appearance of an existing surface.
It can imitate:
- Marble
- Wood
- Concrete
- Stone
- Solid colors
It is particularly useful for:
- Renters
- Temporary updates
- Small apartments
- Budget makeovers
- Properties that may be renovated later
The trade-off is durability. Film should generally be viewed as a cosmetic solution rather than automatically assuming it will perform like a permanent countertop.
Cheap DIY Countertop Ideas
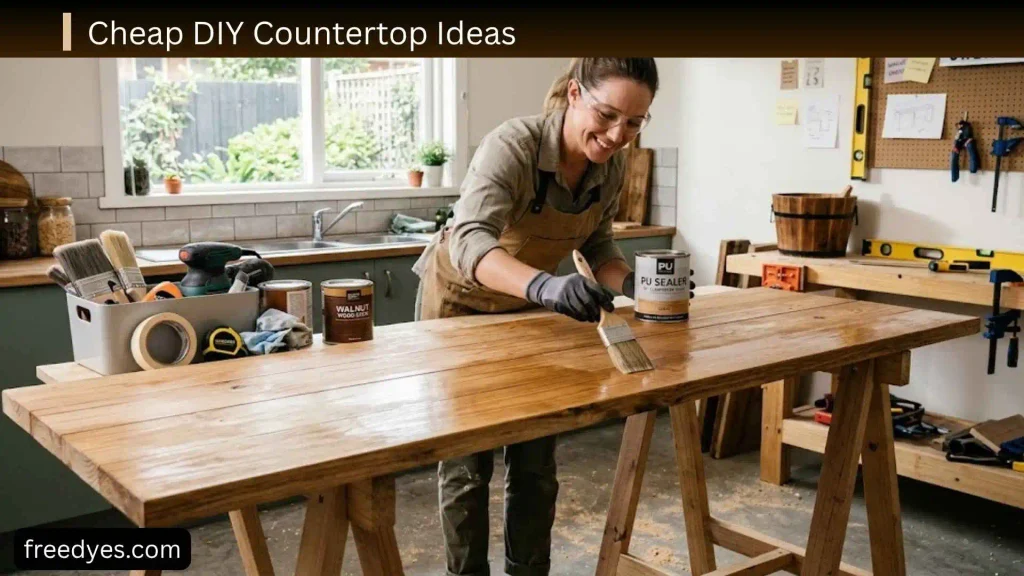
If your main goal is keeping the budget low, start by asking whether you actually need to replace the existing countertop.
Refinish the Existing Countertop
If the surface is structurally sound, refinishing can eliminate demolition and reduce material requirements.
Possible approaches include:
- Painting
- Suitable refinishing kits
- Resealing
- Sanding and refinishing appropriate wood
- Countertop film
Use Budget-Friendly Wood
A simple wood countertop can create a much warmer appearance than many inexpensive synthetic surfaces.
For a low-cost project, focus on:
- Simple rectangular shapes
- Minimal seams
- Straight cuts
- Simple edge profiles
- Efficient material use
Consider Laminate
Laminate can provide a practical surface without requiring a stone slab.
It also gives you many visual options, which means you can spend less on the material while still achieving a decorative appearance.
Reuse Existing Materials
An old door, suitable reclaimed wood, or another structurally appropriate material can reduce material waste and give the project more personality.
Just remember that “free material” is not always free once you account for:
- Cleaning
- Sanding
- Repair
- Cutting
- Finishing
- Transportation
- Extra tools
DIY Countertop Overlay Ideas
Not every countertop makeover needs demolition.
An overlay can be useful when the existing countertop is:
- Structurally sound
- Secure
- Relatively level
- Free from significant water damage
- Suitable for the new material
Potential overlay approaches include:
- Wood
- Laminate
- Tile
- Refinishing systems
- Decorative films
When You Should Not Cover an Existing Countertop
Do not use a new surface to hide serious structural problems.
Be cautious if the existing countertop has:
- Swelling
- Water damage
- Delamination
- Major warping
- Loose sections
- A failing substrate
- Unstable cabinets
A new surface cannot reliably fix a weak foundation.
DIY Bathroom Countertop Ideas
Bathroom countertops have different priorities from kitchen countertops because water and humidity are major concerns.
Good possibilities include:
- Laminate
- Properly finished wood
- Tile
- Concrete
- Suitable solid-surface materials
- Carefully selected plywood-based designs
Wood Bathroom Countertops
Wood can look beautiful in a bathroom, but the sink area needs special attention.
Protect vulnerable areas around:
- Sink openings
- Faucet holes
- Backsplash joints
- Wall connections
- Countertop edges
Standing water should not be allowed to remain on a wood surface.
DIY Bathroom Vanity Makeover
You can sometimes transform a bathroom vanity without replacing the entire cabinet.
Consider updating:
- Countertop
- Faucet
- Hardware
- Mirror
- Lighting
- Backsplash
- Paint color
Changing several small elements together can make an inexpensive countertop look much more intentional.
DIY Laundry Room Countertop Ideas
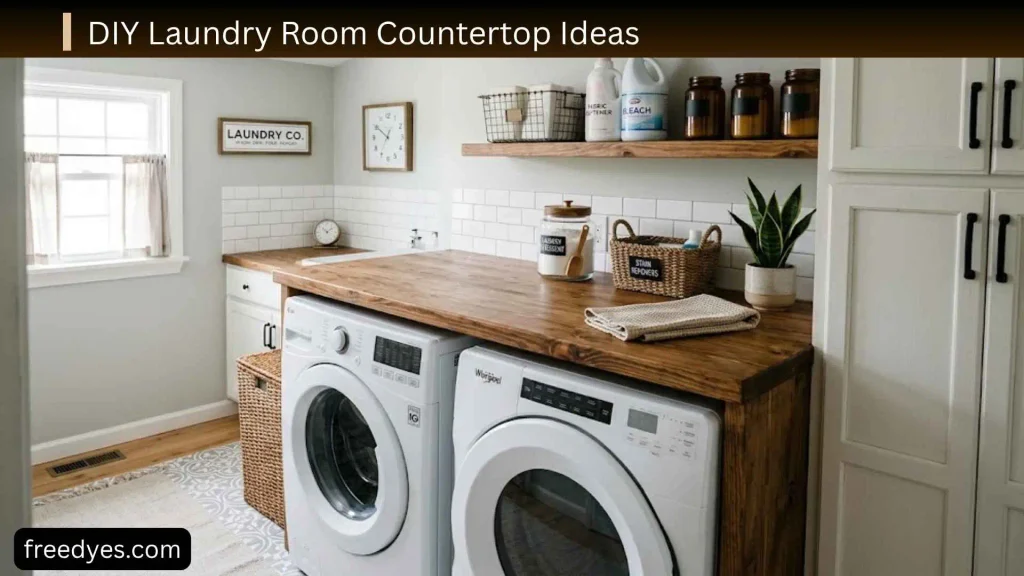
Laundry rooms are excellent places for DIY countertops because the primary goal is often a useful work surface rather than a luxury stone installation.
Countertop Over a Washer and Dryer
A continuous countertop can create a convenient folding area.
Before building it, account for:
- Appliance dimensions
- Appliance movement
- Ventilation
- Access to controls
- Hoses and connections
- Doors and lids
- Future appliance replacement
Do not create a permanent structure that prevents you from servicing or removing the appliances.
Best Materials for a Laundry Room
Consider:
- Plywood
- Butcher block
- Laminate
- Reclaimed wood
- A suitable pre-made countertop
A laundry room may allow more flexibility than a food-preparation kitchen, but moisture resistance is still important.
DIY Kitchen Island Countertop Ideas
An island is one of the best places to experiment with a DIY countertop.
Because the shape is often simple, you may be able to create a high-impact upgrade with fewer complicated cuts.
Contrasting Butcher Block Island
Pair a wood island top with another countertop material around the kitchen.
The contrast can make the island look intentional rather than mismatched.
Waterfall-Style Island
A waterfall design carries the countertop material vertically down the side of the island.
It can look impressive but requires significantly more precise cutting and joining than a simple rectangular top.
Thick-Edge Island Countertop
You can also create the appearance of a thicker countertop by building up the edge rather than using an unusually thick slab.
This is a design technique, not a reason to ignore structural requirements.
DIY Countertop Ideas for Small Kitchens
Small kitchens benefit from designs that reduce visual clutter.
Consider:
- Light-colored surfaces
- Simple patterns
- Thin-looking edges
- Consistent materials
- Small-format butcher block
- Minimal seams
- Countertop film for a quick makeover
- A contrasting island surface
Avoid overly busy patterns if the kitchen already contains many competing colors and textures.
DIY Countertop Ideas for a Modern Kitchen
For a modern appearance, focus on clean lines rather than expensive materials alone.
Consider:
- Simple wood
- Matte neutral finishes
- Concrete-inspired surfaces
- Minimal edge profiles
- Solid colors
- Subtle stone patterns
- Clean backsplash transitions
A simple countertop can look expensive when the edges, seams, backsplash, lighting, and cabinet hardware are coordinated.
DIY Countertop Ideas for a Rustic Kitchen
Rustic kitchens naturally suit materials with texture and visible character.
Consider:
- Butcher block
- Reclaimed wood
- Aged-looking finishes
- Warm wood tones
- Thick-looking edges
- Repurposed doors
The goal is to make the imperfections look intentional rather than unfinished.
DIY Countertop Ideas for Renters
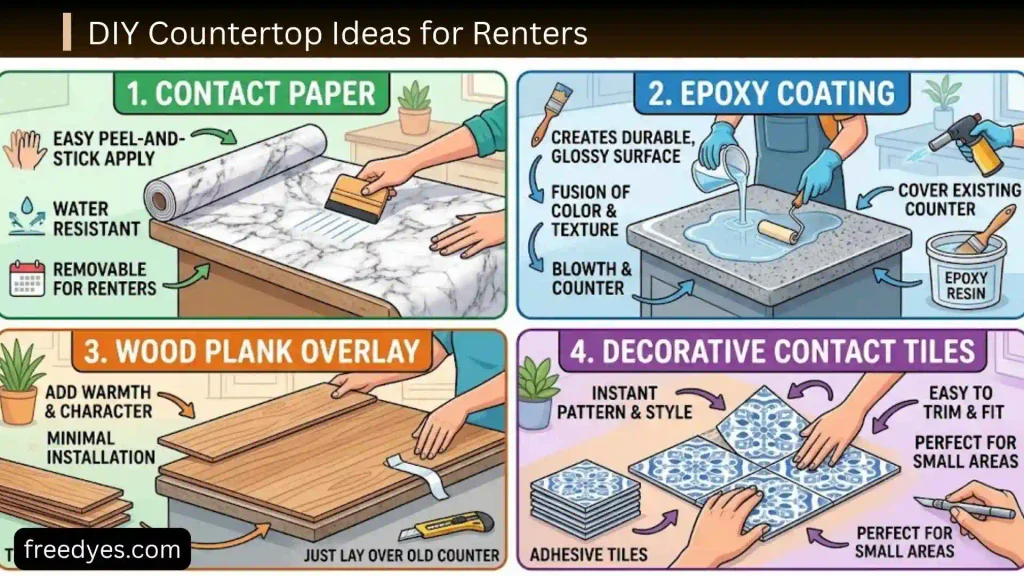
If you cannot permanently modify the countertop, focus on reversible options.
Countertop Film
Film can create a temporary marble, wood, or stone appearance without replacing the underlying surface.
Decorative Styling
Sometimes the cheapest transformation is not replacing anything.
Improve the surrounding area with:
- Matching storage
- Trays
- Cutting boards
- Small organizers
- Updated hardware
- Better lighting
Recent home-improvement advice similarly recommends combining countertop refreshes with surrounding changes to make the overall kitchen feel more cohesive.
How to Make a DIY Countertop Look More Expensive
The difference between a cheap-looking DIY countertop and a convincing one often comes down to finishing details.
Keep the Edges Clean
Choose an edge treatment that matches your skill level.
Possible styles include:
- Square
- Eased
- Rounded
- Bullnose-inspired
- Built-up edge
- Contrasting wood edge
You do not need a complicated profile to achieve a professional appearance.
Make the Seams Intentional
Poorly aligned seams immediately attract attention.
Before applying adhesive or permanently securing anything:
- Dry-fit the sections
- Check alignment
- Check the wall fit
- Check the overhang
- Confirm the sink location
- Look at the seam from normal viewing distance
Coordinate the Backsplash
A new countertop can look out of place if the backsplash strongly clashes with it.
You do not necessarily need a new backsplash, but consider whether the colors and patterns work together.
Update Small Details
A countertop makeover becomes more convincing when paired with:
- New cabinet hardware
- Improved lighting
- Fresh cabinet paint
- A cleaner backsplash
- Coordinated accessories
How to Measure for a DIY Countertop
Accurate measurement is one of the most important parts of the entire project.
Do not simply measure the front edge once and order material.
Measure the Cabinet Width
For complicated layouts, measure at multiple points.
Check:
- Front
- Middle
- Back
This can reveal variations that are invisible at first glance.
Current butcher-block installation guidance specifically recommends measuring cabinet width at the front, middle, and back and checking cabinet depth at multiple points.
Measure Cabinet Depth
Check depth:
- Along the wall
- At the center
- Near the front
Walls are not always perfectly straight.
Measure Cabinet Height
This matters particularly when replacing an existing countertop.
If the new surface is significantly different in thickness, it can affect:
- Backsplash relationships
- Appliance clearances
- Sink position
- Finished working height
Measure the Sink
Never assume the new sink will use the same opening as the old sink.
Use the actual sink manufacturer’s cutout requirements.
Check Appliances
Confirm clearance around:
- Dishwasher
- Range
- Refrigerator
- Washer
- Dryer
- Cooktop
A countertop that fits the cabinets can still interfere with an appliance.
How to Make a DIY Countertop Template
A template can save expensive material.
You can use:
- Cardboard
- Heavy paper
- Thin hardboard
- Other suitable rigid template material
The purpose is to reproduce the actual shape of your countertop area before cutting the expensive material.
What a Template Can Reveal
A good template can expose:
- Out-of-square corners
- Curved walls
- Cabinet irregularities
- Sink location
- Faucet position
- Appliance conflicts
- Seam locations
- Required overhang
Current countertop installation guidance specifically recommends templating for irregular layouts and explains how templates help determine joins and wall fitting.
How to Install a DIY Countertop
The exact installation method depends on the material, but the planning process is similar.
Step 1: Inspect the Cabinets
Before installing anything, make sure the cabinets are:
- Secure
- Stable
- Properly supported
- Suitable for the new countertop
A beautiful countertop cannot compensate for unstable cabinets.
Step 2: Remove the Existing Countertop if Necessary
If replacing the old surface:
- Disconnect appliances where appropriate
- Remove fasteners
- Break old seals carefully
- Protect the cabinets
- Avoid damaging plumbing or electrical connections
If plumbing or electrical work is required, use an appropriately qualified professional.
Step 3: Check for Level
Place a suitable level across the cabinet run.
If the cabinets are not level, resolve the problem before permanently installing the countertop.
Step 4: Create Your Template
Transfer the real shape of the cabinet area to your template.
Include:
- Wall edges
- Overhang
- Sink
- Appliances
- Corners
- Seams
Step 5: Dry-Fit Everything
This is one of the most valuable steps.
Put the countertop pieces into position before permanent attachment.
Check:
- Wall fit
- Cabinet fit
- Overhang
- Sink opening
- Appliance clearance
- Seams
- Edge alignment
Current installation guidance also emphasizes dry fitting before permanently securing countertop material.
Step 6: Make the Required Cuts
Use the correct blade and cutting technique for the specific material.
Do not assume a blade suitable for wood is suitable for laminate, tile, or another countertop material.
Step 7: Finish the Edges
Complete the edge treatment before final installation whenever the design makes that easier.
Step 8: Secure the Countertop
The attachment method depends on the countertop material and cabinet construction.
Use the method recommended for your particular material rather than relying on a universal adhesive or screw pattern.
Step 9: Install the Sink
Use the sink manufacturer’s instructions.
Double-check the opening before making irreversible cuts.
For plumbing connections, especially water supply and waste/disposal connections, use a licensed professional where required or where you are not qualified to perform the work. Current butcher-block guidance likewise recommends professional plumbing connections.
Step 10: Seal or Finish the Countertop
Use a finish appropriate for:
- The material
- Food contact, if applicable
- Water exposure
- Heat exposure
- Cleaning requirements
Always follow the specific product instructions.
DIY Countertop Sink-Cutout Tips
The sink opening is one of the highest-risk parts of a countertop project.
Before cutting:
- Identify the exact sink model.
- Obtain the manufacturer’s cutout template.
- Confirm sink orientation.
- Mark faucet locations.
- Check cabinet clearance underneath.
- Confirm the countertop has enough material around the opening.
- Dry-check the placement.
- Make the cut using the appropriate tool.
- Finish and protect the exposed edge as required.
- Test-fit the sink before permanent installation.
A small measurement error can turn an otherwise successful project into an expensive repair.
DIY Countertop Edge Ideas
The edge can completely change how the countertop looks.
Simple Square Edge
The easiest option for many DIY materials.
It works particularly well with:
- Plywood
- Laminate
- Wood
- Modern designs
Eased Edge
A slightly softened edge removes the harshness of a perfectly sharp corner.
It can also be more comfortable during everyday use.
Rounded Edge
A rounded edge gives wood countertops a softer appearance.
Built-Up Edge
A built-up edge can create the visual impression of a thicker countertop without using a solid piece of unusually thick material.
Waterfall Edge
Waterfall edges can make an island look custom and high-end, but the joints need accurate cuts.
This is better suited to experienced DIYers.
DIY Countertop Maintenance
Different materials require different care.
Butcher Block
Depending on the finish and intended use, wood may require periodic maintenance and protection from standing water.
Laminate
Keep seams and edges protected from moisture and avoid excessive heat.
Painted Countertops
Use the cleaning products recommended by the coating manufacturer and avoid aggressive use until the finish has fully cured.
Tile
Keep grout clean and maintain it according to the grout and sealer manufacturer’s recommendations.
Concrete
Concrete surfaces may require sealing and periodic maintenance depending on the chosen system and use.
Reclaimed Wood
Monitor for finish wear, moisture problems, and damaged areas.
The easiest countertop to maintain is not necessarily the most attractive one for your space, so consider maintenance before choosing the material.
DIY Countertop Ideas by Goal
Best for a Budget Makeover
Refinishing an existing countertop is often worth considering before full replacement.
Best for a Warm Kitchen
Butcher block or another carefully finished wood surface.
Best for a Rustic Kitchen
Reclaimed wood or butcher block.
Best for a Modern Look
A simple wood, neutral laminate, concrete-inspired, or minimalist surface.
Best for a Laundry Room
Plywood, laminate, or butcher block can all work depending on moisture and design requirements.
Best for a Kitchen Island
Butcher block is particularly attractive for a straightforward island project.
Best for Renters
A removable countertop covering can provide a temporary visual change.
Best for Experienced DIYers
Concrete, complex multi-piece layouts, and detailed edge treatments offer more customization but also introduce more opportunities for mistakes.
DIY Countertop Installation vs. DIY Fabrication
These two projects are not the same.
DIY Installation
You purchase a finished countertop and install it yourself.
This reduces the amount of fabrication required.
DIY Fabrication
You purchase raw materials and actually build the countertop yourself.
That may involve:
- Cutting
- Joining
- Laminating
- Routing
- Sanding
- Edge finishing
- Sink fabrication
- Sealing
Fabrication generally requires more skill and tools.
For example, installing a pre-finished butcher block is a different task from fabricating an entire countertop from raw boards.
Countertop Projects Beginners May Want to Avoid
Not every countertop should be treated as a beginner project.
Consider hiring a professional when the project involves:
- Very large stone slabs
- Fragile stone
- Complex stone fabrication
- Numerous seams
- Difficult plumbing changes
- Complicated electrical changes
- Major cabinet modifications
- Very large unsupported overhangs
- Structural changes
Large stone slabs can be especially difficult because of their weight, fragility, transportation requirements, and specialized fabrication needs.
A DIY project should save money and provide satisfaction—not create a much more expensive repair.
Common DIY Countertop Mistakes
Measuring Only Once
Measure multiple areas rather than assuming the cabinets and walls are perfectly square.
Cutting Without a Template
A template can expose problems before you cut your expensive material.
Skipping the Dry Fit
Always check the pieces before adhesive, screws, caulk, or permanent attachment.
Ignoring Cabinet Support
The countertop needs a suitable base.
Current installation guidance specifically discusses adding blocking or support where cabinet construction does not provide an adequate surface.
Forgetting the Sink Cutout
Verify the exact sink requirements before cutting.
Choosing a Finish Based Only on Appearance
A finish should be appropriate for the actual use of the countertop.
Using the Wrong Tool
Different materials require different cutting and finishing methods.
Ignoring the Wall
Walls may not be perfectly straight or square.
The countertop may need to be carefully fitted or scribed.
Making the Project Too Complicated
A simple rectangular countertop can look fantastic.
You do not need a waterfall edge, multiple materials, or elaborate patterns to create a successful DIY project.
How to Choose a DIY Countertop by Skill Level
Beginner DIYer
Start with:
- Countertop film
- Simple refinishing
- Straight butcher block installation
- A basic pre-finished countertop
Intermediate DIYer
Consider:
- Plywood
- Laminate
- Tile
- Reclaimed wood
- More complicated wood countertops
Advanced DIYer
Consider:
- Concrete
- Complex seams
- Waterfall edges
- Custom fabrication
- Complicated layouts
Your available tools matter just as much as your experience.
Frequently Asked Questions About DIY Countertop Ideas
What is the easiest countertop to DIY?
A simple, straight countertop made from a pre-finished material is generally easier than a countertop requiring extensive fabrication. A basic butcher-block island is also a popular DIY project, although accurate measuring, cutting, finishing, and installation are still necessary.
What is the cheapest way to redo countertops?
If the existing countertop is structurally sound, refinishing or covering it may cost less than complete replacement. Painting, suitable refinishing systems, and temporary countertop film are options worth investigating.
Can I make a countertop from plywood?
Yes. Plywood can be used for custom countertop projects, particularly in laundry rooms, workshops, islands, desks, and other spaces. The key is properly finishing the surface and edges for the intended application.
Can I put a new countertop over an old one?
Sometimes. The existing countertop needs to be structurally sound, stable, suitable for the new material, and free from serious water damage or swelling.
Can I replace countertops without replacing cabinets?
Often, yes. If the cabinets are stable and adequately supported, the countertop can sometimes be replaced independently. Cabinet condition and countertop thickness still need to be considered.
Can I paint a laminate countertop?
Painting can be an option when the existing laminate is suitable for refinishing. Proper cleaning, surface preparation, compatible coatings, and complete curing are essential.
Is butcher block good around a kitchen sink?
It can be, but the sink area needs careful finishing and moisture management. Follow the finish manufacturer’s recommendations for the intended use.
How do I make a cheap countertop look expensive?
Focus on details rather than expensive materials alone.
Use:
- Clean edges
- Accurate cuts
- Intentional seams
- Coordinated backsplash
- Matching hardware
- Good lighting
- A consistent color palette
- A properly finished surface
What countertop is best for a small kitchen?
A simple surface with limited visual pattern can help a small kitchen feel less cluttered. Light or neutral colors can also work well, but the best choice depends on the cabinets, backsplash, flooring, and lighting.
What is the best countertop for a laundry room?
Plywood, laminate, butcher block, and reclaimed wood can all be considered depending on the design, budget, moisture exposure, and required durability.
Can I DIY a quartz countertop?
Some aspects of installation may be possible for experienced DIYers, but large stone slabs can be difficult to transport, cut, position, and install safely. Professional fabrication and installation may be the better choice for complicated stone projects.
What should I measure before making a countertop?
Measure cabinet width at multiple points, cabinet depth, cabinet height, wall conditions, overhang, sink location, faucet openings, appliances, corners, and backsplash relationships.
Do I need a countertop template?
A template is especially useful for irregular walls, corners, sink cutouts, multiple countertop pieces, and complicated layouts. It can help identify problems before you cut the final material.
Final Thoughts
The best DIY countertop ideas are not necessarily the most complicated or expensive ones. A successful countertop project starts by matching the material to the room, your skill level, your budget, and the amount of maintenance you are willing to handle.
For a simple and warm transformation, butcher block can be an excellent choice. Plywood can offer a flexible budget-friendly option, while laminate provides practical styling possibilities. Painting or refinishing can transform an existing countertop without full demolition, and temporary countertop film can work when you want a quick or renter-friendly update.
More advanced options such as concrete, intricate tile layouts, complicated seams, and waterfall edges can create impressive results, but they require more planning and precision.
Most importantly, do not rush the measuring stage. Check the cabinets, create a template when appropriate, confirm sink and appliance dimensions, dry-fit the pieces, and choose finishes based on how the countertop will actually be used.
A well-planned simple countertop will almost always look better than an ambitious project that was rushed.