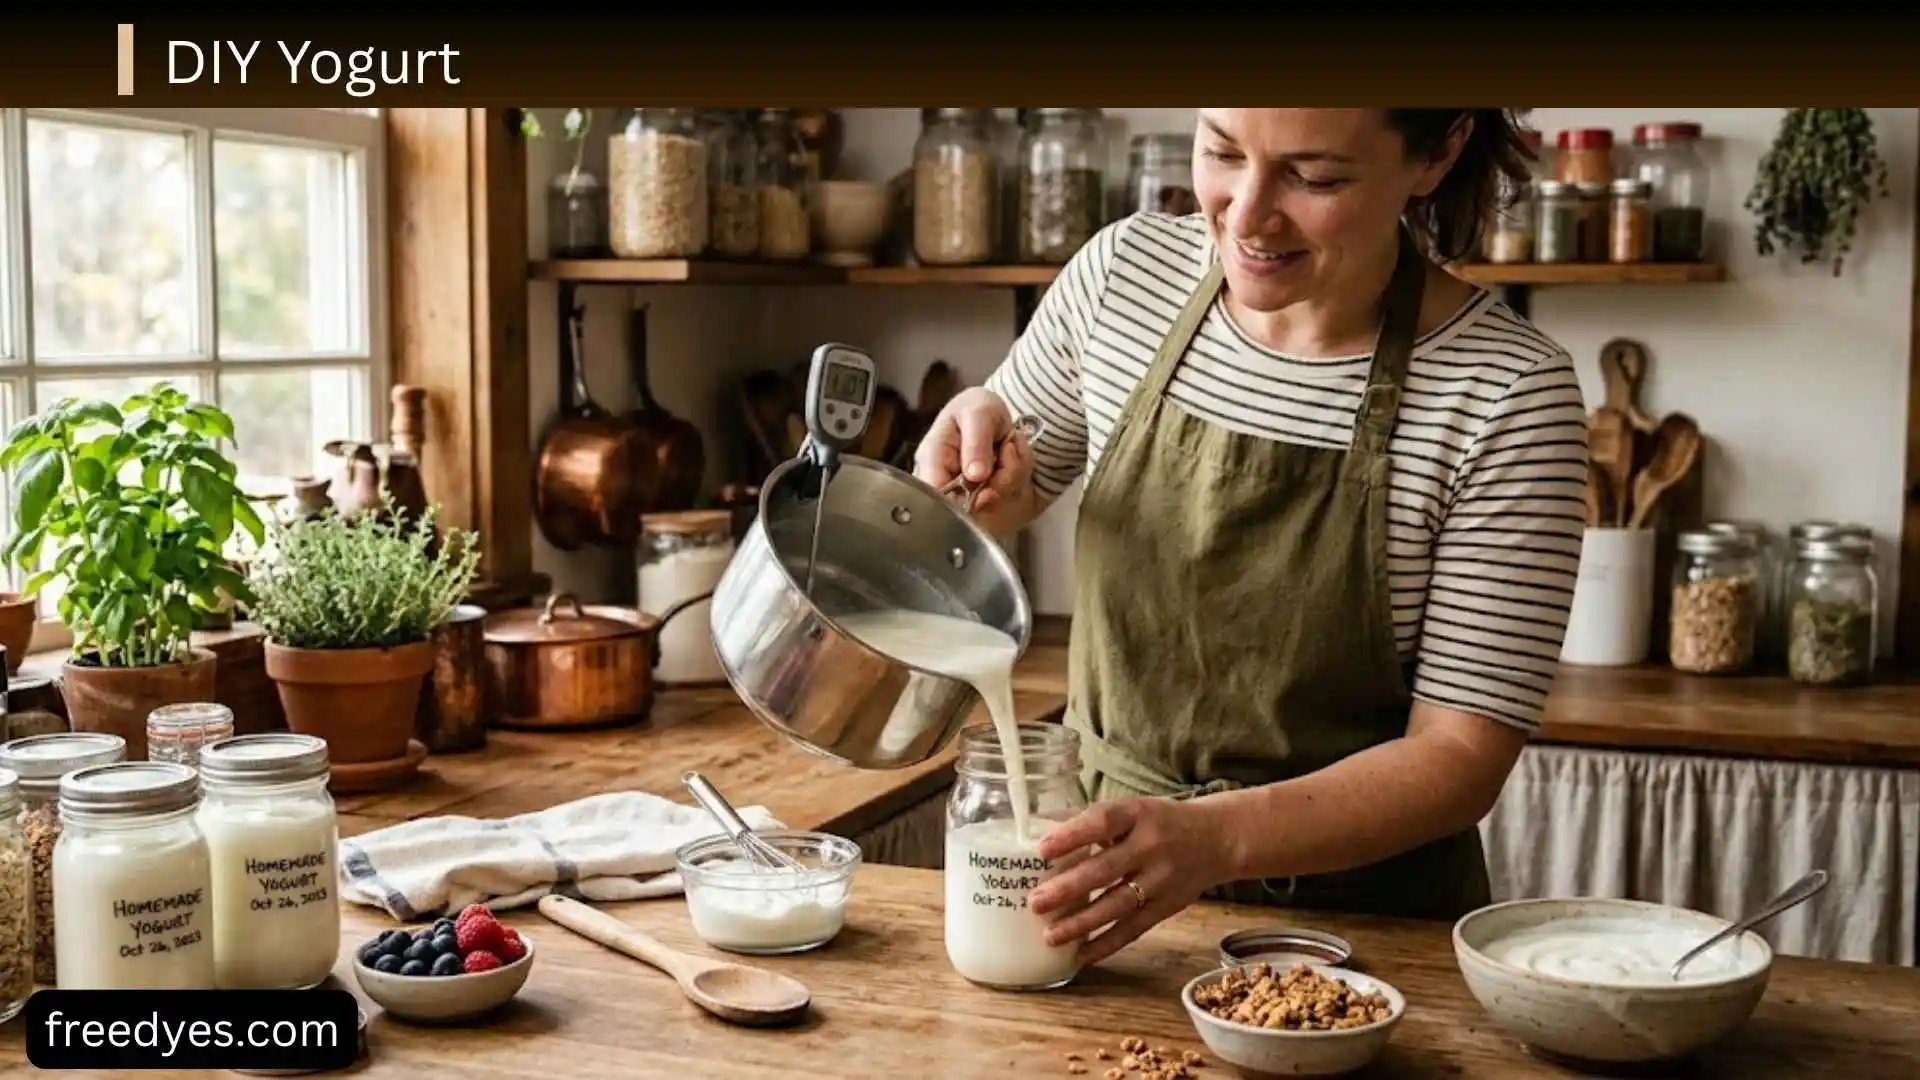
I am always looking for simple ways to make healthier food at home, and DIY yogurt has become one of my favorite kitchen projects. If you have ever wondered whether homemade yogurt is worth the effort, I can tell you that it is easier than you might think. With just a few basic ingredients and a little patience, I am able to make creamy, fresh yogurt that tastes delicious and costs less than many store-bought options.
Whether I am making breakfast, preparing a healthy snack, or adding yogurt to my favorite recipes, homemade yogurt gives me complete control over the ingredients and flavor. In this guide, I will show you everything you need to know about making DIY yogurt, from choosing the right milk and starter culture to achieving the perfect texture every time. By the end, you will feel confident enough to make fresh, homemade yogurt in your own kitchen.
Easy DIY Yogurt Recipe at a Glance
Before getting into all the details, here is the basic method.
| Detail | Homemade Yogurt |
| Difficulty | Beginner |
| Yield | About 1 quart |
| Main ingredients | Milk + plain yogurt with live cultures |
| Active preparation | About 15–20 minutes |
| Fermentation | Usually several hours |
| Milk temperature before starter | About 110–115°F (43–46°C) |
| Yogurt maker required | No |
| Best beginner milk | Whole dairy milk |
| Thick Greek-style option | Strain after fermentation |
The exact fermentation time can vary with the starter culture, temperature, milk, and incubation method. Some established recipes use roughly 5–10 hours, while other methods commonly allow 6–12 hours.
DIY Yogurt Ingredients
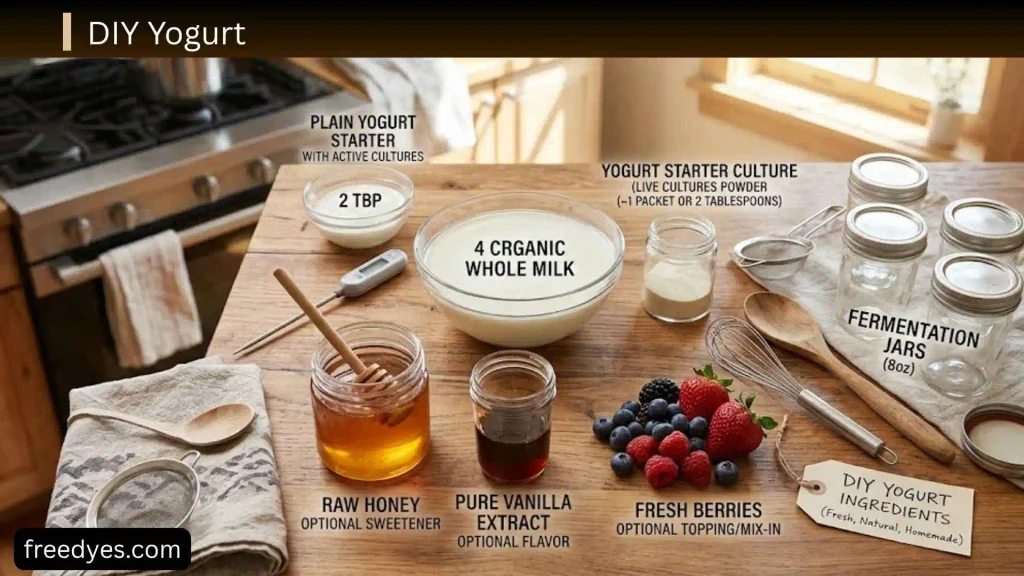
You only need two main ingredients for a basic batch.
Milk
Use 4 cups (1 liter) of dairy milk for this beginner-friendly recipe.
Whole milk is the easiest choice if you want creamy, rich yogurt. Lower-fat milk can also work, although the finished yogurt may be lighter and less rich.
Plain Yogurt With Live Cultures
Use about 2–3 tablespoons of plain yogurt containing live or active cultures as your starter.
Check the label before buying it. Avoid flavored yogurt for your starter because added fruit, sugar, or other ingredients are unnecessary when you are trying to create a predictable first batch.
Greek or regular plain yogurt can work as a starter if it contains suitable live cultures.
Equipment You Need
You do not need a yogurt maker.
For the basic method, gather:
- Heavy-bottomed saucepan
- Food thermometer
- Clean whisk or spoon
- Clean glass jar or covered container
- Measuring spoons
- Clean towel
- Refrigerator
Helpful Optional Equipment
You may also use:
- Yogurt maker
- Instant Pot with a yogurt function
- Insulated cooler
- Thermos
- Fine-mesh strainer
- Cheesecloth or reusable yogurt cloth
- Large bowl
A thermometer is strongly recommended for beginners because yogurt cultures are sensitive to temperature, and guessing can make your results inconsistent.
How to Make DIY Yogurt Step by Step
The basic process is heat, cool, culture, incubate, chill, and serve.
Step 1: Clean Everything
Wash your hands and clean the saucepan, spoon or whisk, thermometer, storage container, and any straining equipment you plan to use.
You do not need to create a laboratory environment, but clean equipment is important because you want your intended yogurt cultures to have a good environment in which to grow.
Step 2: Measure the Milk
Pour 4 cups (1 liter) of milk into a saucepan.
If you are making your first batch, whole dairy milk is a good starting point because it generally produces a creamy result without requiring additional thickeners.
Step 3: Heat the Milk
Place the saucepan over medium heat and warm the milk gradually.
Heat it to about 180°F (82°C).
Stir occasionally and watch the pot carefully so the milk does not scorch or boil over.
Heating the milk is not simply about making it hot. It also changes the behavior of the milk proteins, which helps the finished yogurt develop a better structure.
Step 4: Cool the Milk
Remove the saucepan from the heat.
Allow the milk to cool to approximately 110–115°F (43–46°C) before adding the starter.
This is an important step. If the milk is excessively hot when the yogurt culture is added, the heat can damage the living cultures you need for fermentation. Established homemade-yogurt methods commonly use this cooling range before adding starter.
If the milk cools below your target, you can gently warm it again.
Step 5: Mix the Starter Separately
Place the 2–3 tablespoons of plain yogurt starter in a small bowl.
Add a little of the warm milk and whisk gently until the yogurt becomes smooth.
This makes it easier to distribute the starter throughout the rest of the milk without having to stir the entire batch aggressively.
Step 6: Add the Starter to the Milk
Pour the thinned starter mixture into the remaining warm milk.
Stir gently until combined.
You do not need to beat or vigorously whisk the mixture. The goal is simply to distribute the cultures evenly.
Step 7: Transfer the Milk to a Container
Pour the cultured milk into a clean jar or another suitable container.
Cover it.
Now the fermentation stage begins.
Step 8: Keep It Warm
Place the container somewhere warm and relatively stable.
The yogurt cultures need warmth to ferment the milk, but you do not want to repeatedly heat and cool the mixture.
If your home is cool, use one of the incubation methods described later in this article.
Step 9: Let the Yogurt Ferment
Allow the yogurt to sit undisturbed for several hours.
A practical starting point is to begin checking around 6 hours, although some batches may need longer. Many methods fall somewhere around 6–12 hours, depending on the culture and incubation conditions.
Longer fermentation generally produces a more pronounced tang.
Do not judge the batch solely by the clock. Look at the yogurt’s consistency and consider the flavor you want.
Step 10: Check Whether It Has Set
Carefully look at the yogurt without shaking the container.
A successfully cultured batch should have thickened noticeably rather than remaining completely liquid.
It may still seem softer than refrigerated yogurt at this stage.
That’s okay.
The yogurt will firm further as it chills.
Step 11: Refrigerate
Once the yogurt has set, transfer it to the refrigerator.
Chilling helps improve its final consistency.
Allow it to cool thoroughly before deciding whether you want to strain it.
Step 12: Serve or Strain
You can eat the yogurt plain, add flavorings, or strain it to make a thicker Greek-style yogurt.
How to Make DIY Yogurt Without a Yogurt Maker
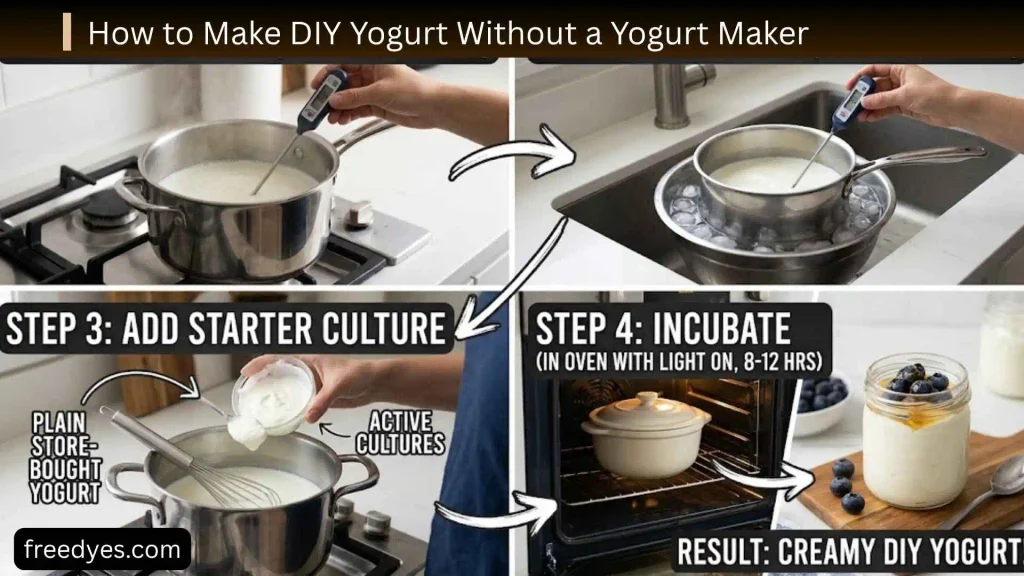
A yogurt maker is convenient, but it is not essential.
The appliance’s main job is to provide a reasonably stable environment for fermentation. You can create that environment in several ways.
Method 1: Insulated Container
Place the covered yogurt container inside an insulated cooler or another suitable insulated container.
The goal is to slow heat loss and keep the yogurt warm during fermentation.
This method can be particularly useful in a cool kitchen.
Method 2: Oven With the Heat Off
Some home cooks use an oven as an enclosed incubation space.
If you choose this method, make sure the oven is off unless your particular method specifically calls for a controlled low-temperature setting.
The most important danger is accidentally turning the oven on and overheating the cultures or the container.
An oven thermometer can help you understand the actual environment rather than guessing.
Method 3: Wrapped Container
Place the covered container somewhere stable and wrap it with a clean towel to provide insulation.
This is simple and inexpensive, although the temperature may be less consistent than with a dedicated appliance.
Method 4: Thermos
A clean food-safe thermos can help retain warmth.
If you use a thermos, clean it carefully and warm it according to your method before adding the cultured milk.
Once fermentation is complete, transfer the yogurt to a normal storage container before refrigeration if necessary.
Method 5: Instant Pot
If your Instant Pot or similar appliance has a yogurt function, you can use that setting according to the manufacturer’s instructions.
The appliance can make temperature management easier, but you still need an appropriate starter and clean equipment.
Which Method Is Best?
| Your situation | Good starting method |
| You have a thermometer and saucepan | Stovetop + insulated container |
| You have an Instant Pot | Yogurt function |
| You own a yogurt maker | Yogurt maker |
| You have no special equipment | Covered container + insulation |
| Your kitchen is cool | Insulated method |
| You want repeatable results | Controlled yogurt maker or appliance |
For a first attempt, the simplest method is often the best. Learn the basic process before experimenting with several variables at once.
What Is the Best Milk for DIY Yogurt?
Milk choice affects the final texture.
Whole Milk
Whole milk is an excellent beginner choice when you want creamy yogurt.
It contains more milk fat than lower-fat options, which can contribute to a richer eating experience.
2% Milk
2% milk can make good yogurt, but the finished product may be lighter.
If you want thicker yogurt, you can strain it after fermentation.
Skim Milk
Skim milk can be cultured, but the resulting yogurt may be noticeably less rich and may require more attention to texture.
Lactose-Free Dairy Milk
Lactose-free dairy milk can be used, although different products may produce somewhat different results.
Plant-Based Milk
Plant-based milk is a different project.
Dairy milk naturally contains proteins that help create yogurt’s familiar structure. Many plant-based milks need additional ingredients or specific cultures to produce a similarly thick result.
If you are a beginner, dairy milk is the easiest place to start.
Can You Use UHT or Ultra-Pasteurized Milk?
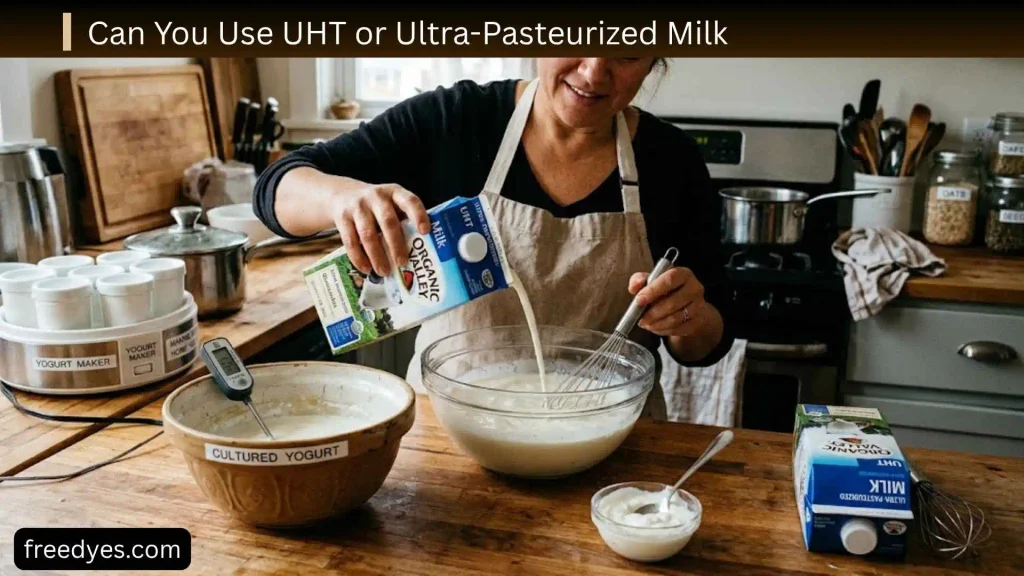
Some ultra-pasteurized or UHT milks can be used for yogurt, but their behavior can vary by product.
If you are having trouble getting the texture you want, compare results with a different suitable milk rather than changing several parts of the recipe simultaneously.
For your first batch, choose a milk that is commonly used for homemade yogurt and follow a consistent process.
How to Choose a Yogurt Starter
Your starter is one of the most important ingredients.
Look for Live or Active Cultures
Choose plain yogurt that clearly indicates it contains live or active cultures.
The starter is not merely there for flavor. It provides the microorganisms responsible for transforming the milk into yogurt.
Use Plain Yogurt
Plain yogurt is easier to work with because it does not contain unnecessary flavorings.
Can Greek Yogurt Be Used?
Yes, if the Greek yogurt contains appropriate live cultures.
Can Homemade Yogurt Be Used?
A successful batch can be saved and used as starter for a future batch.
However, do not assume that repeatedly carrying the same culture forward will always produce identical results.
If your batches become weaker or inconsistent, start again with a fresh commercial yogurt starter or a fresh direct-set culture.
How Long Should DIY Yogurt Ferment?
There is no single fermentation time that works perfectly for every kitchen.
A reasonable starting range is about 6–12 hours, with the exact time depending on your starter, incubation temperature, milk, and desired flavor. Some established recipes use shorter ranges, such as 5–10 hours.
For Milder Yogurt
Check the yogurt earlier.
For Tangier Yogurt
Allow more fermentation time, provided your method and starter support it.
For Thicker Yogurt
Fermentation and straining are separate variables.
Do not assume that simply fermenting for a very long time is the best way to create thick yogurt. Over-fermentation can make the yogurt excessively sour and may encourage more whey separation.
How Do You Know When Homemade Yogurt Is Done?
Look for a clear change from liquid milk to a thicker, set mixture.
The surface should no longer behave like ordinary milk when the container is gently moved.
The yogurt should also have a recognizable cultured, tangy aroma.
Do not repeatedly shake the container to check it. Every disturbance makes it harder to judge the final texture.
When in doubt, allow it a little more time rather than constantly opening and moving the container.
How to Make DIY Yogurt Thicker
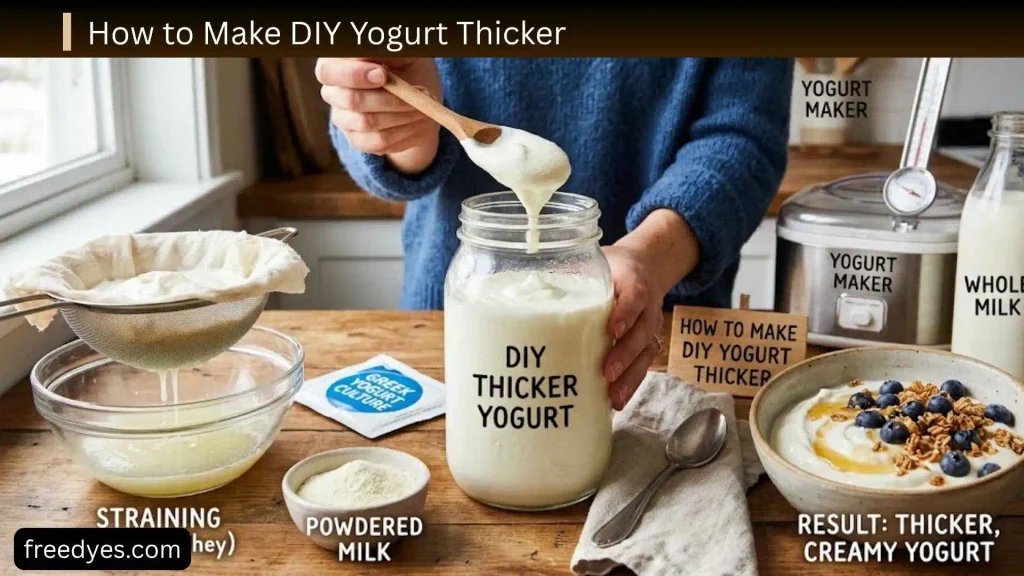
If your goal is thick spoonable yogurt, you have several options.
Start With Whole Milk
Whole milk is a simple starting point for a creamy texture.
Follow the Heating Step Carefully
The milk-heating stage contributes to the structure of the finished yogurt.
Maintain a Stable Incubation Environment
Large temperature swings can make the process less predictable.
Let It Chill
Freshly fermented yogurt may seem softer than expected.
Refrigeration improves its consistency.
Strain It
This is the most straightforward way to turn regular homemade yogurt into thick Greek-style yogurt.
How to Make Greek Yogurt From DIY Yogurt
You do not need a separate recipe.
Start with finished homemade yogurt.
Step 1: Chill the Yogurt
Refrigerate the yogurt before straining.
Step 2: Prepare a Strainer
Place a fine-mesh strainer over a bowl.
Line it with cheesecloth or a suitable reusable yogurt cloth.
Step 3: Add the Yogurt
Spoon the chilled yogurt into the lined strainer.
Step 4: Refrigerate
Place the setup in the refrigerator while the whey drains.
Step 5: Check the Texture
Start checking after about an hour.
For thicker yogurt, continue straining.
Longer straining produces a denser consistency.
Step 6: Transfer the Yogurt
Once you like the texture, transfer the thick yogurt to a clean covered container.
Do not throw away the whey automatically. There are several ways you can use it.
What to Do With Leftover Whey
Whey is the liquid that drains from yogurt as it becomes thicker.
Instead of automatically discarding it, you can experiment with using it in:
- Smoothies
- Pancake batter
- Bread dough
- Soups
- Cooking grains
- Other recipes that can accommodate its mild acidic flavor
Keep it refrigerated and use it only when it has been handled safely.
Why Is My DIY Yogurt Runny?
Runny yogurt is one of the most common beginner problems.
The Starter Was Inactive
If the starter did not contain live cultures or was no longer viable, fermentation may fail.
Try: Use fresh plain yogurt labeled with live or active cultures.
The Milk Was Too Hot
If you added the starter while the milk was excessively hot, the cultures may have been damaged.
Try: Use a thermometer and allow the milk to cool to the recommended starter temperature.
The Mixture Was Too Cool
If the yogurt never stayed warm enough, fermentation may have been extremely slow.
Try: Improve insulation or use a more controlled incubation method.
The Yogurt Needed More Time
Some cultures simply take longer.
Try: Give the batch additional time within the recommended conditions.
The Yogurt Was Disturbed
Moving or shaking the container repeatedly can interfere with setting.
Try: Leave the container alone during fermentation.
The Milk Produced a Soft Texture
Different milk products can behave differently.
Try: Use whole milk for your next batch and compare the results.
Why Did My Yogurt Not Set at All?
If the milk still looks essentially like milk after adequate fermentation time, work backward through the process.
Ask:
- Did the starter contain live cultures?
- Was the starter fresh?
- Was the milk excessively hot when the starter was added?
- Was the incubation environment warm enough?
- Did the yogurt remain undisturbed?
- Did you use a suitable milk?
- Did the fermentation conditions remain stable?
Changing only one variable at a time is useful when troubleshooting.
For example, if you change the milk, starter, incubation method, and fermentation time simultaneously, you will not know which change solved the problem.
Why Is There Liquid on Top of My Yogurt?

A small amount of yellowish or clear liquid can be whey.
Some whey separation is normal, particularly as yogurt becomes more acidic or is disturbed.
You can gently stir it back into the yogurt, or drain it if you want a thicker consistency.
A large amount of separation may indicate that the yogurt fermented for too long, experienced temperature issues, or simply developed a texture that needed straining.
Liquid by itself does not automatically mean the yogurt is spoiled.
Why Is My Yogurt Too Sour?
Yogurt becomes more acidic as fermentation continues.
If your batch is much tangier than you prefer, reduce the fermentation time in your next batch.
Also remember that homemade yogurt does not necessarily taste exactly like commercial yogurt. Store-bought products can have different cultures, processing methods, ingredients, and flavor profiles.
Why Is My Yogurt Grainy?
Graininess can result from temperature problems, culture behavior, milk differences, or fermentation conditions.
Try to make the next batch more consistent:
- Heat gradually.
- Monitor the temperature.
- Cool to the correct range before adding starter.
- Stir gently.
- Keep incubation conditions stable.
- Avoid disturbing the container.
If the same problem happens repeatedly, change only one variable at a time.
Why Does My Yogurt Smell Strange?
A normal yogurt batch should have a recognizable cultured, acidic aroma.
If you notice an unpleasant rotten odor, unusual discoloration, mold, or other obvious signs of spoilage, do not taste the yogurt to determine whether it is safe.
When food looks or smells suspicious, the safest choice is to discard it.
How to Make Yogurt in Cold Weather
Cold kitchens can make yogurt fermentation less predictable.
Use Better Insulation
Wrap the container or place it inside a suitable insulated environment.
Choose a Stable Location
Avoid cold countertops, drafts, and areas near frequently opened doors.
Use a Controlled Appliance
A yogurt maker or an appliance with a yogurt function can make temperature management easier.
Do Not Simply Turn Up the Heat
More heat is not automatically better.
The cultures need a suitable fermentation environment, not extreme temperatures.
The goal is stable warmth, not maximum heat.
How to Make Yogurt in Hot Weather
Warm weather can also affect fermentation.
If your kitchen is already very warm, yogurt may ferment more quickly.
Check it earlier rather than assuming it always needs the same amount of time.
Once the yogurt has set, refrigerate it promptly.
How to Make DIY Yogurt Without a Thermometer
It is possible to make yogurt without a thermometer, but beginners will usually find the process easier with one.
Traditional methods have relied on touch and observation, but these methods are less precise.
If you want repeatable results, an inexpensive food thermometer is one of the most useful tools you can buy for yogurt making.
It helps you distinguish:
- milk that is ready for the starter
- milk that is still too hot
- an incubation environment that is too cool
- an incubation environment that is excessively warm
Can You Reuse Homemade Yogurt as a Starter?
Yes.
After making a successful batch, reserve some plain yogurt before adding fruit, honey, or other flavorings.
Store it properly and use it as starter for another batch.
However, do not expect unlimited generations to behave exactly the same.
If later batches become:
- unusually thin
- slow to ferment
- inconsistent
- less tangy than expected
start again with fresh commercial yogurt containing live cultures or a fresh yogurt culture.
How to Flavor Homemade Yogurt
Make the plain yogurt first and add flavor after fermentation.
Honey Yogurt
Stir honey into chilled yogurt.
Berry Yogurt
Add fresh or mashed berries.
Mango Yogurt
Mix in ripe mango pieces or a small amount of mango puree.
Cinnamon Yogurt
Add cinnamon with honey or another sweetener.
Vanilla Yogurt
Add vanilla after fermentation.
Nut and Seed Yogurt
Top yogurt with almonds, walnuts, pumpkin seeds, sunflower seeds, or chia seeds.
Granola Yogurt Bowl
Layer yogurt with fruit and granola immediately before serving.
Savory Yogurt
Skip the sweeteners and combine thick yogurt with cucumber, herbs, garlic, salt, and spices.
Ways to Use Homemade Yogurt
A successful batch can become much more than breakfast.
Smoothies
Blend yogurt with fruit and your preferred liquid.
Dips
Use thick yogurt as the base for cucumber, garlic, herb, or spice-based dips.
Sauces
Mix yogurt with herbs, spices, lemon, or other ingredients for a simple sauce.
Marinades
Yogurt can be used as part of many savory marinades.
Breakfast Bowls
Combine yogurt with fruit, oats, seeds, nuts, or granola.
Desserts
Serve it with fruit, honey, nuts, or other toppings.
How to Store Homemade Yogurt
Once fermentation is complete, refrigerate the yogurt in a clean, covered container.
Avoid repeatedly eating directly from the storage container because utensils and food particles can introduce contaminants.
Commercial and homemade yogurt are not necessarily handled under identical conditions, so do not assume a homemade batch has exactly the same shelf life as a commercial product.
One established recipe gives up to two weeks of refrigerated storage, with the best flavor earlier in that period, but storage depends on preparation and handling.
If you notice mold, abnormal discoloration, an unpleasant rotten smell, or other signs of spoilage, discard the yogurt.
Can You Freeze DIY Yogurt?
Yes, but freezing can change its texture.
After thawing, yogurt may become watery or slightly separated.
Frozen yogurt is therefore often more useful for:
- smoothies
- cooking
- sauces
- frozen desserts
than for eating plain when you want the exact texture of freshly refrigerated yogurt.
How to Calculate the Cost of DIY Yogurt
Whether homemade yogurt saves money depends on local prices.
Instead of claiming a universal cost saving, calculate your own batch.
Simple Formula
Batch cost = milk cost + starter cost + optional ingredient cost
Then:
Cost per serving = total batch cost ÷ number of servings
If you reuse some successful homemade yogurt as the starter for the next batch, the starter portion may effectively cost very little, although you should occasionally restart with a fresh commercial culture if your batches become inconsistent.
Common DIY Yogurt Mistakes
Adding Starter to Very Hot Milk
This can damage the cultures.
Using Yogurt Without Live Cultures
Not every yogurt product is suitable as a starter.
Skipping Temperature Control
Guessing can produce inconsistent results.
Disturbing the Yogurt
Moving it repeatedly while it ferments can interfere with setting.
Adding Flavorings Too Early
Plain yogurt is easier to culture and troubleshoot.
Changing Too Many Variables
If a batch fails, changing everything at once makes troubleshooting difficult.
Over-Fermenting for Thickness
Longer fermentation mainly increases acidity. For very thick yogurt, straining is a better approach.
Ignoring Signs of Spoilage
Do not try to rescue suspicious yogurt by removing a small affected area.
DIY Yogurt Troubleshooting Chart
| Problem | Possible reason | What to try next time |
| Completely liquid | Weak/inactive starter | Use fresh yogurt with live cultures |
| Yogurt is slightly thin | Milk or incubation conditions | Try whole milk and better temperature control |
| Yogurt is too sour | Fermented too long | Check the batch earlier |
| Lots of whey | Natural separation or extended fermentation | Stir or strain |
| Grainy texture | Temperature or culture issue | Control heating and incubation more carefully |
| No noticeable fermentation | Culture or temperature problem | Check starter and incubation conditions |
| Strange odor | Possible spoilage | Discard the batch |
| Mold or unusual color | Possible spoilage | Discard the batch |
| Good flavor but too soft | Not enough straining | Strain after chilling |
DIY Yogurt: The Best Beginner Method
If all the options feel overwhelming, use this simple setup.
Ingredients
- 4 cups whole milk
- 2–3 tablespoons plain yogurt with live cultures
Equipment
- Saucepan
- Food thermometer
- Clean jar
- Spoon or whisk
- Clean towel
- Refrigerator
Method
- Heat the milk to about 180°F (82°C).
- Remove it from the heat.
- Cool it to approximately 110–115°F (43–46°C).
- Mix the starter with a little warm milk.
- Stir the starter mixture into the remaining milk.
- Transfer to a clean container.
- Keep warm and undisturbed.
- Begin checking after about 6 hours.
- Continue until the yogurt has set to your liking.
- Refrigerate until cold.
- Eat it plain or strain it for thicker yogurt.
This heat-cool-starter-incubation sequence is consistent with established homemade-yogurt methods, although exact fermentation time varies by recipe and culture.
What Should Homemade Yogurt Look Like at Each Stage?
Knowing what to expect can make the process much less stressful.
After Heating
The milk is hot and should be handled carefully.
After Cooling
The milk should be warm but no longer at the high temperature used during heating.
After Adding Starter
The milk will still look like milk. Nothing dramatic happens immediately.
During Fermentation
The mixture gradually becomes thicker.
At the End of Fermentation
The milk should have transformed into a recognizable yogurt consistency.
After Refrigeration
The yogurt should become firmer and easier to spoon.
After Straining
The yogurt becomes progressively thicker as more whey drains away.
DIY Yogurt vs. Store-Bought Yogurt
Homemade yogurt is not automatically better for every situation.
Choose DIY Yogurt When You Want
- Control over ingredients
- Custom texture
- Custom flavor
- Reusable containers
- A hands-on kitchen project
- The ability to make larger batches
Choose Store-Bought Yogurt When You Want
- Immediate convenience
- Consistent texture
- No fermentation time
- Easy single-serving portions
- No equipment or cleanup
The best choice depends on what matters most to you.
Frequently Asked Questions About DIY Yogurt
Is DIY yogurt difficult to make?
No. The basic method is simple, but consistent results depend on controlling the milk temperature, starter, incubation conditions, and fermentation time.
Can I make yogurt without a yogurt maker?
Yes. A saucepan, thermometer, clean container, starter, and suitable warm environment can be enough.
What is the easiest milk to use?
Whole dairy milk is a good starting point because it generally produces a creamy, rich yogurt.
How much starter should I use?
For this 4-cup batch, start with about 2–3 tablespoons of plain yogurt containing live cultures. If your commercial starter provides different directions, follow its instructions.
Can I use Greek yogurt as a starter?
Yes, provided it contains suitable live cultures.
Can I use flavored yogurt as a starter?
Plain yogurt is preferable because it gives you a cleaner and more predictable starting point.
Why did my yogurt stay liquid?
The most common possibilities include inactive starter, unsuitable temperature, insufficient fermentation, or problems with the milk or incubation environment.
How do I make homemade yogurt thicker?
Use whole milk, follow the heating and cooling steps carefully, maintain a stable incubation environment, and strain the finished yogurt.
Does longer fermentation make yogurt thicker?
It can affect the texture, but longer fermentation primarily increases acidity. If you want substantially thicker yogurt, straining is more reliable.
How long should homemade yogurt ferment?
A practical starting range is around 6–12 hours, but the correct time varies according to culture, temperature, milk, and desired flavor.
How do I know when yogurt is finished?
It should have visibly thickened and developed a yogurt-like cultured aroma. It will generally firm further after refrigeration.
Why is there liquid on top?
That liquid is often whey. Some separation is normal and can be stirred back in or drained for a thicker texture.
Can I make Greek yogurt at home?
Yes. Make regular yogurt first, then strain it in the refrigerator until it reaches your preferred consistency.
Can I use homemade yogurt as a starter for the next batch?
Yes. Save some plain yogurt from a successful batch before adding flavorings. If later batches become inconsistent, restart with a fresh commercial culture.
Can I make yogurt in cold weather?
Yes, but maintaining stable warmth becomes more important. Use insulation or a controlled appliance rather than relying on a cold room.
Can I make yogurt without a thermometer?
Yes, but a thermometer makes the process considerably easier to repeat accurately.
Why does homemade yogurt taste more sour than store-bought yogurt?
Fermentation creates acidity. Longer fermentation generally produces a more pronounced tang, while commercial yogurt can have different cultures and processing methods.
Can I freeze homemade yogurt?
Yes, although freezing may change the texture. Thawed yogurt is often better suited to smoothies or cooking than eating plain.
What should I do with leftover whey?
You can experiment with using it in smoothies, bread dough, pancakes, soups, or cooking grains, provided it has been handled and stored safely.
Can I use plant-based milk?
Some plant-based milks can be cultured, but they generally require a more specialized approach because their protein and composition differ from dairy milk.
What should I do if my yogurt smells rotten?
Do not taste it to test it. If the yogurt has a clearly abnormal odor, mold, unusual discoloration, or other signs of spoilage, discard it.
How to Create Your Own DIY Yogurt Routine
Once your first batch works, you can make the process almost automatic.
Choose One Milk
Start with the same milk each time.
Choose One Starter
Use a reliable plain yogurt with live cultures.
Keep Your Temperature Consistent
Use the same thermometer and incubation method.
Record Your Fermentation Time
Write down when you started and when the yogurt set.
Save Some Plain Yogurt
Reserve starter before adding toppings or sweeteners.
Change One Variable at a Time
If you want thicker, milder, or tangier yogurt, experiment gradually rather than changing everything simultaneously.
This approach helps you learn what actually works in your kitchen.
Final Thoughts
Making DIY yogurt is less about finding a complicated secret recipe and more about understanding a few important variables.
Start with 4 cups of milk and 2–3 tablespoons of plain yogurt containing live cultures. Heat the milk to about 180°F (82°C), cool it to around 110–115°F (43–46°C), mix in the starter, and keep the mixture warm and undisturbed while it ferments.
Once the yogurt sets, refrigerate it before judging its final texture. If you want something thicker, strain it to make Greek-style yogurt.
The biggest lesson for beginners is consistency. Use a thermometer, clean equipment, a reliable starter, and one incubation method. If your first batch is too thin or too sour, don’t assume the entire process is wrong. Identify what happened, change one variable, and try again.
Once you understand the basic method, homemade yogurt becomes much more flexible. You can make it mild or tangy, regular or Greek-style, sweet or savory, and use it for breakfasts, smoothies, dips, sauces, marinades, and desserts.
Most importantly, the goal is not simply to make yogurt once. It is to develop a simple process that works reliably in your own kitchen.