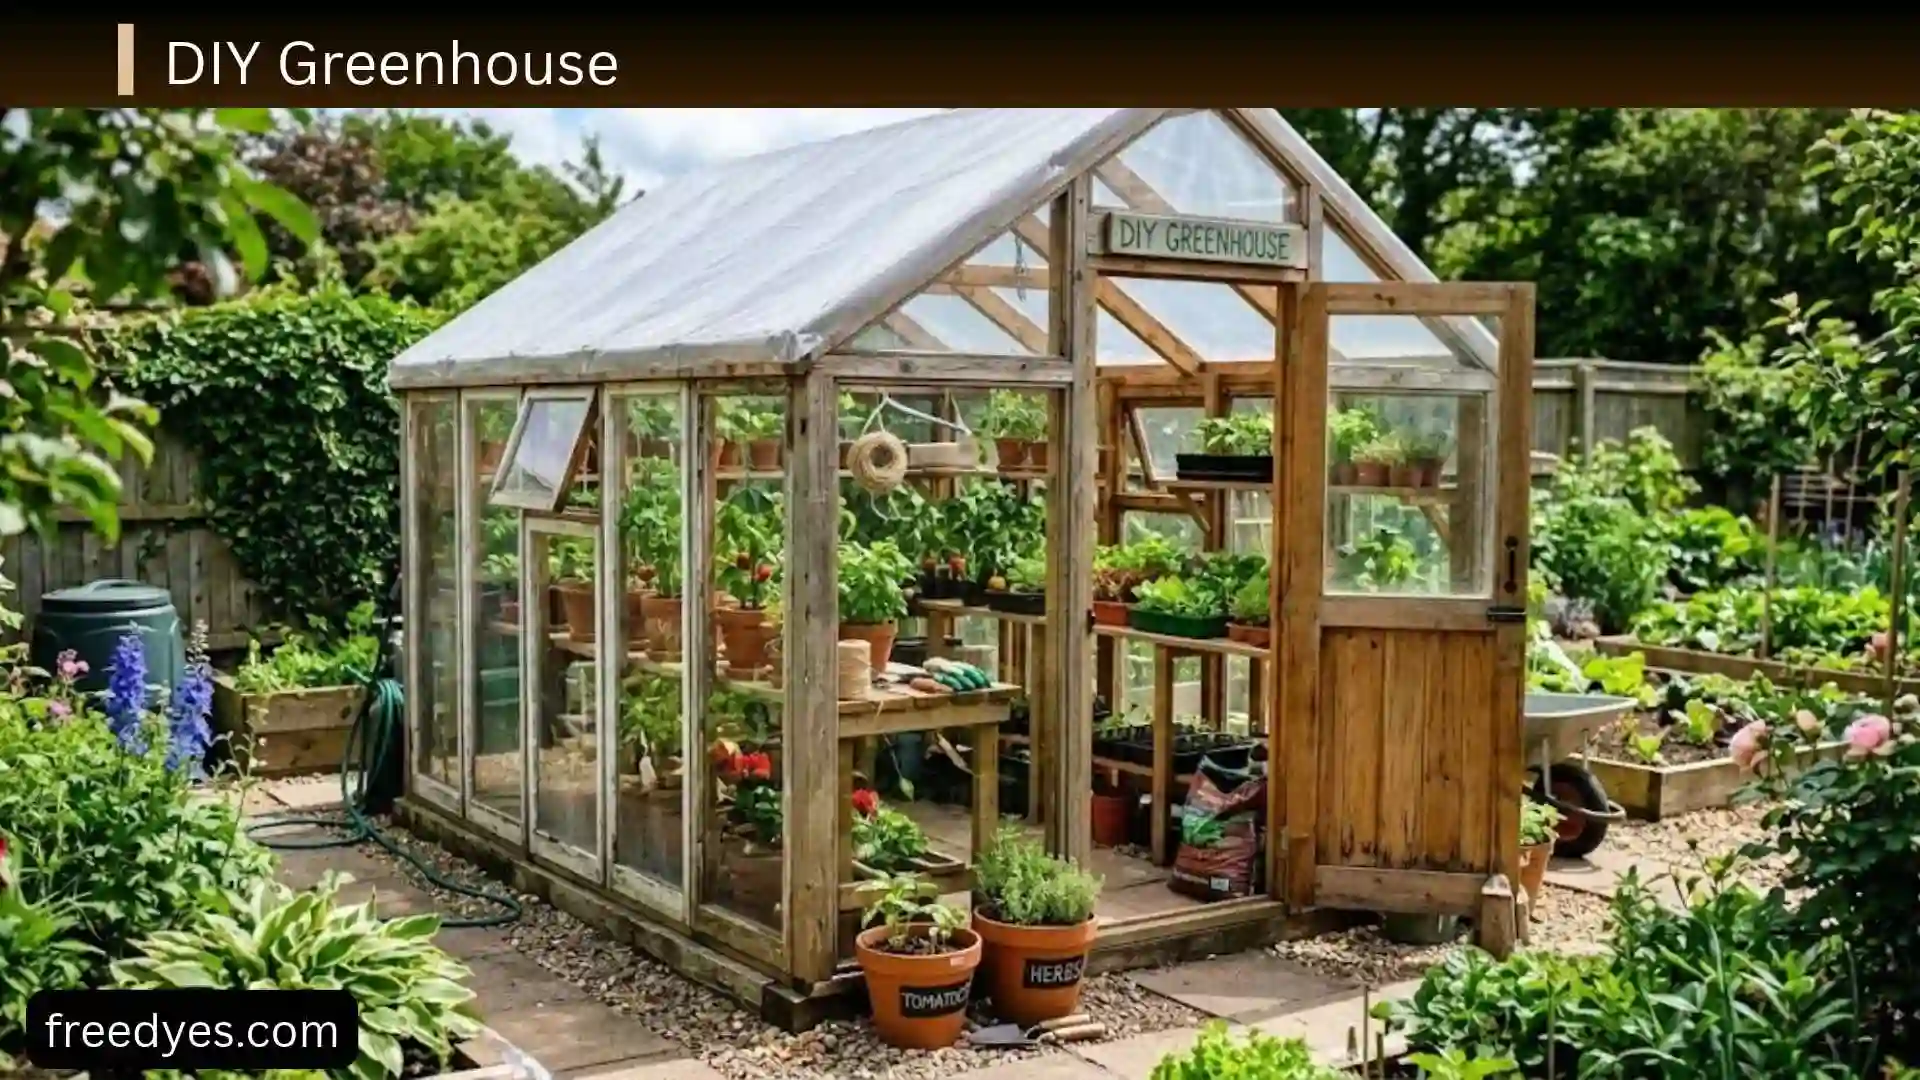
A DIY greenhouse can be as simple as a small PVC-covered structure for seedlings or as substantial as a permanent backyard growing space with a framed door, benches, vents, and rigid panels. The best choice depends on your available space, climate, budget, and what you want to grow.
The important thing is not simply building a clear enclosure. A useful greenhouse needs the right combination of sunlight, drainage, structural stability, ventilation, covering, temperature control, and convenient access to water.
This guide explains how to choose a greenhouse design, estimate the size and cost, select the right location and materials, build a beginner-friendly structure, and manage common problems such as overheating, condensation, wind damage, and nighttime cold.
Important: Treat the dimensions and construction approach below as a practical example rather than an engineered plan. If your area experiences significant wind, snow, flooding, or other severe weather, adapt the structure to local conditions and check applicable building or zoning requirements.
DIY Greenhouse at a Glance
Before buying materials, use this quick overview to decide whether the project fits your needs.
| Project detail | Beginner recommendation |
| Example size | 6 × 8 feet |
| Best use | Seedlings, herbs, greens, and seasonal vegetables |
| Frame | Exterior-rated wood, PVC, or another suitable structural material |
| Budget covering | UV-stabilized greenhouse film |
| Longer-lasting covering | Polycarbonate panels |
| Foundation | Level, well-drained, properly anchored base |
| Ventilation | Door plus high-level vent/opening |
| Interior | Narrow beds or benches with a usable walkway |
| Difficulty | Beginner to intermediate |
| Best location | Sunny, accessible, well-drained area |
| Main priority | Stability and ventilation before appearance |
A small greenhouse does not need to be complicated. In fact, a simple structure with good ventilation and anchoring can be more useful than an elaborate greenhouse placed in the wrong location.
Choose the Right DIY Greenhouse Design
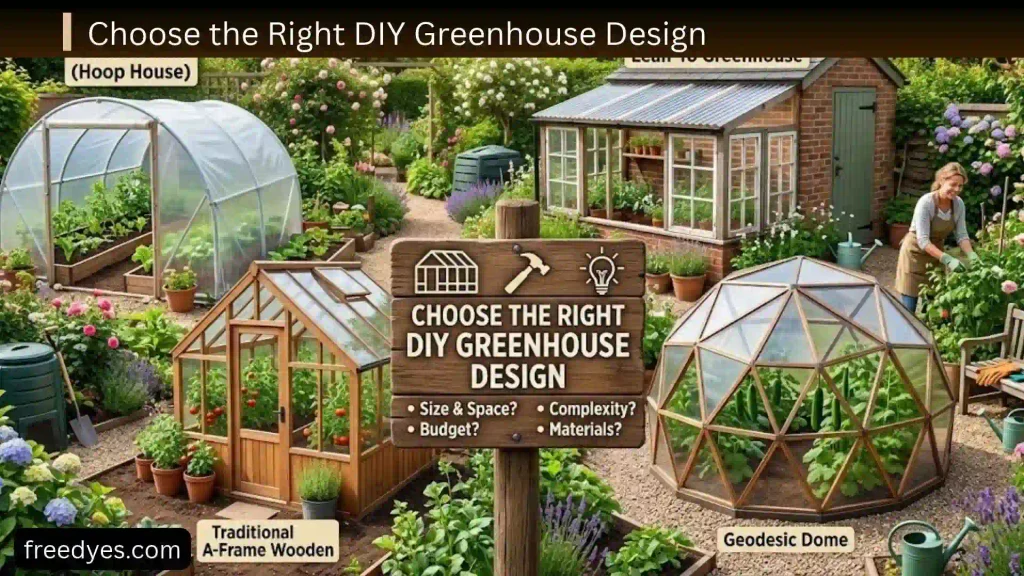
There is no single best DIY greenhouse for every gardener. The right design depends on how permanent you want the structure to be, how much space you have, and how much you want to spend.
PVC Hoop Greenhouse
A PVC hoop greenhouse uses curved pipes to create a series of arches covered with greenhouse film.
It is a good choice if you want:
- A relatively inexpensive structure
- A lightweight greenhouse
- A seasonal growing space
- A project that does not require advanced carpentry
- A structure for seedlings or vegetables
Its main weakness is that lightweight construction needs careful anchoring. Wind can put considerable stress on a greenhouse covering and frame.
For a windy location, don’t assume that adding more plastic will make the structure stronger. The base, anchors, connections, and bracing are what keep the greenhouse secure.
Wooden Frame Greenhouse
A wooden greenhouse gives you a more traditional structure and makes it easier to attach doors, shelves, vents, and rigid panels.
It is a good option when you want:
- A permanent backyard structure
- A stronger frame
- Straight walls for shelving
- A more finished appearance
- Easier attachment of polycarbonate panels
The trade-off is more cutting, measuring, fastening, and weather protection compared with a simple hoop structure.
Polycarbonate Greenhouse
Polycarbonate panels are popular for longer-term greenhouse construction because they combine durability with useful light transmission and can provide better thermal performance than a single layer of film.
They generally cost more initially than greenhouse film, so they make more sense when you expect to keep the greenhouse for years.
When comparing coverings, consider not only purchase price but also light transmission, heat retention, durability, maintenance, installation, and future replacement costs.
Lean-To Greenhouse
A lean-to greenhouse is built against an existing wall.
It can work particularly well when:
- Yard space is limited
- You have a suitable sunny wall
- You want easier access from the house
- You want to reduce the amount of framing required
However, the existing wall should not automatically be treated as a perfect greenhouse wall. Think about drainage, moisture, ventilation, roof runoff, and whether the wall receives enough useful sunlight.
Mini Greenhouse
A mini greenhouse is useful for:
- Balconies
- Patios
- Small gardens
- Seedlings
- Container plants
- Protecting a few tender plants
It won’t provide the same growing area as a walk-in greenhouse, but it can be much more practical for someone who doesn’t have room for a full structure.
Reclaimed-Window Greenhouse
Old windows can create an attractive greenhouse, but this option requires more planning than it first appears.
The biggest challenge is that reclaimed windows rarely have identical dimensions. Instead of designing the greenhouse first and trying to force random windows into it, measure the windows first and build the structure around their dimensions.
Also remember that glass is heavy and breakable, so the frame and foundation need to support it securely.
Which DIY Greenhouse Is Best for You?
Use this simple decision guide:
| Your goal | Good starting design |
| Cheapest temporary greenhouse | PVC or hoop structure |
| Seed starting | Mini or small greenhouse |
| Permanent backyard greenhouse | Wood frame |
| Better long-term covering | Polycarbonate |
| Very limited space | Mini or lean-to greenhouse |
| Seasonal vegetable production | Hoop house or walk-in greenhouse |
| Decorative garden structure | Wood and glass |
| Reusing old materials | Reclaimed-window greenhouse |
| Stronger weather resistance | Properly anchored wood or metal frame |
If you’re unsure, a simple 6 × 8-foot greenhouse is a useful middle ground for many home gardeners. It is large enough to walk into while remaining small enough to manage without turning the project into a major construction job.
How Much Does a DIY Greenhouse Cost?
There is no single reliable price because greenhouse costs vary by location and material prices.
Instead of promising a specific budget, calculate your project using these categories:
Total cost = frame + covering + foundation + fasteners + door + ventilation + interior + optional irrigation + optional heating
Where You Can Save Money
You can reduce costs by using:
- A simple rectangular design
- Reclaimed shelving
- Locally available lumber
- Basic manual vents
- Greenhouse film instead of rigid panels
- Gravel or pavers where appropriate
- Existing structures for a lean-to design
Where You Should Not Cut Corners
Avoid saving money on:
- Structural anchoring
- Cover attachment
- Ventilation
- Door hardware
- Foundation stability
- Weather-resistant materials
- Electrical safety
A cheap greenhouse that blows apart in the first strong storm is not actually a cheap greenhouse.
How Big Should a DIY Greenhouse Be?
The best size is the smallest structure that comfortably accommodates the plants, benches, walkway, tools, and working space you actually need.
Small Greenhouse
A small greenhouse can work well for:
- Seedlings
- Herbs
- Lettuce
- A few containers
- Overwintering selected plants
Medium Backyard Greenhouse
Something around 6 × 8 or 8 × 10 feet can provide considerably more flexibility.
You can create:
- Side benches
- A central walkway
- Seedling shelves
- Container space
- Taller crops
Why Width Matters
Don’t calculate greenhouse size based only on floor area.
A greenhouse filled edge-to-edge with plants can become difficult to water and maintain.
Draw the interior layout before building. Mark:
- The door
- The walkway
- Benches
- Plant beds
- Shelves
- Water access
- Ventilation openings
A smaller greenhouse with a usable layout is usually better than a larger greenhouse that becomes difficult to work inside.
Where to Put a DIY Greenhouse
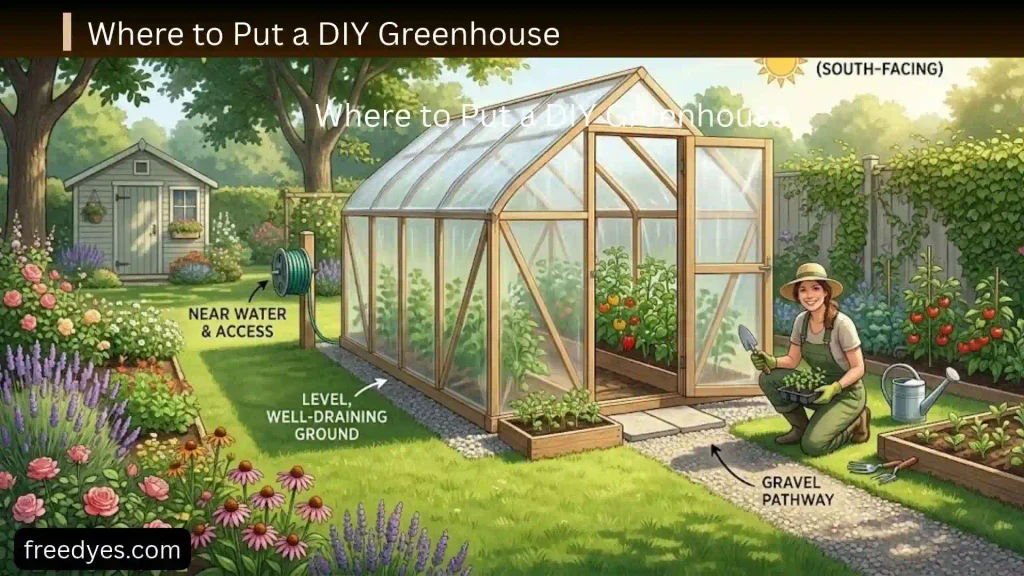
Choosing the site may be more important than choosing the frame material.
Greenhouse placement affects sunlight, heat gain, ventilation, maintenance, water access, and protection from weather. Extension guidance consistently emphasizes site selection as a major part of successful greenhouse planning.
Look for Plenty of Sunlight
Choose an area with good exposure to sunlight, particularly during the part of the year when you intend to use the greenhouse most.
Check the location at different times of day rather than judging it from one visit.
A site that looks sunny at noon may be shaded by a house or tree in the morning.
Consider Seasonal Shade
Remember that the sun changes position throughout the year.
Large trees and buildings can create much longer shadows during parts of the year, especially when the sun is lower.
For many Northern Hemisphere locations, a sunny south or southeast exposure can be a useful starting point, but the best orientation depends on the site, season, surrounding structures, and intended crops.
Choose Well-Drained Ground
Avoid locations where rainwater collects.
Water flowing from the greenhouse roof should also have somewhere to go. Poor drainage can create muddy access, standing water, and unnecessary moisture around the structure.
WSU recommends planning for rainwater drainage so runoff doesn’t accumulate around or inside the greenhouse.
Think About Wind
A greenhouse can be surprisingly vulnerable to strong winds, especially when it uses lightweight framing and flexible covering.
Where possible, choose a location that provides reasonable wind protection without sacrificing essential sunlight.
Don’t place the structure directly beneath unstable branches simply because the area is sheltered.
Keep Water Nearby
You will probably visit the greenhouse frequently.
A convenient water source makes everyday care much easier.
If you plan to use electrical equipment, fans, lights, or heating, consider access to electricity during the planning stage rather than after construction.
Check Local Rules
Before building, check applicable local requirements, zoning restrictions, homeowner association rules, or other property regulations.
Requirements can vary depending on structure size, foundation, location, and local rules. Extension guidance also recommends considering permitting and legal issues before construction.
DIY Greenhouse Materials
Your materials will depend on the design, but most backyard greenhouses require the same basic categories.
Frame Materials
Common choices include:
- Exterior-rated wood
- PVC pipe for suitable hoop designs
- Metal tubing
- Aluminum greenhouse framing
- Reclaimed materials in appropriate condition
For a permanent structure, prioritize strength and weather resistance.
Greenhouse Covering
Common choices include:
- UV-stabilized greenhouse film
- Polycarbonate
- Glass
- Fiberglass or other suitable rigid panels
Covering materials should be evaluated for light transmission, heat retention, durability, structural strength, cost, installation, and expected lifespan.
Fasteners and Hardware
You may need:
- Exterior screws
- Brackets
- Bolts
- Washers
- Hinges
- Door latch
- Covering clips or appropriate attachment hardware
- Ground anchors
- Frame connectors
Use hardware suitable for the material and outdoor conditions.
Foundation or Base Materials
Depending on the design:
- Gravel
- Pavers
- Exterior-rated lumber
- Concrete
- Ground posts
- Anchoring hardware
The foundation does not have to be expensive, but the greenhouse must sit on a stable, well-drained base.
Tools You Need
A basic wooden greenhouse may require:
- Tape measure
- Level
- Carpenter’s square
- Drill/driver
- Saw
- Screwdriver
- Utility knife
- Staple gun where appropriate
- Clamps
- Shovel
- Mallet
- Safety glasses
- Work gloves
The exact tools depend on your design.
Measure twice before cutting. A few minutes spent checking measurements can prevent an entire frame section from needing to be rebuilt.
A Simple 6 × 8-Foot DIY Greenhouse Plan
The following is an example beginner layout, not a universal engineered construction plan.
The idea is to create a small walk-in greenhouse with a rectangular base, simple frame, weather-appropriate covering, one entrance, and deliberate ventilation.
Step 1: Prepare the Site
Clear vegetation and debris from the selected location.
Create a level, well-drained surface.
Check the footprint using stakes and string before installing the permanent base.
This is the stage to correct the location. Once the frame is installed, moving the greenhouse becomes much more difficult.
Step 2: Build and Secure the Base
Create a stable rectangular base appropriate to your chosen frame.
Check:
- Length
- Width
- Square corners
- Level
- Drainage
Measure diagonally from corner to corner. If the two diagonal measurements are equal, the rectangle is square.
Anchor the base appropriately for local conditions.
Do not assume the weight of the greenhouse alone will prevent movement.
Step 3: Assemble the Frame
Install the vertical supports or hoops according to your chosen design.
Keep the frame square and aligned as you progress.
A common beginner mistake is attaching everything permanently before checking whether the structure is leaning or out of alignment.
Use temporary bracing while assembling the frame if needed.
Step 4: Add Bracing
Bracing helps the structure resist movement.
Pay particular attention to:
- Corners
- Door openings
- End walls
- Long sides
- Roof connections
Lightweight structures generally need more attention to anchoring and bracing than people expect.
Step 5: Build the Door
The door should be large enough to comfortably carry:
- Seedling trays
- Pots
- Watering equipment
- Soil
- Garden tools
Make sure the door can open without hitting a bench or plant bed.
A screen or secondary opening can also help with summer ventilation.
Step 6: Install the Covering
Install the covering according to its manufacturer’s recommendations.
For greenhouse film:
- Keep it away from sharp edges.
- Attach it securely.
- Avoid unnecessary folds that collect water.
- Allow enough material for proper attachment.
- Inspect the structure for anything that could puncture the film.
For rigid panels:
- Follow the panel manufacturer’s installation requirements.
- Account for expansion and contraction where required.
- Seal or finish edges appropriately.
- Make sure the frame is strong enough to support the panels.
Step 7: Add Ventilation Before Filling the Greenhouse
Do not wait until plants are already inside to discover that the greenhouse overheats.
Install or plan:
- Door ventilation
- High vents
- Roof vents
- Side openings
- Optional exhaust fan
Warm air naturally rises, so high-level outlets are particularly useful.
The RHS identifies roof vents as especially valuable because they help release hot air from the upper part of the greenhouse.
Step 8: Add Benches and Shelves
Start with a simple interior.
Leave a clear walkway.
Keep plants far enough apart that you can:
- Water them
- Inspect leaves
- Remove damaged growth
- Harvest crops
- Clean the greenhouse
Avoid filling every available inch on the first day.
Step 9: Inspect Everything
Before adding plants, check:
- Anchors
- Frame connections
- Covering
- Door operation
- Ventilation
- Drainage
- Sharp edges
- Shelves
- Water access
Then walk around the structure and look at it from different angles.
How to Ventilate a DIY Greenhouse
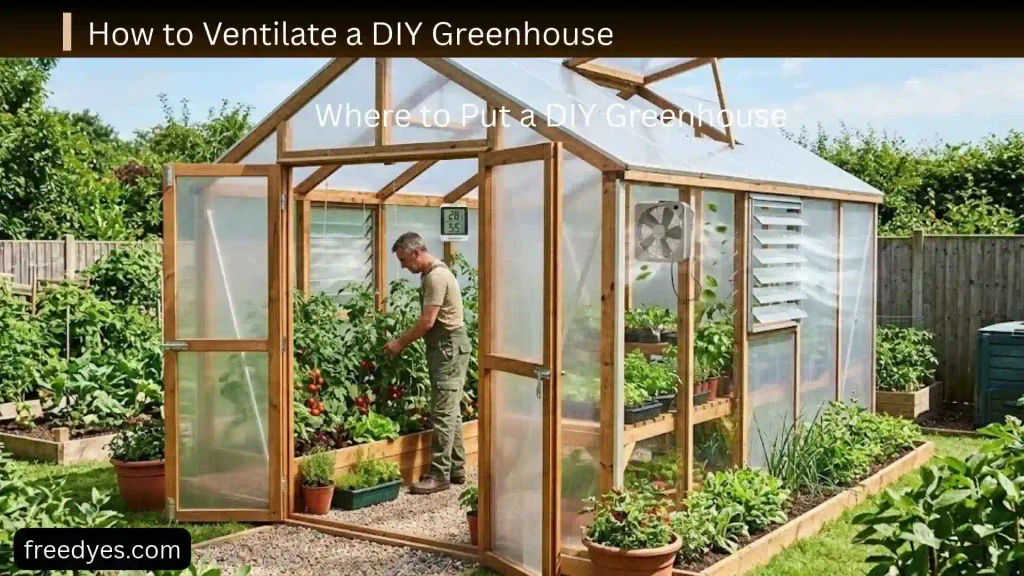
Ventilation isn’t an optional luxury.
Sunlight entering the greenhouse can raise the internal temperature quickly, so a greenhouse needs a way to release excess heat. Extension guidance emphasizes ventilation and airflow as important parts of greenhouse environmental control.
Use Low and High Openings
A simple natural ventilation strategy uses:
Lower opening → air enters
Higher opening → warm air exits
The difference in height helps encourage natural air movement.
Use the Door as a Vent
For a very small greenhouse, opening the door may provide substantial airflow.
However, don’t make the door your only ventilation strategy if the structure is likely to become extremely hot.
Add Roof or High-Level Vents
Roof vents are especially useful because hot air tends to collect near the roof.
A vent near the highest point can release accumulated heat more effectively than an opening positioned only near ground level.
Add a Fan When Necessary
A fan can improve air circulation or assist with exhausting hot air.
The right fan depends on greenhouse size and climate, so avoid choosing equipment based only on appearance or a generic recommendation.
Use Automatic Vent Openers
Automatic vent openers can open vents as the greenhouse warms.
They can be convenient, particularly if you cannot check the greenhouse frequently, but they should complement rather than replace sensible manual ventilation.
The RHS notes that automatic openers can be useful but may respond slowly and still benefit from manual control.
How to Keep a DIY Greenhouse Cool in Summer
A greenhouse can become too hot even when outdoor temperatures don’t initially feel extreme.
Increase Ventilation
Open available doors and vents when conditions require it.
If natural airflow is insufficient, consider mechanical ventilation.
Add Shade When Necessary
Shade cloth or another suitable shading method can reduce the amount of solar energy entering the greenhouse.
Shading can be especially useful in hot climates or during intense summer sunlight. Extension guidance recognizes shading as an important method of reducing excessive solar heating.
Avoid Overcrowding
A crowded greenhouse has poorer airflow.
Leave enough space around plants to allow air movement and routine maintenance.
Monitor the Temperature
Don’t guess how hot the greenhouse becomes.
A basic thermometer can tell you whether your ventilation strategy is actually working.
How to Keep a DIY Greenhouse Warm in Winter
A greenhouse captures solar energy during the day, but that does not mean it stays warm all night.
Without a heat source, a greenhouse can cool rapidly after sunset and may approach outdoor temperatures as the night continues.
Reduce Unnecessary Drafts
Check:
- Door gaps
- Torn covering
- Poorly sealed panels
- Loose openings
Improve the Covering
Depending on your climate and greenhouse design, options may include:
- Double-layer film
- Polycarbonate
- Additional insulation in selected areas
- Thermal curtains
Use Thermal Mass
Containers filled with water can absorb heat during the day and release some of it later.
Thermal mass is not a replacement for heating in severe cold, but it can moderate temperature swings.
Choose Plants for the Conditions
The easiest way to make winter gardening successful is not necessarily to heat a greenhouse to summer temperatures.
Choose crops appropriate for your climate and intended winter conditions.
Use Supplemental Heat Carefully
If heating is necessary, use equipment appropriate for the environment and follow the manufacturer’s safety instructions.
Greenhouses are damp spaces, so electrical equipment needs appropriate protection. For electrical installations, use properly rated equipment and follow local electrical requirements rather than improvising connections.
Best DIY Greenhouse Covering Materials
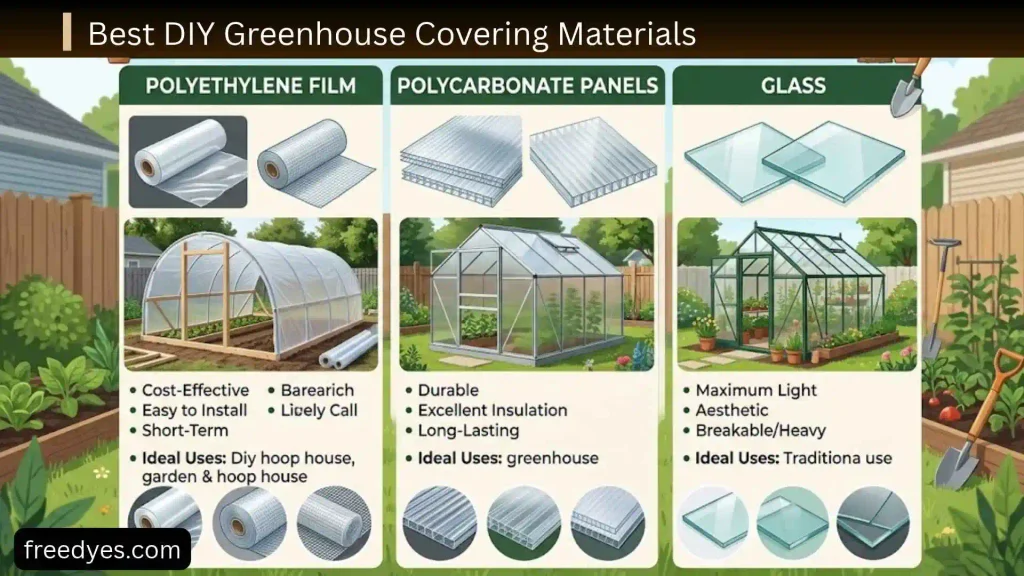
Greenhouse Film
Greenhouse film is usually the budget-friendly choice.
Advantages:
- Lightweight
- Relatively inexpensive
- Easy to install
- Suitable for hoop structures
Disadvantages:
- Can tear
- Needs replacement
- Wind and sunlight can shorten its useful life
If using film, choose material specifically intended for greenhouse use rather than assuming any transparent plastic will perform the same way.
UV-stabilized polyethylene is commonly used for temporary or lower-cost greenhouse structures, although it generally requires more frequent replacement than rigid coverings.
Polycarbonate
Advantages:
- Durable
- Good choice for permanent structures
- Available in multiwall forms
- Can provide useful insulation
Disadvantages:
- Higher upfront cost
- Requires more careful installation
- Less forgiving if the frame isn’t properly designed
Glass
Glass offers excellent light transmission and a traditional greenhouse appearance, but it is heavy and breakable.
A glass greenhouse also requires a suitable frame and careful handling.
Reclaimed Windows
Old windows can be attractive and inexpensive if you already have them.
However, inspect them carefully for:
- Cracks
- Damaged frames
- Poor seals
- Unequal sizes
- Difficult hardware
And remember that reclaimed glass increases structural and safety considerations.
How to Make a DIY Greenhouse More Wind-Resistant
Wind is one of the biggest risks to lightweight greenhouse structures.
Anchor the Structure
The frame should be secured to a suitable foundation or anchoring system.
Reinforce Corners
Corners experience significant movement, so use appropriate bracing and strong connections.
Secure the Covering
Loose film can flap violently in wind.
The covering should be attached according to the material’s requirements and kept away from sharp edges.
Choose the Site Carefully
A sheltered location can reduce exposure to strong winds, provided it still receives sufficient useful sunlight.
Inspect Before Storms
Before severe weather, check:
- Anchors
- Screws
- Brackets
- Door hardware
- Covering
- Roof connections
Wind protection is an important part of greenhouse planning, not something to add after the first storm.
DIY Greenhouse Interior Ideas
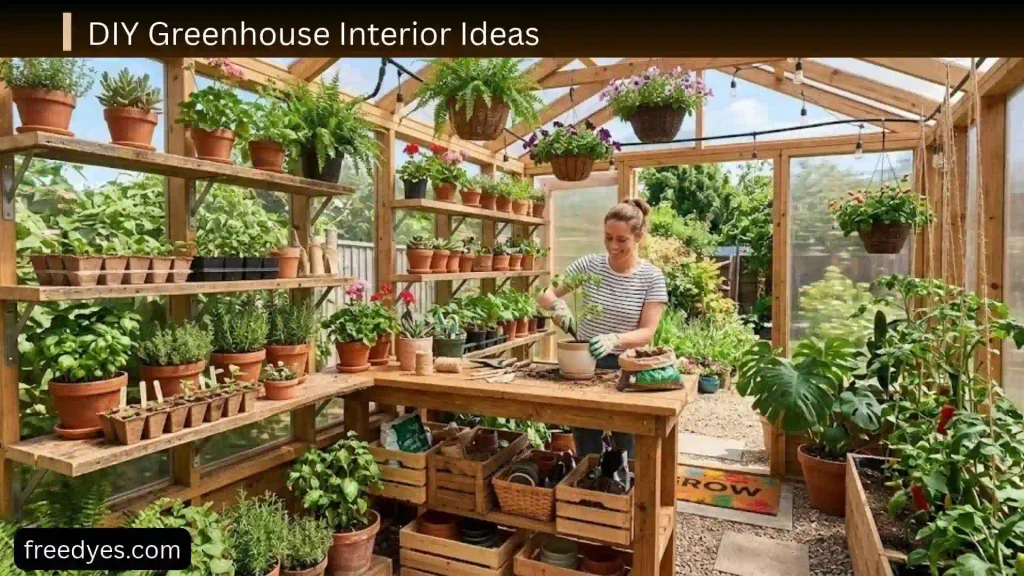
The inside should be designed around the plants and the person working there.
Side Benches
Benches along the sides provide convenient growing space while keeping a central walkway open.
Shelves for Seedlings
Vertical shelving can significantly increase usable growing space for small trays.
Raised Beds
Raised beds work well when you want to grow vegetables directly inside the greenhouse.
Containers
Containers provide flexibility and make it easier to rearrange crops.
Keep the Center Clear
A clear central walkway makes the greenhouse much easier to use.
Don’t sacrifice access simply to fit in another row of plants.
What to Grow in a DIY Greenhouse
Your greenhouse can serve different purposes throughout the year.
Start Seedlings
One of the most practical uses is starting plants before outdoor conditions are suitable.
Grow Leafy Greens and Herbs
Small greenhouses are particularly useful for:
- Lettuce
- Spinach
- Herbs
- Other compact crops suited to your climate
Grow Warm-Season Vegetables
A larger greenhouse can provide a useful environment for crops such as:
- Tomatoes
- Peppers
- Cucumbers
These plants can become large, so plan their final size before choosing the greenhouse dimensions.
Protect Tender Plants
A greenhouse can also be used to protect selected plants from unfavorable outdoor conditions.
The overall purpose of a hobby greenhouse commonly includes starting seedlings, extending the growing season, overwintering plants, and providing a controlled environment for selected crops.
How to Water Plants in a Greenhouse
Watering becomes easier when the system is planned before the plants arrive.
Hand Watering
Best for:
- Small greenhouses
- Seedlings
- Container plants
- Beginners
Drip Irrigation
Useful for larger growing areas because water can be delivered directly to plant bases.
Avoid Standing Water
Good drainage matters inside and outside the greenhouse.
Don’t allow water to accumulate around the structure or create constantly wet conditions around plant roots.
Check Plants Individually
Different crops have different watering needs.
A greenhouse doesn’t mean every plant should receive the same amount of water.
How to Control Humidity and Condensation
A greenhouse naturally contains moisture from:
- Watering
- Wet soil
- Plant transpiration
- Humid outdoor air
Too much moisture combined with poor airflow can contribute to disease problems.
Improve Air Movement
Use vents and fans where appropriate.
Avoid Overwatering
Water according to the needs of the crop and growing medium.
Give Plants Enough Space
Crowded foliage restricts airflow.
Ventilate After Watering
If conditions allow, ventilation can help remove excess moisture.
Watch the Leaves
Persistent wet foliage, condensation, or visible fungal growth is a sign that your growing environment needs attention.
DIY Greenhouse for Small Spaces
You don’t need a large yard.
Balcony Greenhouse
A compact greenhouse cabinet can protect a small number of plants, but check:
- Weight limits
- Wind exposure
- Water drainage
- Building rules
- Safe anchoring
Patio Greenhouse
A small freestanding structure can work well for seedlings and containers.
Lean-To Greenhouse
If you have a suitable wall with good sunlight, a lean-to can use space more efficiently than a freestanding greenhouse.
Mini Greenhouse Shelving Unit
A shelving unit covered with an appropriate transparent greenhouse covering can provide a very small growing environment.
The important point is to match the structure to the number of plants you actually want to grow.
Common DIY Greenhouse Mistake
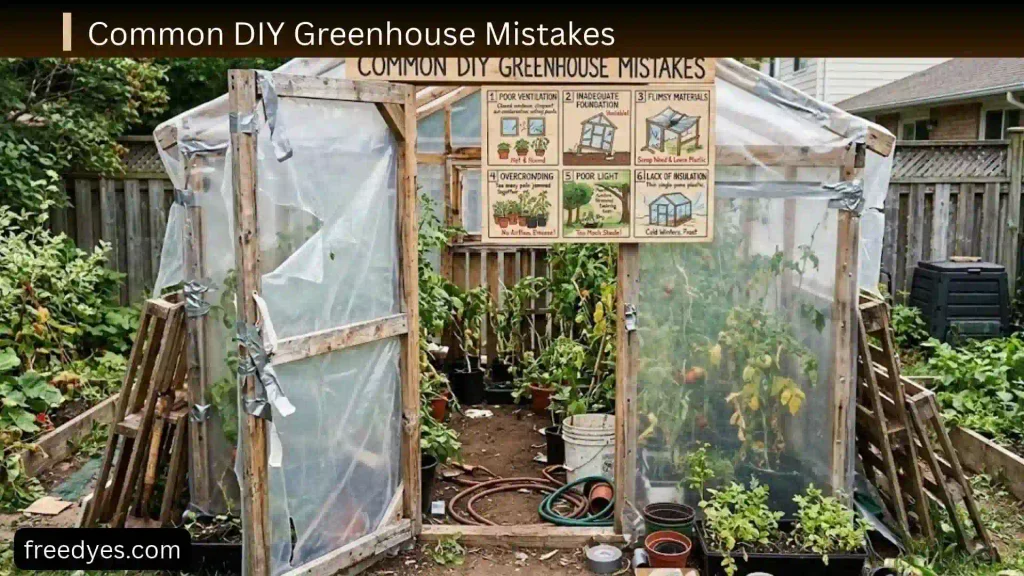
Building Before Choosing the Site
A beautiful greenhouse in a shaded, wet location will still perform poorly.
Not Providing Enough Ventilation
This is one of the most serious beginner mistakes.
Ignoring Wind
Lightweight structures need proper anchoring.
Using Ordinary Plastic
Cheap clear plastic isn’t automatically suitable for long-term greenhouse use.
Making the Greenhouse Too Small
Remember that you need room to walk, water, prune, harvest, and move supplies.
Forgetting Drainage
Rainwater needs a planned path away from the greenhouse.
Overcrowding Plants
More plants do not always mean more harvest.
Treating a Greenhouse as a Heated Building
A greenhouse captures sunlight, but it can still become cold after sunset.
Adding Heating Without Planning for Safety
Heating and electricity require particular care in a humid environment.
Forgetting Maintenance
Every covering eventually needs inspection, and every moving part needs occasional attention.
DIY Greenhouse Troubleshooting
My Greenhouse Is Too Hot
Check:
- Are vents open?
- Is the door providing enough airflow?
- Is hot air trapped near the roof?
- Is shade needed?
- Is the structure overcrowded?
- Would a fan help?
My Greenhouse Is Too Cold at Night
Check:
- Covering condition
- Drafts
- Insulation
- Nighttime outdoor temperatures
- Crop suitability
- Whether supplemental heat is actually required
Don’t assume a transparent structure will remain warm after sunset.
The Greenhouse Has Too Much Condensation
Check:
- Ventilation
- Watering frequency
- Plant spacing
- Air circulation
- Morning ventilation
The Plastic Cover Keeps Tearing
Check:
- UV suitability
- Wind exposure
- Sharp frame edges
- Attachment points
- Excessive movement
The Greenhouse Moves in Strong Wind
Inspect:
- Base anchoring
- Frame connections
- Corner bracing
- Ground condition
- Cover attachment
If the structure moves significantly, don’t simply add more plants or heavier objects inside. Correct the structural problem.
DIY Greenhouse Maintenance
Weekly Checks
Look at:
- Plants
- Temperature
- Moisture
- Vents
- Doors
- Covering
Monthly Checks
Inspect:
- Anchors
- Screws
- Brackets
- Frame joints
- Shelves
- Drainage
Seasonal Maintenance
Before hot weather:
- Clean vents
- Check fans
- Prepare shade
Before cold weather:
- Repair tears
- Check door seals
- Inspect panels
- Review heating requirements
After severe weather:
- Inspect the entire structure before returning plants to normal conditions.
Is a DIY Greenhouse Worth It?
For many gardeners, yes—but only if the greenhouse solves a specific growing problem.
A DIY greenhouse can be worthwhile if you want to:
- Start seedlings earlier
- Extend your growing season
- Protect tender plants
- Grow warm-season crops
- Overwinter selected plants
- Create a dedicated growing workspace
It may not be worth the effort if you have no suitable sunny location, don’t have time for ventilation and watering, or are expecting an unheated greenhouse to maintain warm temperatures through severe winter weather.
The biggest benefit isn’t simply having a greenhouse.
It’s having a growing environment that is matched to your climate, crops, space, and routine.
Frequently Asked Questions
What is the cheapest way to build a DIY greenhouse?
A simple hoop-style greenhouse covered with UV-stabilized greenhouse film is often a practical low-cost approach. Keep the design simple, but don’t sacrifice anchoring, ventilation, or covering quality merely to reduce the initial price.
What is the easiest greenhouse to build?
A small hoop or PVC greenhouse is generally simpler than a framed glass structure. A basic wooden greenhouse is more work but can provide a more permanent structure.
Can I build a greenhouse with PVC pipe?
Yes. PVC can be used for suitable hoop-style greenhouse structures. The frame still needs appropriate bracing, anchoring, and covering attachment, particularly in windy locations.
What is the best covering for a DIY greenhouse?
There isn’t one universal answer. Greenhouse film is attractive for low-cost temporary structures, while polycarbonate is often more appropriate for a longer-lasting greenhouse. Glass can provide excellent light transmission but requires a stronger frame and careful handling.
Does a greenhouse stay warm at night?
Not necessarily. Without a heat source, a greenhouse can lose heat quickly after sunset. Covering type, insulation, air leakage, weather, and thermal mass all influence nighttime temperatures.
Does a DIY greenhouse need ventilation?
Yes. Ventilation is essential because solar heating can rapidly raise the internal temperature. Roof or high-level vents are particularly useful for releasing hot air.
Should a greenhouse face south?
Not always. In many Northern Hemisphere locations, a south or southeast location can provide useful sunlight, particularly in winter, but orientation must be considered alongside seasonal use, shade, wind, and the actual site.
Can I use ordinary clear plastic?
You can physically cover a structure with many types of clear plastic, but ordinary plastic isn’t necessarily designed for prolonged sunlight, weather exposure, or greenhouse use. Greenhouse-specific film is generally a better choice for a plastic-covered structure.
Can I build a greenhouse from old windows?
Yes, provided the windows are safe and structurally suitable. The challenge is designing the frame around different window sizes and supporting the weight of the glass.
How do I make a greenhouse wind-resistant?
Start with a stable foundation, appropriate anchors, strong frame connections, corner bracing, and secure covering attachment. Site selection also matters because strong wind exposure increases the risk of damage.
Can I grow vegetables year-round in a DIY greenhouse?
Possibly, but it depends heavily on your climate, greenhouse construction, crop selection, sunlight, and whether supplemental heating is available. An unheated greenhouse should not automatically be considered a year-round warm growing environment.
Can I put a greenhouse on concrete?
A greenhouse can be installed on a suitable solid surface, but drainage, anchoring, water runoff, and the specific greenhouse design need to be considered. Don’t allow water to collect around the structure.
How can I stop my greenhouse from overheating?
Improve ventilation first. Use doors, side openings, roof vents, fans where appropriate, and shade when needed. Monitor actual temperature rather than relying on how the weather feels outside.
How can I reduce condensation?
Improve airflow, ventilate when conditions allow, avoid excessive watering, and prevent plants from becoming overcrowded.
Final Thoughts
A successful DIY greenhouse is not defined by how elaborate it looks. It is defined by whether it gives your plants the conditions they need while remaining practical for you to maintain.
Start with the site, then choose the design. Decide how much space you actually need, select a covering that fits your budget and expected lifespan, and plan ventilation before you install the plants.
For most beginners, a simple, well-anchored greenhouse with good sunlight, reliable ventilation, sensible drainage, and an easy-to-use interior will outperform a complicated structure that looks impressive but is difficult to manage.
Most importantly, adapt the project to your local weather. Greenhouse construction involves structural and environmental considerations such as wind, snow, heat, drainage, and covering strength, so a generic online plan should never override local conditions or applicable requirements.
From an SEO perspective, the strongest version of this article should also include original photographs, a real material/cost breakdown, an original build diagram, and genuine first-hand observations if available. Google explicitly recommends original, comprehensive, people-first content that adds value rather than simply copying or rewriting information found elsewhere.