
If salon-quality gel nails at home sound impossible, think again. The OPI GELement DIY Gel Kit makes it simple to achieve a glossy, long-lasting manicure without the hassle of booking salon appointments.
Whether I am getting ready for a special occasion or I am refreshing my nails for the week, this kit provides the essential tools needed for a smooth and professional-looking finish. In this guide, I will explain what is included in the kit, how it works, its key benefits, and whether it is the right choice for your at-home nail care routine.
OPI DIY Gel Kit at a Glance
| Feature | OPI GELement Essentials Kit |
| Intended use | At-home gel manicures |
| Current listed price | $59.99 at time of writing |
| LED lamp | Included |
| Base coat | Included |
| No-wipe top coat | Included |
| Gel color | Sold separately |
| Prep pads | 100 included |
| Cuticle pushers | 10 included |
| Files/buffers | 5 included |
| Lamp curing | 4 fingers, then thumb |
| Listed cure setting | 60 seconds |
| Removal | Acetone-based soak-off process |
| Beginner friendly | Yes, with practice |
| Professional system | No; GELement is OPI’s at-home system |
OPI specifically identifies GELement as its at-home gel system, while other OPI systems such as GelColor are positioned for salon/professional use.
Is the OPI DIY Gel Kit Worth It?
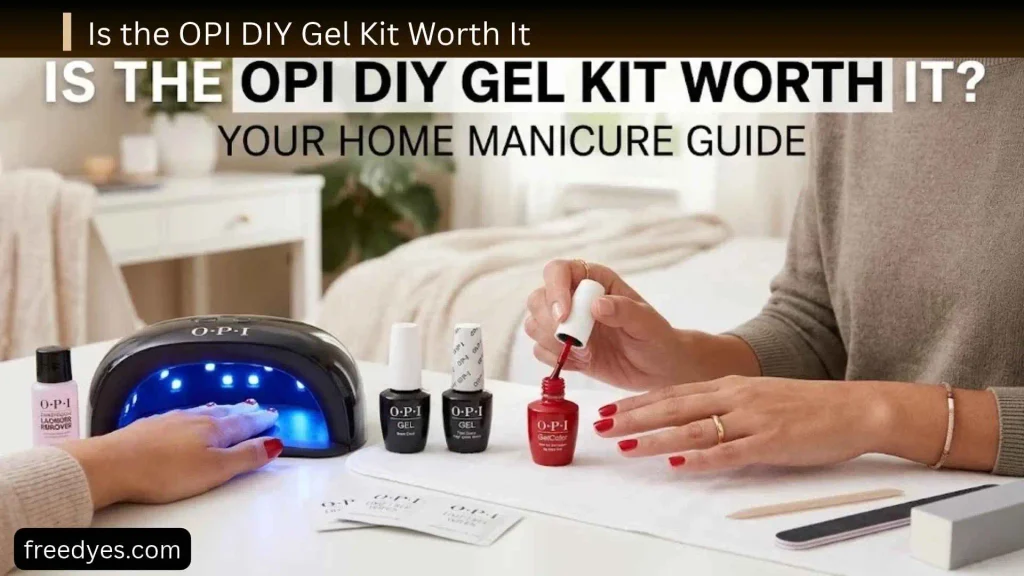
The short answer is yes for the right person, but not for everyone.
The GELement Essentials Kit makes the most sense if you:
- regularly wear gel polish
- want to do manicures at home
- like OPI colors
- want a dedicated lamp and matching base/top system
- are willing to learn proper nail preparation
- don’t mind spending a little more on colors and removal supplies
It may be less attractive if you:
- only paint your nails occasionally
- prefer inexpensive regular polish
- don’t want to use a curing lamp
- dislike acetone-based removal
- want a starter kit that already contains several colors
- want the fastest possible manicure with almost no learning curve
The biggest advantage is that the kit brings the main components together. The biggest drawback is that you still need to purchase a GELement color separately, and removal is another part of the ownership cost.
So, rather than asking only whether the $59.99 kit is affordable, ask whether you will use it often enough to justify the complete setup.
What Is the OPI GELement DIY Gel Kit?
OPI GELement is an at-home gel nail system created for people who want to perform gel manicures themselves rather than visit a salon.
The current Essentials Kit combines the products and tools needed for the basic manicure process:
- base coat
- no-wipe top coat
- LED gel lamp
- prep pads
- cuticle pushers
- files/buffers
OPI also provides GELiversity educational material covering preparation, application, and removal.
The important distinction is that GELement is specifically designed for home use. OPI’s own educational material separates GELement from its professional GelColor system.
That distinction matters because simply seeing the OPI name on two gel products does not mean every OPI gel formula, lamp, base coat, and top coat should automatically be mixed together.
OPI GELement vs. OPI GelColor
This is one of the most important things to understand before buying an OPI gel kit.
| Feature | GELement | GelColor |
| Main purpose | At-home use | Professional/salon system |
| Target user | DIY manicure user | Nail professional |
| Dedicated home kit | Yes | No |
| Included LED lamp in Essentials Kit | Yes | Different professional lamp system |
| Application education | GELiversity | OPI professional education |
| Best choice for home beginners | GELement | Not the first choice |
OPI describes GELement as its at-home gel system and GelColor as a salon formula.
Can You Use OPI GelColor With GELement?
Don’t assume that two products are interchangeable just because they carry the OPI name.
For a beginner, the simplest approach is to use the GELement base, GELement color, GELement top coat, and GELement lamp as the intended system and follow the manufacturer’s curing instructions.
That reduces unnecessary compatibility questions and makes troubleshooting easier if something goes wrong.
What Comes in the OPI GELement Essentials Kit?
The current OPI listing specifies the following contents.
GELement Base Coat
The base coat provides the foundation for the gel color.
OPI describes it as providing adhesion for the color and recommends applying it in a thin layer.
For beginners, the important lesson is simple: more base coat does not mean better adhesion.
A thick layer can make application messier and can interfere with the intended curing process.
GELement No-Wipe Top Coat
The no-wipe top coat seals the color and creates the finished glossy surface.
Because it is a no-wipe top coat, you don’t need the same post-cure cleansing step associated with some traditional gel systems.
OPI recommends applying it thinly and curing it according to the GELement instructions.
GELement LED Gel Lamp
The lamp is one of the most important components of the kit.
The current GELement lamp has a four-finger design, followed by a separate thumb cure. OPI specifies an automatic 60-second cure setting.
This means you should not expect to put all ten fingers under the lamp at once.
100 Prep Pads
The prep pads are used to clean the nail surface before application.
OPI emphasizes starting with clean, dry nails and using the prep step to remove dust and oils.
10 Cuticle Pushers
The included pushers help move the cuticle back gently during preparation.
You should not aggressively scrape or damage the nail plate during this stage. The goal is preparation, not heavy removal of the natural nail.
5 Files/Buffers
The included files and buffers are used for shaping and lightly preparing the nail surface.
OPI’s instructions specifically mention using the file to lightly remove shine from the nail rather than aggressively filing it.
What Does the OPI DIY Gel Kit Not Include?
This is where many first-time buyers can misunderstand the word “kit.”
The current Essentials Kit includes the lamp and the basic base/top/prep components, but GELement color shades are sold separately.
Depending on what you already own, you may also want:
- GELement gel color
- cuticle oil
- additional files
- lint-free wipes
- acetone/remover supplies
- removal wraps
- a suitable USB wall charger if needed for the lamp setup
You therefore shouldn’t calculate your budget using the kit price alone.
How Much Does an OPI DIY Gel Kit Cost?
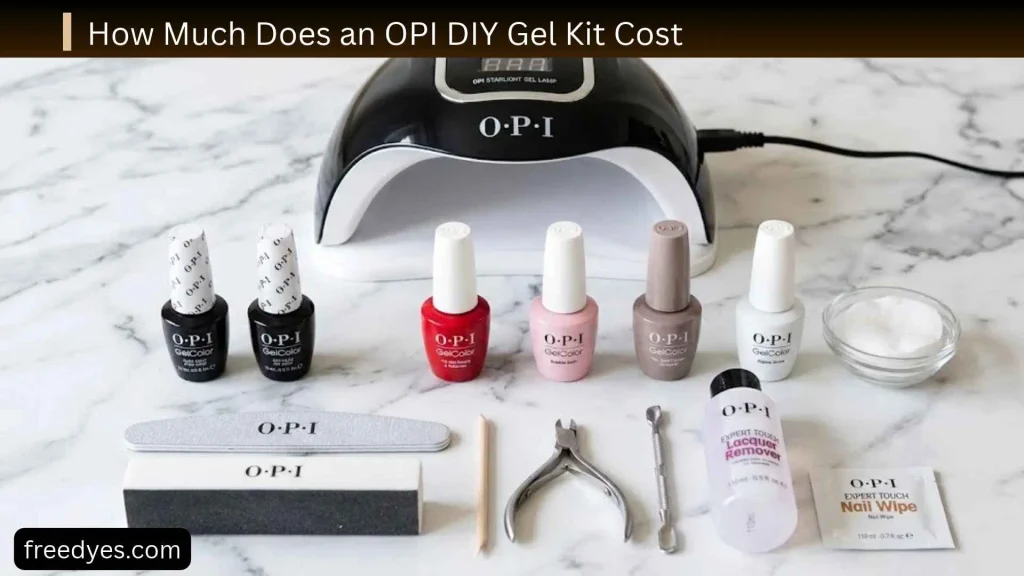
At the time of writing, OPI lists the GELement Essentials Kit at $59.99.
However, your actual starting cost can be higher because color is sold separately.
There is also a dedicated GELement Removal Kit currently listed by OPI at $24.99. It contains 20 foil removal wraps, 110 mL of Expert Touch remover, 10 cuticle sticks, and five nail files.
That doesn’t mean you must buy the branded removal kit. It does show an important point for shoppers:
The real cost of an at-home gel system includes both application and removal.
A Better Way to Calculate Your Cost
Use this simple formula:
First-use cost = Essentials Kit + gel color + removal supplies
Then:
Approximate cost per manicure = total setup cost ÷ number of manicures completed
The more frequently you use the system, the easier it becomes to spread the initial equipment cost across multiple manicures.
If you only do your nails a few times per year, regular polish may make more financial sense.
If you regularly get gel manicures, the economics become more attractive.
Does the OPI GELement Kit Include Polish?
No, not in the current Essentials Kit.
The kit includes the base coat and no-wipe top coat, but OPI states that GELement nail shades are sold separately.
This is one of the first things to check before purchasing.
If you expected to open the box and immediately have a colored gel polish ready to apply, you’ll need to purchase at least one compatible GELement shade.
How to Choose Your First GELement Color
You don’t need to buy a large collection immediately.
For your first manicure, one versatile shade is enough.
Good beginner choices are generally:
- soft pink
- nude
- neutral beige
- classic red
- sheer-looking neutral
A lighter or neutral color can also make small application imperfections less obvious than a very dark shade.
Once you understand the application process, you can experiment with brighter colors, darker shades, shimmer finishes, and nail art.
What You Need Before Your First OPI Gel Manicure
Before starting, prepare everything you need.
Basic Setup
Have these ready:
- GELement Essentials Kit
- GELement gel color
- clean work surface
- good lighting
- cuticle oil for after the manicure
- removal supplies for later
- USB power source for the lamp
Do not begin application while you’re still searching for tools.
Gel polish is easier to control when you can work methodically instead of rushing.
How to Use the OPI GELement DIY Gel Kit Step by Step
The application process is straightforward, but technique matters.
OPI’s current GELement instructions recommend clean, dry nails, gentle preparation, thin coats, keeping gel away from skin, and curing each stage with the GELement lamp.
Step 1: Start With Clean, Dry Nails
Begin with clean, dry hands.
Don’t apply hand cream or cuticle oil immediately before gel application.
OPI specifically advises keeping the nails dry during preparation because moisture, oil, and residue can interfere with adhesion.
Step 2: Shape Your Nails
Use the file to create your preferred shape.
You can choose:
- round
- oval
- square
- squoval
- almond
The best shape is the one that suits your natural nail length and lifestyle.
Avoid over-filing simply because you’re trying to create a perfectly uniform shape.
Step 3: Gently Push Back the Cuticles
Use the included cuticle pusher to gently push back the cuticle area.
The goal is to expose the nail plate sufficiently for proper preparation.
Avoid aggressive scraping.
Step 4: Lightly Buff the Nail Surface
OPI recommends lightly buffing the nail surface to remove its natural shine and improve adhesion.
This is a step where beginners can easily go too far.
You are preparing the surface—not trying to make the natural nail extremely thin.
Think light preparation, not heavy filing.
Step 5: Clean the Nail
Use the included prep pad to remove dust and oils.
OPI notes that a prep pad can remove debris and oil and temporarily dehydrate the nail surface for better adhesion.
After cleaning, avoid touching the prepared nail with your fingers.
Step 6: Shake the Products
OPI’s current GELement instructions recommend shaking the bottles well for about 30 seconds before application.
This small step is easy to skip when you’re in a hurry, but following the manufacturer’s preparation instructions gives you a more consistent starting point.
Step 7: Apply the Base Coat
Start by sealing the free edge.
Then apply a thin layer over the nail.
OPI recommends applying the product down the center and then along each side while leaving a small margin around the perimeter.
Most importantly:
Keep the gel off your skin and cuticles.
Step 8: Cure the Base Coat
Place four fingers into the GELement lamp and cure for 60 seconds.
Then cure the thumb separately for another 60 seconds.
The separate thumb step is important because the lamp is designed around four-finger curing.
Step 9: Apply the First Color Coat
Shake the color before applying.
Paint the free edge first, then apply a thin layer to the nail.
Again, avoid the skin.
A thin coat is much easier to control than a thick one.
Step 10: Cure the First Color Coat
Cure four fingers for 60 seconds, then cure the thumb for 60 seconds using the GELement lamp.
Do not skip curing because the layer appears dry.
Gel polish does not behave like ordinary nail polish that simply air-dries.
Step 11: Apply a Second Color Coat
If more coverage is needed, apply another thin coat.
OPI’s GELement FAQ says to use one to two color layers depending on the desired opacity, curing between layers.
Very pigmented colors may require more careful application rather than simply adding a thick layer.
Step 12: Cure the Second Color Coat
Again, cure the four fingers for 60 seconds and the thumb separately for 60 seconds.
Step 13: Apply the No-Wipe Top Coat
Apply a thin layer of the GELement No-Wipe Top Coat.
Seal the free edge and avoid flooding the cuticle area.
Step 14: Cure the Top Coat
Cure the four fingers for 60 seconds and the thumb for another 60 seconds.
Once curing is complete, the manicure is finished.
Step 15: Apply Cuticle Oil
After the gel process is complete, apply cuticle oil around the nail.
OPI recommends its Glow Up Nail & Cuticle Oil after curing.
Why Thin Gel Coats Matter
One of the most common beginner mistakes is applying too much product.
It can be tempting to apply a thick layer because it seems like you’ll get stronger coverage.
In practice, thick application can create problems with:
- uneven surfaces
- flooding around the cuticle
- wrinkling
- poor curing
- bulky-looking nails
- product touching the skin
OPI repeatedly emphasizes thin application throughout its GELement instructions.
A better strategy is:
thin coat → cure → thin coat → cure
rather than:
one thick coat → hope for the best
Why You Should Keep Gel Off Your Skin
This deserves special attention.
If gel touches the skin or cuticle area, remove it before curing rather than simply curing over it.
OPI specifically instructs users to keep GELement off the skin.
For beginners, a smaller amount of product on the brush is usually easier to control.
If you accidentally flood the cuticle area, clean it up before placing your hand under the lamp.
How Long Does OPI GELement Take to Cure?
The current GELement system specifies:
- 60 seconds for four fingers
- 60 seconds for the thumb
and this curing process is repeated for the base, color layers, and top coat.
The actual manicure takes longer than the lamp time because you also need to:
- prepare the nails
- shake products
- apply each layer
- position your fingers
- repeat the process on the other hand
- clean up mistakes
So don’t expect the entire manicure to take only a few minutes.
How to Make an OPI Gel Manicure Last Longer
Longer wear starts before you apply the first coat.
Keep Nails Dry During Prep
OPI emphasizes dry nails during preparation because proper adhesion depends on the prepared surface.
Don’t Skip Prep
Skipping cuticle preparation, buffing, or cleansing can contribute to adhesion problems.
Keep Coats Thin
Thick application is harder to control and can create curing and appearance problems.
Keep Gel Away From Skin
Clean up accidental contact before curing.
Cap the Free Edge
OPI’s instructions recommend sealing the free edge during the base, color, and top-coat steps.
Don’t Pick at Lifting Gel
If the manicure starts lifting, don’t turn it into a peeling session.
Proper removal is part of maintaining the condition of your natural nails.
OPI GELement Troubleshooting Guide
Even with a good system, beginners can run into problems.
Why Is My OPI Gel Polish Peeling?
Possible causes include:
- insufficient nail preparation
- oil or moisture on the nail
- gel touching the surrounding skin
- coats that are too thick
- incomplete curing
- picking at the edges
- wear-related lifting
Start by reviewing your preparation and application technique.
OPI’s own FAQ identifies improper prep and undercuring among reasons gel can peel quickly.
Why Does My Gel Look Wrinkled?
Wrinkling can be a sign that the product was applied too heavily or did not cure properly.
Try:
- thinner coats
- more controlled application
- keeping the product away from the skin
- following the specified lamp and cure time
Why Is My Gel Shrinking Away From the Edges?
Possible causes include:
- applying too much product
- insufficiently sealing the free edge
- uneven application
- product pulling back before curing
Working with thin layers can make the application easier to control.
Why Are There Bubbles in My Gel?
Bubbles can appear when product is handled aggressively or applied unevenly.
Avoid repeatedly brushing the same area once the product has been positioned.
Why Is My Top Coat Not Shiny?
Check whether:
- the top coat was applied evenly
- the correct curing process was followed
- the lamp was functioning correctly
- the surface was contaminated before curing
The GELement top coat is designed as a no-wipe finish, so don’t automatically cleanse it as though it were a traditional sticky-layer gel system.
OPI GELement Removal: The Step Beginners Should Not Rush
Application gets most of the attention, but removal is equally important.
OPI’s current GELiversity removal instructions recommend breaking the seal, soaking the gel with acetone-based remover, and allowing approximately 20 minutes of soaking before checking whether the product has released.
Step 1: Break the Seal
File the edge of the gel and lightly remove the shine from the top coat.
The purpose is to help the remover reach the gel.
Step 2: Prepare the Removal Wraps
Saturate the cotton portion of the wrap with the appropriate remover.
Step 3: Wrap the Nail
Cover the entire nail and secure the wrap around the finger.
Step 4: Soak for About 20 Minutes
OPI recommends setting a timer for 20 minutes.
Don’t repeatedly open the wraps to check progress because that can allow the remover to evaporate and interfere with the process.
Step 5: Check One Nail
After the initial soak, check whether the gel has released.
If it hasn’t, replace the wrap and soak for a few additional minutes.
Step 6: Gently Remove the Released Gel
This is critical:
Do not scrape stubborn gel aggressively from the natural nail.
OPI’s GELiversity removal instructions specifically say not to scrape the gel off.
If it hasn’t released, more soaking may be preferable to force.
Step 7: Clean and Condition
Remove remaining residue with remover and finish with cuticle oil.
Do You Need the OPI GELement Removal Kit?
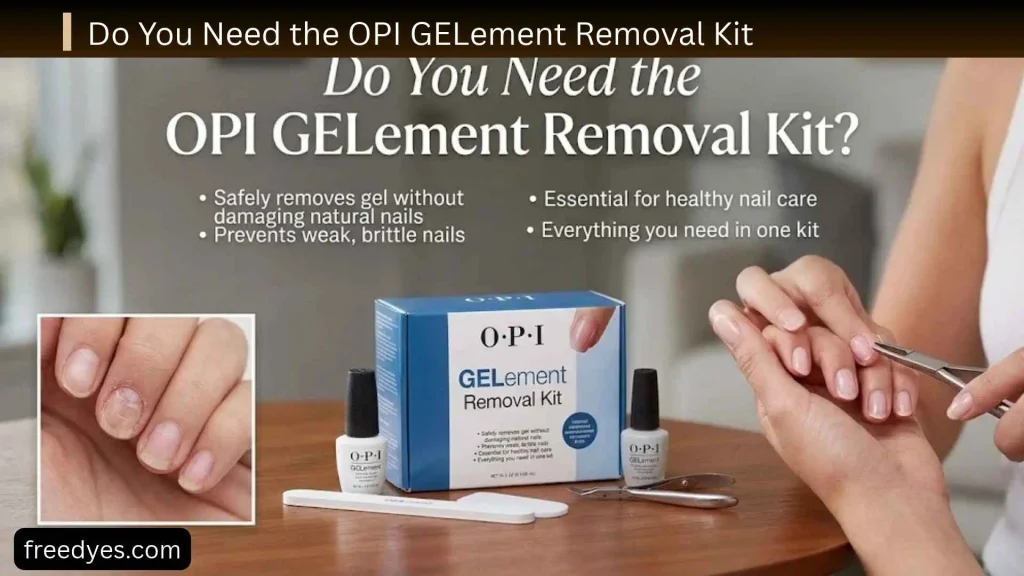
Not necessarily.
But the dedicated kit makes the removal process more convenient because it includes:
- 20 foil removal wraps
- 110 mL Expert Touch remover
- 10 cuticle sticks
- 5 nail files
OPI currently lists it at $24.99.
If you’re calculating the true cost of owning the system, this is worth considering.
The removal kit is particularly convenient for someone who wants everything organized into one package, while experienced DIY users may already have suitable removal supplies.
OPI GELement and Natural Nail Care
A gel manicure isn’t just about how the finished polish looks.
Your preparation and removal habits matter too.
Avoid:
- aggressively filing the natural nail
- peeling gel off
- scraping stubborn product
- repeatedly buffing the nail surface
- curing gel that has spread onto the surrounding skin
If your nails or surrounding skin become irritated, painful, unusually sensitive, or otherwise concerning, stop using the product and consider getting appropriate professional advice.
The goal of a DIY manicure should be to improve your routine—not create a cycle of damage and repair.
OPI GELement vs. Regular Nail Polish
Which one is better depends on your priorities.
| Factor | OPI GELement | Regular Nail Polish |
| Lamp required | Yes | No |
| Curing | Yes | Air drying |
| Setup | More involved | Simple |
| Removal | More involved | Usually easier |
| Equipment | More | Less |
| Beginner learning curve | Moderate | Low |
| Color changes | Less convenient | Very easy |
| Best for | Regular gel users | Occasional polish users |
OPI states that gel polish requires a UV/LED lamp to cure, whereas regular nail polish cannot simply be cured using a gel lamp.
If you enjoy changing your nail color every few days, regular polish may be the more convenient choice.
If you prefer a gel manicure routine and don’t mind the additional steps, GELement makes more sense.
OPI GELement vs. Going to a Salon
The biggest advantage of DIY gel is convenience and the possibility of reducing repeated salon expenses.
But the tradeoff is that you become responsible for:
- nail preparation
- application
- curing
- troubleshooting
- removal
- buying replacement products
- maintaining your equipment
A salon appointment costs more per visit, but someone else handles the technique.
The OPI kit makes the most financial sense for someone who expects to use it regularly.
Who Should Buy the OPI DIY Gel Kit?
The GELement Essentials Kit is a good match for someone who:
- wants to learn at-home gel manicures
- already likes OPI
- wants a dedicated LED lamp
- plans to do gel manicures regularly
- is comfortable learning proper preparation and removal
- wants to choose colors individually
It is particularly appealing if you don’t want to assemble a completely separate lamp, base, top, and prep system yourself.
Who Should Skip It?
You may want to skip the kit if:
- you rarely paint your nails
- you want a very low-cost starter kit
- you expect colors to be included
- you don’t want to deal with acetone-based removal
- you dislike curing lamps
- you prefer changing polish frequently
- you don’t want to learn gel application technique
In those cases, ordinary nail polish or another manicure format may suit you better.
OPI GELement Pros and Cons
Pros
- Dedicated at-home OPI gel system
- LED lamp included
- Base and no-wipe top coat included
- Prep supplies included
- Separate thumb curing is clearly defined
- OPI provides educational material
- Colors can be selected individually
- Suitable for beginners willing to practice
- Complete removal guidance is available
Cons
- Color is not included in the Essentials Kit
- Additional colors increase the total cost
- Removal takes more time than regular polish
- Proper prep is important
- Beginners need to learn thin application
- Lamp requires four-finger curing followed by a separate thumb cure
- A dedicated removal kit adds another potential expense
Common Beginner Mistakes With an OPI Gel Kit
Applying Too Much Product
Thin coats are easier to control and are specifically recommended by OPI.
Skipping Nail Prep
Even a good gel system cannot compensate for poor preparation.
Getting Gel on the Skin
Clean it up before curing.
Curing Only the Color
Base and top coats need to follow the system’s curing instructions too.
Forgetting the Thumb
The GELement lamp uses a separate thumb cure.
Peeling the Gel Off
If gel is lifting, don’t use that as an excuse to peel the entire manicure away.
Filing the Natural Nail Too Aggressively
The goal of buffing is preparation, not thinning the nail.
Rushing Removal
If the gel doesn’t release after the first soak, give the remover more time rather than forcing it.
A Simple Beginner OPI GELement Routine
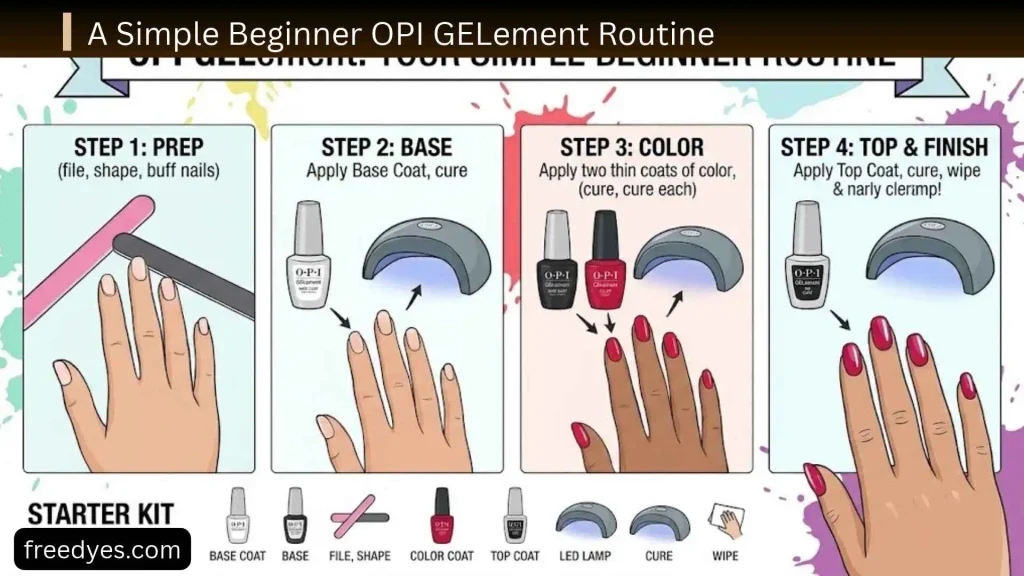
If you’re using the kit for the first time, keep your routine simple.
Before Application
- Gather everything.
- Clean and dry your hands.
- Shape your nails.
- Gently push back the cuticles.
- Lightly buff the surface.
- Clean away dust and oils.
During Application
- Shake products for the recommended time.
- Work one hand at a time.
- Apply thin coats.
- Keep gel away from skin.
- Cure each layer.
- Cure four fingers separately from the thumb.
- Finish with the no-wipe top coat.
After Application
- Inspect the edges.
- Make sure no gel has cured on the surrounding skin.
- Apply cuticle oil.
- Avoid picking or peeling the manicure.
How to Build a Better At-Home Gel Nail Station
You don’t need a huge beauty setup.
A small, organized area is enough.
Keep:
- your lamp
- base coat
- color
- top coat
- files
- prep pads
- cuticle pusher
- removal supplies
- cuticle oil
together in one place.
Good lighting is especially helpful because it makes it easier to see whether you’re getting too close to the cuticle or leaving excess product on the skin.
How to Get Better at DIY Gel Nails
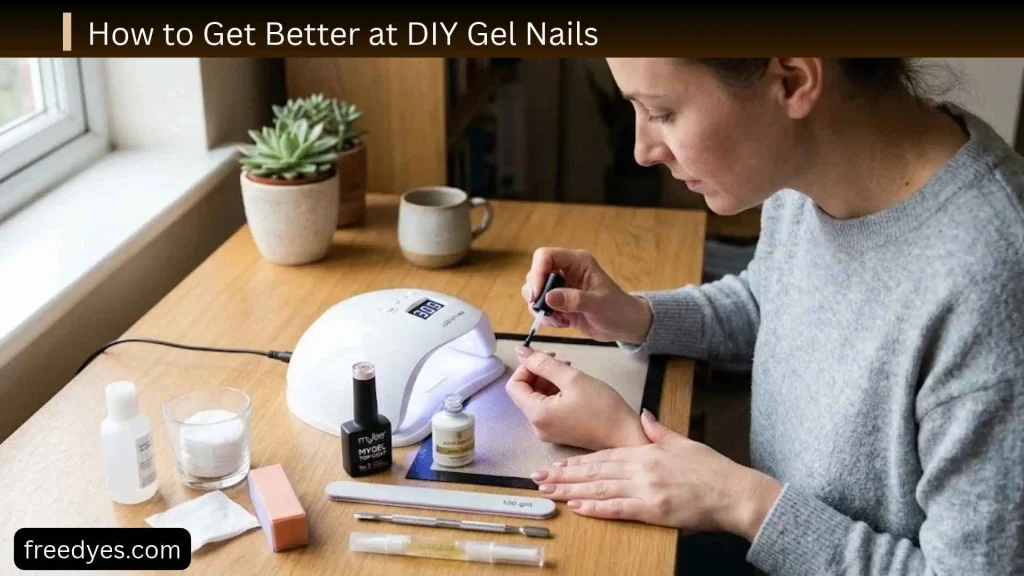
Your first manicure doesn’t have to be perfect.
Focus on mastering these five skills:
1. Preparation
Learn to clean and lightly prepare the nail without overworking it.
2. Product Control
Learn how much product your brush actually carries.
3. Thin Application
This is one of the most important skills.
4. Skin Control
Learn to leave a small, neat margin around the cuticle.
5. Removal
A good manicure isn’t successful if you destroy the natural nail while removing it.
Practice matters more than buying additional accessories.
Frequently Asked Questions About the OPI DIY Gel Kit
Does the OPI GELement Essentials Kit include color?
No. OPI currently lists GELement shades as sold separately from the Essentials Kit.
Does the OPI DIY gel kit include a lamp?
Yes. The current GELement Essentials Kit includes a GELement LED Gel Lamp.
How long do you cure OPI GELement?
OPI’s current instructions specify 60 seconds for four fingers followed by a separate 60-second thumb cure.
Do you cure every layer?
Yes. The base, color layers, and top coat are cured according to the GELement system instructions.
How many color coats should you use?
OPI says to apply one or two color layers depending on the desired opacity, curing between layers.
Why is my OPI gel peeling?
Improper preparation, undercuring, or application problems can contribute to peeling. OPI specifically identifies improper prep and undercuring as possible causes.
Can I use regular nail polish with the OPI GELement lamp?
No. Regular nail polish does not cure under a gel lamp in the same way gel polish does.
Can I remove OPI GELement at home?
Yes. OPI provides an at-home removal process involving filing the shine, acetone-based soaking, and gentle removal.
How long should I soak OPI gel during removal?
OPI’s current GELiversity instructions recommend an initial 20-minute soak, followed by additional soaking if the gel has not released.
Should I scrape off stubborn gel?
No. OPI specifically advises against scraping the gel off. If it has not released, continue soaking according to the removal instructions rather than forcing it.
Is the OPI GELement kit good for beginners?
It can be a good beginner system because the main lamp, base, top, and preparation tools are packaged together and OPI provides educational instructions. However, beginners still need to learn proper prep, thin application, curing, and removal.
Is OPI GELement the same as OPI GelColor?
No. OPI identifies GELement as an at-home system, while GelColor is a professional/salon system.
Do I need the OPI removal kit?
Not necessarily. You need appropriate removal supplies, but the dedicated OPI kit is optional. OPI currently lists its GELement Removal Kit at $24.99.
Is the OPI GELement kit worth it?
For someone who regularly wants gel manicures at home, it can be a practical investment because the Essentials Kit combines the lamp, base, top, and preparation tools. For occasional users, the additional cost and removal process may make regular polish a better fit.
Final Verdict: Should You Buy the OPI DIY Gel Kit?
The OPI GELement Essentials Kit is best viewed as a starting platform rather than a completely finished manicure in one box.
The current $59.99 kit gives you the important equipment and preparation products: an LED lamp, base coat, no-wipe top coat, prep pads, cuticle pushers, and files/buffers. However, you’ll need to buy a GELement color separately.
Its biggest strengths are convenience, a dedicated at-home system, clear curing instructions, and OPI’s educational resources.
Its biggest weaknesses are the additional cost of colors and removal supplies and the learning curve associated with proper gel preparation and removal.
My Bottom Line
Buy the OPI GELement DIY gel kit if you want a dedicated at-home gel system and expect to use it regularly.
Skip it if you only paint your nails occasionally or want the cheapest possible manicure setup.
And regardless of which gel system you choose, don’t judge the experience only by how good the manicure looks on day one. Good preparation, correct curing, and careful removal are just as important as the final glossy finish.