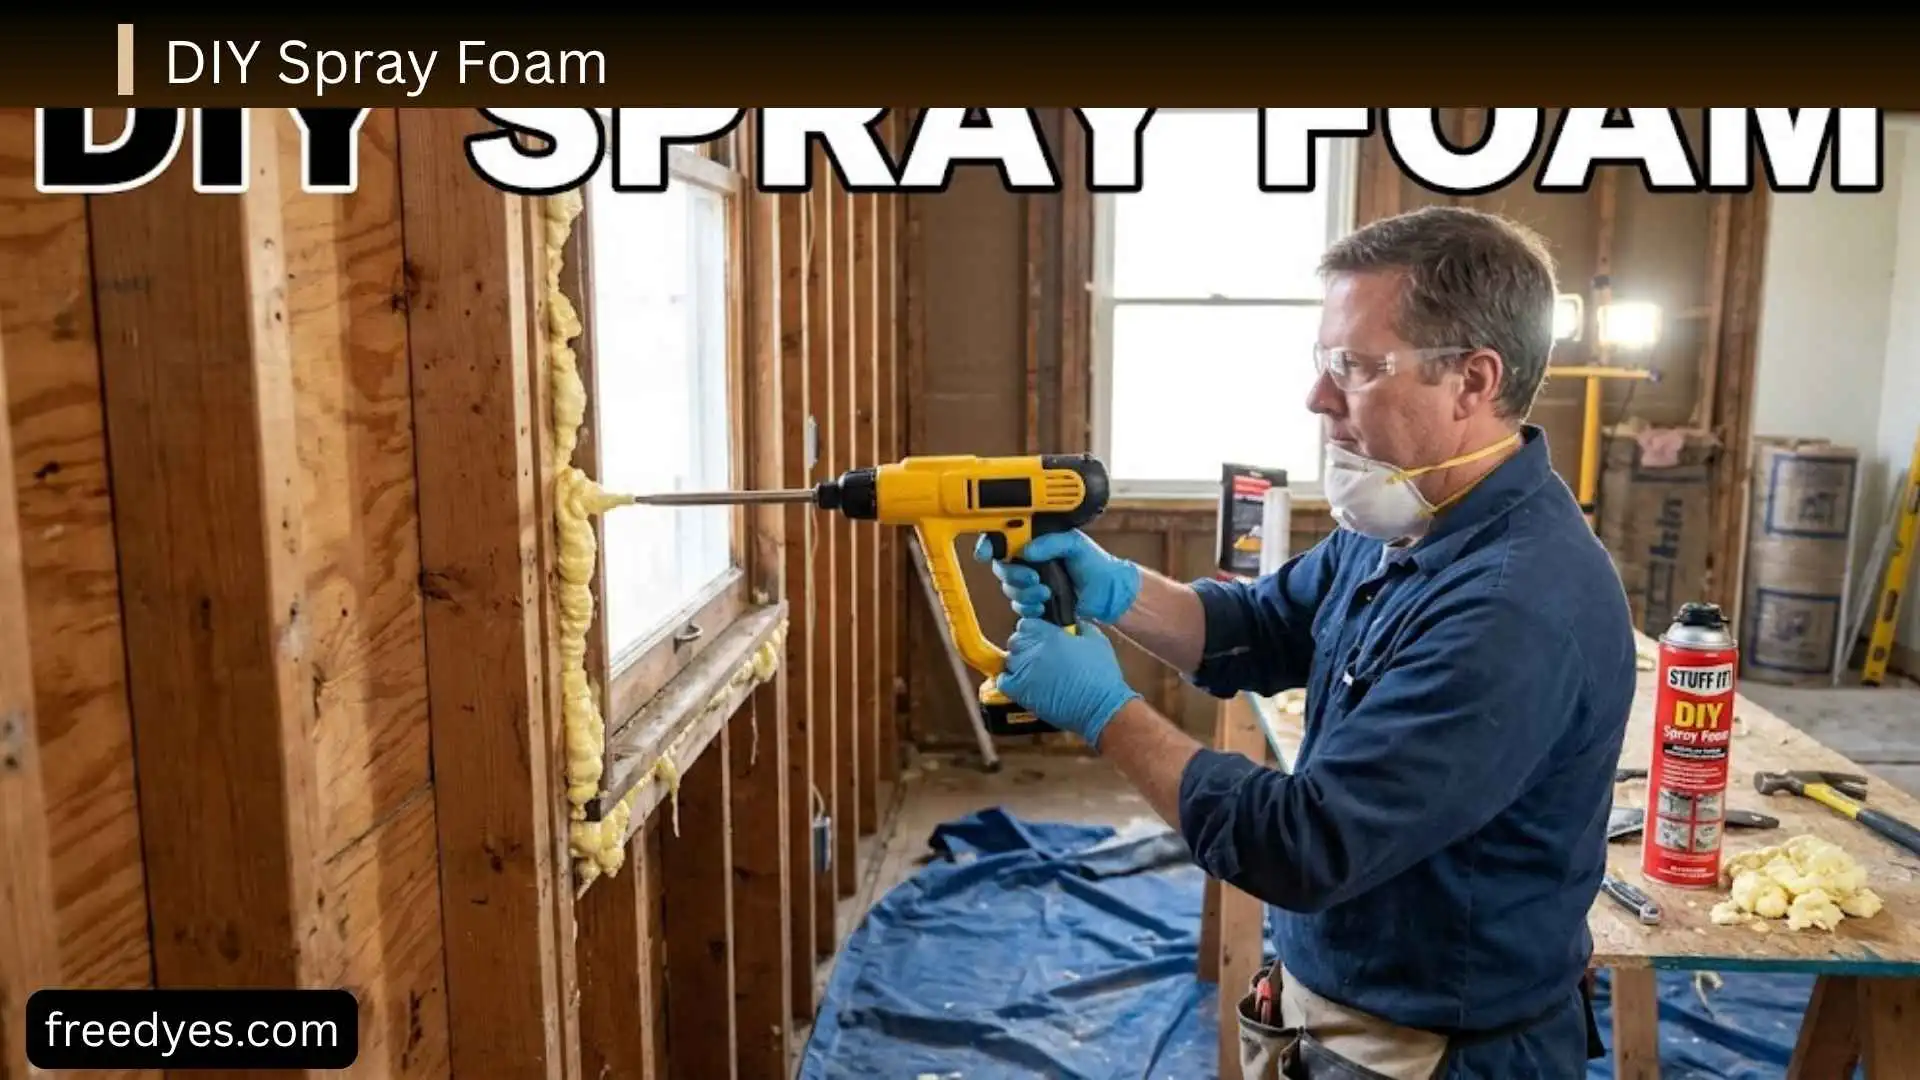
Drafty rooms, rising energy bills, and unwanted air leaks can make any home feel uncomfortable. DIY spray foam has become a popular solution for homeowners looking to improve insulation without hiring a professional. With the right materials and proper application, spray foam can seal gaps, reduce heat loss, and create a more energy-efficient living space.
Before starting a project, understanding how DIY spray foam works is essential. Different types of spray foam are designed for specific applications, and choosing the right product can make a significant difference in both performance and long-term durability. Learning the correct installation techniques, safety precautions, and common mistakes to avoid helps ensure successful results.
This guide covers everything needed to know about DIY spray foam, including its benefits, types, installation process, costs, safety tips, and expert recommendations. Whether sealing small cracks or tackling a larger insulation project, the information below provides the knowledge needed to complete the job with confidence.
DIY Spray Foam (Quick answer)
DIY spray foam is generally most practical for small sealing and insulation jobs when the product is specifically designed for that application. Larger insulation projects, complicated building assemblies, and professional high-pressure spray systems require considerably more knowledge, equipment, and safety controls.
What Is DIY Spray Foam?
DIY spray foam usually refers to polyurethane foam products sold in forms that homeowners can use without the large equipment associated with professional spray-foam installation.
Depending on the product, DIY spray foam may come in a small one-component can or a low-pressure two-component kit. These products are commonly used for sealing gaps, cracks, penetrations, and smaller insulation applications.
The U.S. Environmental Protection Agency distinguishes between one-component foam, low-pressure two-component systems, and high-pressure two-component systems. High-pressure two-component systems are professional systems, while one-component products and some low-pressure kits are commonly available to DIY users.
That distinction is important because a small can of expanding foam is not the same thing as installing spray-foam insulation throughout a house.
Is DIY Spray Foam Right for Your Project?
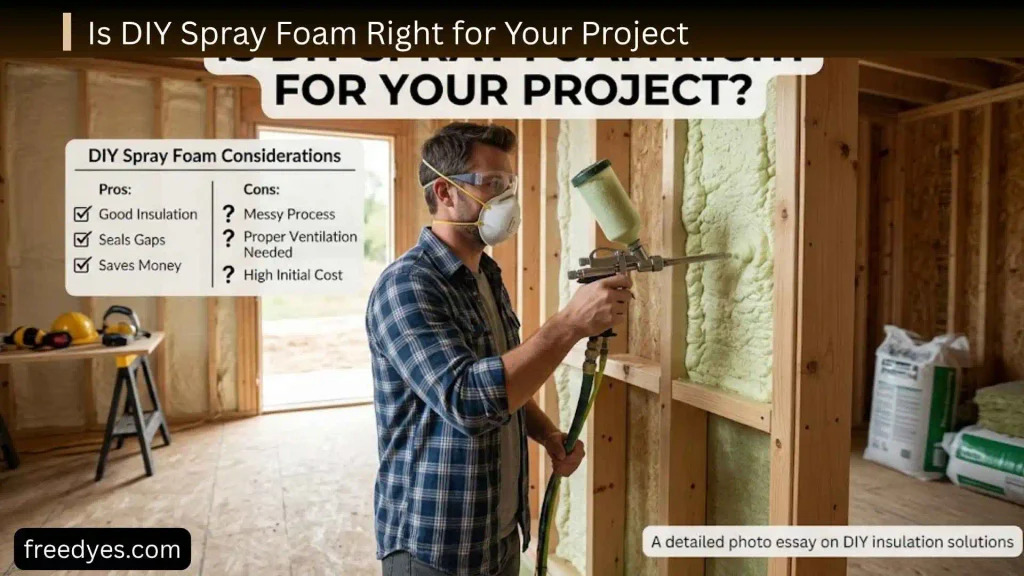
Before buying a can or kit, decide what you actually want the foam to accomplish.
Projects That May Be Suitable for DIY
DIY spray foam can make sense for relatively small jobs such as:
- Filling suitable gaps and cracks
- Sealing certain pipe or cable penetrations
- Reducing drafts around appropriate openings
- Sealing small gaps around windows and doors with the correct product
- Completing a small insulation repair
- Sealing irregular openings where another material is difficult to use
The product label should always confirm that the foam is intended for the specific application.
Projects Better Left to Professionals
Think carefully before attempting DIY spray foam if you are planning to:
- Insulate an entire house
- Spray large wall cavities
- Spray an entire attic or roof deck
- Apply high-pressure two-component foam
- Work around complicated mechanical systems
- Work in a poorly ventilated area
- Deal with an existing moisture problem
- Modify a building assembly you don’t fully understand
- Apply foam where fire or building-code requirements are involved
EPA guidance specifically identifies high-pressure two-component spray foam as a professional system intended for trained applicators.
The larger the project becomes, the less appropriate it is to treat it like a simple DIY sealing job.
DIY Expanding Foam vs. Spray Foam Insulation
The phrase “spray foam” can mean different products, which can cause confusion for beginners.
| Feature | DIY expanding foam | DIY spray-foam kit |
| Typical use | Small gaps and cracks | Larger sealing or insulation work |
| Product form | Usually one-component can | Usually two-component kit |
| Application | Bead or stream | Spray pattern |
| Project size | Small | Small to medium |
| Equipment | Simple applicator | Dedicated kit equipment |
| Skill level | Lower | Higher |
| Main concern | Expansion and control | Chemical exposure, application technique, coverage and curing |
A one-component can is generally more appropriate for localized sealing. A two-component kit involves more complicated application and safety considerations.
Types of DIY Spray Foam
Choosing the right product is one of the most important steps in a successful project.
One-Component Spray Foam
One-component foam is commonly sold in smaller cans and is used for sealing cracks, holes, gaps, and crevices.
Typical applications can include:
- Small building gaps
- Certain window and door gaps
- Pipe penetrations
- Cable penetrations
- Drafty openings
- Small air-sealing jobs
These products are convenient, but they still require careful application because the foam expands after leaving the container.
Low-Pressure Two-Component Foam
Low-pressure two-component kits combine two chemical components at the time of application.
These kits can be used for some larger air-sealing and insulation projects, but they require considerably more attention to preparation, PPE, ventilation, application conditions, and curing.
EPA guidance notes that products used by DIYers still require precautions similar to those used for professional applications.
High-Pressure Two-Component Foam
High-pressure spray-foam systems are a different category.
They are generally used for larger insulation applications and professional installation. They require specialized equipment, training, protective equipment, ventilation, and controlled application procedures.
This is not the type of project most beginners should approach as a casual weekend DIY job.
Open-Cell vs. Closed-Cell Spray Foam
You may also see spray foam described as open-cell or closed-cell.
Open-Cell Foam
Open-cell foam has a less dense cellular structure and generally expands more aggressively.
It can be useful in certain larger insulation applications, but expansion must be controlled carefully.
Closed-Cell Foam
Closed-cell foam has a denser structure and is generally more rigid.
It can provide higher insulation performance per inch than many open-cell products and can offer greater resistance to moisture movement, depending on the formulation and application.
Neither option is automatically “better” for every project.
The correct choice depends on the building assembly, available space, moisture conditions, product specifications, and the performance you need.
How to Choose the Right DIY Spray Foam
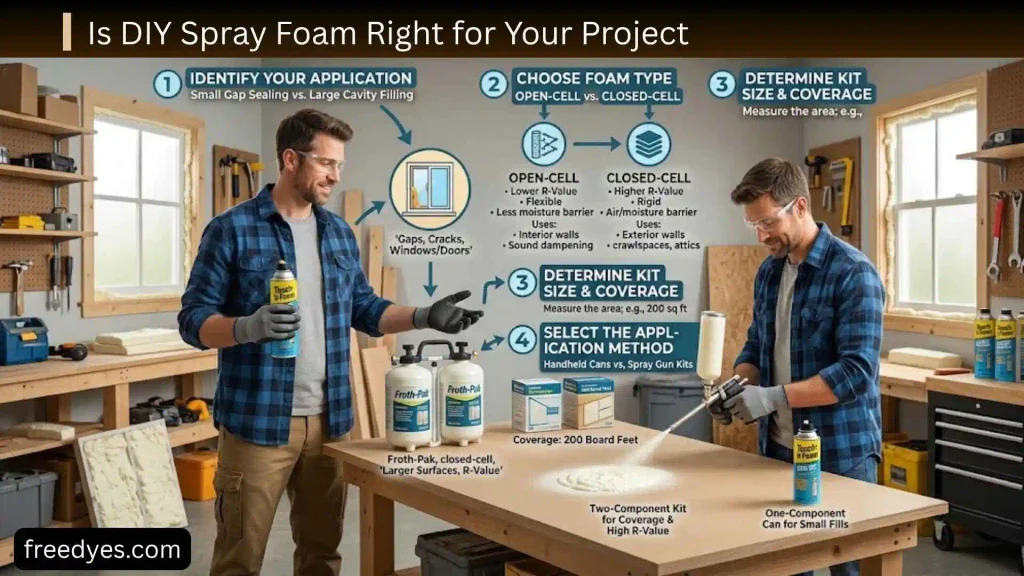
Don’t choose a product only because it has the highest advertised insulation value.
Instead, check the product for these characteristics:
- Intended application
- Expansion level
- Open-cell or closed-cell construction
- Coverage
- Cure time
- Application temperature
- Recommended surfaces
- Maximum application thickness
- Moisture limitations
- Fire or ignition requirements
- Applicator type
- Required PPE
- Manufacturer’s re-entry instructions
The manufacturer’s label and Safety Data Sheet should take priority over generic DIY advice.
What Do You Need Before Starting?
For a small DIY spray-foam project, you may need:
- The correct spray foam product
- Applicator or straw specified by the manufacturer
- Chemical-resistant gloves
- Appropriate eye protection
- Protective clothing
- Required respiratory protection
- Drop cloth or protective covering
- Masking materials
- Utility knife for trimming cured foam
- Adequate ventilation
- Manufacturer’s instructions
- Safety Data Sheet
Do not assume that the same PPE applies to every spray-foam product. Product formulation and application method affect the precautions required.
EPA guidance emphasizes protective equipment, ventilation, and restricting unprotected occupants during spray-foam work.
How to Use DIY Spray Foam Step by Step
1. Inspect the Area First
Before spraying anything, determine why the gap exists.
Ask yourself:
- Is this actually an unwanted opening?
- Is water entering through it?
- Does the area need ventilation?
- Are electrical components nearby?
- Are there pipes or mechanical components inside?
- Will the foam interfere with future access?
- Is the surface suitable for the product?
Do not use spray foam to hide an active leak, mold problem, damaged framing, or another underlying building problem.
2. Read the Product Instructions
Read the label before preparing the foam.
Pay particular attention to:
- Temperature requirements
- Humidity or moisture requirements
- Application thickness
- Expansion characteristics
- Cure time
- PPE
- Ventilation
- Surface compatibility
- Cleanup
- Storage
- Re-entry requirements
A generic spray-foam tutorial cannot replace the instructions for the specific product you purchased.
3. Prepare the Surface
The surface should be suitable for the product and free of contaminants that could interfere with adhesion.
Remove loose dust and debris and address grease or other contamination where the manufacturer’s instructions require it.
If the surface is wet, don’t simply assume the foam will solve the problem. Determine whether moisture is expected, temporary, or evidence of a larger leak.
4. Protect Nearby Surfaces
Spray foam is extremely adhesive.
Before spraying, protect:
- Floors
- Finished walls
- Cabinets
- Glass
- Fixtures
- Tools
- Clothing
- Nearby equipment
It is much easier to prevent unwanted foam from reaching a surface than to remove cured foam later.
5. Prepare Your PPE and Ventilation
Put on the protective equipment specified by the product manufacturer before opening or spraying the product.
Ventilation is particularly important for spray polyurethane foam because application can produce vapors, aerosols, and other airborne contaminants.
EPA guidance recommends controlling airflow, isolating the application area where appropriate, exhausting contaminated air safely, and continuing ventilation after application according to the applicable instructions.
6. Keep Unprotected People Away
Children, pets, visitors, and other unprotected occupants should not remain in the application area.
Don’t assume that because a product is sold as “DIY” it has no exposure concerns.
EPA states that DIY users should follow safe work practices and precautions and consider whether professional installation is more appropriate.
7. Test the Foam
If the manufacturer recommends a test application, perform one before working on the visible project.
This lets you observe:
- Expansion
- Adhesion
- Spray pattern
- Cure behavior
- Approximate working time
A small test can prevent a large mess.
8. Apply a Small Amount
This is where many beginners go wrong.
Do not automatically fill a cavity completely because the foam expands after application.
Apply a controlled amount and allow it to expand according to the product instructions.
For larger two-component systems, follow the manufacturer’s specified lift thickness and application limits rather than building up a thick layer in one pass.
9. Allow the Foam to Cure
Do not immediately press, trim, paint, or cover the foam unless the product instructions permit it.
Curing depends on the formulation and application conditions.
Temperature, humidity, thickness, mixing, and application technique can affect the curing process.
10. Trim Excess Foam
Once the product has fully cured and the manufacturer allows trimming, use a sharp utility knife to remove excess foam.
Work slowly, especially around finished surfaces.
Don’t cut deeper than necessary because the material underneath may be fragile or important to the seal.
11. Finish the Area
Depending on the location and product, cured foam may be covered, painted, sealed, or otherwise finished.
However, compatibility and fire-protection requirements vary.
Always check the product instructions before covering the foam.
Where Should You Not Use DIY Spray Foam?
One of the most important DIY rules is knowing where not to spray.
Avoid treating these situations as simple foam-filling jobs:
- Active water leaks
- Areas designed for intentional ventilation
- Moving mechanical components
- Heat-producing equipment unless specifically permitted
- Locations requiring future access
- Areas containing components that could be damaged by expanding foam
- Fire-rated assemblies without understanding the requirements
- Large concealed cavities you cannot inspect
- Surfaces not approved by the manufacturer
The existence of a gap does not automatically mean the gap should be filled.
Sometimes an opening is part of a ventilation, drainage, expansion, or access system.
DIY Spray Foam Safety Checklist
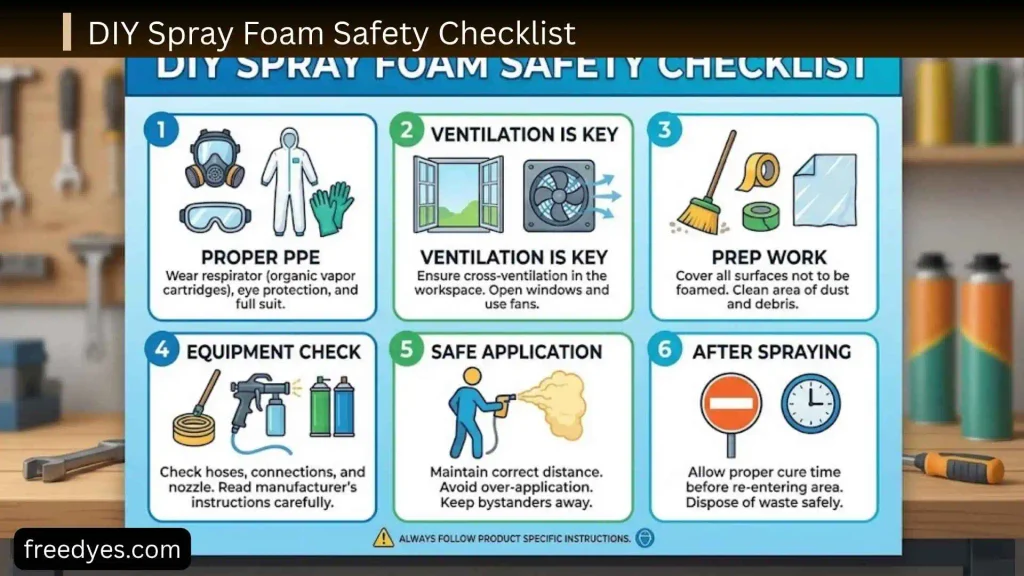
Before Application
- Read the label.
- Review the Safety Data Sheet.
- Check temperature requirements.
- Check application limitations.
- Inspect the surface.
- Identify electrical, plumbing, and mechanical components.
- Protect surrounding surfaces.
- Plan ventilation.
- Remove unprotected occupants and pets.
- Have the required PPE ready.
During Application
- Follow the manufacturer’s application method.
- Keep foam away from skin and eyes.
- Do not intentionally breathe vapors or aerosols.
- Avoid overapplication.
- Maintain appropriate ventilation.
- Keep unnecessary people away.
- Stop if the product behaves unexpectedly.
After Application
- Follow the manufacturer’s curing instructions.
- Observe the specified re-entry time.
- Continue ventilation as instructed.
- Keep unprotected people out of the area until it is appropriate to re-enter.
- Use PPE when trimming or disturbing cured foam if required.
- Clean the work area carefully.
EPA notes that exposure can occur through vapors, aerosols, and dust during and after installation and that SPF chemicals can cause respiratory, skin, and eye effects.
Why Ventilation Matters
Ventilation is not simply about making the room smell better.
During application and subsequent trimming, airborne contaminants can be generated. EPA guidance recommends controlling airflow so contaminated air is removed from the work area rather than being allowed to spread through the building.
Research examining DIY two-component spray-foam applications has also found that emissions can move beyond an isolated application area, reinforcing the importance of carefully planned ventilation and containment.
This is one reason you should not treat a basement, attic, or enclosed room as automatically safe just because a window is open.
Follow the product’s specific ventilation and re-entry requirements.
How Much Does DIY Spray Foam Cost?
The cost of DIY spray foam depends heavily on the size and type of project.
Your total cost can include:
- Foam cans or kits
- Applicator equipment
- Replacement nozzles
- Gloves
- Eye protection
- Protective clothing
- Respiratory protection where required
- Surface protection
- Cleaning supplies
- Additional foam for mistakes or waste
For a small gap, buying a single can may be inexpensive.
For a larger insulation project, however, the cost can increase quickly because you may need multiple kits and additional equipment.
Is DIY Spray Foam Cheaper Than Professional Installation?
For a small repair, DIY can be economical because you’re paying only for a relatively small amount of material.
For a large project, the calculation becomes more complicated.
Professional installation includes labor, equipment, preparation, experience, ventilation controls, and application knowledge.
If a DIY installation goes wrong, removing defective foam and correcting the underlying problem can also add significant expense.
So the better question isn’t simply:
“Is DIY spray foam cheaper?”
It’s:
“Is this project small and straightforward enough that doing it myself makes financial and practical sense?”
How Much Area Does One Can of Spray Foam Cover?
There isn’t one universal coverage figure.
Coverage depends on:
- Container size
- Expansion ratio
- Gap dimensions
- Foam density
- Application method
- Temperature
- Surface conditions
- Amount of waste
- Thickness of application
Always use the manufacturer’s stated yield rather than assuming every can covers the same area.
For two-component insulation kits, manufacturers may express coverage in board feet rather than simply square feet.
A board foot represents one square foot of material at one inch thick.
That measurement can make it easier to compare insulation-kit coverage, but actual field results can differ from theoretical coverage.
DIY Spray Foam for Windows and Doors
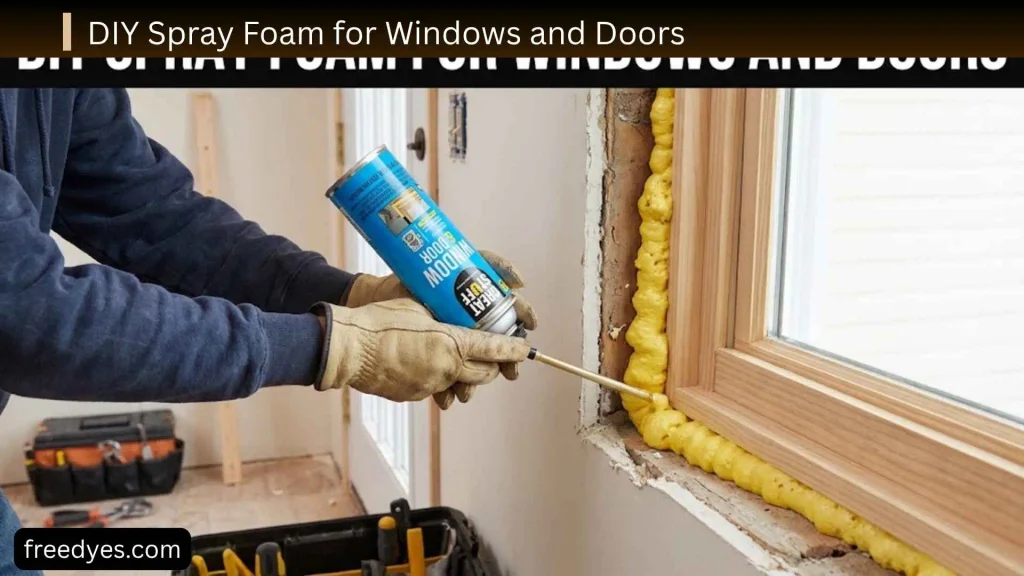
Windows and doors are common locations for drafts, but the wrong foam can create problems.
For these applications, look for a product specifically designed for window and door use when appropriate.
The goal is to seal the unwanted air gap without applying excessive expansion pressure to the frame.
Before spraying:
- Identify the actual gap.
- Check the product label.
- Protect the finished surfaces.
- Apply a controlled amount.
- Allow expansion.
- Add more only if necessary.
- Trim after curing.
Don’t assume that a general high-expansion foam is automatically suitable for every window or door installation.
Can You Use Spray Foam Around Electrical Wiring?
Sometimes spray foam may be used to seal an appropriate penetration around a cable, but that is different from completely surrounding electrical equipment with foam.
Before applying it around electrical components, consider:
- Product compatibility
- Heat exposure
- Electrical-component requirements
- Access requirements
- Local building requirements
- Manufacturer instructions
If you’re unsure whether the foam can safely contact a particular electrical component, don’t guess.
A qualified electrician or other appropriate professional can determine the correct approach.
Can You Use DIY Spray Foam Around Pipes?
Spray foam can be useful around certain pipe penetrations and openings, but the application must account for the pipe itself.
Consider whether the pipe:
- Expands or contracts
- Becomes hot
- Needs future access
- Carries water
- Carries gas
- Is subject to movement
- Requires a specific fire or sealing treatment
Do not simply surround every pipe with foam.
The product needs to be appropriate for the application and compatible with the materials involved.
Can You Use DIY Spray Foam in an Attic?
An attic is where a simple DIY sealing project can quickly become a building-science project.
Before applying foam, determine whether you’re insulating:
- The attic floor
- The underside of the roof deck
- Around penetrations
- Around ductwork
- Around specific framing areas
These approaches can affect ventilation and moisture behavior differently.
Attic Floor vs. Roof Deck
Sealing and insulating the attic floor is different from moving the thermal and air boundary to the roofline.
A roof-deck spray-foam application can affect the way the roof assembly manages heat and moisture.
You therefore need to understand:
- Existing ventilation
- Roof construction
- Moisture conditions
- Existing insulation
- HVAC equipment
- Electrical equipment
- Required insulation level
- Fire and ignition requirements
- Local building requirements
For a small attic air-sealing repair, DIY may be reasonable.
For an entire attic insulation project, professional advice is often worthwhile.
Common DIY Spray Foam Mistakes
Applying Too Much Foam
More foam doesn’t necessarily mean better insulation or better sealing.
Excess material can expand into unwanted spaces and create cleanup problems.
With two-component systems, applying material beyond the manufacturer’s permitted thickness can also create curing and heat-related problems.
Using the Wrong Product
A foam designed for filling small cracks isn’t automatically appropriate for insulating a wall or roof.
Read the intended-use information before purchasing.
Ignoring Moisture
Spray foam should not be used to hide an active leak.
Find and repair the moisture source first.
Spraying Without Protecting the Area
Foam can bond strongly to many materials.
Cover nearby surfaces before spraying rather than trying to clean cured foam afterward.
Ignoring Expansion
A gap that looks small can become filled with a surprisingly large amount of foam.
Start conservatively.
Blocking Ventilation
Never seal an opening without first determining whether it is intentionally providing ventilation.
Covering Components That Need Access
If a valve, junction, service connection, or mechanical component needs future inspection, don’t permanently bury it without confirming that doing so is appropriate.
Treating a Large Project Like a Small One
A can of foam and a professional insulation system should not be approached in the same way.
As project size increases, so do the consequences of incorrect application.
DIY Spray Foam Troubleshooting
Why Isn’t My Spray Foam Expanding?
Possible reasons include:
- Product stored incorrectly
- Product used outside its temperature range
- Improper application
- Inadequate mixing in a two-component system
- Expired or damaged product
- Surface or environmental conditions outside the manufacturer’s specifications
Don’t immediately add more foam.
First determine why the original application did not behave as expected.
Why Is My Spray Foam Still Sticky?
Foam that remains tacky or uncured may indicate an application or curing problem.
Possible factors include:
- Incorrect temperature
- Incorrect mixing
- Excessive application thickness
- Product problems
- Environmental conditions
- Incorrect application technique
Check the product instructions and contact the manufacturer if the material does not cure as expected.
Why Did My Spray Foam Shrink?
Shrinkage can result from application conditions, formulation problems, inadequate mixing, or other curing issues.
If significant shrinkage occurs, don’t simply cover it with another layer without understanding the cause.
Why Won’t Spray Foam Stick?
Poor adhesion can occur when the surface is contaminated or otherwise unsuitable.
Check for:
- Dirt
- Dust
- Oil
- Grease
- Moisture
- Incompatible materials
- Temperature outside the recommended range
Always check the product’s approved substrate list.
Why Did the Foam Expand Too Much?
The most common explanation is simply applying more material than necessary.
Some foams expand considerably after application.
Use smaller applications and follow the manufacturer’s instructions for bead size, lift thickness, and application technique.
How to Remove DIY Spray Foam
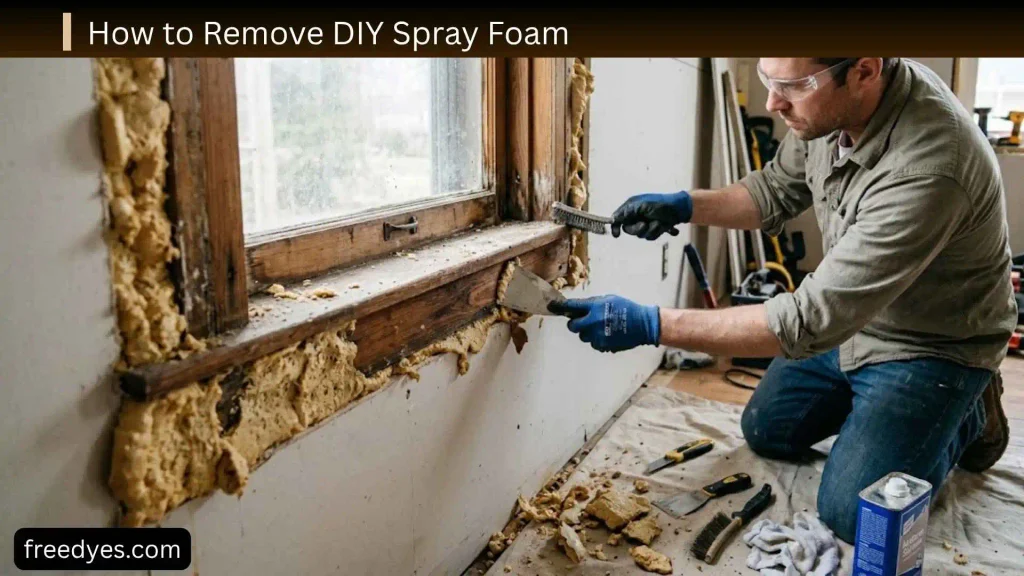
Removal depends on whether the foam is cured.
Removing Uncured Foam
Uncured foam can be particularly messy.
Do not spread it around while trying to clean it.
Follow the product manufacturer’s cleanup instructions and use only cleaning materials that are compatible with the affected surface.
Removing Cured Foam
Once spray foam has cured, mechanical removal is often necessary.
Depending on the surface, this may involve:
- Cutting
- Scraping
- Careful trimming
- Sanding where appropriate
Be especially careful on finished surfaces.
Do not assume that heat is a safe shortcut. EPA materials warn that heating or mechanically disturbing cured spray foam can create hazardous emissions under some circumstances.
Can You Paint Over Spray Foam?
Some cured spray foams can be painted or covered, but compatibility varies.
Before applying paint, sealant, drywall, or another finish:
- Allow the foam to cure completely.
- Trim excess material.
- Check the foam manufacturer’s instructions.
- Confirm that the finishing material is compatible.
- Check whether additional fire or ignition protection is required.
Never assume that painting the foam automatically makes an application code-compliant.
How Long Does DIY Spray Foam Take to Cure?
There is no universal curing time for every spray foam product.
Cure time can vary based on:
- Product formulation
- Temperature
- Humidity
- Application thickness
- Surface conditions
- Mixing quality
- Ventilation
Use the manufacturer’s specified curing and re-entry instructions rather than relying on a generic number of hours.
The EPA specifically recommends checking manufacturer information for safe re-entry after spray-foam application.
Is DIY Spray Foam Safe?
DIY spray foam can be used for suitable projects when the product is handled correctly and the manufacturer’s safety requirements are followed.
However, “DIY” does not mean “risk-free.”
Spray polyurethane foam can involve chemicals such as isocyanates, and exposure during application can cause respiratory problems, sensitization, asthma, and skin or eye irritation.
The safest approach is to:
- Choose an appropriate product
- Read the label and Safety Data Sheet
- Use required PPE
- Control access to the work area
- Provide appropriate ventilation
- Follow application limits
- Follow curing and re-entry instructions
- Stop if you are unsure about the application
When Should You Hire a Professional?
A professional is worth considering when:
- The project covers a large area.
- You’re insulating an entire attic.
- You’re spraying a roof deck.
- You’re working with high-pressure equipment.
- The building assembly is complicated.
- There is an existing moisture problem.
- You can’t adequately ventilate the space.
- Electrical or mechanical systems are involved.
- You don’t understand the required fire protection.
- You aren’t comfortable following the product’s safety requirements.
- The consequences of a mistake would be expensive.
Professional installation isn’t simply about having someone else hold the spray gun.
It can involve building-science knowledge, equipment, containment, ventilation, application thickness, material compatibility, and code considerations.
DIY Spray Foam vs. Professional Installation
| Factor | DIY | Professional |
| Small gap sealing | Often practical | Usually unnecessary |
| Small air-sealing repair | May be suitable | Optional |
| Small insulation repair | Product dependent | Useful for difficult areas |
| Entire attic | More complicated | Often preferable |
| Whole-house insulation | Usually not beginner-friendly | Recommended |
| High-pressure SPF | Not a typical DIY project | Professional |
| Equipment | Limited | Specialized |
| Application experience | Beginner to moderate | Trained |
| Large-area ventilation | Difficult | Professional setup |
| Risk of costly mistakes | Higher for beginners | Generally lower |
Is DIY Spray Foam Worth It?
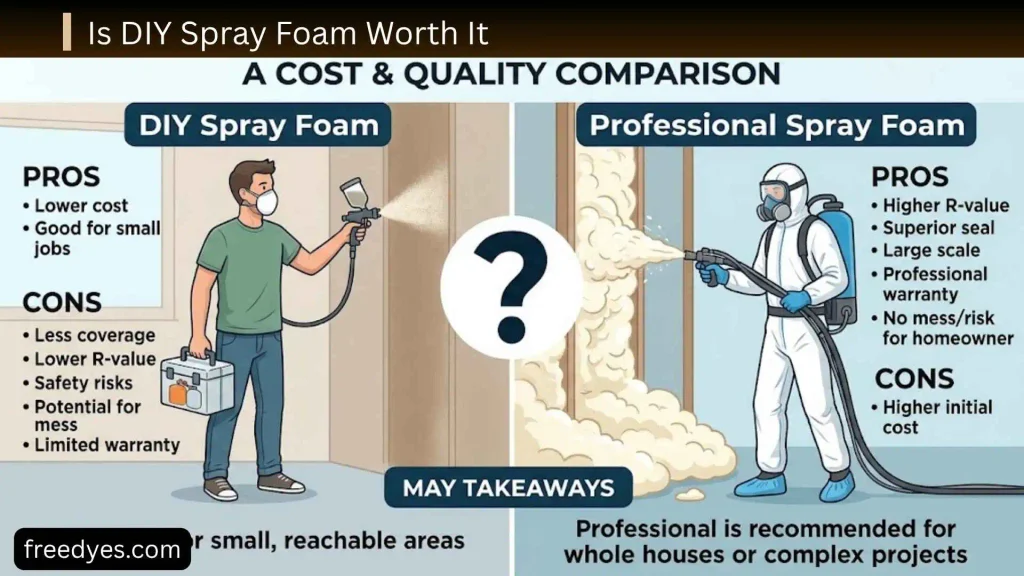
For the right project, yes.
DIY spray foam can be a convenient option when you have a small, clearly defined job and the product is specifically designed for it.
It can be especially useful for localized air sealing where traditional insulation or caulk isn’t practical.
However, DIY becomes less attractive when the job grows beyond a simple repair.
A useful rule is:
The more area, complexity, chemical exposure, building-science knowledge, and potential consequences involved, the stronger the case for professional installation.
Frequently Asked Questions About DIY Spray Foam
What is DIY spray foam used for?
DIY spray foam is commonly used for suitable small gaps, cracks, penetrations, air-sealing work, and some localized insulation applications.
Is DIY spray foam the same as professional spray foam?
No. DIY products can include one-component foam and certain low-pressure two-component kits, while professional installers may use high-pressure two-component systems and specialized equipment.
Can DIY spray foam stop drafts?
It can help reduce drafts when the draft is caused by an unwanted gap or penetration that is appropriate to seal.
However, you should identify the source of the air leak before applying foam.
Can I use spray foam around windows?
Some products are specifically designed for window and door applications. Use the correct product and avoid excessive expansion that could interfere with the frame.
Can I use spray foam around pipes?
It may be appropriate for some pipe penetrations, but the pipe material, temperature, movement, accessibility, and product instructions must be considered.
Can I spray foam around electrical wires?
Some foam may be suitable for sealing around certain cable penetrations, but do not assume every foam can safely surround every electrical component. Check the product instructions and applicable requirements.
Can I spray foam an entire house myself?
Large-scale spray-foam insulation is much more complicated than sealing a few gaps. Whole-house projects should generally be evaluated carefully and may be better handled by trained professionals.
Is closed-cell spray foam better than open-cell foam?
Not automatically. They have different properties and applications. The appropriate choice depends on the building assembly, available space, moisture conditions, and performance requirements.
How much spray foam do I need?
Use the manufacturer’s coverage or yield information. Your actual coverage depends on the application, expansion, thickness, surface conditions, and waste.
Why is my spray foam not curing?
Incorrect temperature, application thickness, mixing, product condition, or other environmental factors can affect curing. Check the manufacturer’s instructions before applying additional foam.
Can you remove cured spray foam?
Yes, cured foam can often be mechanically trimmed or removed, but the difficulty depends on the surface and how strongly the foam has bonded.
Can you paint spray foam?
Some cured products can be painted or covered, but you should verify compatibility and any required fire or ignition protection first.
Is spray foam waterproof?
Don’t treat spray foam as a universal waterproofing solution. It may provide moisture resistance in certain applications, but it should not be used as a substitute for repairing leaks or designing a proper water-management system.
Final Thoughts
DIY spray foam can be an effective tool for homeowners when the project is small, the product is appropriate, and the application is carefully controlled.
The biggest mistake is assuming that all spray foam products work the same way.
A small one-component can used to seal a suitable gap is a very different project from spraying insulation across an attic or roof deck. The larger and more complicated the job becomes, the more important product selection, ventilation, PPE, curing, building science, and professional expertise become.
For a small project, start by asking three questions:
- Is this opening actually supposed to be sealed?
- Is this product specifically designed for the job?
- Can I safely apply it according to the manufacturer’s instructions?
If the answer to all three is yes, DIY spray foam may be a practical solution. If any answer is uncertain, investigate the problem further before spraying.
The goal isn’t to use the most foam possible. The goal is to create the right seal, in the right place, with the right product, while keeping the people and building around it safe.