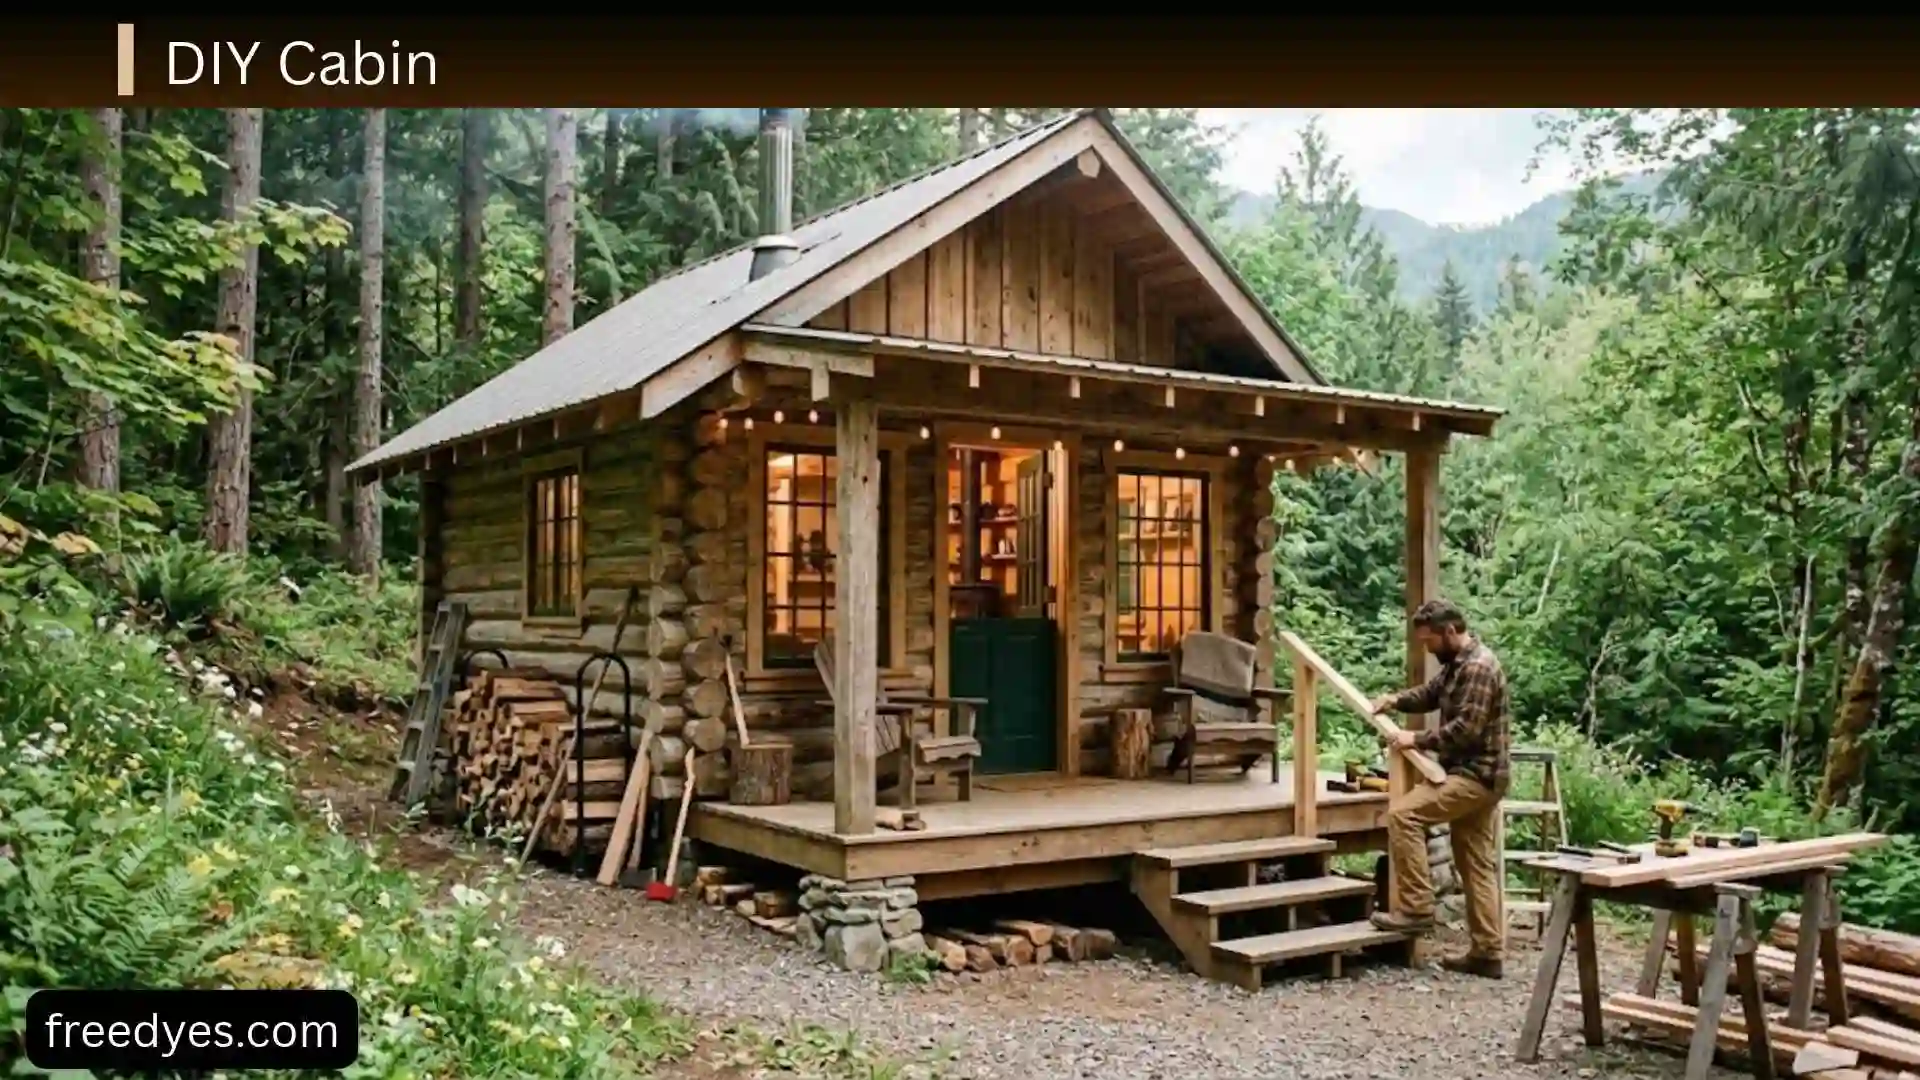
Have you ever looked at a cozy cabin and thought, “I wish I could build something like that”? If so, you are not alone. I know how exciting it feels to imagine having a peaceful retreat that reflects your own style and creativity. The good news is that building a DIY cabin is more achievable than many people think. Whether you are planning a simple weekend getaway, a backyard workspace, or a full-time tiny home, the right guidance can make the process much easier.
In this guide, I am going to walk you through everything you need to know about creating a DIY cabin—from choosing the best design and materials to understanding the basic building steps, budgeting, and avoiding common mistakes. By the end, you will have the confidence and knowledge to start planning a cabin that fits your needs, your skills, and your budget.
DIY Cabin at a Glance
| Feature | Practical starting point |
| Example footprint | 12 × 16 feet |
| Floor area | 192 sq. ft. before wall thickness |
| Basic shape | Rectangle |
| Beginner-friendly framing | Conventional wood platform framing |
| Roof | Simple gable or single-slope design |
| Foundation | Site-dependent |
| Main uses | Weekend cabin, studio, guest space, hunting cabin |
| Difficulty | Moderate to advanced |
| Best cost-saving method | Keep the footprint and design simple |
| Off-grid option | Solar, water, wastewater and approved heating systems |
The goal isn’t to make this the only possible cabin design. It is to give you a practical framework for making the major decisions in the right order.
Choose the Right DIY Cabin Before You Build
The first question isn’t “How do I build a cabin?”
It is:
“What do I need the cabin to do?”
That answer determines almost everything else.
| Cabin goal | Priorities |
| Weekend retreat | Simple shell, heating, lighting, storage |
| Hunting cabin | Durable finishes, gear storage, simple utilities |
| Guest cabin | Comfortable sleeping, ventilation, basic utilities |
| Studio | Natural light, wall space, electrical outlets |
| Year-round cabin | Insulation, air sealing, heating, ventilation |
| Off-grid cabin | Power, water, wastewater, heating and storage |
| Tiny cabin | Efficient furniture and vertical storage |
Weekend Cabin
A seasonal or occasional cabin can have a simpler utility system than a full-time dwelling.
You may prioritize:
- Sleeping space
- Basic lighting
- Heating
- Storage
- Small food-preparation area
- Simple water arrangement
That doesn’t mean you can ignore structural or safety requirements. The building still needs a suitable foundation, weather protection, drainage and safe systems.
Year-Round Cabin
A cabin used throughout the year needs much more attention to:
- Wall insulation
- Roof insulation
- Floor insulation
- Air sealing
- Windows
- Doors
- Moisture control
- Heating
- Ventilation
Poor insulation becomes particularly noticeable in a small cabin because the interior volume is limited and temperatures can change quickly.
Off-Grid Cabin
An off-grid cabin should be designed around its systems rather than adding them as an afterthought.
Plan the location of:
- Solar equipment
- Batteries
- Water storage
- Plumbing
- Wastewater system
- Heating
- Cooking
- Utility storage
Off-grid building guidance consistently emphasizes planning the structure, site work and utility systems together because the site and infrastructure can become a substantial part of the total project.
A Simple 12 × 16 DIY Cabin Plan
For a practical example, imagine a rectangular 12 × 16-foot cabin.
The exact interior can change, but one efficient arrangement could include:
- Entry near one end
- Main living/sleeping area
- Compact kitchen wall
- Built-in storage
- Optional bathroom or utility corner
- Windows on selected exterior walls
- Optional sleeping loft
The important idea is not the exact floor plan. It is using every part of a small cabin deliberately.
Example Layout
A simple arrangement could divide the cabin into three functional zones:
Zone 1: Entry and storage
Use this area for:
- Shoes
- Coats
- Outdoor equipment
- Cleaning supplies
Zone 2: Living and sleeping
Use the largest uninterrupted section for:
- Bed or convertible seating
- Small table
- Chairs
- Heating equipment
Zone 3: Kitchen and utilities
Keep the kitchen, water lines, electrical equipment and other services close together where practical.
This can reduce unnecessary utility runs and make future maintenance easier.
Why a Simple Rectangle Works
A rectangular cabin has fewer:
- Exterior corners
- Framing complications
- Roof intersections
- Flashing details
- Material transitions
That means fewer places for construction errors.
For a first cabin, simplicity is often a bigger advantage than visual complexity.
How Much Cabin Do You Actually Need?
Before increasing the footprint, list everything that must fit inside.
For example:
- Bed
- Table
- Chairs
- Kitchen counter
- Refrigerator
- Heater
- Clothing
- Tools
- Food
- Bathroom equipment
- Water storage
- Electrical equipment
Then draw those items into the floor plan.
A larger cabin isn’t automatically better.
A small cabin that is fully finished, insulated and weatherproof can be more useful than a large cabin that consumes the entire budget before the interior is completed.
Plan the Site Before Buying Lumber
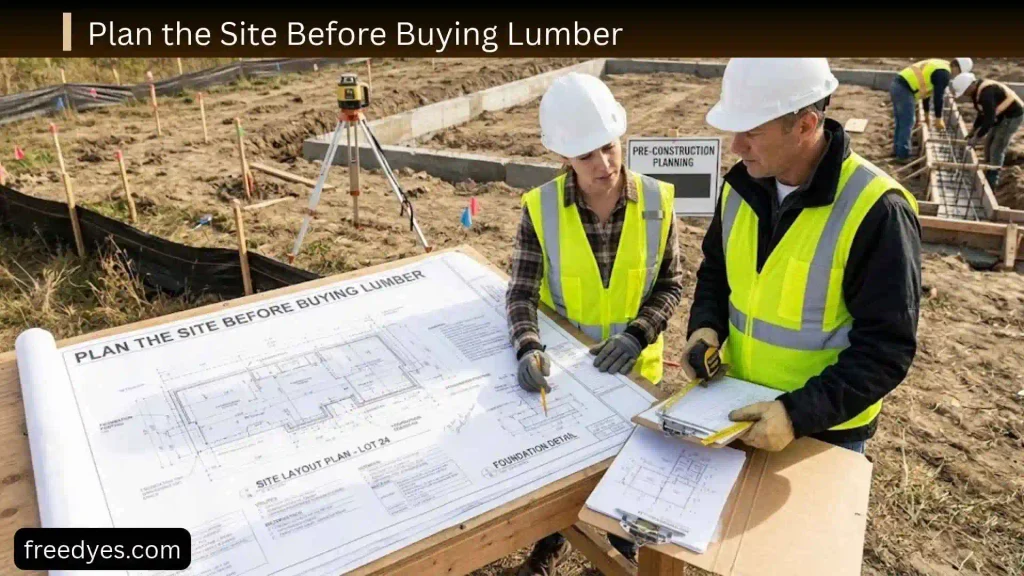
Do not start by ordering framing materials.
Start with the property.
Check:
- Building regulations
- Permits
- Setbacks
- Access
- Drainage
- Slope
- Soil
- Flood risk
- Water source
- Wastewater options
- Electricity availability
- Fire access
- Material delivery access
Local rules can vary significantly, and a structure being small or off-grid does not automatically mean it is exempt from permits or other requirements.
Think About Access
A remote cabin can become much more expensive if materials cannot easily reach the building site.
Consider how you will transport:
- Lumber
- Roofing
- Windows
- Concrete
- Insulation
- Appliances
- Water tanks
- Solar equipment
Site access should be part of the budget, not an afterthought.
Choose the Foundation
The foundation is one of the decisions you should not copy directly from another cabin.
The right system depends on:
- Soil
- Slope
- Groundwater
- Frost conditions
- Cabin size
- Structural loads
- Local requirements
Common foundation approaches include:
- Concrete piers
- Continuous footings
- Slabs
- Helical piles
- Skid-type foundations where permitted and appropriate
Different cabin projects use different systems because site conditions vary.
Concrete Piers
Piers can work well for some small raised cabins.
Potential advantages include:
- Less excavation than some continuous systems
- Raised floor
- Easier leveling on certain sites
- Space beneath the floor
But pier spacing, footing size and structural connections need to be designed for the actual building.
Slab Foundation
A slab can provide a solid ground-level floor and may work well on suitable sites.
It requires proper:
- Site preparation
- Drainage
- Reinforcement
- Insulation where required
- Concrete design
Skid Foundation
A skid system may be suitable for some small structures where local rules and site conditions permit it.
It is not automatically suitable for permanent cabins or frost-prone locations.
Foundation Decision Rule
Don’t ask:
“What foundation did another cabin use?”
Ask:
“What foundation is appropriate for this soil, climate, cabin load and local requirement?”
That is the safer way to approach the decision.
Prepare the Cabin Site
Once the foundation approach is established, prepare the site.
Step 1: Establish the Cabin Location
Mark:
- Cabin corners
- Setbacks
- Finished floor elevation
- Utility routes
- Drainage paths
Step 2: Manage Water
Water should move away from the cabin.
Plan for:
- Roof runoff
- Ground slope
- Downspouts
- Drainage
- Foundation water management
Never design the cabin so that normal rainfall naturally collects against the foundation.
Step 3: Prepare Material Access
Create a practical path for:
- Lumber
- Roofing
- Windows
- Tools
- Concrete or foundation materials
Build the Cabin Floor
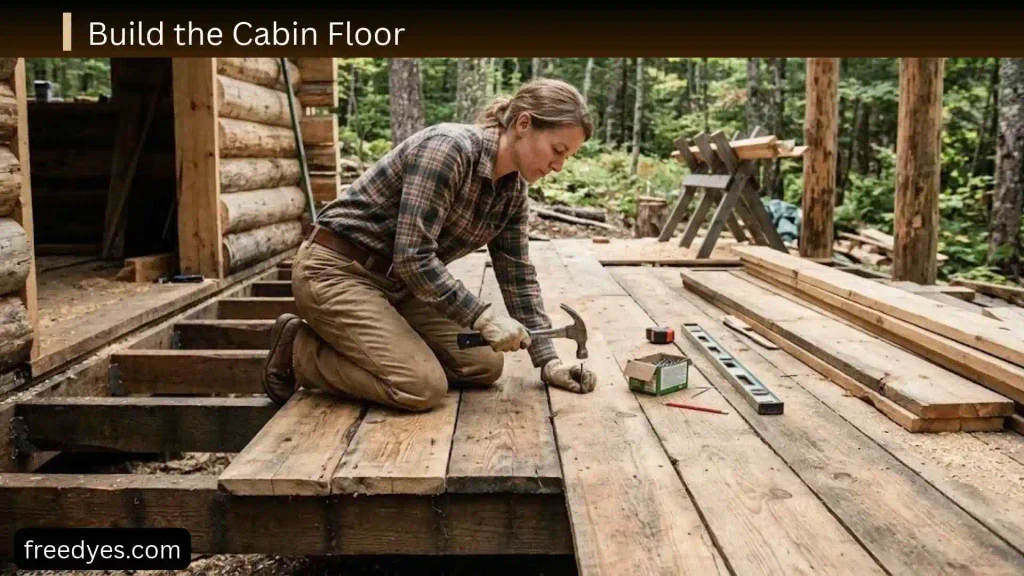
For a raised wood floor, the floor system normally includes structural supports, beams or foundation connections, joists, perimeter framing, blocking where required, and structural subflooring.
The exact member dimensions and spacing depend on span, loads, species, grade and local structural requirements.
Floor-Building Sequence
A general sequence is:
- Complete and verify the foundation supports.
- Install beams or supporting members.
- Install floor joists according to the structural design.
- Add required blocking.
- Check the frame for level.
- Measure the diagonals to check squareness.
- Install the structural subfloor.
- Protect the completed floor from weather.
Check the Floor for Square
Measure both diagonals of the rectangular floor.
If they are different, the frame isn’t square.
Fix this before building walls.
A small error at floor level can become a much larger problem when walls, windows and roof framing are added.
Frame the Cabin Walls
Conventional platform framing is a practical method for many small wood cabins.
A typical wall assembly includes:
- Bottom plate
- Studs
- Top plate
- Door and window openings
- Headers or other structural support
- Structural sheathing where required
Wall stud size and spacing should come from the structural design rather than being selected only because another cabin used the same dimensions.
Lay Out the Walls
Before cutting studs:
- Mark wall locations.
- Mark door openings.
- Mark window openings.
- Mark stud positions.
- Confirm corners.
- Check the overall dimensions.
Build Walls on the Floor
For a small cabin, wall sections can often be assembled flat and then raised.
The basic process is:
- Lay out the bottom plate.
- Position studs.
- Install the top plate.
- Frame openings.
- Add required structural members.
- Check the wall for straightness.
- Install appropriate sheathing if called for.
- Raise the wall.
- Plumb it.
- Temporarily brace it.
- Secure it to the floor structure.
Keep the Walls Plumb
Use a level or appropriate layout equipment to check:
- Vertical walls
- Corners
- Door openings
- Window openings
Don’t permanently secure a wall until you have checked its position.
Plan Doors and Windows
Windows should be selected according to both appearance and function.
Consider:
- Natural light
- Ventilation
- Views
- Privacy
- Furniture placement
- Heat gain/loss
- Weather exposure
Window Placement
A small cabin doesn’t necessarily need many windows.
Instead, place them where they provide the most value.
For example:
- A large window can serve the main living/view area.
- Smaller windows can provide ventilation.
- High windows can provide privacy.
- Opposing openings can help with natural cross-ventilation where climate and design make that useful.
Door Placement
Make sure the door doesn’t interfere with:
- Bed placement
- Kitchen counters
- Furniture
- Heating equipment
- Bathroom access
Draw the door swing on the floor plan before framing.
Build the Cabin Roof
A simple roof is one of the best ways to keep a beginner cabin manageable.
Common choices include:
- Gable roof
- Single-slope roof
- Shed roof
- A-frame roof
For a first build, a simple repeated framing system is generally easier to manage than a roof containing multiple valleys and intersections.
Roof Pitch
Roof pitch affects:
- Rain drainage
- Snow shedding
- Interior headroom
- Loft possibilities
- Roof material
- Exterior appearance
The correct pitch depends on climate, roofing system and structural requirements.
Do not copy a roof pitch from another cabin without checking the requirements for your location.
Roof Overhang
A useful roof overhang can help protect:
- Exterior walls
- Windows
- Doors
- Siding
It also changes the appearance of the cabin.
Plan the overhang before finalizing wall and roof dimensions.
Install the Roof Weather Barrier
After the structural roof framing is complete:
- Check the roof geometry.
- Install structural roof sheathing as specified.
- Install the required underlayment.
- Complete flashing.
- Install the roofing material.
- Finish roof edges and penetrations.
- Install drainage components where appropriate.
Get the roof weather-tight as early as possible.
Choose Roofing for the Cabin
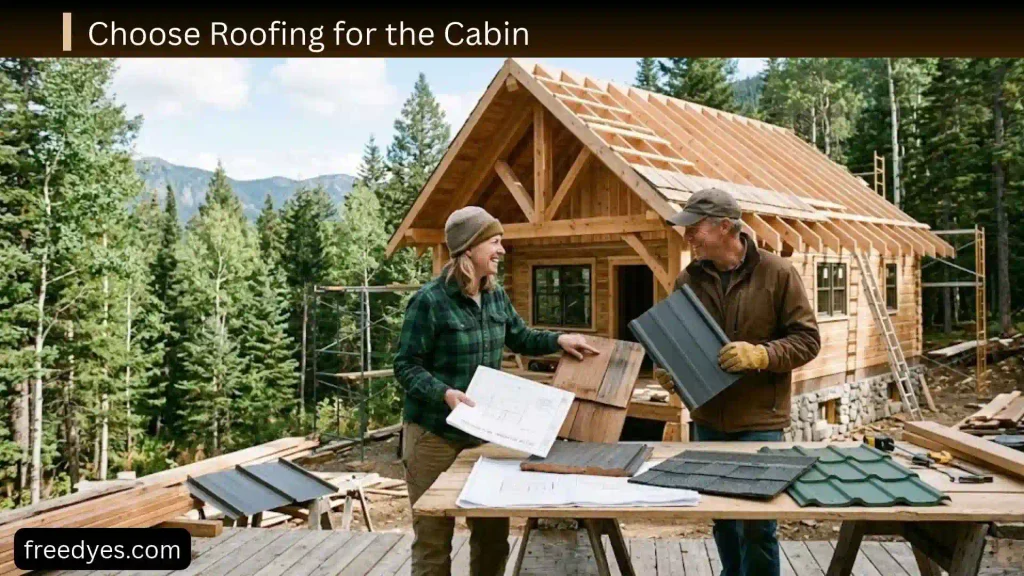
Two common options are metal roofing and asphalt shingles.
Metal Roofing
Metal can be attractive for cabins because of its durability and low-maintenance characteristics.
It can also work well for some rainwater collection systems, subject to local water-use rules and appropriate system design.
Asphalt Shingles
Asphalt shingles can be practical when:
- They suit the roof pitch
- Local climate is appropriate
- They are readily available
- Installation requirements are understood
The best roofing material isn’t necessarily the cheapest one at purchase.
Consider its expected maintenance and compatibility with the roof design.
Weatherproof the Cabin Before Finishing the Interior
This is one of the most important stages.
Before spending heavily on interior finishes, make sure the exterior can keep water out.
Pay particular attention to:
- Roof penetrations
- Window openings
- Door openings
- Wall-to-roof transitions
- Exterior corners
- Foundation-to-wall connection
- Siding details
- Flashing
Don’t Use Caulk as Your Entire Waterproofing System
Caulk can be part of a proper installation, but it should not replace correctly designed flashing and drainage.
Water should be directed outward through the building envelope rather than simply blocked with sealant.
Good cabin waterproofing is based on layers and drainage, not a tube of caulk.
Insulate the DIY Cabin
Insulation requirements vary according to climate and building assembly.
Possible materials include:
- Fiberglass
- Mineral wool
- Cellulose
- Rigid foam
- Spray foam
The important question isn’t simply:
“Which insulation is best?”
It is:
“Which insulation and assembly are appropriate for this climate and wall, floor or roof design?”
Cold-Climate Cabin
Prioritize:
- Roof/ceiling insulation
- Floor insulation
- Wall insulation
- Air sealing
- Quality windows
- Proper door seals
- Moisture control
Warm-Climate Cabin
Prioritize:
- Roof insulation
- Solar shading
- Ventilation
- Window placement
- Reflective or appropriate roofing
- Efficient cooling
Mixed Climate
A mixed climate requires balanced attention to:
- Heating
- Cooling
- Air sealing
- Moisture
- Ventilation
Off-grid building guidance particularly emphasizes the importance of insulation and air sealing because energy losses can place additional demands on limited heating fuel or battery capacity.
Air Sealing the Cabin
Air can leak through small openings around:
- Electrical penetrations
- Plumbing
- Windows
- Doors
- Floor edges
- Roof penetrations
- Wall joints
Insulation alone doesn’t stop uncontrolled air movement.
Air-Sealing Checklist
Before closing the walls, inspect:
- Every pipe penetration
- Every cable penetration
- Window and door interfaces
- Floor-to-wall connections
- Wall-to-roof transitions
- Utility penetrations
A cabin with good insulation but major uncontrolled air leaks can still be uncomfortable and inefficient.
Install the Windows and Doors
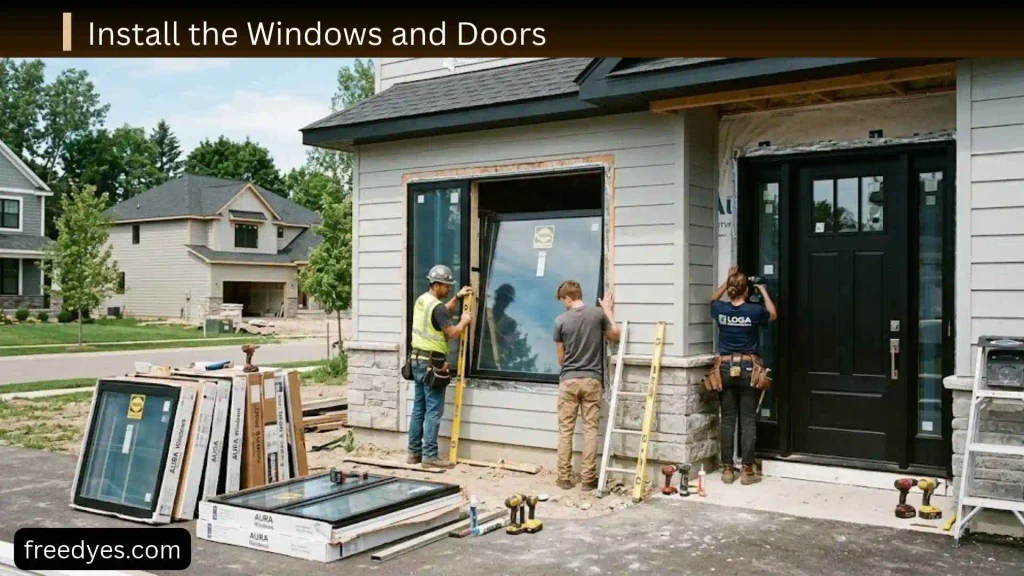
Windows and doors should be installed according to their manufacturer’s requirements and with appropriate flashing.
Check:
- Level
- Plumb
- Square
- Operation
- Sealing
- Flashing
- Drainage
Open and close every door and window before covering surrounding areas.
It is much easier to correct a problem before the interior is finished.
Plan Electrical Work Before Closing the Walls
Electrical planning should happen before insulation and interior wall coverings.
Mark:
- Light locations
- Switches
- Outlets
- Appliance outlets
- Exterior lights
- Heating equipment
- Solar equipment
- Battery location
- Main electrical equipment
DIY or Electrician?
Basic planning can be done by the cabin owner.
Actual electrical installation should follow applicable local requirements, including licensing and inspection rules where required.
Do not improvise mains electrical wiring inside a cabin simply to reduce the project cost.
Plan Plumbing Before Framing Is Finished
If the cabin will have plumbing, decide early where you need:
- Sink
- Shower
- Toilet
- Water heater
- Water tank
- Pump
- Drain lines
- Exterior connections
Keeping wet areas close together can simplify the layout.
For example, placing the kitchen and bathroom on the same side of the cabin can reduce the length and complexity of plumbing runs.
Heating the DIY Cabin
Heating depends on:
- Climate
- Cabin size
- Insulation
- Electricity availability
- Fuel availability
- Occupancy
- Local rules
Possible systems include:
- Electric heater
- Mini-split heat pump
- Wood stove
- Approved propane system
- Other locally permitted heating equipment
Wood Stove
A wood stove can work well for some cabins, particularly where firewood is readily available.
But it requires proper attention to:
- Clearances
- Chimney
- Combustion
- Floor protection
- Wall protection
- Ventilation
- Carbon monoxide detection
Never improvise a chimney or reduce required clearances to fit a small room.
Electric Heating
Electric heating can be simple on a reliable electrical grid.
For an off-grid cabin, however, heating can consume much more energy than lighting and small electronics.
That means the heating system should be considered when sizing the entire power system.
Planning an Off-Grid Cabin
An off-grid cabin should be designed around four major systems:
- Electricity
- Water
- Wastewater
- Heating
Off-Grid Electricity
A basic solar system may contain:
- Solar panels
- Charge controller
- Battery storage
- Inverter
- Distribution/protection equipment
Start by listing your loads.
For example:
| Load | Frequency |
| LED lighting | Daily |
| Phone charging | Daily |
| Refrigerator | Daily |
| Water pump | Intermittent |
| Laptop | Intermittent |
| Microwave | Short but high power |
| Electric heater | Potentially very high |
The cabin’s electrical design should come from expected usage rather than starting with an arbitrary solar-panel size.
Off-Grid Water
Potential sources include:
- Well
- Rainwater collection where permitted
- Delivered water
- Other approved sources
You may need:
- Storage
- Pump
- Filtration
- Treatment
- Pressure system
Water quality and treatment requirements depend on the source and local regulations.
Wastewater
Possible solutions vary by property and jurisdiction.
Depending on local requirements, they may include:
- Septic system
- Approved composting toilet
- Other permitted wastewater systems
Never assume an off-grid wastewater solution is legal simply because another cabin uses it.
Add a Loft or Keep One Level?
A loft can increase usable sleeping or storage space without increasing the ground footprint.
But it adds:
- Structural loads
- Access requirements
- Headroom considerations
- Guard/rail requirements where applicable
- Stairs or ladder
- Additional framing
A Loft Makes Sense When:
- The cabin has limited floor area.
- Sleeping space can be separated from the living area.
- You are comfortable with the additional structural planning.
Skip the Loft When:
- The cabin is already large enough.
- Accessibility is important.
- You want the simplest possible construction.
- You don’t want stairs or a ladder taking floor space.
Small Cabin Storage Ideas
Storage is one of the biggest challenges in a small cabin.
Use vertical and hidden space.
Useful ideas include:
- Under-bed drawers
- Built-in benches
- High shelves
- Wall-mounted cabinets
- Narrow pantry cabinets
- Entry storage
- Loft storage
- Hooks near the door
- Storage under stairs
- Fold-down tables
Design Storage Before Furniture
Don’t fill the cabin with furniture and then ask where everything else will go.
Instead, draw:
- Bed
- Table
- Seating
- Kitchen
- Storage
on the floor plan first.
Cabin Shell vs Finished Cabin
This distinction is important when budgeting.
Cabin Shell
A shell generally refers to the main structure and weather protection, such as:
- Foundation
- Floor
- Walls
- Roof
- Exterior weatherproofing
- Basic doors/windows
Finished Cabin
A finished cabin may additionally require:
- Insulation
- Interior walls
- Flooring
- Electrical
- Lighting
- Plumbing
- Heating
- Kitchen
- Bathroom
- Cabinets
- Appliances
- Water system
- Wastewater system
A low-cost shell price should never be confused with the cost of a comfortable, finished cabin.
How to Keep a DIY Cabin Affordable
The most effective savings usually come from simplifying the design, not from cutting critical construction quality.
Save Money With the Design
Use:
- Small footprint
- Rectangular shape
- Standard windows
- Standard doors
- Simple roof
- Fewer interior partitions
- Short plumbing runs
- Simple finishes
Save Money With Phased Construction
You can divide the project into:
Phase 1: Site and foundation
Phase 2: Floor, walls and roof
Phase 3: Weatherproof exterior
Phase 4: Insulation and utilities
Phase 5: Interior finishing
Phase 6: Optional upgrades
This allows you to concentrate money on getting the building structurally complete and weather-tight before spending heavily on decoration.
Where You Should Not Cut Costs
Avoid trying to save money by compromising:
- Foundation stability
- Structural framing
- Roof waterproofing
- Flashing
- Electrical safety
- Heating safety
- Required insulation
- Water management
- Structural connections
- Required inspections
Save money on decorative details before sacrificing the systems that protect the building.
How to Estimate DIY Cabin Cost
Avoid relying on a single internet price.
Create a project budget by category.
| Category | Include |
| Site | Clearing, grading, access |
| Foundation | Footings, piers, slab or other system |
| Floor | Joists, subfloor, insulation |
| Walls | Lumber, sheathing, fasteners |
| Roof | Framing, sheathing, roofing |
| Openings | Windows and doors |
| Exterior | Siding, trim, flashing |
| Insulation | Walls, roof, floor |
| Interior | Walls, ceiling, flooring |
| Electrical | Wiring, outlets, lighting |
| Plumbing | Pipes, fixtures, pump |
| Heating | Heater, chimney or related equipment |
| Off-grid power | Solar, batteries, inverter |
| Water | Tank, pump, filtration |
| Wastewater | Approved system |
| Tools | Purchases and rentals |
| Delivery | Material transportation |
| Contingency | Unexpected costs |
Current cabin-building examples show why a simple structure and a complete off-grid project can have very different budgets: site work, water, power and other infrastructure can substantially change the final cost.
Use a Contingency
Keep money available for:
- Damaged materials
- Extra fasteners
- Delivery charges
- Site surprises
- Tool rental
- Design changes
- Weather-related delays
- Replacement materials
If your budget has no room for surprises, it is probably too tight.
DIY Cabin Build Order
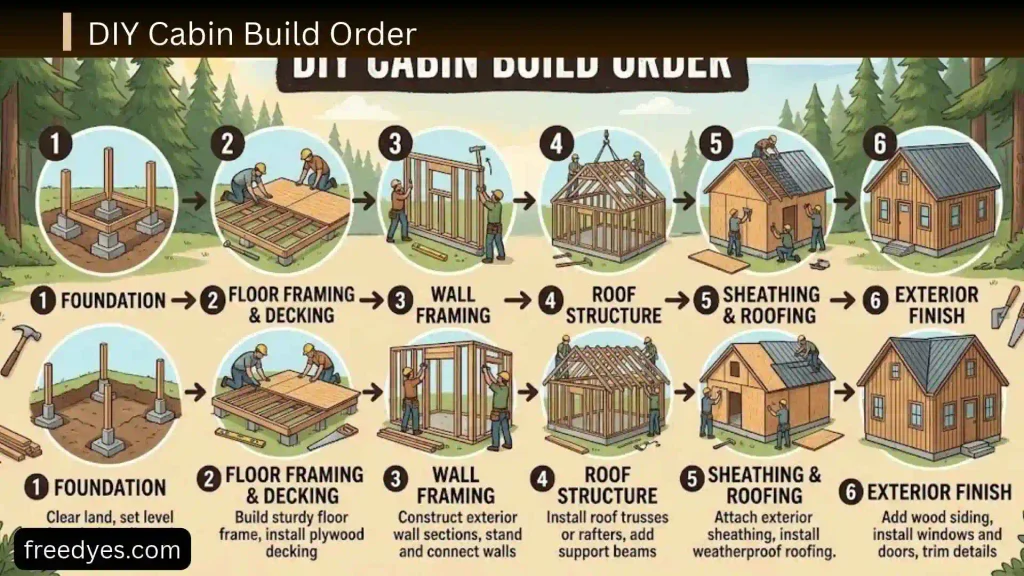
A useful overall construction sequence is:
- Confirm property requirements.
- Decide how the cabin will be used.
- Finalize the floor plan.
- Assess the site.
- Choose the foundation.
- Plan drainage.
- Plan utilities.
- Order materials.
- Build the foundation.
- Build the floor.
- Frame the walls.
- Install structural sheathing as required.
- Frame the roof.
- Install roof sheathing and weather protection.
- Install roofing.
- Install windows and doors.
- Weatherproof the exterior.
- Complete rough electrical/plumbing work.
- Insulate and air-seal.
- Finish the interior.
- Install fixtures and heating.
- Complete exterior finishing.
- Inspect and test systems.
- Complete required inspections.
- Begin regular maintenance.
This order can change depending on the foundation, construction system and local requirements, but the basic principle is consistent: get the structure stable and weather-tight before investing heavily in finishes.
What Can a Beginner DIY?
Some tasks are more approachable for a capable beginner than others.
More Suitable for DIY
Depending on skill level:
- Measuring and layout
- Basic framing
- Sheathing
- Siding
- Painting
- Interior trim
- Flooring
- Shelving
- Basic non-structural furniture
Work That May Need Specialist Help
Depending on local law and project complexity:
- Structural engineering
- Foundation design
- Electrical work
- Gas systems
- Septic systems
- Major plumbing
- Complex heating installations
- Structural modifications
The goal isn’t to do every task yourself.
The goal is to build as much as you can without creating a safety or compliance problem.
Common DIY Cabin Mistakes
Building Too Large
A larger footprint increases material, foundation, roofing and finishing costs.
Better approach: design around actual needs.
Choosing the Foundation From a Random Cabin Plan
Different soil and climates require different approaches.
Better approach: evaluate the actual property first.
Making the Roof Too Complicated
Roof valleys and intersections increase construction and waterproofing complexity.
Better approach: choose a simple roof unless there is a strong reason not to.
Ignoring Drainage
Water around the foundation can create long-term problems.
Better approach: plan roof runoff and site drainage before construction.
Adding Too Many Windows
More windows increase cost and can affect energy performance and furniture placement.
Better approach: place windows intentionally.
Forgetting Storage
A small cabin can become cluttered quickly.
Better approach: include storage in the original floor plan.
Closing Walls Too Early
Finishing the walls before concealed utilities are complete can force you to remove finished materials.
Better approach: photograph and verify all concealed systems before closing walls.
Choosing Heating Too Late
Heating affects ventilation, electrical demand, fuel storage and interior layout.
Better approach: choose the heating strategy during design.
Spending the Budget on Appearance First
Decorative features don’t make an unfinished cabin weather-tight.
Better approach: prioritize foundation, structure, roof, drainage, insulation and utilities first.
DIY Cabin Troubleshooting
The Cabin Feels Cold Even With Insulation
Possible causes include:
- Air leaks
- Poor floor insulation
- Weak roof insulation
- Poor door seals
- Window leakage
- Thermal bridges
- Insufficient heating
Check the building envelope before simply installing a larger heater.
Water Is Appearing Near a Window
Possible causes include:
- Incorrect flashing
- Poor drainage
- Failed seal
- Water entering higher in the wall
Don’t immediately seal the interior stain and ignore the source.
Find where the water is entering.
The Floor Feels Uneven
Possible causes include:
- Foundation settlement
- Incorrect support height
- Framing variation
- Subfloor installation problems
Do not assume the finish flooring is the problem until the underlying structure has been checked.
The Cabin Is Humid
Potential causes include:
- Poor ventilation
- Indoor drying
- Bathroom moisture
- Cooking moisture
- Water leaks
- Ground moisture
Address the source instead of simply adding more heating.
The Cabin Gets Too Hot in Summer
Check:
- Roof insulation
- Solar exposure
- Window shading
- Ventilation
- Window placement
- Air movement
A well-designed cabin needs to deal with both heating and cooling.
DIY Cabin Maintenance
Inspect the cabin periodically.
Check:
- Roof
- Flashing
- Gutters
- Downspouts
- Siding
- Windows
- Doors
- Foundation
- Drainage
- Sealants
- Plumbing
- Heating equipment
After Severe Weather
Look for:
- Roof damage
- Loose flashing
- Water entry
- Fallen branches
- Damaged siding
- Blocked drainage
- Foundation movement
Small problems are easier to repair before they become structural moisture problems.
DIY Cabin Pre-Build Checklist
Before construction begins:
- Confirm the property can legally accommodate the structure.
- Check permits and setbacks.
- Decide whether the cabin is seasonal or year-round.
- Choose the approximate footprint.
- Draw the interior layout.
- Plan storage.
- Decide whether you need a loft.
- Assess soil and slope.
- Choose a foundation approach.
- Plan drainage.
- Select the roof design.
- Plan windows and doors.
- Decide on insulation.
- Choose heating.
- Plan electrical needs.
- Plan water.
- Plan wastewater.
- Calculate the project budget.
- Add contingency.
- Plan material delivery.
- Arrange necessary tools.
- Identify work that requires professional help.
DIY Cabin Final Inspection Checklist
Before using the cabin:
- Roof is weather-tight.
- Flashing is complete.
- Doors operate correctly.
- Windows operate and seal properly.
- Foundation and supports are stable.
- Drainage moves water away from the cabin.
- Electrical system is complete and compliant.
- Heating equipment is properly installed.
- Required smoke/CO detection is installed.
- Plumbing has been tested.
- Water system has been checked.
- Wastewater system is approved and functional.
- Insulation and air sealing are complete.
- Interior finishes are secure.
- Required inspections have been completed.
Frequently Asked Questions
What is the easiest DIY cabin to build?
A small rectangular wood-frame cabin with a simple roof is generally easier to manage than a design with multiple rooflines, unusual angles and numerous interior partitions.
What is a good size for a small DIY cabin?
A 12 × 16-foot footprint is a useful example for planning a compact cabin, but the appropriate size depends on the number of occupants and whether you need a kitchen, bathroom, storage, loft or year-round utilities.
Can I build a cabin myself?
Many owners can perform portions of cabin construction themselves, particularly basic carpentry and finishing. However, structural, electrical, plumbing, foundation and utility work may require professional design, installation or inspection depending on the project and location.
What is the cheapest way to build a cabin?
The biggest savings usually come from reducing complexity: use a small footprint, rectangular layout, simple roof, standard openings, short utility runs and uncomplicated finishes.
Can a small cabin be off-grid?
Yes. An off-grid cabin can use systems such as solar power, battery storage, water storage and approved wastewater solutions. These systems should be planned before construction because they affect the cabin layout and budget.
Is a loft a good idea for a small cabin?
A loft can provide additional sleeping or storage space without increasing the ground footprint, but it adds structural and access requirements. It is best planned during the original design.
Should I use 2×4 or 2×6 walls?
That depends on structural requirements, climate, insulation goals and local building requirements. A larger wall cavity can provide more room for insulation, but the framing should not be selected from a generic cabin article alone.
Can I build a cabin without plumbing?
A simple seasonal cabin may be designed without full indoor plumbing, depending on its intended use and local rules. Water, toilet and wastewater arrangements still need to be safe and legally appropriate.
What is the most important part of a cabin build?
There isn’t one single component. A successful cabin needs a suitable foundation, sound structure, reliable drainage, weatherproofing, appropriate insulation, safe utilities and proper maintenance.
How long does it take to build a DIY cabin?
The timeline depends on cabin size, foundation, worker experience, weather, material availability, tool access and how finished the cabin needs to be. A weather-tight shell is substantially different from a fully finished year-round cabin.
Can reclaimed wood be used for a DIY cabin?
Reclaimed wood can be useful for appropriate applications, particularly interior finishes and some non-critical components. Structural use requires careful evaluation of the material’s condition, grade and suitability for the intended load.
What should I build first on an off-grid property?
Plan the complete system first. Site access, foundation, cabin location, water, wastewater, solar, battery storage and heating can affect one another, so designing them separately can lead to expensive changes later.
Final Thoughts
A successful DIY cabin doesn’t start with the most complicated floor plan or the cheapest materials.
It starts with a realistic understanding of what the cabin needs to do.
Choose the smallest practical footprint, keep the shape simple, evaluate the actual site before selecting the foundation, plan drainage early, and design utilities before closing the walls.
For a first project, a simple rectangular cabin with a straightforward roof, practical windows, efficient storage, appropriate insulation and carefully planned utilities provides a strong starting point.
Most importantly, don’t sacrifice structural safety, waterproofing, electrical safety or required approvals just to reduce the budget.
Build smaller if necessary. Build more slowly if necessary. But build the important parts correctly.