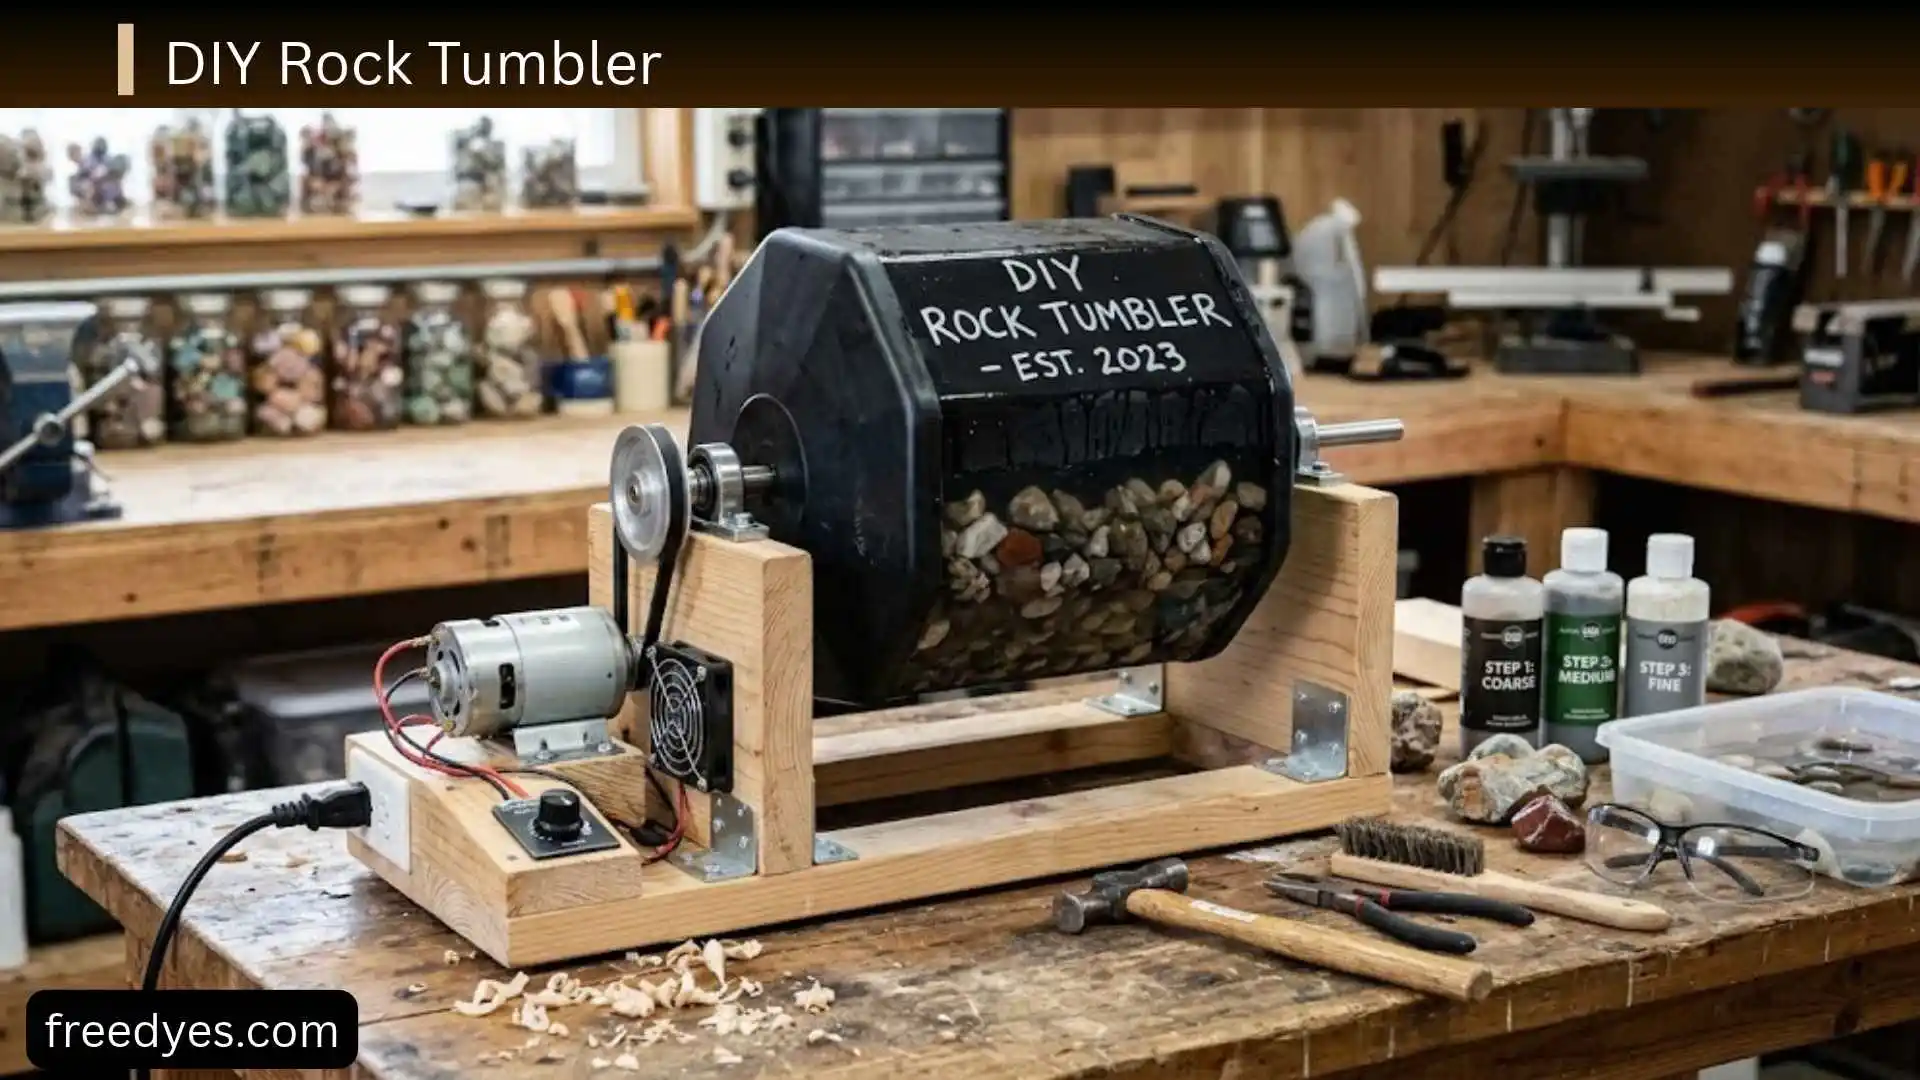
There is something incredibly satisfying about turning rough, ordinary rocks into smooth, polished gems with your own hands. A DIY rock tumbler is an affordable and creative project that allows you to explore the fascinating world of rock polishing without investing in expensive equipment. Whether you are looking for a fun family activity, a science project, or a new hobby, building your own rock tumbler can be both rewarding and educational.
In this guide, I explain everything you need to know about making a DIY rock tumbler, from the materials you need to the step-by-step process of assembling and using it. I also share practical tips to help you achieve better polishing results, avoid common mistakes, and keep your homemade tumbler running smoothly. By the end, you will have the confidence to create your own rock tumbler and transform rough stones into beautiful, polished treasures.
DIY Rock Tumbler at a Glance
| Feature | Practical starting point |
| Tumbler type | Rotary |
| Barrel position | Horizontal |
| Drive | Slow geared motor |
| Support | Two rollers |
| Frame | Wood or metal |
| Best beginner barrel | Strong cylindrical, sealable container |
| Rock load | About 1/2 to 2/3 full |
| Main abrasive | Silicon carbide |
| Typical stages | Coarse, medium, fine, polish |
| Typical project time | Several weeks |
| Difficulty | Moderate |
| Best for | Hobby rock polishing and DIY machine building |
Important: A homemade tumbler combines rotating machinery, abrasive material, water, and electricity. Keep electrical components protected from water, guard moving parts, secure the frame, and test the machine thoroughly before leaving it to operate for an extended cycle.
Which DIY Rock Tumbler Design Is Best?
Not every homemade tumbler needs to use the same drive system.
Simple Rotary Tumbler
This is the best starting point for most DIY builders.
A cylindrical barrel sits across two parallel rollers. One roller receives power from the motor and turns the barrel.
Best for: beginners who want a reusable rock-polishing machine.
Advantages:
- Relatively simple construction
- Easy barrel removal
- Easy to inspect
- Easy to repair
- Can be customized for different barrel sizes
Drill-Powered Prototype
A drill can be useful for proving that a barrel-and-roller arrangement works.
However, a drill is better treated as a prototype or temporary drive than an automatic permanent solution. Continuous operation creates concerns involving heat, trigger control, mounting, ventilation, and mechanical stability.
Best for: testing the mechanical concept.
Dedicated Geared-Motor Tumbler
A geared motor is the better choice for a permanent homemade tumbler because the gearbox can provide slow, continuous rotation.
Best for: regular rock tumbling.
Rotary vs. Vibratory Tumblers
This article focuses on a rotary tumbler.
A vibratory tumbler uses a different mechanism and follows a different tumbling process. It should not be treated as simply a faster version of the roller-barrel design.
For a first DIY build, the rotary system is easier to understand because the mechanical action is straightforward: the barrel rotates, the rocks cascade, and abrasive grit works between them.
DIY Rock Tumbler Plan

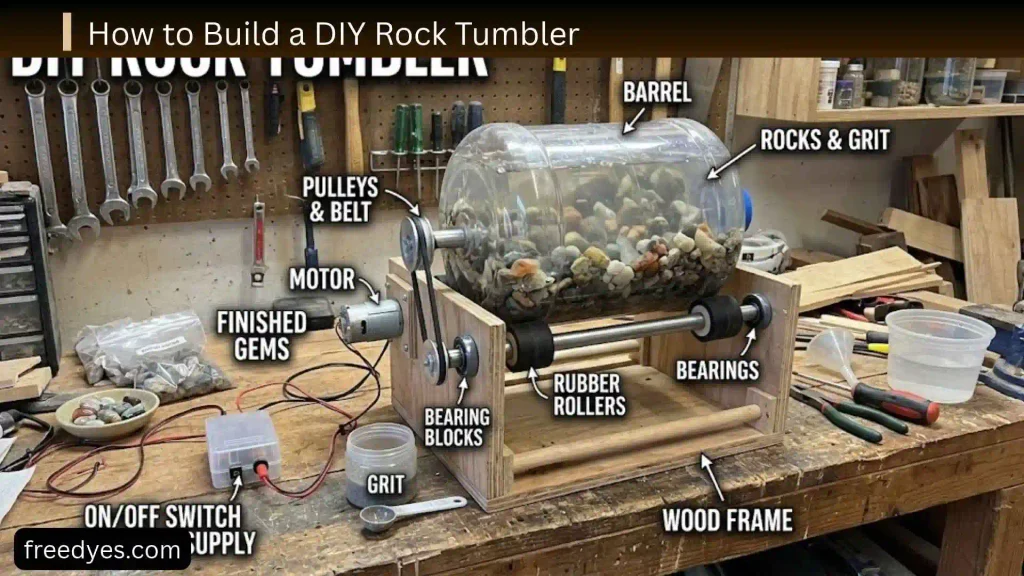
The easiest useful design has five major parts:
- Barrel
- Two rollers
- Frame
- Geared motor
- Drive connection
The motor turns one roller. Friction between the roller and barrel turns the barrel. The second roller supports the opposite side.
Example Frame Design
For a small hobby barrel, an illustrative wooden frame could use:
- Two long side rails
- Two end supports
- Four bearing supports
- Two roller shafts
- A separate motor platform
- Optional cross-bracing
A frame around 24–30 inches long and roughly 12–16 inches wide can be a useful starting envelope for a small homemade machine, but do not cut the lumber until you have measured your actual barrel and rollers.
The important dimension is not the overall frame size.
It is the distance between the rollers.
How to Determine Roller Spacing
Measure the outside diameter of the barrel.
Then position the rollers so the barrel sits securely between them without touching the frame.
Start with a temporary arrangement before permanently drilling the bearing holes.
Place the empty barrel on the rollers and confirm that:
- It sits level.
- It cannot easily fall between the rollers.
- It has enough room to rotate.
- The lid does not strike the frame.
- The barrel can be removed without dismantling the machine.
Do not permanently fix the roller spacing until the actual barrel has been tested on the frame.
Example DIY Rock Tumbler Cut List
Because barrels vary, the following is a planning example rather than a universal cut list.
| Part | Example starting point | Purpose |
| Side rails | 2 pieces, approximately 24–30 in. | Main frame |
| End supports | 2 pieces, sized to frame width | Connect frame |
| Roller shafts | Sized to chosen bearings | Support rollers |
| Roller bodies | Sized to barrel width | Turn barrel |
| Motor platform | Sized to motor | Holds motor |
| Cross-braces | As needed | Reduce frame movement |
For the rollers, use a diameter and material appropriate for the barrel. Rubber-coated or naturally high-friction surfaces can help maintain contact.
Measure twice before drilling. The barrel, not a generic plan, should determine the final roller spacing.
How a DIY Rock Tumbler Works
The process has two separate systems.
Mechanical System
The motor turns the roller.
The roller turns the barrel.
The rotating barrel lifts the rocks.
The rocks then fall and slide through the load.
Abrasive System
Grit becomes trapped between moving rocks.
As the rocks repeatedly collide and slide, the abrasive removes small amounts of material.
That is why rock tumbling is not simply “washing rocks in a spinning container.”
The machine needs a controlled combination of:
- Rotation
- Rock movement
- Abrasive
- Water
- Appropriate load
- Time
Choosing the Barrel
The barrel is one of the most important parts of the DIY machine.
A good barrel should be:
- Strong
- Cylindrical
- Water-resistant
- Abrasion-resistant
- Securely closable
- Easy to clean
- Balanced during rotation
A barrel that looks sturdy when empty may behave very differently after adding rocks, grit, and water.
What to Avoid
Avoid containers that:
- Flex heavily under pressure
- Have unreliable lids
- Leak around the closure
- Have weak handles that interfere with rollers
- Become unstable when loaded
- Are badly out of round
- Cannot tolerate repeated abrasion
A household container can work only if it can safely perform the job. “Available at home” does not automatically mean “suitable for continuous mechanical rotation.”
How Large Should the Barrel Be?
A larger barrel is not automatically better.
A large barrel requires:
- More rocks
- More water
- More grit
- More motor torque
- Stronger rollers
- A stronger frame
For a first build, a smaller barrel is easier to balance and troubleshoot.
The barrel should also have enough room for the rocks to move rather than becoming a tightly packed mass.
Choosing the Motor and Roller System

The motor is where many homemade tumbler designs fail.
A motor that can spin an empty barrel may stall once the barrel is filled.
Your motor must handle the combined load of:
- Barrel
- Rocks
- Water
- Grit
- Roller friction
- Starting resistance
Geared Motor vs. High-Speed Motor
A geared motor is generally the easier choice because the gearbox reduces the output speed and increases usable torque.
A high-speed motor can be used only if the drive system is properly designed to reduce its speed.
Do not assume that adding a random speed controller automatically turns a high-speed motor into a suitable rock-tumbler motor.
Motor Selection Checklist
Before choosing a motor, determine:
- Barrel diameter
- Empty barrel weight
- Expected rock weight
- Water weight
- Roller diameter
- Desired barrel speed
- Expected operating time
- Available electrical supply
Then select a motor and reduction system that can continuously handle the loaded machine.
How Fast Should a DIY Rock Tumbler Rotate?
There is no single RPM that works for every homemade tumbler.
Barrel diameter changes the surface speed, so two barrels turning at the same RPM can behave differently.
The practical goal is controlled cascading.
Too Slow
The rocks mostly slide around the bottom.
There is little lifting and falling action.
Reasonable
The rocks move upward with the barrel and then cascade downward through the load.
You should hear a consistent tumbling sound rather than constant hard impacts.
Too Fast
The rocks can start riding around the barrel wall instead of falling.
That reduces the type of cascading action you want.
Adjust speed based on the actual barrel and load rather than copying an RPM number from a different tumbler.
How to Prevent the Barrel From Slipping
If the barrel stops turning while the motor continues running, the drive may be slipping.
Check:
- Roller surface
- Barrel surface
- Roller alignment
- Motor torque
- Load size
- Drive tension
- Frame rigidity
The contact between the powered roller and barrel needs enough traction to transfer motion without damaging the barrel.
How to Stop the Barrel From Walking Sideways
A barrel that slowly moves toward one side is usually telling you something about alignment.
Check whether:
- Rollers are parallel
- Roller shafts are level
- Frame is square
- Barrel is symmetrical
- Bearings are mounted evenly
- One roller is angled
Do not immediately add rigid side stops.
First correct the alignment.
A badly aligned barrel can place unnecessary sideways force on the rollers and frame.
How to Build a DIY Rock Tumbler
Step 1: Measure the Barrel
Record:
- Outside diameter
- Length
- Loaded weight
- Lid dimensions
- Roller contact area
Do not build the frame from assumptions.
Step 2: Build the Frame
Construct a rigid rectangular frame.
The frame should not twist when you push on one corner.
If the frame flexes while empty, it will usually behave worse once the barrel is loaded.
Step 3: Install the Roller Bearings
Mount the bearings so the shafts remain parallel.
Use a straightedge or similar measuring method to check alignment before tightening everything permanently.
Step 4: Install the Rollers
Place the rollers so the barrel sits securely.
Turn the barrel by hand.
Check that it:
- Rotates freely
- Does not scrape the frame
- Remains centered
- Does not wobble excessively
Step 5: Mount the Motor
Mount the motor on a solid platform.
Leave enough adjustment for the drive system.
The motor should not be allowed to vibrate independently of the frame.
Step 6: Connect the Drive
A belt, chain, or other suitable transmission can connect the motor to the powered roller.
Choose a system that matches your motor speed and required reduction.
Make sure moving belts, chains, and pulleys are guarded where practical.
Step 7: Turn the Barrel by Hand
Before connecting power, rotate the barrel manually.
This catches many problems early.
Look for:
- Binding
- Scraping
- Uneven roller contact
- Frame interference
- Excessive resistance
Step 8: Test the Empty Machine
Run the empty system briefly.
Watch for:
- Excessive vibration
- Roller movement
- Bearing noise
- Motor overheating
- Barrel wandering
- Drive slippage
Step 9: Test With a Partial Load
Do not begin with the maximum possible load.
Add a partial load and repeat the test.
If the motor struggles, stop and correct the problem before beginning a multi-day tumbling cycle.
DIY Rock Tumbler First-Test Procedure
A short test can prevent a long and frustrating failure.
Test 1: Empty
Confirm smooth rotation.
Test 2: Partial Weight
Check whether the motor still starts reliably.
Test 3: Loaded Barrel
Check the rollers and frame.
Test 4: Extended Test
Run the loaded machine long enough to identify heating, slipping, or alignment problems.
Test 5: Leak Check
Inspect the barrel and lid after operation.
Do not commit a new homemade machine to a week-long cycle until it has passed shorter tests.
How to Choose Rocks for Tumbling
The machine can work perfectly and still produce poor results if the rocks are unsuitable.
Good tumbling material should generally be:
- Durable
- Suitable for polishing
- Free of excessive cracks
- Reasonably compatible in hardness
- Appropriate for the barrel size
Common materials used for rotary tumbling include agate, jasper, quartz, and petrified wood.
Some established tumbling guidance recommends hard, polishable material and warns that mixing much softer stones with harder material can cause the softer stones to wear away before the harder ones are finished.
Should You Mix Different Rocks?
For predictable results, it is usually easier to tumble similar material together.
Mixing rocks with very different hardnesses can make the batch harder to diagnose if something goes wrong.
For a beginner, one compatible rock type per batch is the simplest approach.
How Full Should a Rock Tumbler Be?
For rotary tumbling, a practical starting point is around 1/2 to 2/3 full, depending on the barrel and material.
Established rotary-tumbling instructions commonly use that range because an appropriate load gives the rocks enough contact and movement without leaving them excessively loose.
If the Barrel Is Too Empty
The rocks can move too violently.
This can increase impact and bruising.
If the Barrel Is Too Full
There may not be enough room for effective movement.
The rocks can become packed instead of cascading.
What About Ceramic Media?
Ceramic media can fill empty spaces when the rock volume drops after earlier grinding stages.
It can also help provide a smoother tumbling action.
How to Use Rock-Tumbling Grit
A typical rotary process has four main stages:
| Stage | Purpose | Typical abrasive |
| 1 | Shape and remove rough surfaces | Coarse silicon carbide |
| 2 | Remove scratches | Medium silicon carbide |
| 3 | Produce a very smooth surface | Fine silicon carbide |
| 4 | Create final shine | Rock-polishing compound |
A commonly used sequence is approximately 60/90 coarse → 120/220 or 150/220 medium → 500/600 fine → polish, although exact products and schedules vary.
Stage 1: Coarse Grinding
The coarse stage does the heavy shaping.
It removes:
- Sharp edges
- Rough surfaces
- Deep imperfections
- Uneven areas
A common starting point is 60/90 silicon carbide.
For many rotary setups, about a week is used as an initial inspection point, but the rocks may need longer. Some materials can require multiple coarse cycles before they are ready to move forward.
Don’t Rush This Stage
If deep scratches remain, moving to finer grit does not magically remove them.
Inspect the rocks after the stage.
If they are still badly scratched or poorly shaped, repeat the appropriate coarse grinding stage.
Stage 2: Medium Grinding
The medium stage removes scratches left by coarse grit.
A common choice is 120/220 or 150/220 silicon carbide.
The goal is a smooth, evenly frosted surface.
If the rocks still have obvious deep scratches, they are not ready for pre-polish.
Stage 3: Fine Grinding
The fine stage prepares the rocks for polishing.
A 500- or 600-grade abrasive is commonly used.
At the end of this stage, properly prepared rocks should feel extremely smooth and may show a slight luster when dry.
The Important Check
Dry the rocks and inspect them under bright light.
If you can still see scratches, return to the earlier grinding stage instead of wasting polish.
Stage 4: Polishing
The final stage uses a suitable polishing compound.
Aluminum oxide is one commonly used polishing material for rotary tumbling.
Polish is not intended to reshape rough rocks.
It works best when the previous stages have already produced a very smooth surface.
How Much Grit Should You Use?
There is no universal amount for every DIY barrel.
The amount depends on:
- Barrel capacity
- Rock weight
- Media
- Grit stage
- Rock type
One established three-pound-barrel method uses about two level tablespoons of grit or polish per pound of material as a starting point. Other tumbler systems use different quantities, so treat this as a reference rather than a universal DIY formula.
For a homemade tumbler, weigh the material when possible and keep notes about what you use.
That gives you a repeatable process for future batches.
How Much Water Do You Need?
Water helps turn the abrasive and rock particles into a slurry.
For many rotary methods, water is added until it approaches the upper portion of the rock load without simply flooding the barrel. Published rotary instructions commonly describe adding water to just below or nearly up to the tops of the rocks.
Your exact amount will vary because:
- Rocks have different shapes.
- Ceramic media changes the load.
- Barrel sizes differ.
- Some materials absorb or retain water.
- Different grits behave differently.
If the Slurry Is Too Thin
There may be too much water for the abrasive action you want.
If It Is Too Thick
The rocks may not move smoothly through the mixture.
Use the movement of the load as a practical guide rather than trying to force every barrel to use exactly the same water volume.
How to Clean a DIY Rock Tumbler Between Stages

Cleaning is one of the most important parts of the entire process.
After each grit stage:
- Empty the barrel.
- Separate the rocks.
- Rinse the rocks.
- Clean the barrel.
- Clean the lid.
- Clean the sealing surfaces.
- Clean ceramic media.
- Remove trapped grit from cracks and cavities.
- Inspect the rocks.
- Only then add the next grit.
Do not carry coarse grit into the fine or polishing stages.
Even a small amount of coarse abrasive can create new scratches.
A thorough cleaning between stages is specifically emphasized in established rotary-tumbling instructions.
Never Pour Tumbling Slurry Down the Drain
Rock-tumbling slurry contains abrasive grit and rock particles.
Collect the dirty water in a bucket or other suitable container instead of pouring it into a household drain.
Abrasive mud can clog plumbing.
How Long Does a DIY Rock Tumbler Take?
A complete rotary tumbling process commonly takes several weeks.
A simple planning schedule might look like:
| Stage | Starting planning time |
| Coarse | About 1 week, often longer |
| Medium | About 1 week |
| Fine | About 1 week |
| Polish | About 1 week or longer |
| Total | Roughly 4+ weeks |
These are planning points, not deadlines.
Some rocks require repeated coarse grinding, while a batch with scratches may need additional medium or fine stages. Published instructions likewise recommend inspecting the rocks rather than assuming every batch is finished after one fixed week per stage.
Why Aren’t My Rocks Getting Shiny?
If the final polish produces dull stones, don’t immediately add more polish.
First check the previous stages.
Check the Coarse Stage
Were the rocks properly shaped?
Check the Medium Stage
Are deep scratches still visible?
Check the Fine Stage
Does the surface feel extremely smooth?
Check for Contamination
Did any coarse grit remain in the barrel?
Check the Rock Type
Is the material suitable for polishing?
Check the Barrel Load
Was there enough material for a controlled tumbling action?
Check the Polish
Was the correct polishing compound used for the material?
A shiny finish begins with a scratch-free surface, not with a large amount of final polish.
DIY Rock Tumbler Mechanical Troubleshooting
| Problem | Likely cause | What to do |
| Barrel will not start | Motor lacks torque | Reduce load and check gearing |
| Barrel stops during operation | Overload or drive slipping | Reduce load and inspect roller traction |
| Barrel slips on roller | Insufficient contact | Check roller surface and alignment |
| Barrel walks sideways | Rollers not parallel | Realign shafts and bearings |
| Frame shakes | Weak or twisted frame | Add bracing and tighten hardware |
| Motor becomes very hot | Excessive load or poor ventilation | Stop and inspect motor/load |
| Roller squeals | Bearing or alignment issue | Inspect bearings and shafts |
| Barrel scrapes frame | Incorrect spacing | Reposition rollers/frame |
| Barrel leaks | Damaged or dirty seal | Clean and inspect sealing surfaces |
| Excessive impact noise | Poor load or insufficient media | Check fill level and rock mix |
Rock and Grit Troubleshooting
| Problem | Likely cause | Solution |
| Rocks remain sharp | Coarse stage too short | Continue coarse grinding |
| Deep scratches remain | Earlier stage incomplete | Repeat the appropriate stage |
| Rocks are frosted but dull | Not yet polished | Continue to polish after proper preparation |
| Random scratches appear | Grit contamination | Deep-clean and repeat finer stages |
| Rocks are badly chipped | Fragile material or poor load | Change rock selection/load |
| Slurry is too watery | Too much water | Reduce water next batch |
| Rocks barely move | Barrel overloaded | Reduce load |
| Rocks hit too violently | Barrel underloaded | Increase compatible material/media |
What to Do If the Rocks Break
Breaking is not always a machine failure.
Some rocks contain:
- Internal fractures
- Weak layers
- Cavities
- Natural cleavage
- Structural weaknesses
Remove badly fractured pieces before continuing to a fine or polishing stage.
A broken rock can also release fresh sharp surfaces that need additional grinding.
DIY Rock Tumbler With Household Items

You can repurpose some components, but each one needs to be evaluated for continuous operation.
Possible Reusable Materials
You may be able to repurpose:
- Scrap lumber for the frame
- A suitable cylindrical container for the barrel
- Salvaged bearings
- Rubber-covered rollers
- A suitable geared motor
- Hardware from another mechanical project
What Should Not Be Improvised?
Do not compromise on:
- Barrel integrity
- Motor suitability
- Electrical protection
- Bearing support
- Frame stability
- Moving-part guarding
Saving money on the frame is reasonable; saving money on electrical safety or an overloaded motor is not.
DIY Rock Tumbler Cost: Build or Buy?
The cost depends heavily on what you already have.
Cheapest DIY Route
Best when you already have:
- Scrap wood
- Bearings
- Rollers
- A suitable barrel
- A geared motor
Your main expense may be grit and replacement parts.
Mid-Range DIY Build
If you must buy:
- Motor
- Bearings
- Shafts
- Rollers
- Barrel
- Hardware
- Electrical components
the cost can approach the price of a small commercial tumbler.
Higher-Quality DIY Build
A more refined machine may include:
- Better bearings
- Purpose-built rollers
- Proper speed reduction
- Stronger frame
- Guarding
- Replaceable barrel
- Dedicated electrical enclosure
Is DIY Worth It?
Build one if you:
- Enjoy mechanical projects.
- Want to customize the machine.
- Already have useful components.
- Want to learn how the mechanism works.
Buy one if you:
- Mainly want polished rocks.
- Don’t have suitable mechanical parts.
- Want predictable operation.
- Don’t want to troubleshoot a homemade machine.
DIY Rock Tumbler Safety
A homemade tumbler should be treated as machinery, not simply a craft project.
Protect Moving Parts
Keep fingers, hair, clothing, and loose materials away from:
- Rollers
- Belts
- Chains
- Pulleys
- Shafts
Use guards where practical.
Keep Electricity Away From Water
Water and abrasive slurry must not be allowed to reach electrical connections.
Position the motor and electrical components where a leaking barrel cannot discharge directly onto them.
Use electrical components appropriate for the installation and protect connections from moisture.
Secure the Frame
A loaded barrel can create significant vibration.
The frame should sit securely on a stable surface.
Monitor Motor Temperature
A motor that becomes excessively hot is a warning sign.
Stop the machine and investigate:
- Load
- Gear ratio
- Bearing friction
- Roller resistance
- Ventilation
- Electrical supply
Use Eye Protection
Wear safety glasses when opening and cleaning a loaded barrel because muddy abrasive slurry can splash.
Control Dust
Keep dry grit and dried slurry from becoming airborne.
Follow the handling instructions supplied with the abrasive products.
Test Before Long Runs
Never assume a newly assembled homemade tumbler is safe for a multi-day unattended run.
Run shorter tests first and inspect the machine.
DIY Rock Tumbler: What Not to Do
Avoid these common mistakes:
- Don’t overload the barrel.
- Don’t use an unsuitable high-speed motor.
- Don’t permanently drill the frame before measuring the barrel.
- Don’t allow the barrel to scrape the frame.
- Don’t ignore sideways barrel movement.
- Don’t mix very soft and very hard rocks without understanding the consequences.
- Don’t rush the coarse stage.
- Don’t move scratched rocks into polishing.
- Don’t leave coarse grit in the barrel.
- Don’t pour abrasive slurry down a drain.
- Don’t run a leaking barrel near electrical equipment.
- Don’t ignore an overheating motor.
- Don’t leave a new machine running unattended before testing it properly.
Frequently Asked Questions
Can I make a rock tumbler at home?
Yes. A simple rotary design can be made using a cylindrical barrel, two rollers, a frame, and a suitable slow drive motor.
What is the easiest DIY rock tumbler design?
A roller-supported rotary tumbler is one of the simplest designs because the barrel does not need to be permanently connected to the motor.
What motor is best for a homemade rock tumbler?
A slow geared motor is a practical starting choice because it provides continuous rotation at a reduced output speed. The correct motor still depends on the loaded barrel and drive arrangement.
Can I use a drill as a rock tumbler motor?
A drill can be useful for testing a homemade mechanism, but it is not automatically suitable for continuous multi-day operation. A properly selected geared motor is generally a better permanent drive.
How full should a homemade rock tumbler be?
A practical starting range for many rotary tumblers is about 1/2 to 2/3 full, with the exact load depending on the barrel and material.
What grit should I use first?
For hard, polishable rocks in a rotary tumbler, coarse silicon carbide such as 60/90 grit is commonly used for the first shaping stage.
Can I use sand instead of rock-tumbling grit?
Ordinary sand is not a direct substitute for properly graded tumbling abrasive when you want predictable shaping and polishing. Use an abrasive intended for the process and follow its instructions.
Why are my rocks still scratched after polishing?
The scratches may have survived an earlier grinding stage. Return to the appropriate earlier stage rather than simply adding more polish.
Can I tumble different types of rocks together?
You can, but similar materials are easier to manage. Rocks with substantially different hardnesses can wear at different rates and make troubleshooting harder.
Do I need ceramic media?
Not always. Ceramic media can be useful for filling empty space when the rock load becomes too small and can help create smoother tumbling action.
How often should I check a DIY rock tumbler?
Check the machine regularly, especially during early testing. Look for leaks, overheating, unusual noise, barrel movement, and drive problems.
Can I leave a DIY rock tumbler running overnight?
Only after the machine has been thoroughly tested and the complete setup is appropriate for extended operation. A newly built machine should not be treated as safe for unattended operation simply because it runs correctly for a few minutes.
How do I dispose of used rock-tumbling slurry?
Collect the slurry and abrasive material instead of washing it into household plumbing. Rock and abrasive mud can clog drains.
Final Thoughts
The best DIY rock tumbler is not necessarily the most complicated one. A simple roller-based rotary design can provide everything needed: a secure barrel, stable rollers, controlled rotation, and enough torque to handle a loaded barrel.
The real challenge is making the entire system work together.
Start with a measured barrel, build the frame around it, align the rollers carefully, choose a motor for the loaded machine rather than the empty one, and test the setup before committing to a long tumbling cycle.
For the rocks themselves, patience matters just as much as the machine. Use compatible material, work through the grit stages in order, inspect the rocks between stages, and clean the barrel thoroughly before changing to finer abrasive.
Most importantly, don’t try to fix poor polishing by simply adding more polish. A good final shine starts with properly shaped, scratch-free, thoroughly cleaned rocks.