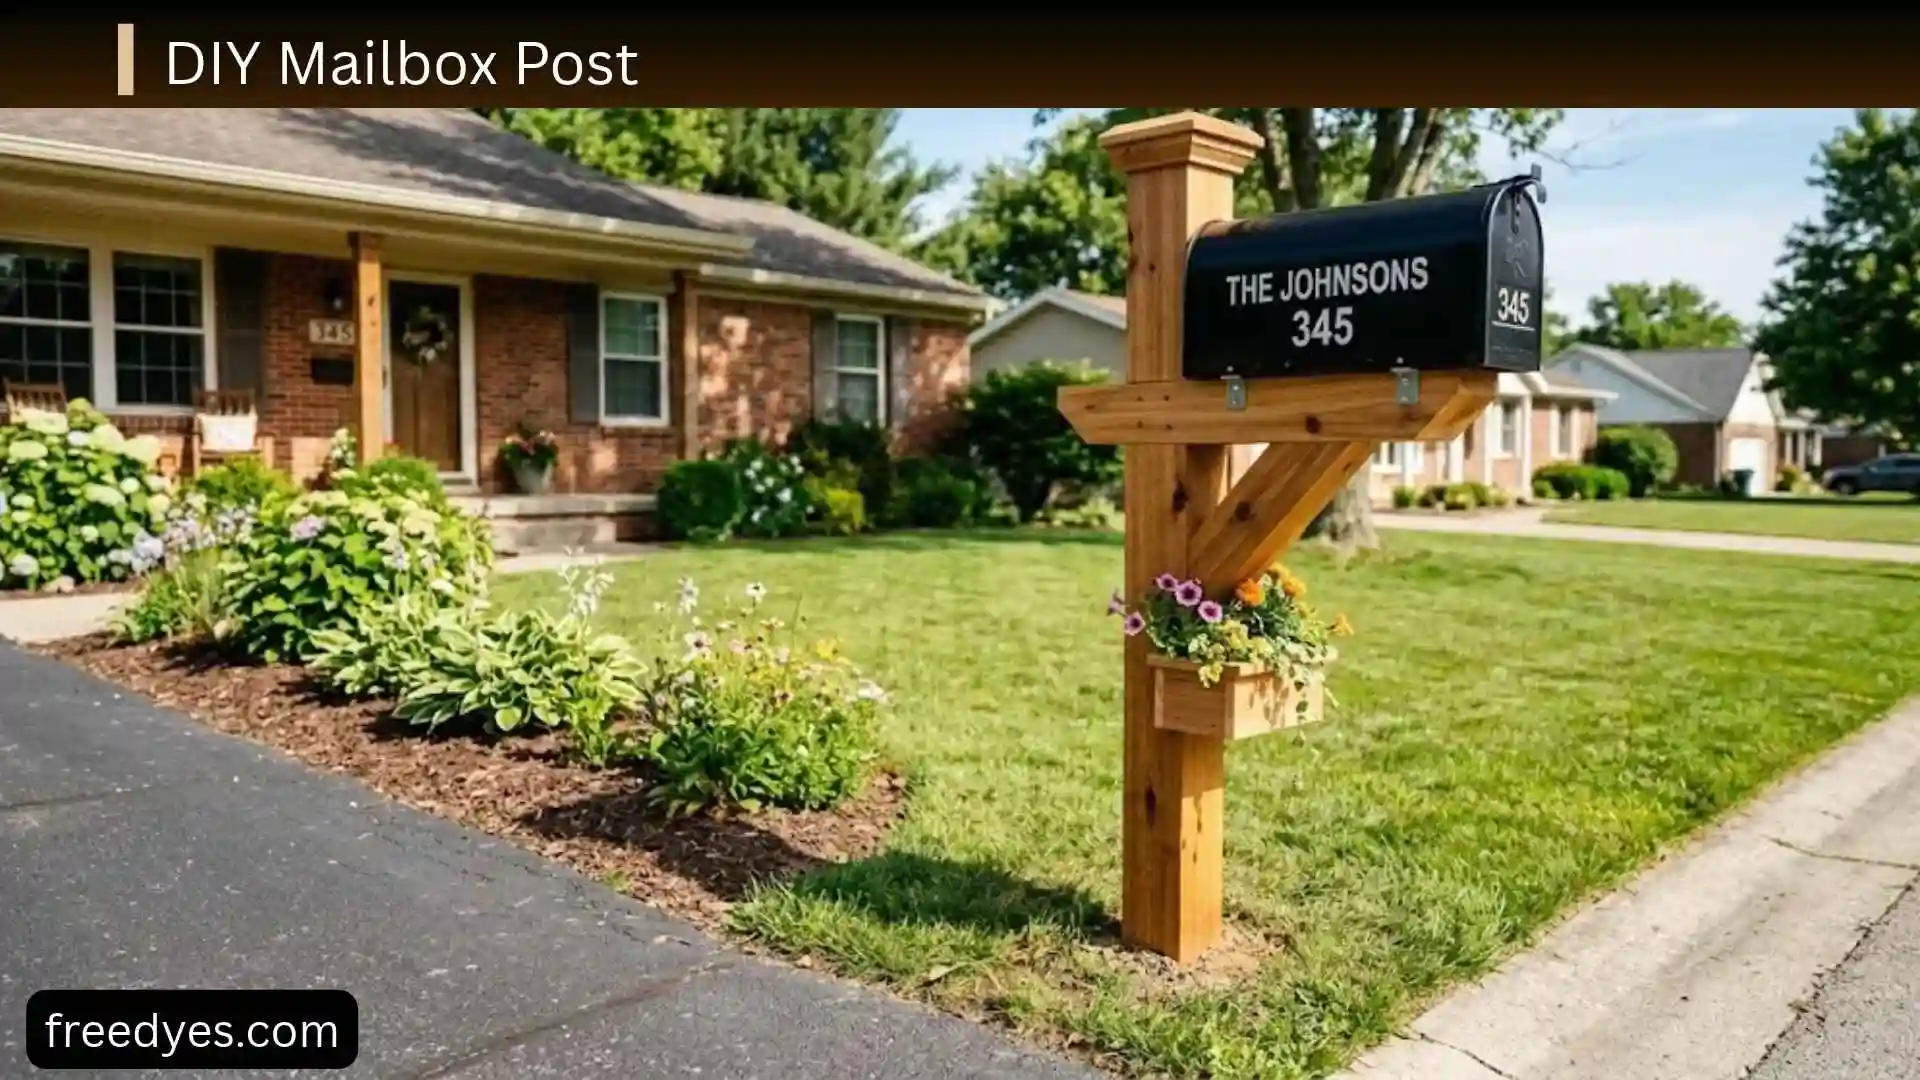
A DIY mailbox post is one of the easiest ways to improve your home’s curb appeal without spending a fortune. Whether your old mailbox post is damaged, outdated, or simply doesn’t match your home’s style anymore, building a new one yourself can make a noticeable difference. The best part is that you don’t need to be an experienced carpenter to complete this project.
With the right materials, a few basic tools, and step-by-step guidance, you can create a sturdy, attractive mailbox post that adds both function and charm to your property. In this guide, you’ll learn everything you need to know—from choosing the best materials and design ideas to installation tips and maintenance—so you can confidently build a DIY mailbox post that looks great and lasts for years.
DIY Mailbox Post at a Glance
| Feature | Practical choice |
| Main support | Exterior-rated 4×4 |
| Crossarm | Exterior-rated 2×4 or 2×6 |
| Bracing | Two matching 2×4 braces |
| Mounting surface | Sized to your actual mailbox |
| Finish | Exterior paint or stain |
| Skill level | Beginner to intermediate |
| Best for | Standard curbside mailbox |
| Main planning issue | Mailbox height and road position |
| Most important measurement | Road surface to mailbox entry/bottom |
| Before digging | Check local requirements and underground utilities |
Important: The 41–45 inch mailbox measurement is not automatically the height of the wooden post. The mounting platform and mailbox itself add height, while part of the 4×4 will extend into the ground.
DIY Mailbox Post Plan

The easiest way to approach this project is to think of the post as five parts:
- 4×4 vertical post — the main support.
- Horizontal crossarm — supports the mailbox.
- Two diagonal braces — strengthen and visually finish the upper structure.
- Mounting platform — provides the surface or hardware needed for the mailbox.
- Footing — keeps the post stable in the ground.
The exact dimensions of the crossarm and mounting platform should be based on your mailbox because mounting-hole locations and mailbox sizes vary.
Example 4×4 Mailbox Post Design
For a simple design, use:
- One exterior-rated 4×4 for the main post
- One 2×4 or 2×6 for the crossarm
- Two 2×4 pieces for diagonal braces
- One exterior-rated board for the mailbox platform if your mailbox requires one
- Exterior-rated screws and appropriate bolts
- A suitable footing system
- Exterior finish
The sample dimensions below are planning examples, not universal construction requirements. Measure your mailbox and local site before making final cuts.
How to Calculate the DIY Mailbox Post Height
This is one of the most important parts of the project.
Do not decide that an 8-foot 4×4 automatically gives you the correct mailbox height.
Instead, calculate the finished position first.
Simple Height Formula
Use this basic planning formula:
Required visible post height = desired mailbox height − height added by mounting components
Then:
Total post length = visible post height + buried portion
For example, suppose your target mailbox position is 43 inches above the road surface.
If your crossarm and mounting arrangement place the bottom of the mailbox 4 inches above the top of the post, then:
43 − 4 = 39 inches
That means the top of your main post would be approximately 39 inches above the reference point used for your calculation.
You would then add the amount of post that will be below ground.
This is only an example. Your actual mounting system may add a different amount.
Simple Measurement Worksheet
Before cutting the 4×4, write down:
- Desired mailbox height from road: ______
- Height added by crossarm/platform: ______
- Required post height above ground: ______
- Planned buried portion: ______
- Total 4×4 length required: ______
This simple worksheet can prevent an expensive mistake.
How to Measure a Sloped Yard
A sloped yard needs extra attention because the road and soil may not be at the same elevation.
For example:
- Desired mailbox height from road = 43 inches
- Yard at the post location = 5 inches higher than the road
- Mounting structure = 4 inches
You should not simply measure 43 inches upward from the lawn and assume the mailbox is correctly positioned.
Instead, establish the road-to-mailbox measurement first, then account for the elevation difference and the mounting structure.
The road surface is your important reference point, not simply the soil around the post.
This is particularly important on:
- Sloping driveways
- Raised lawns
- Ditches
- Roads without conventional curbs
- Properties where the mailbox sits several feet from the pavement
Before You Build: Mailbox Placement Checklist
Before buying lumber, confirm:
- Mailbox dimensions
- Mailbox mounting-hole pattern
- Desired mailbox height
- Distance from road or curb
- Road-to-yard elevation difference
- Mailbox door clearance
- Driveway clearance
- Space for the delivery vehicle or carrier
- Local postal placement requirements
- Local property or roadside restrictions
- Underground utility location
Postal guidance generally calls for the mailbox door to be positioned 6–8 inches back from the curb or road edge and the mailbox to sit 41–45 inches above the road surface, but unusual road conditions can require additional guidance.
Materials for a DIY 4×4 Mailbox Post
What to Buy
For a basic wooden design, you will generally need:
- 1 exterior-rated 4×4 post
- 1 exterior-rated 2×4 or 2×6 for the crossarm
- 2 exterior-rated 2×4 pieces for braces
- Exterior-rated mounting board, if required
- Exterior construction screws
- Appropriate bolts and washers where needed
- Concrete or a suitable ground-anchor system
- Gravel if appropriate for your site
- Exterior paint or stain
- House numbers
- Mailbox mounting hardware
The exact quantity of fasteners depends on your design and mailbox mounting system.
Choose Outdoor-Rated Wood
The post will be exposed to rain, humidity, sunlight, temperature changes, and soil moisture.
Use wood appropriate for exterior exposure rather than ordinary indoor lumber.
For the portion entering the ground, choose material and treatment suitable for ground contact and follow the product labeling and local requirements.
Do not bury ordinary untreated indoor lumber and expect it to perform like a purpose-suitable outdoor post.
Tools You Will Need
You can build a basic mailbox post with:
- Tape measure
- Pencil
- Saw
- Drill
- Driver
- Level
- Speed square
- Clamps
- Sandpaper
- Post-hole digging tools
- Shovel
- Wrench or socket set for bolts
A table saw is not necessary for this basic design.
Example DIY Mailbox Post Cut List
Because mailbox dimensions differ, use this as a sample planning layout rather than a universal cut list.
| Component | Starting material | How to determine final size |
| Main post | 4×4 | Calculate from mailbox height + buried section |
| Crossarm | 2×4 or 2×6 | Size around mailbox width and mounting position |
| Braces | 2×4 | Make two matching pieces |
| Mounting board | Exterior board | Follow mailbox base and mounting-hole pattern |
| Number plaque | Exterior material | Size for clear visibility |
The most important rule is simple:
Measure the actual mailbox before making the final cuts.
How to Build the DIY Mailbox Post

Step 1: Measure the Mailbox
Put the mailbox on a flat surface.
Measure:
- Width
- Length
- Height
- Bottom dimensions
- Mounting-hole locations
- Door swing
- Flag position
- Any special mounting brackets
Record these measurements before cutting your wood.
Step 2: Cut the 4×4 Post
Determine the required total post length using your height worksheet.
Cut the post square.
Sand the cut end to remove splinters.
Do not permanently cut the post until you have checked the relationship between the road, ground elevation, mounting platform, and mailbox.
Step 3: Cut the Crossarm
The crossarm should be long enough to support the mailbox securely without unnecessary overhang.
A 2×4 can work for a simple lightweight design, while a 2×6 can provide a larger visual and mounting surface.
Center the crossarm on the 4×4.
Step 4: Attach the Crossarm
Set the crossarm level on the post.
Clamp it temporarily.
Check:
- Level
- Centering
- Mailbox clearance
- Fastener locations
Pre-drill when appropriate, then install exterior-rated fasteners.
Step 5: Add the Diagonal Braces
Cut two matching 2×4 braces.
Position one on each side of the post.
The braces should connect the post and crossarm without interfering with:
- Mailbox door
- Mailbox flag
- Mounting hardware
- Delivery access
Use the same angle and position on both sides for a balanced appearance.
Step 6: Add the Mounting Platform
If your mailbox requires a flat platform, cut the board according to its actual base dimensions.
Transfer the mounting-hole pattern from the mailbox to the platform.
Drill the necessary holes.
Do not guess the mounting-hole locations.
A mailbox manufacturer’s mounting template is more reliable than assuming every mailbox uses the same pattern.
Step 7: Test-Fit the Mailbox
Before finishing the post, put the mailbox in place.
Open and close the door several times.
Check that:
- The door opens completely.
- The flag moves freely.
- The mailbox is centered.
- The braces do not interfere.
- The platform supports the box properly.
- Hardware does not create sharp projections.
This test-fit can save you from having to modify the finished post later.
How to Finish a Wooden Mailbox Post
Paint
Exterior paint can coordinate the post with your:
- House trim
- Front door
- Fence
- Garage
- Shutters
Follow the coating manufacturer’s preparation instructions.
Stain
Exterior stain can keep the natural wood appearance while adding color.
A dark stain paired with a black or dark mailbox gives a simple 4×4 post a more finished appearance.
Add Decorative Trim
Keep decorative trim simple.
You can add:
- Small caps
- Simple trim boards
- Number plaques
- Decorative braces
- Contrasting paint
Avoid decorations that interfere with the mailbox door, delivery access, visibility, or safe movement around the box.
How to Install the DIY Mailbox Post
Step 1: Mark the Final Position
Before digging, place a temporary marker where the 4×4 will sit.
Then visualize the complete mailbox position.
Check it from:
- The road
- The driveway
- The house
- The direction from which the carrier approaches
Step 2: Check for Underground Utilities
Do not dig before using the utility-locate process required in your area.
Underground electrical, gas, water, communication, and other lines may be present even when there are no visible signs.
Wait for the appropriate clearance before digging.
Step 3: Dig the Post Hole
The required depth and footing depend on:
- Soil
- Frost conditions
- Local requirements
- Post design
- Footing method
- Ground conditions
There is no single hole depth that is automatically correct for every property.
A published postal support drawing shows a 4×4 wood-post configuration with a specific footing arrangement, illustrating that support designs can have defined dimensions—but that should not be treated as a universal requirement for every DIY installation.
Step 4: Position the Post
Place the 4×4 into the prepared hole.
Use a level on two adjacent sides.
Check the post from several directions.
Step 5: Temporarily Brace the Post
Attach temporary braces so the post cannot move while the footing is installed.
Do not rely on your hands or a helper holding the post in place.
A small movement can leave you with a permanently leaning mailbox.
Step 6: Install the Footing
If using concrete, mix and place it according to the product instructions.
Keep checking:
- Plumb
- Roadside position
- Mailbox height
- Post alignment
Do not allow the post to shift while the footing is being installed.
Step 7: Let the Footing Set
Follow the concrete manufacturer’s instructions for the appropriate setting or curing period.
Avoid loading or moving the post prematurely.
How to Mount the Mailbox

After the post and footing are ready, attach the mailbox using its recommended mounting hardware.
Before tightening everything permanently, check:
- Mailbox height
- Road setback
- Level
- Door movement
- Flag movement
- Fastener clearance
Postal guidance also emphasizes that mailbox assemblies should not have hazardous projections or features that interfere with delivery.
DIY Mailbox Post With Concrete
Concrete is a common footing option, but the installation should match your site rather than follow a one-size-fits-all recipe.
Concrete Is Useful When
- You need a firm ground footing.
- Your soil conditions are suitable.
- Your local installation requirements allow it.
- You can brace the post properly during installation.
Pay Attention to Drainage
Do not design the base so water continually collects against vulnerable wood.
Consider:
- Soil drainage
- Water flow
- Sprinklers
- Rain runoff
- Ground slope
The goal is to prevent unnecessary long-term moisture exposure.
DIY Mailbox Post Without Concrete
A no-concrete installation can use a purpose-designed ground anchor or another suitable support system.
It should not simply mean putting a loose wooden post into a hole.
Before choosing this approach, consider:
- Soil type
- Wind exposure
- Frost
- Mailbox size
- Post height
- Local requirements
Choose a system designed for the conditions rather than choosing it only because it is faster to install.
DIY Mailbox Post for a Sloped Yard
A sloped yard requires more careful measuring.
Use This Order
- Measure the road surface.
- Establish the desired mailbox height.
- Measure the elevation difference between the road and post location.
- Account for the mounting platform.
- Calculate the required visible post height.
- Add the buried portion.
- Check the finished position before securing the post.
This prevents the common mistake of measuring only from the lawn.
DIY Mailbox Post for a Locking Mailbox
Locking mailboxes can have different:
- Base dimensions
- Mounting holes
- Weight
- Door mechanisms
- Clearance requirements
Use the manufacturer’s mounting template before building your platform.
Do not assume that a standard mailbox mounting pattern will work.
Also check that the locking mechanism and access door can operate fully after installation.
DIY Double Mailbox Post

A double mailbox design needs a wider support structure.
Plan the Width
Measure:
- Mailbox 1 width
- Mailbox 2 width
- Space between boxes
- Mounting-hole positions
- Door clearance
- Desired crossarm overhang
Then size the crossarm accordingly.
Add Adequate Support
A wider structure may need additional bracing or a larger support arrangement.
Do not simply make the crossarm longer without considering how the additional load affects the post.
DIY Mailbox Post for a Large Mailbox
A larger mailbox may need a larger mounting surface.
Before building, check:
- Base dimensions
- Mounting points
- Weight
- Door clearance
- Flag clearance
- Platform requirements
The best approach is to build around the actual mailbox rather than designing a generic platform and hoping the box fits.
DIY Mailbox Post for Snowy Areas
Snowplow damage is an important consideration in areas with heavy snow removal.
Postal guidance has suggested semi-arch or extended-arm support designs where snow removal is a problem because these designs can allow snow equipment to pass closer to or beneath the mailbox.
For a snowy location:
- Check local mailbox placement requirements.
- Keep the mailbox accessible.
- Consider the snowplow path.
- Avoid placing the support where plowed snow will repeatedly hit it.
- Consider an extended support design if appropriate.
How to Add House Numbers

House numbers should be easy to see from the road.
Good placement usually means:
- Clear contrast
- Adequate size
- No obstruction from plants
- No obstruction from the mailbox door
- A location visible to approaching traffic or the carrier
Postal guidance has also addressed visible address or box-number placement and contrasting numerals for certain delivery situations.
A simple black-and-white number plaque is often easier to read than decorative lettering with low contrast.
DIY Mailbox Post Ideas
Simple Modern Mailbox Post
Use a straight 4×4, simple rectangular crossarm, minimal braces, and a clean exterior finish.
Farmhouse Mailbox Post
Try stained wood, a simple black mailbox, matching braces, and large contrasting numbers.
Cottage Mailbox Post
Use light exterior paint with a small decorative number plaque.
Keep the design restrained so plants and trim do not interfere with access.
Modern Black-and-Wood Mailbox Post
Combine a stained or natural-looking wooden post with a dark mailbox and simple metal numbers.
Mailbox Post With Newspaper Holder
A newspaper receptacle can be added if it does not interfere with mail delivery, block the mailbox flag, or create a hazard. Postal guidance also says it should not extend beyond the front of the mailbox when the door is closed.
Common DIY Mailbox Post Mistakes
Cutting the 4×4 Before Measuring
The mailbox and mounting system determine the final post height.
Fix: Measure the complete assembly first.
Measuring From the Lawn Instead of the Road
This is especially problematic on sloped properties.
Fix: Use the road surface as the reference point for the mailbox-height calculation.
Guessing the Mounting-Hole Pattern
Not all mailboxes use the same mounting arrangement.
Fix: Use the actual mailbox or its manufacturer template.
Using Indoor Lumber
Ordinary indoor lumber is not intended for continuous outdoor exposure.
Fix: Use an appropriate exterior-rated material.
Skipping Temporary Bracing
A post can move while the footing is being installed.
Fix: Brace it until the footing is ready for the next stage.
Making the Structure Excessively Heavy
More material does not automatically mean a better mailbox post.
Fix: Build a properly supported structure around the actual mailbox.
Ignoring Door Clearance
The mailbox may be level but still unusable if the door hits the support.
Fix: Test the complete door swing before final installation.
Putting Decorations in the Delivery Path
Large signs, brackets, plants, or other additions can interfere with access.
Fix: Keep decorative elements away from delivery and opening areas.
Forgetting the Driveway
A mailbox may be correctly positioned relative to the road but create an awkward obstruction near the driveway.
Fix: Look at the complete approach path before digging.
DIY Mailbox Post Troubleshooting
| Problem | Possible cause | What to check first |
| Post is leaning | Footing or soil movement | Level and base |
| Mailbox shakes | Loose connection | Crossarm and fasteners |
| Mailbox is too high | Wrong reference point | Measure from road |
| Mailbox is too low | Post/platform calculation | Recheck mounting height |
| Door hits post | Poor clearance | Full door swing |
| Wood is splitting | Fastener placement | Pilot holes and edge distance |
| Post is rotting | Moisture exposure | Base and drainage |
| Platform is unstable | Poor mounting connection | Platform fasteners |
| Numbers are hard to see | Low contrast/small size | Number placement |
| Snow damages post | Poor snow-path planning | Support location/design |
Why Is My Mailbox Post Leaning?
Check:
- Footing movement
- Soil erosion
- Water drainage
- Post condition
- Installation alignment
If the post has significant structural damage or the footing has failed, simply pushing it upright may not solve the problem.
Why Is My Mailbox Post Shaking?
Inspect the connections between:
- Post and crossarm
- Crossarm and braces
- Platform and crossarm
- Mailbox and platform
Tighten appropriate hardware and replace damaged components.
Why Is My Mailbox Too High?
Check whether you measured from the road or from the soil.
A yard that sits above the road can make a mailbox appear correctly positioned from the property while placing it too high relative to the road.
Why Is My Mailbox Too Close to the Road?
Measure from the front face of the curb or road edge to the mailbox door, rather than using the center of the post as your reference.
Typical guidance is 6–8 inches, but unusual road conditions should be confirmed locally.
Why Is My Wooden Post Rotting?
Look for:
- Persistent moisture
- Poor drainage
- Damaged finish
- Unsuitable wood
- Sprinkler spray
- Soil conditions
If the base is seriously deteriorated, replacement may be safer than cosmetic repair.
Repair or Replace a Mailbox Post?
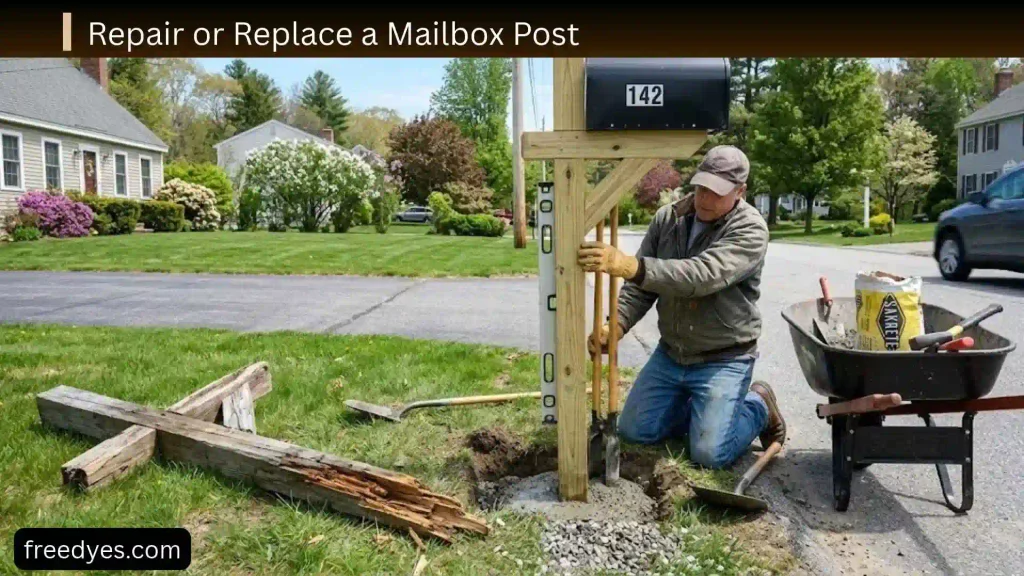
Repair May Be Enough When:
- The 4×4 is structurally sound.
- Only the mailbox is loose.
- The mounting board is damaged.
- Screws or bolts need replacement.
- The finish is peeling.
- House numbers need replacing.
Replacement Makes More Sense When:
- The main post is badly rotted.
- The post is permanently leaning.
- The footing has failed.
- The wood is split through a structural area.
- The mailbox can no longer be positioned correctly.
Do not cover serious structural damage with decorative trim.
Best DIY Mailbox Post Design for Your Situation
| Your situation | Good starting design |
| First DIY mailbox project | 4×4 wooden post |
| Simple and inexpensive | 4×4 + basic crossarm |
| Decorative curb appeal | 4×4 + braces + trim |
| Sloped yard | Custom height calculation |
| Locking mailbox | Platform based on manufacturer’s template |
| Large mailbox | Larger custom mounting surface |
| Two mailboxes | Wider crossarm with appropriate support |
| Heavy snow | Snow-conscious or extended support |
| Existing post damaged | Repair or replace based on structural condition |
| Avoiding concrete | Purpose-designed ground anchor |
Before-You-Dig Checklist
Use this checklist before starting installation:
- Measure the actual mailbox.
- Confirm mounting-hole locations.
- Determine the desired mailbox height.
- Measure from the road surface.
- Check the curb/road setback.
- Measure the yard-to-road elevation difference.
- Check driveway clearance.
- Check mailbox door clearance.
- Confirm local postal guidance.
- Check for underground utilities.
- Choose exterior-rated wood.
- Decide on the footing method.
- Calculate the 4×4 length.
- Prepare temporary braces.
- Plan house-number placement.
Frequently Asked Questions
How tall should a DIY mailbox post be?
There is no single universal post length because the mailbox and mounting structure add height. Typical curbside mailbox guidance places the mailbox about 41–45 inches above the road surface, so calculate the wooden post height after accounting for your mounting system.
Can I use a 4×4 for a mailbox post?
Yes. A 4×4 is a practical starting point for a simple wooden mailbox-post design. Published postal support examples also show 4×4 wood-post configurations, although the exact support design should be matched to the installation rather than treated as a universal template.
How deep should a mailbox post be?
There is no single depth that fits every property. Consider soil, frost conditions, local requirements, post design, and the selected footing system.
Should I use concrete for a mailbox post?
Concrete can be an appropriate footing method, but the correct installation depends on the property and support design. Follow the concrete product instructions and local requirements.
Can I install a mailbox post without concrete?
Yes, a purpose-designed ground-anchor or alternative support system may be suitable in some situations. Do not assume that simply placing a loose post in soil provides adequate support.
How far should a mailbox be from the road?
Typical guidance places the mailbox door 6–8 inches back from the front face of the curb or road edge. Local road conditions can change how the installation should be handled.
What is the best wood for a mailbox post?
Use an exterior-rated or appropriately treated wood suitable for the conditions where the post will be installed. For a ground-set post, make sure the material is appropriate for ground exposure.
Can I make a double mailbox post?
Yes. Use a wider crossarm and design the mounting surface around the actual dimensions and mounting holes of both mailboxes.
Can I build a decorative mailbox post?
Yes. Start with a structurally appropriate support, then add simple trim, paint, stain, braces, or number plaques without interfering with delivery access.
What changes for a locking mailbox?
The biggest difference is the mounting arrangement. Measure the locking mailbox’s actual base and mounting holes rather than assuming a standard mailbox pattern.
What if my yard is higher than the road?
Measure the mailbox height from the road surface and account for the elevation difference before calculating the post height.
How do I stop a mailbox post from leaning?
Check the footing, soil movement, post alignment, and connections. During installation, use temporary braces and repeatedly check the post with a level.
Final Thoughts
A good DIY mailbox post does not need an elaborate design. A properly planned 4×4 wooden post, a suitable crossarm, matching braces, a correctly sized mounting platform, and a stable footing can create a practical support that looks finished without being difficult to build.
The most important part of the project is measurement before construction. Check the actual mailbox, calculate the post height from the road surface, account for a sloped yard, confirm the roadside position, and check underground utilities before digging.
Once the functional details are correct, you can customize the post with paint, stain, house numbers, decorative braces, or simple trim. That approach gives you both the practical support you need and the curb appeal you want.