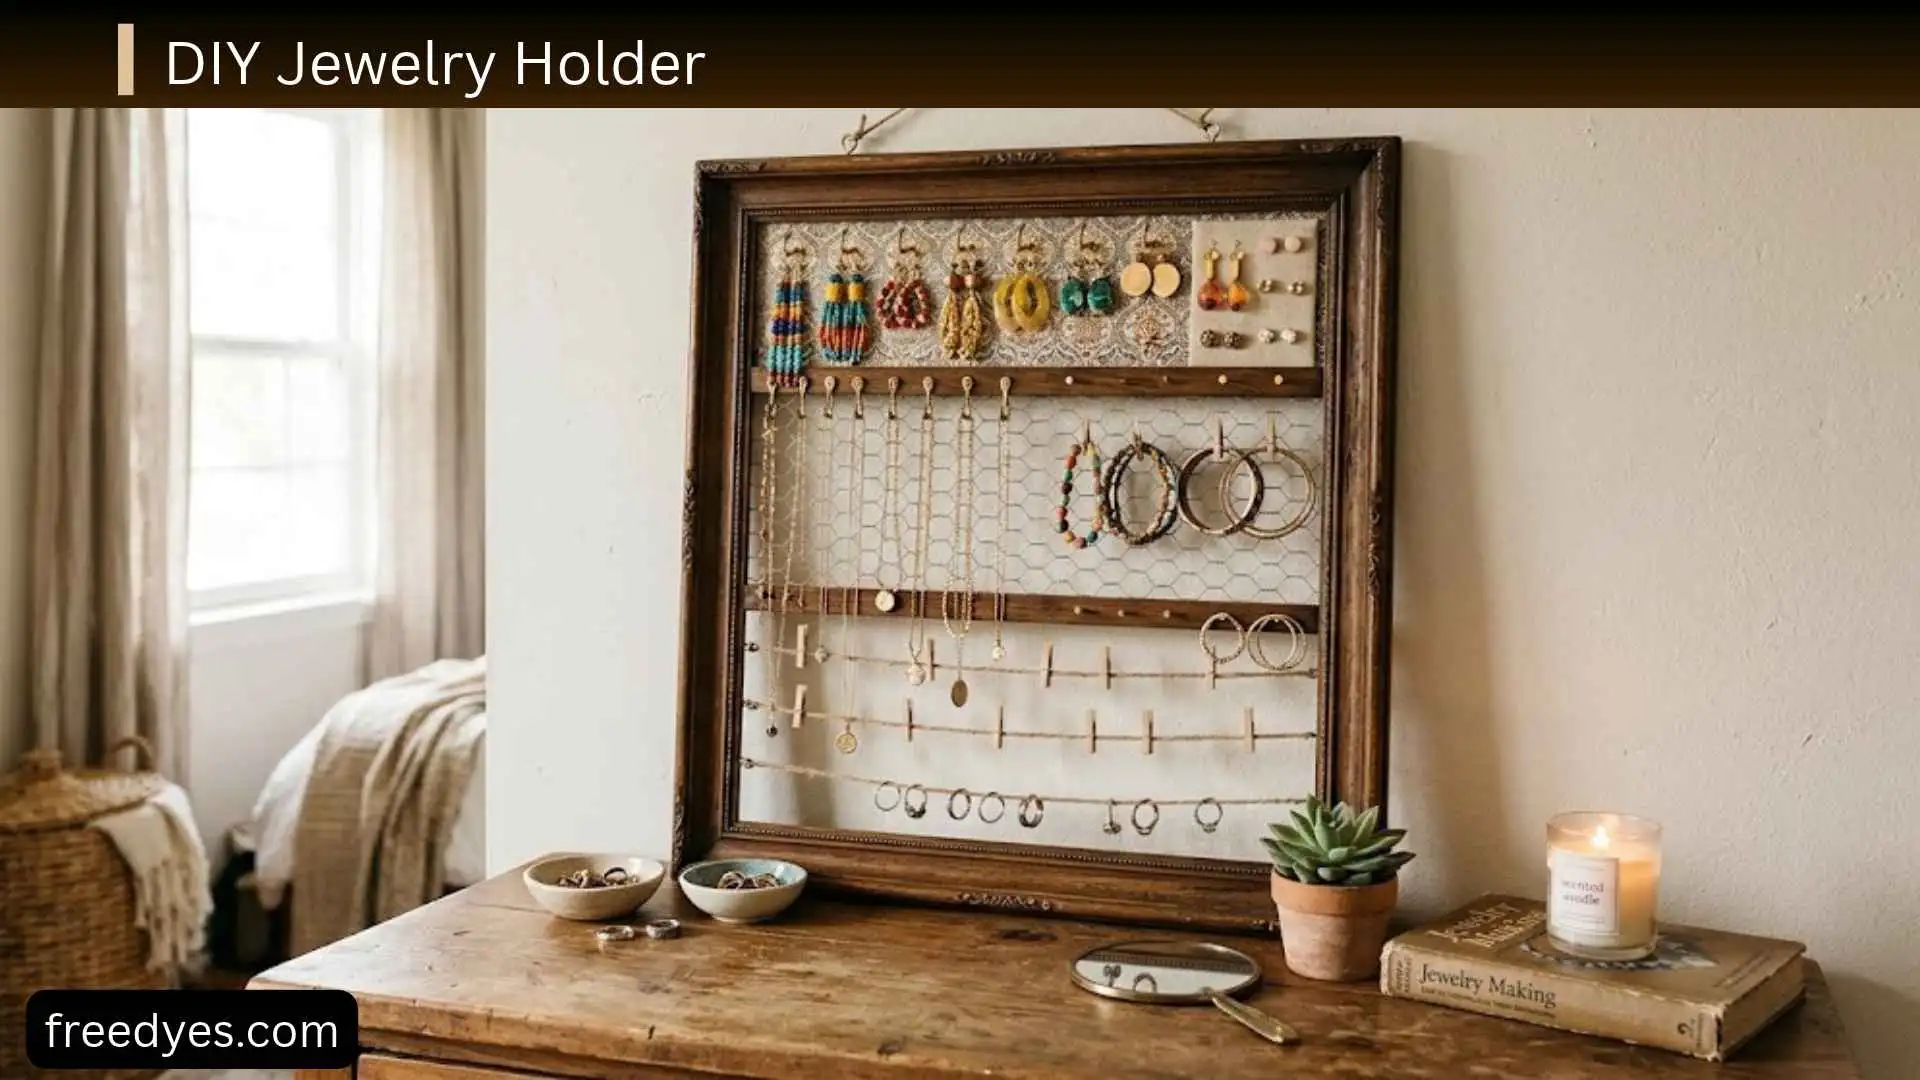
If your necklaces keep getting tangled, earrings disappear in drawers, or your jewelry collection takes over your dresser, a DIY jewelry holder can give every piece a dedicated place without taking up much surface space.
This project creates a simple wall-mounted jewelry organizer with separate areas for necklaces, earrings, bracelets, and rings. The basic design uses an 18 × 24-inch backing board, small hooks, a bracelet rod, and a compact ring tray. You can adjust the size and spacing to fit your own collection.
The best part is that you do not need to make dozens of complicated compartments. The goal is to keep jewelry visible, separated, and easy to reach.
DIY Jewelry Holder at a Glance
| Feature | Details |
| Project type | Wall-mounted jewelry organizer |
| Finished size | About 18 × 24 inches |
| Best for | Necklaces, earrings, bracelets, rings |
| Skill level | Beginner |
| Time | About 1–2 hours, excluding paint or finish drying |
| Tools | Tape measure, pencil, drill or screwdriver, sandpaper |
| Main materials | Wood board, hooks, dowel, small tray |
| Best feature | Separate storage zones |
| Small-space friendly | Yes |
| No-drill option | Yes, for appropriately lightweight designs |
The 18 × 24-inch size is only a starting point. If you own mostly earrings, you may need less vertical space. If you have long necklaces, you may need more.
Which DIY Jewelry Holder Is Best for You?
Before building anything, decide how you actually store jewelry.
| Your main problem | Best solution |
| Tangled necklaces | Individual spaced hooks |
| Lots of dangling earrings | Mesh, hooks, or a perforated section |
| Mostly stud earrings | Cork, felt, or a small dedicated earring panel |
| Bracelets falling from hooks | Horizontal dowel or deeper hooks |
| Rings scattered around | Small tray or ring dish |
| Very little dresser space | Wall-mounted organizer |
| Renting | Lightweight no-drill version |
| No power tools | Ready-made frame with hooks |
| Rustic room | Wood or reclaimed-board design |
| Modern room | Simple painted board with minimal hardware |
| Small jewelry collection | Compact framed holder |
| Large collection | Modular wall organizer |
A good jewelry organizer is not just attractive. It should match the jewelry you actually own.
Materials and Tools
For the main 18 × 24-inch DIY jewelry holder, gather:
Materials
- 1 wood board or plywood panel, approximately 18 × 24 inches
- 8–12 small cup hooks or jewelry hooks
- 2 small supports or hooks for a bracelet dowel
- 1 wooden dowel, approximately 16–17 inches long
- 1 small tray or shallow dish for rings
- Sandpaper
- Paint, stain, or clear finish if desired
- Appropriate wall-mounting hardware
- Optional: small earring mesh or cork panel
- Optional: felt for lining the ring area
Tools
- Tape measure
- Pencil
- Ruler or straightedge
- Drill and small drill bit
- Screwdriver
- Level
- Saw if you need to cut the board or dowel
- Paintbrush if finishing the wood
If you buy a board already cut to size, the project becomes much easier for a beginner.
How to Measure Your Jewelry Before Building
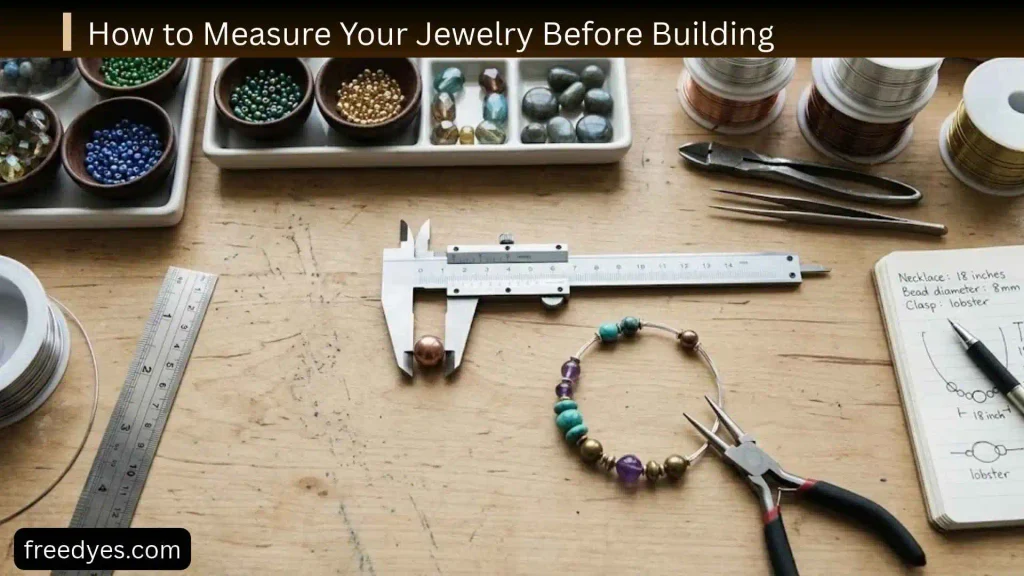
Don’t install the hooks based only on the dimensions of the board.
Your jewelry collection should determine the layout.
Step 1: Separate your jewelry
Make four groups:
- Necklaces
- Earrings
- Bracelets and watches
- Rings
Then look at how many pieces are in each group.
Step 2: Measure the longest necklaces
Place your necklaces next to each other and identify the longest pieces.
Leave enough vertical space beneath the necklace hooks so pendants do not hit the next storage section or nearby furniture.
Step 3: Check bracelet thickness
Thin chain bracelets need less room than chunky bangles.
If you plan to use a dowel, make sure its diameter allows your bracelets to slide on and off easily.
Step 4: Count your earrings
Decide whether your collection is mostly:
- Studs
- Hoops
- Dangling earrings
- A mixture
This matters because studs and dangling earrings need different storage methods.
How to Make a DIY Jewelry Holder
The easiest beginner-friendly version uses one backing board with separate storage zones.
Step 1: Prepare the board
Start with an 18 × 24-inch wood board or plywood panel.
Sand all exposed edges until they are smooth.
Do not leave sharp or splintered edges where delicate chains can catch.
Wipe away the sanding dust.
Step 2: Choose your layout
A simple layout can be divided into three areas:
- Top: necklaces
- Middle: bracelets
- Bottom: earrings and rings
You can reverse this arrangement if your collection requires it.
The important point is to leave enough room for the longest jewelry pieces.
Step 3: Mark the necklace hooks
Place your necklace hooks across the upper section.
Do not automatically space every hook at exactly the same distance.
Instead, look at your necklaces.
For thin chains, closer spacing can work. For large pendants or chunky necklaces, leave more room.
A useful starting point is roughly 2–3 inches between hooks for larger necklaces, but adjust the spacing to your collection.
Step 4: Pre-drill the holes
Mark each hook location with a pencil.
Use a small drill bit to make shallow pilot holes where appropriate for your wood and hardware.
Pilot holes help make hook installation easier and can reduce the chance of splitting the wood.
Step 5: Install the hooks
Twist or screw each hook into its marked location.
Keep the hooks facing the same direction.
Check that every hook is secure but avoid overtightening and damaging the wood.
Step 6: Add the bracelet rod
Cut the wooden dowel so it fits comfortably between the sides of the board.
Install two supports near the ends.
The dowel should sit level.
This gives bracelets and watches a place where they can slide on and off without needing to be clasped onto individual hooks.
Step 7: Create the earring section
Choose the method that matches your earrings.
For dangling earrings, you can use:
- Small hooks
- Metal mesh
- Perforated material
For stud earrings, use:
- Cork
- Felt-backed material
- A small perforated panel
- A separate shallow container
Avoid putting studs into a deep container where small pairs can disappear underneath other jewelry.
Step 8: Add a ring tray
Attach or place a shallow tray at the bottom of the organizer.
A small tray works better than a deep container because rings remain visible.
If you want a more finished look, line the tray with soft felt.
Step 9: Finish the wood
You can leave the wood natural or apply:
- Paint
- Stain
- Clear finish
Allow the finish to dry or cure according to the product’s instructions before putting jewelry on it.
Step 10: Install the wall hardware
Choose mounting hardware based on:
- The weight of the finished organizer
- The jewelry you will add
- Your wall type
- The hardware’s rated capacity
For a heavier wooden organizer, use a suitable screw-and-anchor system or attach it to appropriate wall framing when practical.
For a lightweight organizer, a suitable picture-hanging or removable system may work if its load rating is appropriate.
Do not assume that one type of adhesive strip or wall anchor is suitable for every organizer. Follow the hardware manufacturer’s weight and installation instructions.
Step 11: Check the organizer before loading it
Use a level to make sure the holder is straight.
Gently test the hooks and mounting points before adding your full jewelry collection.
Once everything is secure, organize your jewelry by type.
How to Prevent Necklaces From Tangling
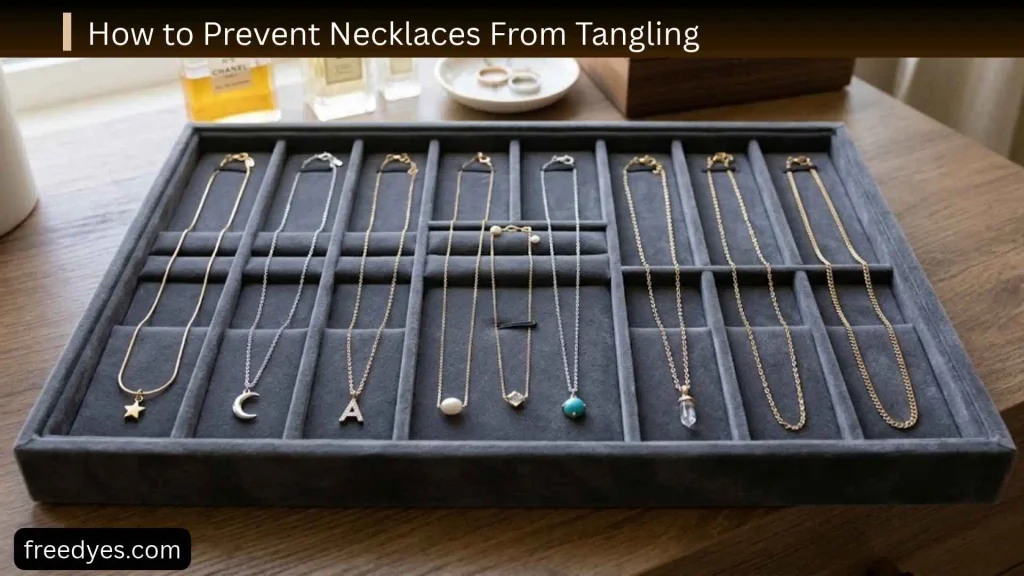
A jewelry holder only works if the necklaces remain separated.
The simplest approach is to give each necklace its own hook.
Keep long necklaces apart
If two long necklaces hang into the same area, their chains can overlap.
Move the hooks farther apart or stagger the necklaces by length.
Avoid overcrowding one hook
Putting several delicate chains on one small hook defeats the purpose of a jewelry organizer.
If you regularly wear several necklaces together, you can still group them, but everyday storage is easier when individual pieces have their own space.
Use the longest necklace as your guide
Before fixing the vertical position of your next storage section, hang your longest necklace from its hook.
This tells you how much clearance you actually need.
How to Make a DIY Earring Holder
Earrings need a slightly different storage system.
For dangling earrings
A small mesh panel works well because the earrings can hang through the openings while remaining visible.
Make sure the mesh edges are safely covered or enclosed.
Never leave freshly cut metal mesh edges exposed where they can scratch fingers or snag jewelry.
For stud earrings
Studs are easier to manage when they can be pushed into a suitable backing.
A small cork or felt-backed section can work well for this purpose.
Another simple solution is to keep stud pairs in a shallow dish or small compartment at the bottom of the holder.
For mixed earring collections
Use two separate zones:
- One for studs
- One for dangling earrings and hoops
This prevents small studs from disappearing among larger pieces.
How to Store Bracelets on a DIY Jewelry Organizer
Bracelets are often awkward to store because their shapes and sizes vary.
A horizontal dowel is a practical option.
Slide bracelets onto the rod rather than fastening each one to a hook.
For rigid bangles, make sure there is enough clearance to slide them on and off.
For watches, allow additional room around the watch face and strap.
How to Store Rings on a DIY Jewelry Holder
Rings don’t need the same type of hanging space as necklaces.
A shallow tray is usually simpler.
You can also create a narrow ring section with:
- Felt
- Foam
- Small compartments
- A miniature jewelry dish
Keep the ring section easy to reach so small pieces don’t become buried under other jewelry.
How to Choose Hook Spacing
There is no single perfect spacing for every jewelry collection.
Instead, use the jewelry itself as your guide.
Small necklaces
Closer hook spacing can work when the chains are thin and lightweight.
Large necklaces
Leave additional space for pendants and thicker chains.
Earrings
Small hooks can be closer together if the earrings do not overlap.
Bracelets
Use a rod rather than trying to force every bracelet onto a tiny hook.
A useful rule is:
The larger or heavier the jewelry, the more clearance it needs.
This approach is more flexible than following one universal measurement.
DIY Jewelry Holder for Small Spaces
If you have a small bedroom, avoid making the organizer unnecessarily deep.
A vertical wall-mounted design is often more useful than another box on the dresser.
Good locations include:
- Beside a mirror
- Inside a closet
- Above a small vanity
- On an unused bedroom wall
- Near your dressing area
Keep the organizer shallow enough that it doesn’t interfere with walking space.
For a particularly narrow wall, reduce the width of the board and use fewer hooks rather than trying to squeeze the same number of pieces into a smaller area.
DIY Jewelry Holder Without Drilling
A no-drill jewelry organizer can be made from a lightweight frame or small board.
You can use suitable removable hanging hardware if:
- The organizer is within the product’s weight rating.
- The wall surface is compatible.
- You follow the manufacturer’s installation instructions.
- The jewelry load does not push the total weight beyond the rating.
For a heavier wood organizer, a screwed mounting system is generally the more appropriate approach.
Easy no-drill version
Use:
- A lightweight picture frame
- A thin mesh or cork backing
- Small jewelry hooks
- A lightweight ring dish
- Appropriate removable hanging hardware
This version is especially useful for renters.
DIY Jewelry Holder From an Old Picture Frame

An old picture frame can become a simple jewelry organizer without building a full wooden structure.
Basic method
Remove the glass and backing.
Keep the frame.
Add a suitable interior material such as:
- Mesh for dangling earrings
- Cork for studs
- Fabric-covered backing for small jewelry
Attach small hooks along the bottom or side areas for necklaces.
Add a small ring tray if space allows.
This is one of the easiest ways to turn an unused frame into a jewelry display.
DIY Jewelry Holder Ideas
You don’t need to build every design from scratch. These alternatives can be adapted to your collection.
Picture-frame jewelry organizer
Best for bedrooms where you want the organizer to look like wall décor.
Pegboard jewelry holder
Good for collections that change frequently because hooks and accessories can be rearranged.
Wood board jewelry organizer
Best for a simple custom design with hooks and a bracelet rod.
Corkboard earring holder
Useful when you own many stud earrings.
Mesh jewelry display
Good for dangling earrings and lightweight pieces that benefit from visibility.
Over-door jewelry organizer
Useful when wall space is limited, provided the door and hardware can support the setup.
Small tray organizer
Best for rings, studs, and small everyday pieces.
How to Organize the Finished Jewelry Holder
Once the holder is mounted, organize jewelry according to how often you wear it.
Put everyday pieces where they are easiest to reach.
Keep occasional pieces toward the sides or lower sections.
You can also organize by:
- Jewelry type
- Color
- Length
- Occasion
- Frequency of use
For necklaces, organizing from shortest to longest can make the collection easier to see.
Common DIY Jewelry Holder Mistakes
Making the holder before counting your jewelry
A beautiful organizer can still be inconvenient if it doesn’t have enough storage for your collection.
Fix: Count necklaces, earrings, bracelets, and rings first.
Putting hooks too close together
This can cause necklaces and larger earrings to overlap.
Fix: Test the layout with your actual jewelry before drilling.
Using one hook for multiple delicate necklaces
This encourages tangling.
Fix: Give frequently worn necklaces individual hooks.
Using deep containers for tiny earrings
Small studs can disappear underneath other pieces.
Fix: Use a shallow tray or dedicated backing.
Making the organizer too large
A huge organizer may waste wall space if you only own a few pieces.
Fix: Scale the project to your collection.
Ignoring the longest necklace
The bottom of a long pendant can hit furniture or another storage section.
Fix: Hang the longest necklace during the planning stage and measure its clearance.
Leaving rough wood edges
Splinters and sharp edges can catch chains.
Fix: Sand every exposed edge thoroughly.
Choosing mounting hardware without checking the load
The organizer itself may be light, but its total mounted weight includes the wood, hardware, and jewelry.
Fix: Choose mounting hardware based on the actual total load and wall type.
DIY Jewelry Holder Troubleshooting
My necklaces still tangle
Increase the distance between hooks and avoid putting multiple long chains on one hook.
My earrings keep falling off
Check whether the hooks or mesh openings are appropriate for the earring style. Small studs may need a backing rather than open mesh.
My bracelets slide off
Use a thicker or better-positioned rod, or add a suitable end stop if the design requires one.
My hooks keep coming loose
Check whether the pilot holes are too large or whether the hooks are appropriate for the board material.
The organizer tilts
Recheck the mounting points and use a level during installation.
The wall hardware keeps loosening
The hardware may not match the wall type or total load.
Do not simply add more adhesive or use a larger screw without checking compatibility.
My jewelry catches on the organizer
Inspect every edge and attachment point. Sand rough wood and cover or safely finish sharp mesh edges.
The organizer feels overcrowded
Don’t add more hooks just because there is empty board space.
Remove rarely worn pieces from the display or create a second storage section.
Best DIY Jewelry Holder by Situation
| Situation | Recommended design |
| Lots of necklaces | Large wall board with individual hooks |
| Lots of earrings | Mesh plus dedicated stud section |
| Mostly rings | Small tray-based organizer |
| Mixed collection | Multi-zone wall organizer |
| Small bedroom | Narrow vertical holder |
| Rental home | Lightweight framed organizer |
| Beginner DIYer | Ready-cut board with hooks |
| No power tools | Picture-frame version |
| Rustic décor | Wood or reclaimed-board holder |
| Modern décor | Minimal painted board |
| Large collection | Modular pegboard system |
| Small collection | Compact framed display |
How to Make the Jewelry Holder Look Decorative
Function should come first, but the holder can still complement your room.
Try:
- Natural wood
- White paint
- Black paint with simple metal hardware
- One accent color
- Matching hooks and rod
- A decorative frame
- Minimal lettering
- Fabric backing
Avoid adding thick decorative pieces that reduce usable storage space.
The jewelry itself can become part of the decoration when it is arranged neatly.
Safety and Care Tips
Smooth all exposed wood edges before placing jewelry on the organizer.
Cover or safely finish cut metal mesh so sharp edges cannot scratch skin or snag jewelry.
Use wall hardware appropriate for the organizer’s total weight and your wall type.
Do not overload adhesive mounting products beyond their stated limits.
Keep valuable or especially delicate jewelry in appropriate protective storage when an open display is not suitable.
Avoid placing the organizer where it will regularly be exposed to moisture, splashing water, or unnecessary humidity.
Frequently Asked Questions
What is the easiest DIY jewelry holder to make?
A picture-frame jewelry organizer is one of the easiest options because you can reuse an existing frame and add hooks, mesh, cork, or another backing rather than building the entire structure.
How do I make a DIY jewelry holder for necklaces?
Use individual hooks mounted across a board or frame. Space them according to the size of your necklaces and leave enough vertical clearance for the longest pendants.
What is the best way to keep necklaces from tangling?
Give frequently worn necklaces individual hooks and leave enough space between them so chains and pendants do not overlap.
How far apart should jewelry hooks be?
There is no universal spacing. Thin chains can usually be stored closer together than chunky necklaces. Start with your actual jewelry and increase the spacing wherever pieces overlap.
How do I make an earring holder?
Use mesh or small hooks for dangling earrings and hoops. For studs, use cork, felt-backed material, a suitable perforated backing, or a shallow storage tray.
Can I make a jewelry holder without drilling?
Yes. A lightweight frame or small board can be paired with appropriately rated removable hanging hardware. Always follow the hardware manufacturer’s weight and surface instructions.
Can I use an old picture frame as a jewelry holder?
Yes. Remove the glass and add a suitable backing, hooks, mesh, or cork. This is a simple way to create a decorative jewelry organizer.
What is the best DIY jewelry holder for a small bedroom?
A narrow wall-mounted design is usually more space-efficient than a large jewelry box because it uses vertical wall space rather than valuable dresser space.
How do I store rings on a wall jewelry organizer?
Use a shallow tray, ring dish, or small felt-lined compartment. Keep it separate from hanging necklaces and earrings.
How do I know how large my jewelry holder should be?
Count your jewelry first, measure the longest necklaces, check the size of your bracelets and earrings, and then design the organizer around those measurements rather than choosing a size blindly.
What should I use for a bracelet holder?
A wooden dowel or horizontal rod is a practical choice because bracelets can slide on and off without needing to be fastened individually.
Is a wall-mounted jewelry holder better than a jewelry box?
It depends on the collection. A wall organizer is particularly useful when you want jewelry visible and easy to access, while enclosed storage may be preferable for pieces that need more protection from dust, light, or accidental handling.
Final Thoughts
The best DIY jewelry holder is not necessarily the most complicated one. It is the one that matches the jewelry you actually own.
For a versatile beginner project, an 18 × 24-inch wall-mounted board with individual necklace hooks, a bracelet rod, a dedicated earring section, and a small ring tray provides a practical starting point. You can make it narrower for a small room, expand it for a larger collection, or replace the wood board with an old picture frame for a simpler project.
The key is to design the storage around the jewelry: separate necklaces, give earrings the right type of backing, provide enough bracelet clearance, and keep rings in a shallow accessible space. That turns a decorative craft into a jewelry organizer you can actually use every day.