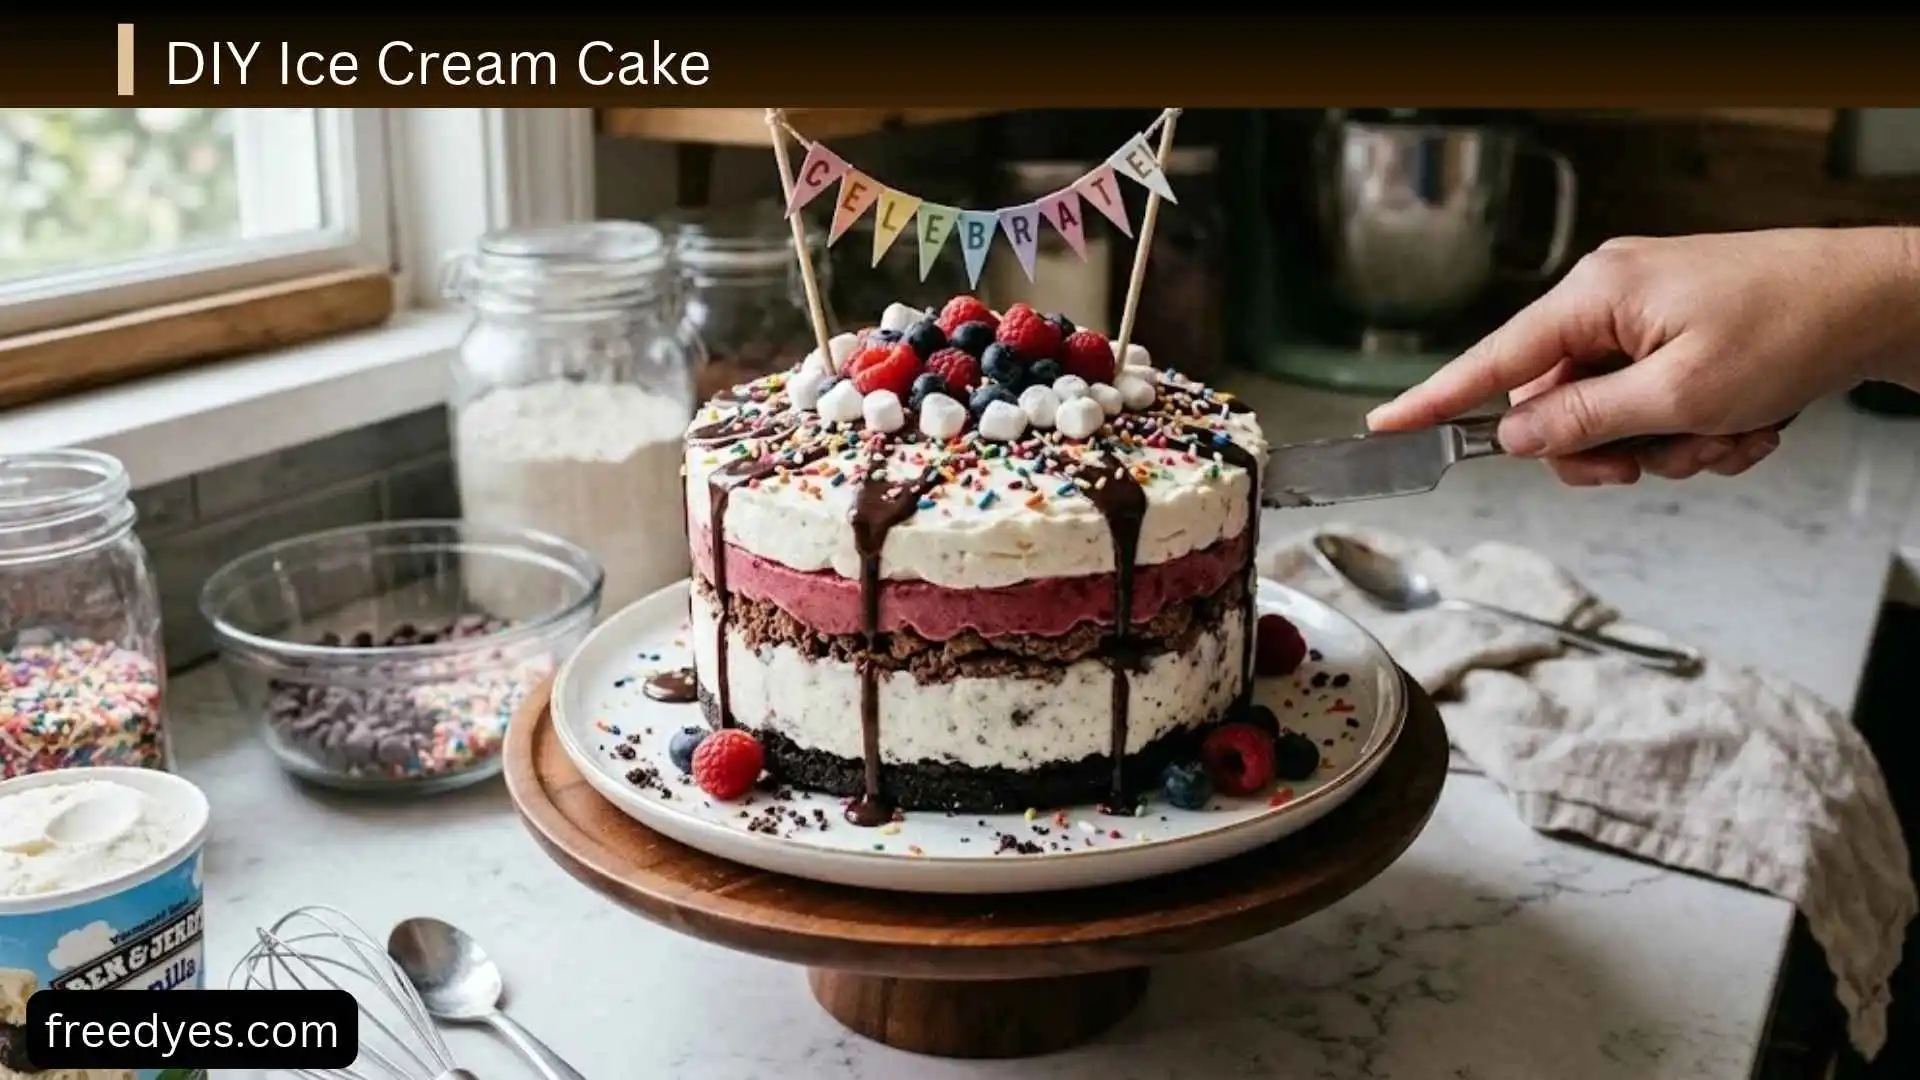
Making a DIY ice cream cake at home is easier than it looks. You do not need an ice cream maker or a complicated cake recipe. This version uses a buttery chocolate cookie crust, two layers of softened ice cream, a thin fudge-and-cookie filling, and a simple whipped cream topping.
The most important part is not complicated baking—it is temperature control. The ice cream should be soft enough to spread but not melted, and each layer needs enough freezer time to become firm before the next one is added.
This recipe is designed as an easy no-bake ice cream cake that works especially well for birthdays, summer gatherings, and make-ahead desserts.
DIY Ice Cream Cake at a Glance
| Detail | Information |
| Servings | 8–10 |
| Pan | 8-inch springform pan |
| Active prep | About 30–40 minutes |
| Freezing time | About 6–8 hours |
| Difficulty | Easy |
| Oven required | No |
| Ice cream maker required | No |
| Main flavors | Vanilla and chocolate |
| Best for | Birthdays, parties, summer desserts |
| Make ahead | Yes |
The recipe follows a simple layered structure: cookie crust, vanilla ice cream, fudge-cookie filling, chocolate ice cream, and whipped cream.
Why This DIY Ice Cream Cake Works
The recipe is intentionally simple.
The cookie crust gives the cake a firm bottom and a little crunch. The two ice cream layers provide the creamy center, while the thin fudge-and-cookie layer adds contrast without making the cake difficult to slice.
Using ready-made ice cream also removes one of the biggest barriers to homemade ice cream cake. You are assembling the cake yourself rather than trying to make every component from scratch.
A no-bake layered approach is also practical because similar homemade ice cream cakes commonly rely on cookies, softened ice cream, a filling, and a long final freeze.
Ingredients for DIY Ice Cream Cake

For the Cookie Crust
- 24 chocolate sandwich cookies, about 270 g
- 5 tablespoons unsalted butter, melted
You can use chocolate sandwich cookies with or without the cream filling. If using a type without filling, you may need a little more butter to make the crumbs hold together.
For the Ice Cream Layers
- About 6 cups ice cream total
- 3 cups vanilla ice cream
- 3 cups chocolate ice cream
You can use approximately 1½ quarts of ice cream, although package sizes and actual usable volume can vary.
Choose ice cream that becomes spreadable when slightly softened. Avoid letting it become completely liquid.
For the Middle Filling
- ½ cup thick chocolate fudge sauce, cooled
- ½ cup mini chocolate chips or finely crushed chocolate cookies
The fudge should be cool and thick rather than hot or runny.
Do not pour warm fudge directly over ice cream. The heat can soften the frozen layer and cause the layers to blend.
For the Whipped Topping
- 1 cup cold heavy whipping cream
- 2 tablespoons powdered sugar
- 1 teaspoon vanilla extract
You can also use a prepared whipped topping if you want to simplify the recipe.
For Decoration
Use any combination of:
- Sprinkles
- Mini chocolate chips
- Cookie crumbs
- Chocolate curls
- Small candies
- A light chocolate drizzle
For a birthday cake, add candles immediately before serving.
Equipment You Need
- 8-inch springform pan
- Parchment paper
- Mixing bowl
- Food processor or rolling pin
- Measuring cups and spoons
- Spatula
- Hand mixer or stand mixer
- Freezer-safe serving plate
A springform pan is the easiest option because its removable sides make releasing the frozen cake much simpler.
If you do not have one, you can still make the cake using a regular pan. The alternative method is explained below.
How to Make DIY Ice Cream Cake
1. Prepare the Pan
Line the bottom of an 8-inch springform pan with parchment paper.
If you want extra protection when removing the cake, line the sides as well.
Place the empty pan in the freezer for about 10–15 minutes.
A cold pan gives the first frozen layer a better starting point and helps prevent the crust or ice cream from softening too quickly.
2. Make the Cookie Crust
Crush the chocolate sandwich cookies into fine crumbs.
You can use a food processor or place the cookies in a sealed bag and crush them with a rolling pin.
Mix the crumbs with the melted butter.
The mixture should resemble damp sand and hold together when pressed.
Transfer it to the chilled pan and press it into an even layer.
Use the bottom of a glass or measuring cup to compact the crust without making it excessively thick.
Place the pan in the freezer for about 20 minutes.
3. Soften the First Ice Cream
Measure 3 cups of vanilla ice cream.
Let it soften just enough to become spreadable.
The correct consistency is similar to very thick soft-serve: it should spread with a spatula while still holding its shape.
Do not use melted ice cream.
If the ice cream becomes runny, return it to the freezer for several minutes before continuing.
4. Add the First Ice Cream Layer
Remove the chilled crust from the freezer.
Spread the softened vanilla ice cream evenly over the cookie base.
Work quickly, especially if your kitchen is warm.
Smooth the surface with a spatula.
Place the pan back in the freezer for about 30–45 minutes, or until the layer is firm enough that the next layer can be added without sinking into it.
5. Add the Fudge and Cookie Filling
Once the vanilla layer is firm, spread approximately ½ cup of cooled, thick fudge sauce over it.
Keep the layer relatively thin.
Sprinkle the mini chocolate chips or crushed cookies evenly over the fudge.
Avoid adding a thick layer of wet filling. Too much soft filling can make the center difficult to cut and can cause layers to slide.
Return the cake to the freezer for about 15–20 minutes.
6. Add the Chocolate Ice Cream
Soften 3 cups of chocolate ice cream until spreadable but not melted.
Carefully spoon it over the filling.
Spread it into an even layer without pressing aggressively into the layer underneath.
Smooth the top.
If the ice cream starts becoming difficult to work with, stop and return it to the freezer rather than trying to spread melting ice cream.
7. Freeze the Cake Until Firm
Cover the pan loosely with plastic wrap or another freezer-safe covering.
Freeze the cake for at least 6 hours.
For the firmest result, freezing it overnight is easier.
Do not judge freezing time only by the clock. The center should be thoroughly frozen before you try to remove the cake from the pan.
8. Make the Whipped Topping
When the cake is fully frozen, prepare the topping.
Beat the cold heavy cream, powdered sugar, and vanilla until the cream reaches firm peaks.
Do not overbeat it until it becomes grainy.
You can spread the whipped cream over the cake or pipe it around the edges.
Add sprinkles, cookie crumbs, chocolate chips, or another decoration immediately afterward.
9. Freeze Briefly Again
After decorating, return the cake to the freezer for about 1–2 hours if the topping or cake became noticeably soft during decorating.
This helps the finished cake firm up again before serving.
How Long Does an Ice Cream Cake Need to Freeze?
The total freezing time depends on the size and thickness of the cake, freezer temperature, and how cold the ingredients were when assembled.
For this recipe:
- Cookie crust: about 20 minutes
- First ice cream layer: about 30–45 minutes
- Filling: about 15–20 minutes
- Final assembled cake: at least 6 hours
- Overnight: easiest option for a firm cake
The most important rule is:
Each layer should be firm enough to support the next one.
If you rush the freezing stages, the layers can mix, slide, or become uneven.
How to Keep Ice Cream Cake From Melting While Making It

Ice cream cake is much easier to assemble when you control the temperature.
Keep the pan cold
Chill the empty pan before starting.
Work with one ice cream flavor at a time
Do not leave both containers sitting open on the counter while you prepare other ingredients.
Soften, don’t melt
The ice cream should be spreadable but thick.
Chill your tools
If your kitchen is warm, place your spatula and mixing bowl in the refrigerator or freezer briefly before using them.
Freeze between layers
This is one of the most important steps.
If the first layer is still soft when you add the second, the two layers can merge.
If the ice cream begins turning liquid, stop assembling and return the cake to the freezer.
How to Remove Ice Cream Cake From a Springform Pan
Take the cake directly from the freezer.
Release the springform carefully.
If the side of the cake is stuck, wrap a warm—not hot—cloth around the outside of the pan for a few seconds.
The small amount of warmth can loosen the edge.
Do not leave the cake exposed to warmth for a long time.
Transfer the cake to a chilled serving plate as soon as possible.
How to Make Ice Cream Cake Without a Springform Pan
You can use a deep round pan, loaf pan, or square baking dish.
The important part is creating a liner with enough overhang to lift the frozen cake.
For a regular pan
- Line the pan with freezer-safe plastic wrap or parchment.
- Leave several inches of overhang on opposite sides.
- Assemble the cake normally.
- Freeze until completely firm.
- Lift the cake using the overhanging liner.
- Transfer it to a serving plate.
- Peel away the liner before decorating.
A liner is much easier than trying to pry a frozen cake out of an unlined pan.
How to Make DIY Ice Cream Cake Without an Oven
This recipe is already oven-free.
You don’t need to bake the crust or cake layer.
The cookie-and-butter base is pressed directly into the pan, followed by the frozen layers.
That makes this method useful when you want:
- A summer dessert
- A birthday cake without baking
- A quick homemade frozen dessert
- A recipe without an oven
- A beginner-friendly cake project
Can You Make Ice Cream Cake Without a Cake Layer?
Yes.
A traditional sponge or sheet cake is not essential for this type of frozen dessert.
The cookie base provides structure while the ice cream creates the main body of the cake.
If you specifically want a more traditional cake texture, you can use a thin, fully cooled cake or brownie layer instead of the cookie crust.
Do not add warm cake to the ice cream.
The cake should be completely cool before assembly.
Can You Use Store-Bought Ice Cream?
Yes. In fact, it is one of the easiest ways to make DIY ice cream cake.
Store-bought ice cream eliminates the need for an ice cream machine and makes the recipe much faster.
Choose flavors based on both taste and texture.
Very large frozen chunks can make slicing harder, so smooth ice cream or ice cream with small mix-ins is easier to work with.
Best Ice Cream and Filling Combinations
You don’t need dozens of combinations. A few balanced pairings cover most preferences.
| Ice Cream | Filling | Base |
| Vanilla + chocolate | Fudge + chocolate cookies | Chocolate cookies |
| Cookies and cream | Fudge + cookie crumbs | Chocolate cookies |
| Strawberry + vanilla | Thin strawberry jam layer | Shortbread cookies |
| Chocolate + peanut butter | Peanut butter swirl | Chocolate cookies |
| Mint chocolate chip + chocolate | Chocolate fudge | Chocolate cookies |
| Coffee + chocolate | Chocolate cookie crunch | Chocolate cookies |
For the most reliable slicing, keep the filling relatively thin and avoid adding large frozen pieces.
Easy Substitutions
Different cookies
You can replace chocolate sandwich cookies with:
- Graham crackers
- Chocolate wafers
- Shortbread cookies
- Vanilla sandwich cookies
- Gluten-free cookies
The amount of butter may need slight adjustment depending on how dry the cookies are.
Different ice cream flavors
Vanilla and chocolate are only the starting point.
Use any two flavors that complement the filling.
Whipped topping
Homemade whipped cream gives the freshest texture, but prepared whipped topping can save time.
Dairy-free version
Use dairy-free ice cream, dairy-free cookies, and a compatible dairy-free topping.
Always check package labels if the dessert must meet a strict dietary requirement.
How to Decorate a DIY Ice Cream Cake
Keep the decoration simple.
A thin layer of whipped cream around the top or edges is enough to make the cake look finished.
You can add:
- Rainbow sprinkles for birthdays
- Chocolate curls for a more elegant look
- Cookie crumbs for a casual dessert
- Mini candies for children
- Chocolate drizzle for a richer finish
If using candles, insert them immediately before serving rather than leaving them on the cake during extended freezer storage.
How to Cut Ice Cream Cake Cleanly

A frozen cake can be difficult to slice with a cold knife.
Use this method:
- Remove the cake from the freezer.
- Let it sit briefly so the surface is slightly easier to cut.
- Dip a large knife in warm water.
- Dry the knife completely.
- Make a firm cut.
- Repeat the warm-and-dry process for the next slice.
Do not use a dripping-wet knife. Excess water can make the surface messy and can freeze against the cake.
Warming and drying the knife between cuts is also a common technique recommended for homemade ice cream cakes.
How to Store DIY Ice Cream Cake
Keep the cake continuously frozen.
For the best texture:
- Cover it tightly.
- Protect it from freezer odors.
- Avoid leaving it uncovered.
- Avoid repeated thawing and refreezing.
- Keep the cake on a level freezer shelf.
Freezer burn and texture deterioration become more likely when frozen desserts are poorly protected or repeatedly exposed to temperature changes.
For a celebration, making the cake the day before is a practical option because it gives all the layers enough time to freeze thoroughly.
DIY Ice Cream Cake for a Birthday
This recipe works particularly well as a birthday dessert because it can be assembled ahead of time.
For a simple birthday version:
- Use vanilla and chocolate ice cream.
- Add a chocolate cookie crust.
- Use fudge and cookie crumbs for the middle.
- Finish with whipped cream.
- Add colorful sprinkles.
- Add candles immediately before serving.
You can also pipe the birthday person’s name onto the top using melted chocolate or a small amount of colored decorating icing that is suitable for frozen desserts.
Common DIY Ice Cream Cake Mistakes
Using melted ice cream
Problem: The layers become difficult to control and may freeze unevenly.
Fix: Work with thick, spreadable ice cream.
Skipping the freezing stages
Problem: Layers blend together.
Fix: Freeze each major layer until firm before adding the next.
Adding warm fudge
Problem: The heat softens the ice cream.
Fix: Cool the fudge before spreading it.
Using too much filling
Problem: The center can slide or become difficult to cut.
Fix: Keep the filling thin and evenly distributed.
Forgetting to line a regular pan
Problem: The frozen cake sticks.
Fix: Use parchment or freezer-safe plastic wrap with overhanging edges.
Cutting immediately with a frozen knife
Problem: The knife struggles to pass through the cake.
Fix: Use a warm, completely dry knife.
Leaving the cake out too long
Problem: The outer layers soften while the center remains frozen.
Fix: Take out only what you plan to serve and return leftovers to the freezer promptly.
DIY Ice Cream Cake Troubleshooting
| Problem | Why It Happens | What to Do |
| Ice cream melts during assembly | Kitchen or ingredients are too warm | Freeze the cake and tools briefly and work faster |
| Layers slide apart | Layers weren’t frozen enough | Freeze between layers until firm |
| Cake won’t release | Pan wasn’t lined or edge is frozen tightly | Use a liner or briefly warm the outside of the pan |
| Base is rock hard | Crust is too thick or heavily compressed | Use a moderate crust layer and allow brief tempering before slicing |
| Filling squeezes out | Filling is too thick or soft | Use a thinner, more stable layer |
| Top cracks | Cake is extremely cold during cutting | Let it temper briefly and use a warm, dry knife |
| Cake looks uneven | Ice cream wasn’t spread evenly | Level each layer before freezing |
| Ice crystals appear | Dessert experienced melting and refreezing | Keep the cake continuously frozen and tightly covered |
| Whipped cream becomes soft | Cake warmed during decorating | Return it to the freezer before serving |
Frequently Asked Questions
Can I make an ice cream cake the day before?
Yes. Making it the day before is often easier because the cake has plenty of time to freeze completely.
How long should I freeze an ice cream cake?
For this recipe, allow at least 6 hours for the completed cake. Overnight is the easiest option when you want a firm cake that is easier to unmold and slice.
Can I make ice cream cake without an oven?
Yes. This recipe uses a cookie crust, so there is no baking required.
Can I use store-bought ice cream?
Yes. Store-bought ice cream is the simplest choice and eliminates the need for an ice cream maker.
Can I make it without a springform pan?
Yes. Use a deep pan lined with parchment or freezer-safe plastic wrap, leaving enough overhang to lift the frozen cake.
Why is my ice cream cake melting while I assemble it?
The ice cream is probably too soft, the room may be warm, or the layers are taking too long to assemble.
Use cold ingredients, chill the pan, work quickly, and freeze the cake whenever a layer becomes too soft.
Why are my ice cream cake layers sliding?
The layer underneath was probably not firm enough, or the filling is too thick or wet.
Freeze between layers and keep the middle filling thin.
How do I cut an ice cream cake without crushing it?
Use a large knife warmed in water and then dried completely. Make firm cuts and rewarm the knife between slices.
Can I use whipped cream on an ice cream cake?
Yes. Homemade whipped cream or a suitable prepared whipped topping works well. If the cake becomes soft during decorating, return it to the freezer before serving.
Can I use fruit in an ice cream cake?
Yes, but use fruit carefully. Very watery fruit can become icy after freezing. Drain juicy fruit well and avoid adding a large amount to the middle of the cake.
Can I make an ice cream cake without an actual cake layer?
Yes. A cookie crust and ice cream layers are enough to create a sliceable frozen cake.
What is the easiest ice cream cake for beginners?
A no-bake cake made with store-bought ice cream and a cookie crust is one of the simplest approaches because there is no cake batter, oven, or homemade ice cream to manage.
Final Thoughts
A good DIY ice cream cake does not require complicated baking skills. The easiest approach is to build the dessert in controlled layers and give each layer enough time to freeze before continuing.
For the most reliable result, remember these four rules:
- Use softened ice cream, not melted ice cream.
- Freeze between layers.
- Keep wet fillings thin and cool.
- Use a warm, dry knife for clean slices.
The result is a creamy, crunchy, make-ahead dessert that can be customized with different ice cream flavors, cookies, fillings, and decorations without turning the project into a complicated baking recipe.