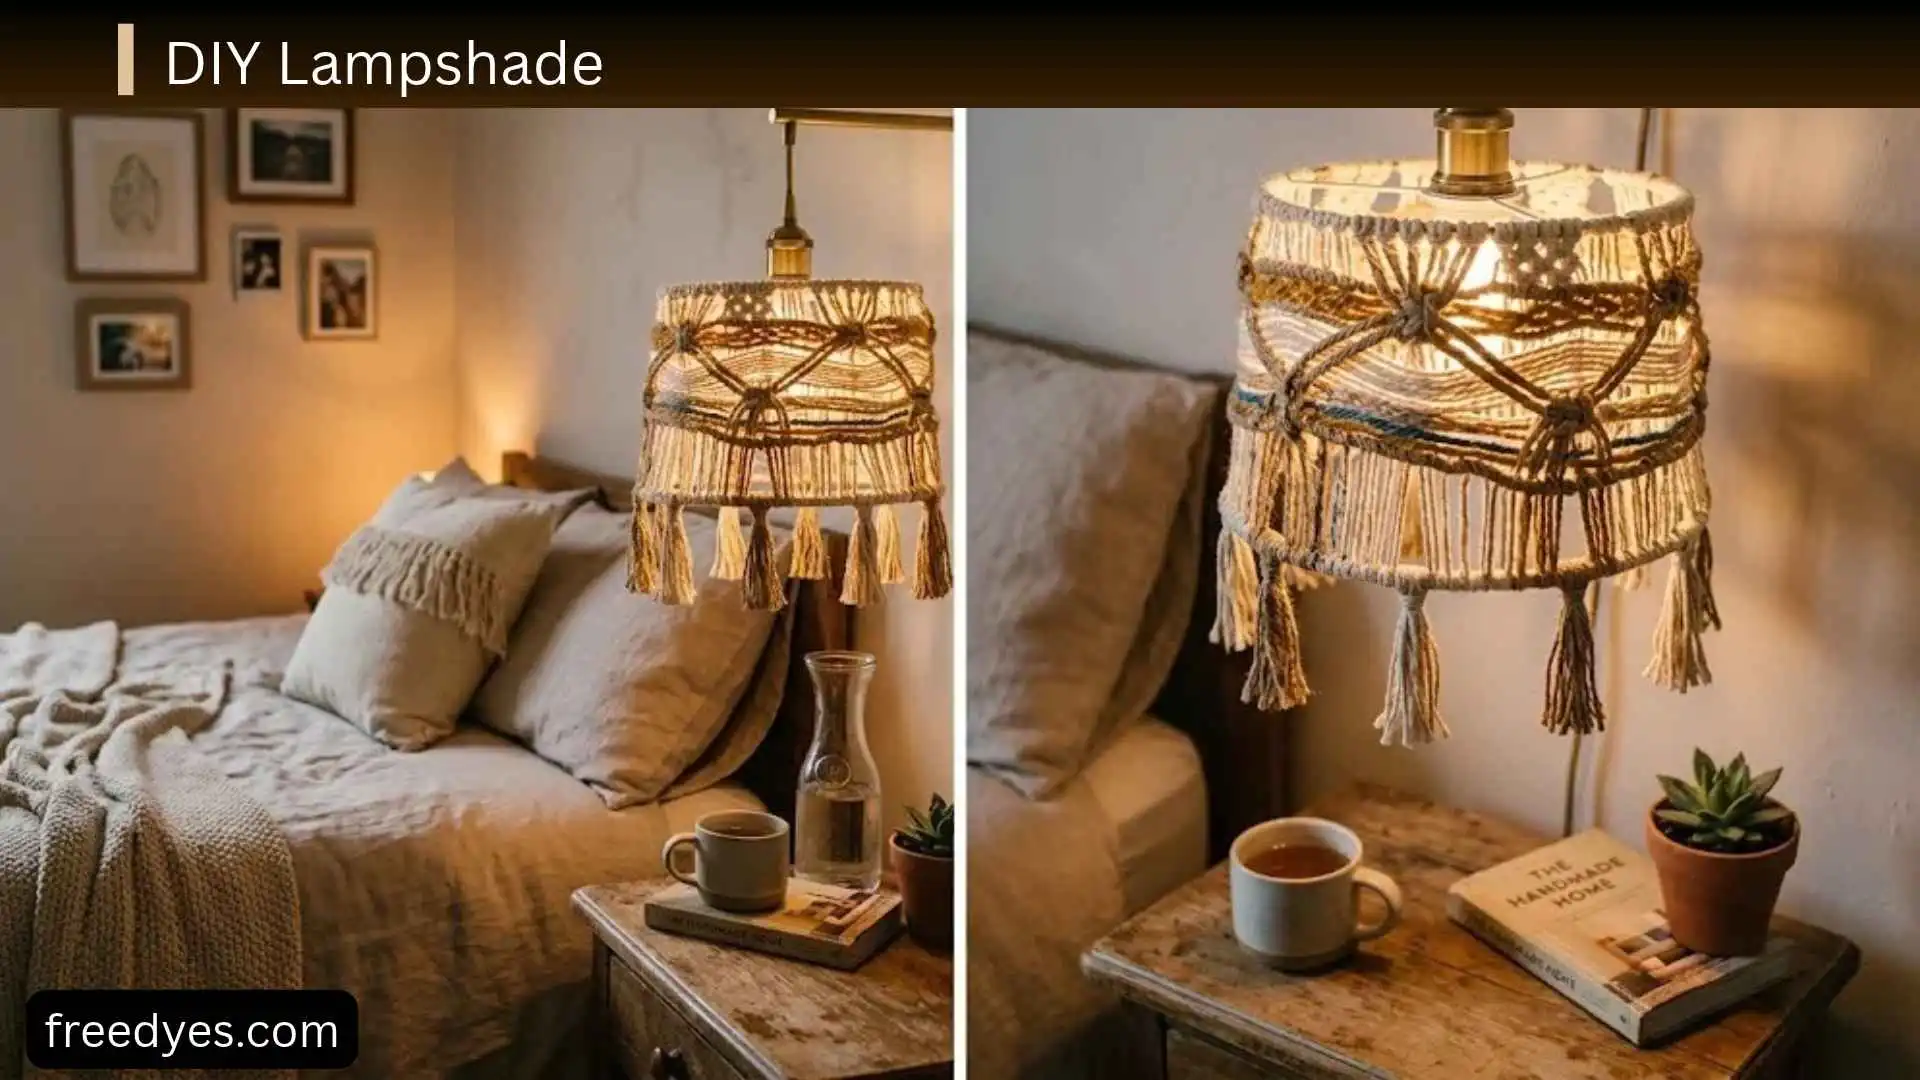
A DIY lampshade is one of the easiest ways to change the look of a lamp without replacing the entire fixture. The simplest beginner method is to recover an existing drum shade with lightweight fabric and suitable lampshade backing. You can also make a new shade from a frame if you need a different size or shape. This guide explains how to choose the right method, measure your shade, calculate fabric, make a template, create a no-sew lampshade, recover an old shade, choose fabric, fix common problems, and work safely around lighting.
DIY Lampshade at a Glance
If you want the easiest project, start with an existing drum lampshade rather than building a complicated frame from scratch.
| Project detail | Beginner recommendation |
| Easiest method | Recover an existing shade |
| Best shape | Straight drum shade |
| Sewing required | No |
| Best fabric | Lightweight cotton or linen |
| Main supplies | Fabric, suitable backing, adhesive, paper |
| Useful tools | Measuring tape, scissors, pencil, clips |
| Main challenge | Measuring and applying fabric smoothly |
| Best light source | A compatible LED bulb |
| Skill level | Beginner |
| Active time | About 1–2 hours for a simple recovery, depending on the shade and adhesive |
These times are practical estimates, not guarantees. Adhesive drying or curing time may add extra time.
Important: A decorative fabric is not automatically a complete lampshade material. Use a suitable lampshade construction system and make sure the finished shade is compatible with the bulb, fitting, ventilation, and lamp.
Which DIY Lampshade Method Is Best for You?
Before buying supplies, decide what you are actually trying to make.
| Your situation | Best option |
| You already have an old shade | Recover the existing shade |
| You want the easiest project | Recover a simple drum shade |
| You don’t sew | Use a no-sew construction method |
| You need a custom size | Start with a suitable new frame |
| You want to reuse fabric scraps | Recover a small existing shade |
| You want a professional custom shape | Use a purpose-made frame and backing |
| You want pleats | Choose a pleated construction method |
| You have a damaged frame | Replace the frame rather than simply covering it |
| You are renting | Recover a removable shade instead of modifying the lamp |
For most beginners, an existing drum shade is the best starting point because the shape is straightforward and doesn’t require complicated pattern shaping.
How to Measure a Lampshade
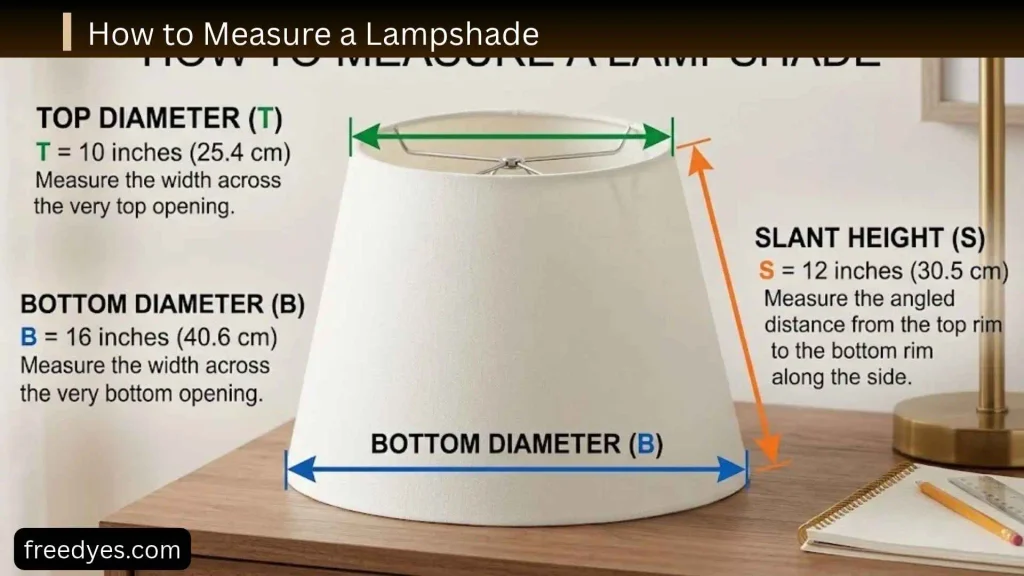
Accurate measuring is one of the most important parts of a DIY lampshade project. Cutting fabric before measuring the actual shade can leave you with a panel that is too short, too narrow, or badly aligned.
Measure the Shade Height
Measure vertically from the top edge of the shade to the bottom edge.
Do not include the lamp base or electrical fitting.
Write this measurement down before making your pattern.
Measure the Circumference
For a straight drum shade, measure around the outside of the shade.
If you are working with a perfectly cylindrical shade and know its diameter, you can estimate the circumference with:
Circumference = diameter × 3.14
However, measuring the actual shade is preferable because handmade or older shades may not be perfectly round.
Measure a Tapered Shade Differently
A tapered or empire-style shade is not simply a rectangle.
Its top and bottom circumferences are different, so the fabric pattern needs to account for that change.
For a first project, a straight drum shade is much easier.
Check the Fitter
Before covering or making a shade, check how it attaches to the lamp.
The fitter must be compatible with the lamp’s socket and intended setup.
Do not finish an entire shade only to discover that its fitter does not match your lamp.
How Much Fabric Do You Need for a DIY Lampshade?
The amount of fabric depends on the shape and size of the shade.
For a simple drum shade, start with:
Fabric width = shade circumference + overlap allowance
Fabric height = shade height + top and bottom finishing allowance
The exact allowance depends on your construction method, the backing system, and how you plan to finish the edges.
For patterned fabric, buy additional material when necessary so you can center the design or match the pattern at the seam.
Example Measurement
Suppose you have a drum shade that is:
- 12 inches in diameter
- 10 inches tall
Its approximate circumference is:
12 × 3.14 = 37.68 inches
You would then add enough extra width for the seam or overlap required by your construction method.
For height, start with the 10-inch shade height and add the amount needed to finish the top and bottom edges.
This is an illustrative example, not a universal cutting measurement. Always account for the particular shade and backing system you are using.
Easy DIY Lampshade Project
For a beginner-friendly project, use an existing drum shade and create a new fabric exterior.
The goal is to change the appearance of the shade without rebuilding the entire lamp.
Materials
You will need:
- Existing lampshade in good structural condition
- Lightweight fabric
- Appropriate lampshade backing or lining system
- Adhesive suitable for your chosen lampshade construction
- Paper for making a template
- Optional trim
- Optional clips or small clamps
Choose supplies according to the construction system you are using rather than assuming one adhesive or backing works for every lampshade.
Tools
Gather:
- Measuring tape
- Pencil
- Ruler
- Scissors
- Craft knife if needed
- Straightedge
- Iron for fabric
- Clean work surface
- Clips or clothespins
A cutting mat can also make trimming easier.
How to Make a DIY Lampshade Step by Step
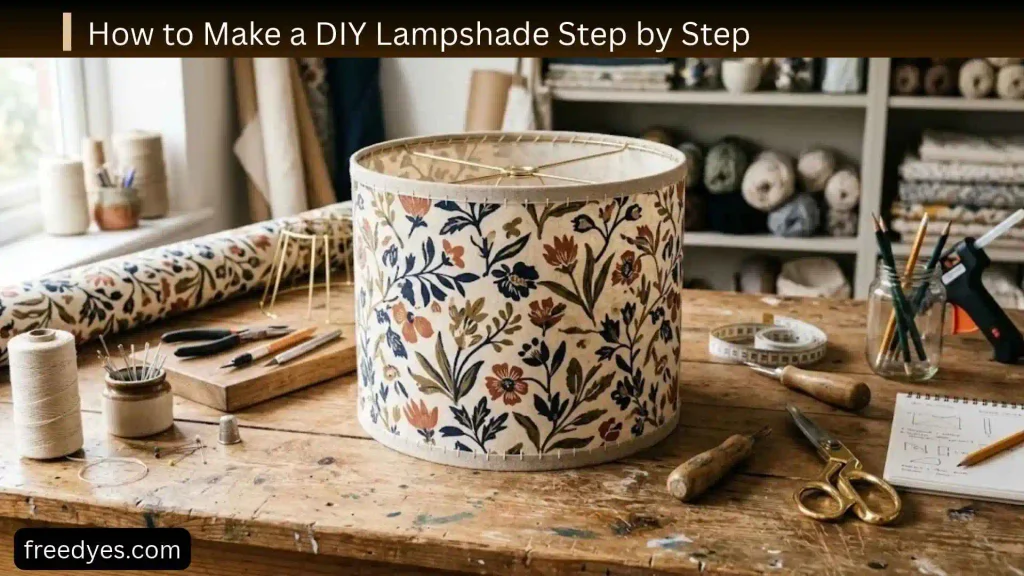
Step 1: Inspect the Existing Shade
Before covering the shade, check the frame and structure.
Look for:
- Bent rings
- Loose parts
- Damaged lining
- Crumbling material
- Rust
- Loose fitter components
- Tears that affect the structure
If the frame is unstable or damaged, replacing it may be better than covering it.
Step 2: Clean the Shade
Remove dust and loose debris.
Allow the shade to become completely dry before applying fabric or adhesive.
Do not soak a shade unless its construction specifically allows it.
Step 3: Measure the Shade
Measure the:
- Height
- Circumference
- Top edge
- Bottom edge
- Fitter position
Record everything before cutting.
Step 4: Make a Paper Template
A paper template gives you a chance to test your measurements before cutting expensive fabric.
For a straight drum shade, create a rectangle based on the measured circumference and height, then add the necessary allowances for your chosen finishing method.
Tape the paper around the shade temporarily.
Check:
- Does it wrap all the way around?
- Is the seam positioned where you want it?
- Are the top and bottom allowances sufficient?
- Does the paper sit straight?
- Does the pattern orientation make sense?
Do not skip this test when working with expensive or patterned fabric.
Step 5: Prepare the Fabric
Iron the fabric if it has wrinkles.
Lay it flat and place your template on the wrong side.
Transfer the outline carefully.
If the fabric has a directional print, decide which way the design should face before cutting.
Step 6: Cut the Fabric
Cut carefully around the template.
For patterned fabric, check the design again before making the final cut.
A random or small-scale print is easier for beginners because slight shifts are less noticeable.
Step 7: Prepare the Backing
If your lampshade construction requires backing or lining, cut it according to the system you are using.
The backing helps provide the appropriate structure and appearance for the finished shade.
Do not treat ordinary fabric as a substitute for a purpose-made lampshade backing when your construction requires one.
Step 8: Test-Fit Everything
Before applying adhesive, place the fabric around the shade.
Check:
- Seam position
- Top edge
- Bottom edge
- Pattern direction
- Pattern alignment
- Fabric tension
This is the easiest stage at which to correct a mistake.
Step 9: Attach the Fabric
Apply your chosen adhesive according to its instructions.
Work gradually rather than covering the entire surface with a large amount of adhesive at once.
Smooth the fabric as you go.
Avoid pulling it so aggressively that the pattern becomes distorted.
Step 10: Smooth the Surface
Work from one section to the next.
If a wrinkle appears, gently lift the affected section if the adhesive system allows it and reposition it.
Do not continue pressing a large wrinkle deeper into the shade.
Step 11: Finish the Top and Bottom Edges
Fold or finish the excess fabric according to your construction method.
Keep the edges even.
Small clips can help hold sections in place while the adhesive sets.
Step 12: Finish the Seam
Bring the fabric edges together neatly.
A small, clean overlap is generally easier to manage than trying to make two edges meet perfectly.
If you are using a strong directional pattern, check the seam before the adhesive becomes permanent.
Step 13: Allow the Shade to Cure
Follow the adhesive manufacturer’s drying or curing instructions.
Do not install or use the shade before the materials are properly set.
How to Make a No-Sew DIY Lampshade
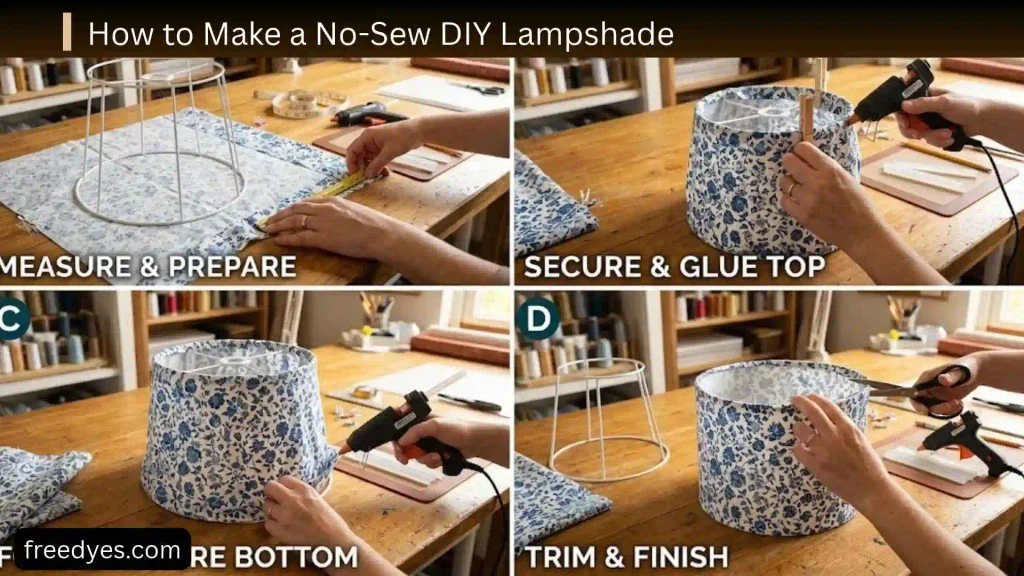
A no-sew lampshade is ideal if you don’t have a sewing machine or simply want a faster project.
The process is similar to recovering an existing shade.
Step 1: Choose a Simple Shade
Use a straight drum shade whenever possible.
Step 2: Make a Paper Pattern
Measure the shade and create a paper template before cutting your fabric.
Step 3: Cut the Fabric
Add the appropriate allowances for the top, bottom, and seam.
Step 4: Prepare the Backing
Use a lampshade backing system appropriate for your frame and fabric.
Step 5: Attach the Fabric to the Backing
Follow the backing manufacturer’s recommended adhesive or application method.
Step 6: Attach the Finished Panel
Position the completed panel carefully around the shade.
Work gradually so you can keep the edges straight.
Step 7: Finish the Seam
Overlap or finish the joining edge neatly.
Step 8: Finish the Edges
Secure the top and bottom edges and allow the materials to cure completely.
No-sew construction can be very beginner-friendly, but it still requires accurate measuring and careful edge finishing.
How to Recover an Old Lampshade
Recovering an old lampshade is often the most economical DIY option.
When an Old Shade Is Worth Recovering
Recover it when:
- The frame is straight
- The fitter is suitable
- The structure is stable
- The existing shade is mainly unattractive or outdated
- The lining and frame are still usable
When to Replace It
Consider replacing the shade or frame if:
- The frame is badly bent
- Important components are loose
- The lining is deteriorating
- The fitter is incompatible
- The shade has structural damage
- The finished construction would not provide appropriate separation from the bulb
A fabric makeover cannot fix a fundamentally damaged lampshade.
Best Fabric for a DIY Lampshade
Fabric choice affects both appearance and how much light comes through the finished shade.
Lightweight Cotton
A good beginner choice.
It is relatively easy to cut and handle and works well with many decorative patterns.
Linen
Linen can create a soft, natural appearance.
Its texture can also make small imperfections less obvious than they would be on a perfectly smooth, glossy fabric.
Lightweight Printed Fabric
Printed fabric is excellent for a decorative lampshade.
Small or irregular patterns are easier to position than large directional motifs.
Stripes
Stripes can look polished, but they require careful alignment.
A crooked stripe can make the entire shade look uneven.
Large Floral Prints
Large motifs can look beautiful, but they require more planning.
You may need additional fabric to center the design properly.
Sheer Fabric
Sheer materials allow more light through, but they may require a more appropriate backing or lining system to create the desired appearance and construction.
Heavy Upholstery Fabric
Heavy fabric can create a substantial appearance but may block more light and can be harder to handle.
For a first project, lightweight fabric is generally easier.
Fabrics and Materials to Avoid
Don’t choose a material simply because it looks attractive.
Be cautious with:
- Highly heat-sensitive materials
- Unknown plastics
- Materials that can melt
- Loose decorative materials near the bulb
- Extremely thick materials that interfere with appropriate light and ventilation
- Materials not intended for the temperature conditions of the lamp
Do not assume that using an LED bulb makes every material automatically safe.
LED bulbs can reduce heat compared with hotter bulb types, but the complete lamp-and-shade combination still needs appropriate clearance, ventilation, and component compatibility.
How to Choose a Fabric Pattern
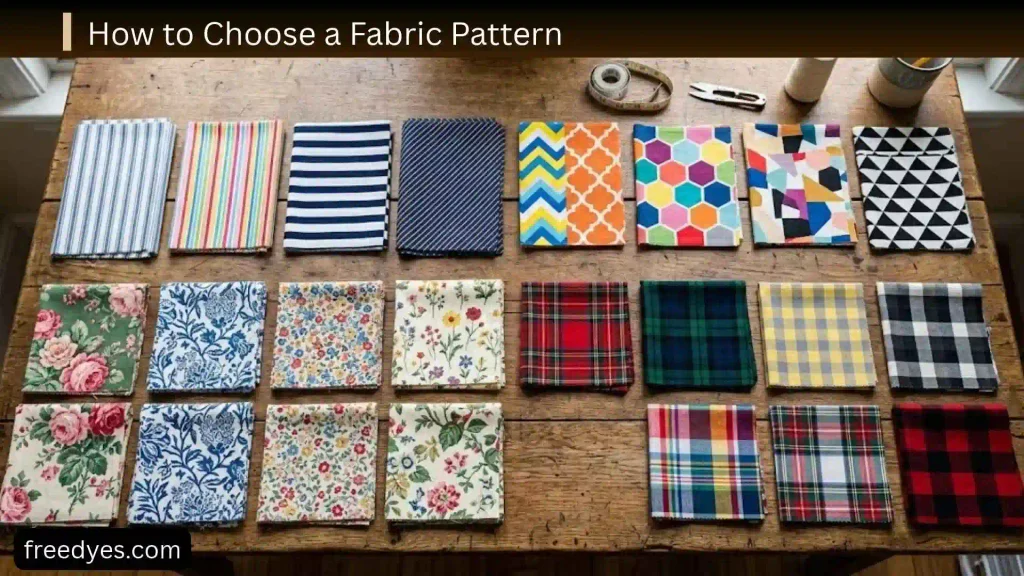
Pattern selection can make or break a DIY lampshade.
Small Random Patterns
Best for beginners.
Minor alignment differences are less noticeable.
Vertical Stripes
These need careful placement because even a slight angle can make the finished shade look crooked.
Horizontal Stripes
Make sure the lines remain level around the shade.
Large Motifs
Plan where the main design will appear.
You may want the central motif to face the room rather than allowing it to fall at the seam.
Directional Prints
Check the direction before cutting.
A beautiful pattern can look completely wrong if it ends up sideways after installation.
How to Prevent Wrinkles on a DIY Lampshade
Wrinkles usually appear because the fabric wasn’t positioned correctly before it was secured.
To reduce them:
- Iron the fabric first.
- Test-fit the fabric before using adhesive.
- Work in small sections.
- Smooth from the center toward the next section.
- Don’t stretch the fabric excessively.
- Avoid using too much adhesive.
- Check the surface from several angles as you work.
If you see a wrinkle immediately, fix it before continuing.
Trying to hide a large wrinkle by adding more glue usually makes the problem harder to correct.
How to Choose a Lampshade Frame
If you are making a shade from scratch, choose the frame before finalizing the fabric pattern.
Drum Frame
A drum frame has a relatively straight profile and is one of the easiest shapes for beginners.
Tapered Frame
A tapered frame creates a more traditional lampshade profile but requires a more carefully shaped pattern.
Bell Frame
The curved profile makes pattern creation more complicated.
Pendant Frame
Pendant shades require particular attention to the fitting and electrical setup.
Don’t choose a frame based only on its appearance.
Check that its size, fitter, and intended use work with your lamp.
DIY Lampshade Safety
Lighting projects deserve more attention than ordinary decorative crafts.
Unplug the lamp before removing, fitting, or working on the shade.
Keep Fabric Away From the Bulb
The shade should not press against the bulb.
Follow the lamp, shade, and bulb manufacturer’s clearance requirements.
Use an Appropriate Bulb
A compatible LED bulb can be a useful choice for many DIY shade projects because it generally produces less heat than incandescent lighting.
However, LED does not mean unlimited material compatibility.
Do Not Block Ventilation
Do not cover ventilation openings or create a construction that traps excessive heat around the light source.
Check the Electrical Components
If the socket, cord, plug, or other electrical components are damaged, don’t assume a new shade solves the problem.
Repair or replace the electrical component appropriately before using the lamp.
Don’t Improvise Around the Socket
A decorative DIY shade should not interfere with the lamp’s electrical or mechanical components.
If you’re unsure whether a frame or fitter is compatible, check the manufacturer’s instructions or have the lamp assessed by a qualified professional.
DIY Lampshade on a Budget
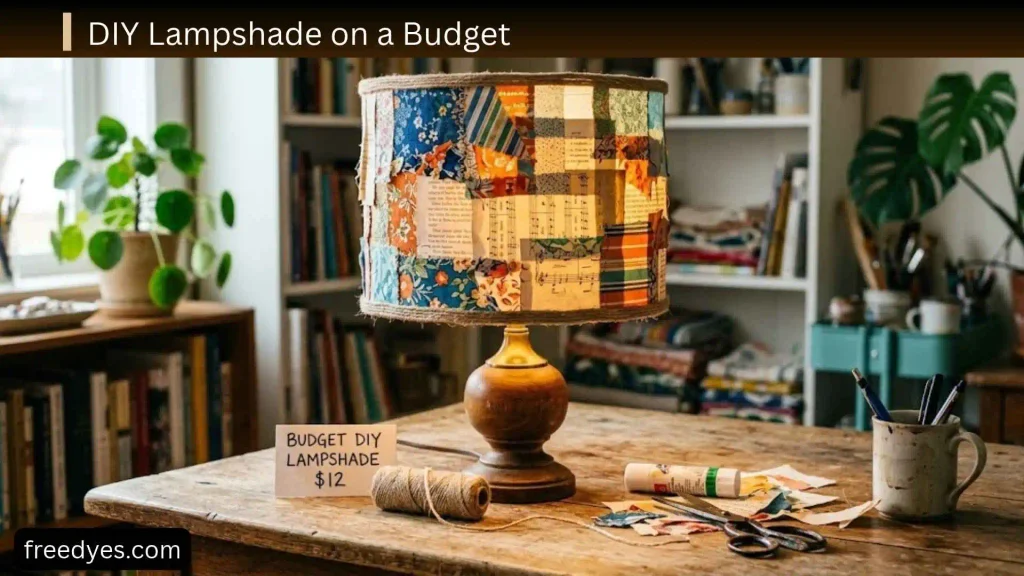
You don’t need to rebuild an entire lamp to create a new look.
Reuse an Existing Shade
This is often the simplest way to save money.
Use Fabric You Already Have
Small shades can be good projects for leftover fabric.
Make sure the fabric is appropriate for the intended lampshade construction.
Choose a Simple Shape
A straight drum shade generally requires less complicated pattern work than a curved or tapered shade.
Spend More on the Right Safety Components
Saving money on decorative fabric is reasonable.
Saving money by using unsuitable shade materials is not.
The best budget strategy is to simplify the design, not compromise the lighting components.
DIY Lampshade for a Small Lamp
Small table lamps are good candidates for beginner projects.
A simple small drum shade can be easier to:
- Measure
- Cut
- Wrap
- Store
- Test
For a small lamp, avoid using a very large-scale pattern unless you have enough fabric to position it properly.
Light-colored fabric can also help maintain a brighter appearance when the lamp is switched on.
DIY Lampshade for a Floor Lamp
A floor-lamp shade usually has a larger visual presence, so pattern and proportion become more important.
Before making one, check:
- Existing frame diameter
- Shade height
- Fitter
- Lamp socket
- Bulb compatibility
- Clearance
- Overall room scale
A tiny shade can look lost on a tall floor lamp, while an oversized shade can dominate a small room.
DIY Lampshade Ideas
Once you understand the basic construction, the same process can be adapted to different styles.
Floral Fabric Lampshade
Choose a floral print and position the main motif deliberately.
Neutral Linen Lampshade
A natural neutral fabric can create a simple, understated look.
Vintage Fabric Lampshade
Old fabric can work well when its condition and construction suitability are appropriate.
Striped Lampshade
Use careful measuring and alignment to keep the stripes visually straight.
Colorful Patterned Lampshade
A bold pattern can turn a plain lamp into a decorative focal point.
Matching Lampshades
The same fabric can be used on several shades, but measure each shade individually rather than assuming they are identical.
Common DIY Lampshade Mistakes
Cutting Fabric Without Making a Template
A paper template lets you identify measurement mistakes before cutting the final fabric.
Forgetting the Seam Allowance
Fabric needs enough material to finish the joining edge.
Ignoring the Top and Bottom Edges
If you don’t plan your edge treatment, you may end up with an uneven finish.
Choosing Fabric Only for Its Appearance
A beautiful fabric may be too thick, too delicate, or otherwise unsuitable for your construction.
Ignoring Pattern Direction
Always decide which way the print should face before cutting.
Using Too Much Adhesive
Excess adhesive can create visible marks or make the fabric difficult to reposition.
Skipping the Test Fit
A dry fit costs almost nothing and can prevent an expensive mistake.
Forgetting the Fitter
The shade must work with the lamp it is intended for.
Assuming Every Old Shade Is Reusable
Inspect the structure before beginning.
Treating LED as a Complete Safety Solution
Lower heat does not eliminate the need for proper shade construction, clearance, ventilation, and compatibility.
DIY Lampshade Troubleshooting
| Problem | Likely cause | What to do |
| Fabric is wrinkled | Fabric wasn’t smoothed during application | Lift and reposition if the adhesive allows |
| Fabric bubbles | Adhesive or application was uneven | Work in smaller sections |
| Seam looks crooked | Fabric wasn’t aligned before securing | Reposition before the adhesive sets |
| Pattern doesn’t meet | Pattern wasn’t planned at the seam | Center the pattern before cutting |
| Shade looks too dark | Fabric is too dense or dark | Choose a lighter or more open fabric |
| Edges look uneven | Allowance wasn’t consistent | Trim and finish the edge carefully |
| Glue shows through | Too much adhesive | Use less and test on scrap first |
| Fabric keeps moving | Insufficient temporary support | Use clips while sections set |
| Shade doesn’t fit the lamp | Wrong fitter | Check compatibility before installation |
| Shade looks tilted | Frame or fitter isn’t level | Inspect the frame and attachment |
| Existing frame looks bent | Structural damage | Straighten or replace rather than simply recover |
| Fabric is distorted | Fabric was stretched too much | Apply it with controlled tension |
| Shade feels loose | Poor fit or insufficient support | Recheck the construction and frame |
Frequently Asked Questions
How do I make a DIY lampshade from fabric?
The easiest method is to recover an existing drum shade. Measure the shade, make a paper template, cut the fabric with the necessary allowances, prepare the appropriate backing, attach the fabric using a suitable construction method, finish the edges, and allow everything to cure before installing the shade.
Can I make a lampshade without sewing?
Yes. A no-sew lampshade can be made using an appropriate backing and adhesive-based construction method. A simple drum shade is usually the easiest shape for beginners.
How much fabric do I need for a lampshade?
Measure the shade’s circumference and height, then add the allowances required for the seam and top and bottom finishing. Add extra fabric when using large or directional patterns that require careful positioning.
What is the easiest lampshade shape to make?
A straight drum shade is generally one of the easiest shapes because the profile is simple and the fabric pattern is less complicated than a tapered or curved shade.
Can I cover an old lampshade?
Yes, if the existing shade and frame are structurally sound and compatible with the lamp. Inspect the frame, fitter, lining, and other components before recovering it.
What fabric is best for a DIY lampshade?
Lightweight cotton and linen are practical beginner options. The best fabric also depends on the shade construction, backing, desired light transmission, and pattern.
Can I use any fabric for a lampshade?
No. Fabric should be considered together with the backing, frame, bulb, ventilation, and construction method. Do not assume ordinary fabric is automatically suitable for direct use around a light source.
Can I make a lampshade from scratch?
Yes, but it is more involved than recovering an existing shade. You need a suitable frame, compatible fitter, appropriate backing, fabric, and a pattern that matches the frame shape.
Why is my DIY lampshade wrinkled?
Common causes include cutting errors, uneven adhesive, applying too much fabric tension, or trying to secure too large an area at once. Working gradually and test-fitting first can help.
How do I keep the fabric straight?
Use a paper template, mark the fabric carefully, position the seam before applying adhesive, and secure the fabric gradually rather than wrapping it quickly.
Can I use patterned fabric?
Yes. Small random patterns are easiest for beginners. Stripes, plaids, and large directional prints require more careful alignment.
Can I make a lampshade for a floor lamp?
Yes. Measure the existing frame and check the fitter, bulb, clearance, and overall proportions before making the shade.
Is an LED bulb better for a DIY lampshade?
An appropriate LED bulb can reduce heat compared with hotter bulb types, but it does not make an unsuitable lampshade construction safe. The bulb, shade materials, clearance, ventilation, and fitting all need to be compatible.
Can I use wallpaper for a DIY lampshade?
Some decorative projects use wallpaper, but its suitability depends on the specific product and lampshade construction. Do not assume ordinary wallpaper is automatically appropriate for use around a light source.
Should I make a new frame or recover an old shade?
If the existing shade is structurally sound and you mainly want a new appearance, recovering it is usually simpler. If you need a completely different size or shape, starting with an appropriate new frame may make more sense.
Final Thoughts
A successful DIY lampshade doesn’t require a complicated design. For beginners, the most reliable starting point is usually a sound existing drum shade, lightweight fabric, an appropriate lampshade backing system, accurate measurements, and careful edge finishing.
The most important step is to measure before cutting. Make a paper template, test the fabric around the shade, plan the pattern direction, and check the fitter before permanently attaching anything.
Most importantly, treat the lampshade as part of a lighting system rather than simply a decorative cover. Use suitable materials, maintain appropriate clearance and ventilation, keep the shade away from direct bulb contact, and follow the instructions for the lamp, bulb, frame, backing, and adhesive.
That combination gives you a lampshade that looks intentional while also being much easier to assemble correctly.