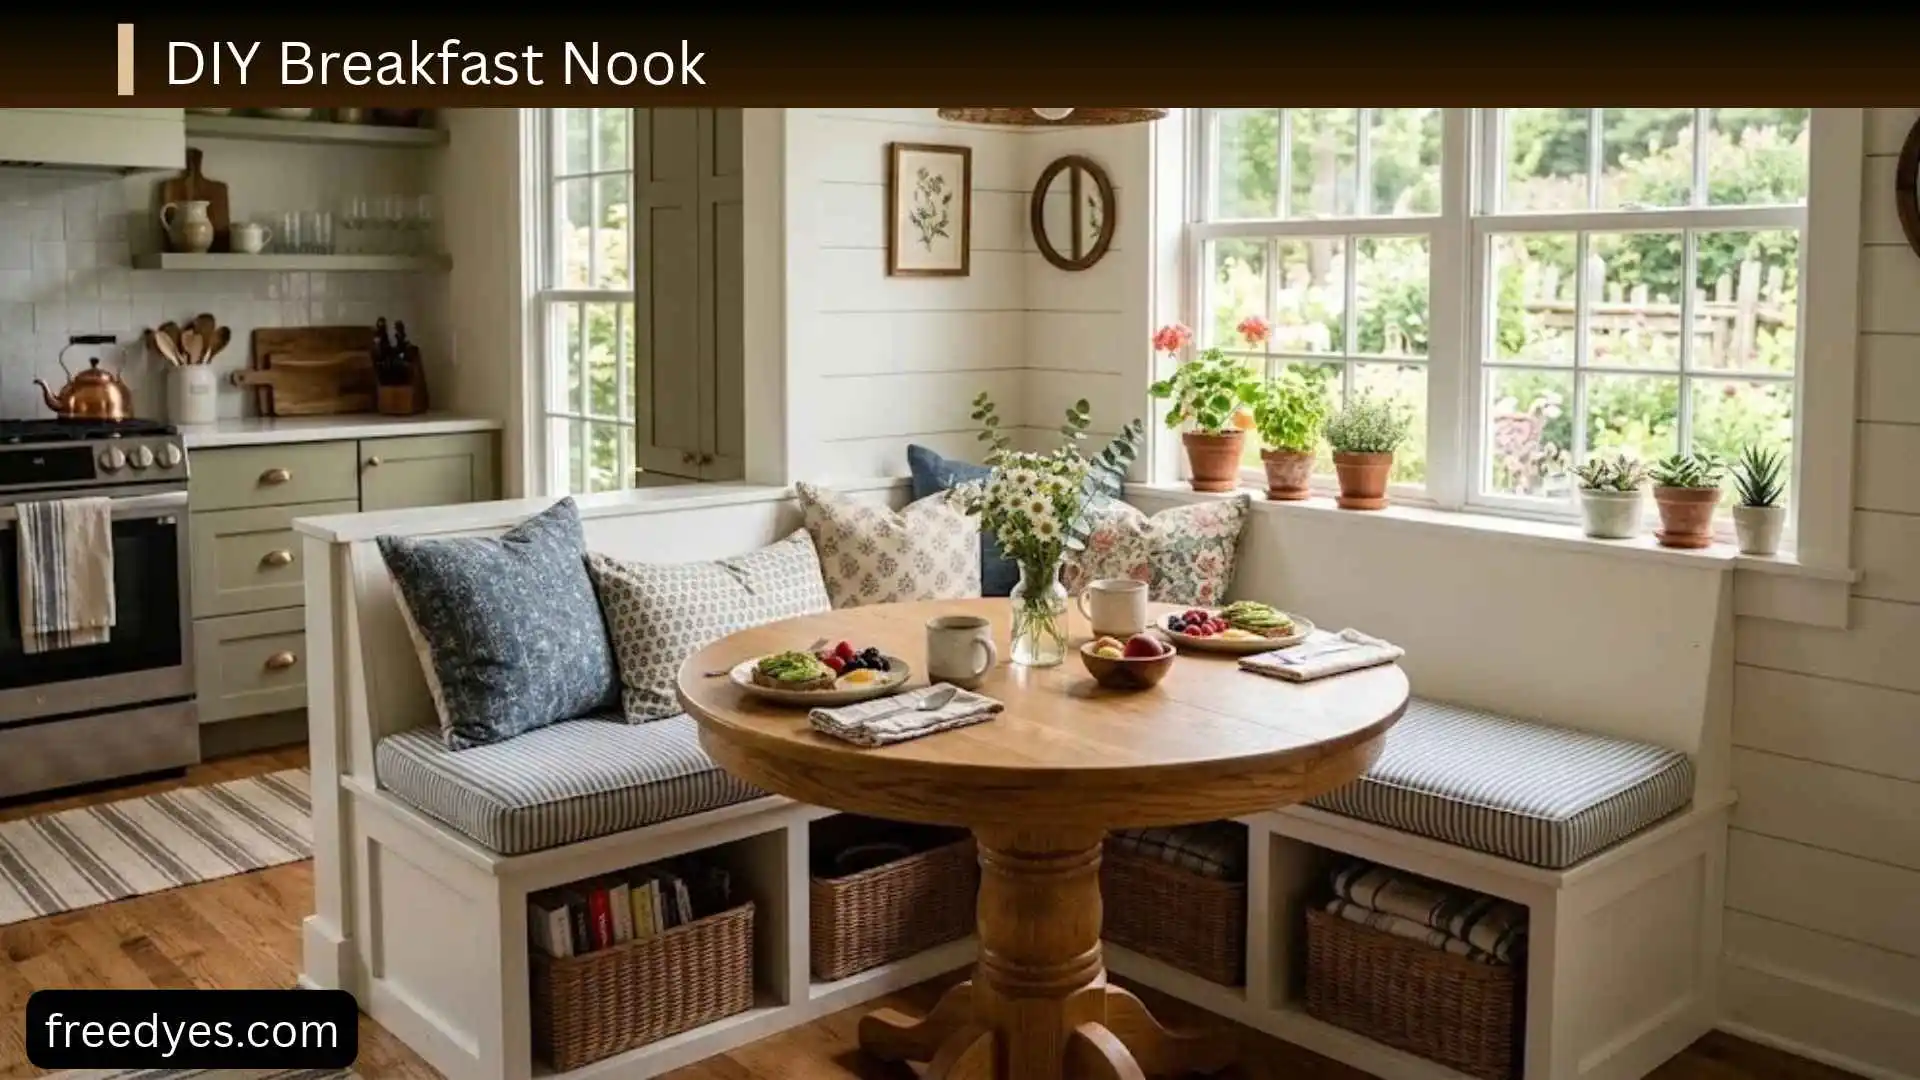
A DIY breakfast nook can turn an unused kitchen corner into a comfortable spot for breakfast, coffee, homework, family meals, or evening conversations. The most practical version is usually a built-in bench paired with a compact table, with the space underneath the bench used for storage.
You don’t need to build a complicated piece of custom cabinetry to get the look. A straightforward framed bench with a plywood seat, finished front, cushion, and optional hinged storage can create a polished breakfast nook while keeping the construction manageable.
The most important part, however, is planning the human dimensions before cutting the wood. A nook can look beautiful and still be frustrating if the bench is too deep, the seat is too high, the table blocks your knees, or the finished unit leaves no comfortable walkway.
This guide focuses on a practical beginner-friendly approach and explains how to adapt the measurements to your own room.
DIY Breakfast Nook at a Glance
| Project detail | Recommended starting point |
| Best beginner design | Straight or L-shaped bench |
| Finished seat height | About 18 inches, including cushion |
| Comfortable seat depth | About 18 inches |
| Typical cushion thickness | About 2–4 inches |
| Dining table height | About 28–30 inches |
| Best storage | Hinged seat or open cubbies |
| Best small-space table | Round or compact pedestal table |
| Skill level | Beginner to intermediate |
| Main tools | Drill, saw, level, tape measure, square |
| Main material | 2×4 framing lumber + plywood |
| Biggest planning priority | Comfort and clearance |
These are starting dimensions, not universal rules. For example, a 4-inch cushion changes the required wooden frame height, and a thick back cushion changes the usable seat depth. Detailed built-in guides commonly design around an 18-inch finished seat height while accounting for cushion compression.
Choose the Right DIY Breakfast Nook Layout
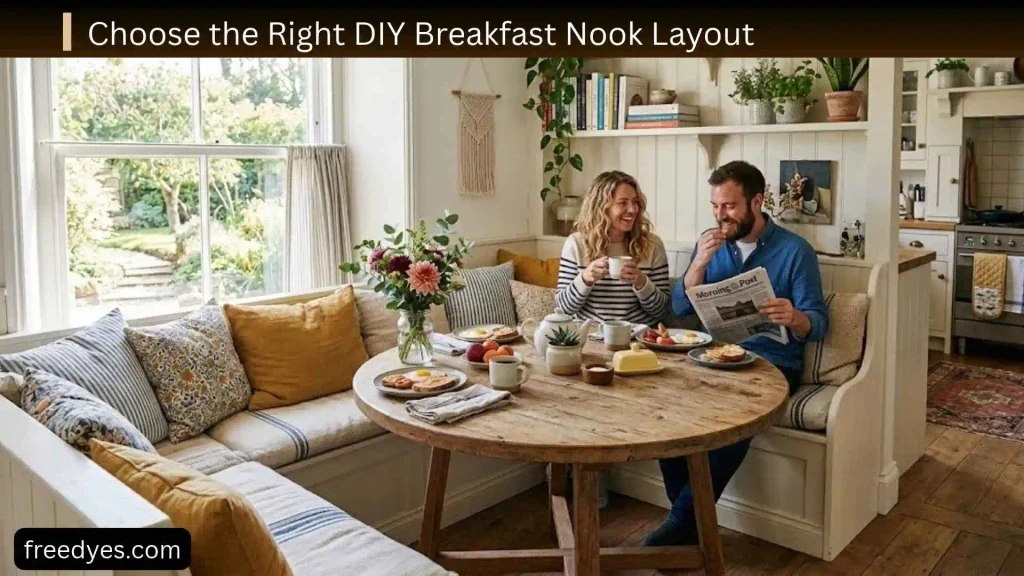
Your room should determine the shape of the nook rather than the other way around.
Straight Bench Breakfast Nook
A straight bench is the simplest design.
Place the bench against one wall and position a small table in front of it. Add one or two movable chairs on the opposite side.
This layout works well when you have a long wall but don’t have enough room for an L-shaped or U-shaped installation.
Best for: beginners, narrow dining areas, apartments, and simple builds.
L-Shaped Breakfast Nook
An L-shaped bench uses two adjoining walls.
It is one of the most useful designs for an unused kitchen corner because the bench occupies space that might otherwise remain empty.
You can also build storage into both sections.
Best for: corner spaces, family seating, and small kitchens.
Window Breakfast Nook
A window can provide a natural location for a bench.
Before building, check the height of the window stool, trim, curtains, blinds, and any nearby heating vent.
Don’t build the seat directly over a vent or radiator without planning for airflow and safe operation.
Freestanding Breakfast Nook
A freestanding setup uses a storage bench or movable bench instead of a permanent built-in.
You can create the same basic arrangement with:
- Storage bench
- Small table
- Cushion
- Two chairs
- Decorative trim
This is a particularly useful option if you rent or don’t want to make permanent changes to the walls.
U-Shaped Breakfast Nook
A U-shaped nook surrounds three sides of the table.
It can provide a lot of seating, but it also requires considerably more room. Current dimensional references show that U-shaped layouts can occupy a substantial floor area once seating and circulation are included.
For a small kitchen, don’t choose a U-shaped design simply because it looks cozy in photos. Make sure people can actually enter, sit, move their knees, and leave comfortably.
DIY Breakfast Nook Dimensions
Getting the dimensions right matters more than the decorative style.
A useful starting point for a built-in bench is approximately 18 inches of finished seat height and 18 inches of usable seat depth. Fine Homebuilding, for example, uses an 18-inch finished seat height and an 18-inch seat depth in its built-in approach.
Other dimensional references use ranges rather than one fixed number, which is a good reminder that the final measurements need to suit your room and furniture.
Bench Seat Height
Aim for approximately 18 inches from the floor to the top of the finished cushion.
This measurement includes:
- Frame
- Plywood seat
- Cushion
For example, if your cushion is approximately 3 inches thick, the wooden structure must finish below the 18-inch target.
Do not build an 18-inch-high wooden box and then add a 3-inch cushion unless you intentionally want a much taller seat.
Bench Seat Depth
About 18 inches of usable seat depth is a practical starting point.
If you use a thick back cushion, remember that it occupies some of that depth.
A deeper bench isn’t automatically more comfortable. If the seat pushes you too far forward, your feet may not sit naturally on the floor.
Cushion Thickness
A cushion around 2–4 inches thick can work well for a breakfast nook, depending on the foam and desired comfort. Current dimensional guidance also places cushion thickness within roughly this range.
If you choose thicker foam, recalculate the frame height.
Table Height
A typical dining-height table is around 28–30 inches high.
The table should work with the finished bench height rather than being selected independently.
Space Between Bench and Table
Don’t push the table tightly against the bench.
Leave enough space for:
- Knees
- Feet
- Comfortable posture
- Getting in and out
A practical starting point is to position the table so the seated person can pull comfortably toward it without their knees hitting the table structure.
Use the actual table and cushion during a dry run whenever possible.
Space Around the Nook
The overall footprint needs to include more than the bench and tabletop.
Allow room for:
- Walking
- Pulling out chairs
- Opening cabinets
- Opening appliances
- Entering the bench
Some dimensional references place the bench zone around 18–20 inches and circulation zones substantially wider depending on the layout.
There is no single clearance number that works for every kitchen. Test your actual layout before construction.
How Many People Can a Breakfast Nook Seat?
A useful planning estimate is to allow roughly 24 inches of bench length per adult, then adjust for children, table shape, corners, and the amount of elbow room you want.
| Approximate bench length | Practical seating |
| 36–48 inches | 1–2 people |
| 48–60 inches | 2–3 people |
| 60–72 inches | 3 people comfortably, depending on layout |
| 72 inches or more | 3–4+ people depending on table and space |
These are planning estimates rather than strict seating standards.
An L-shaped bench can seat more people than a straight bench of the same single-wall length because the second wall contributes additional seating.
Before You Build: Measure the Room
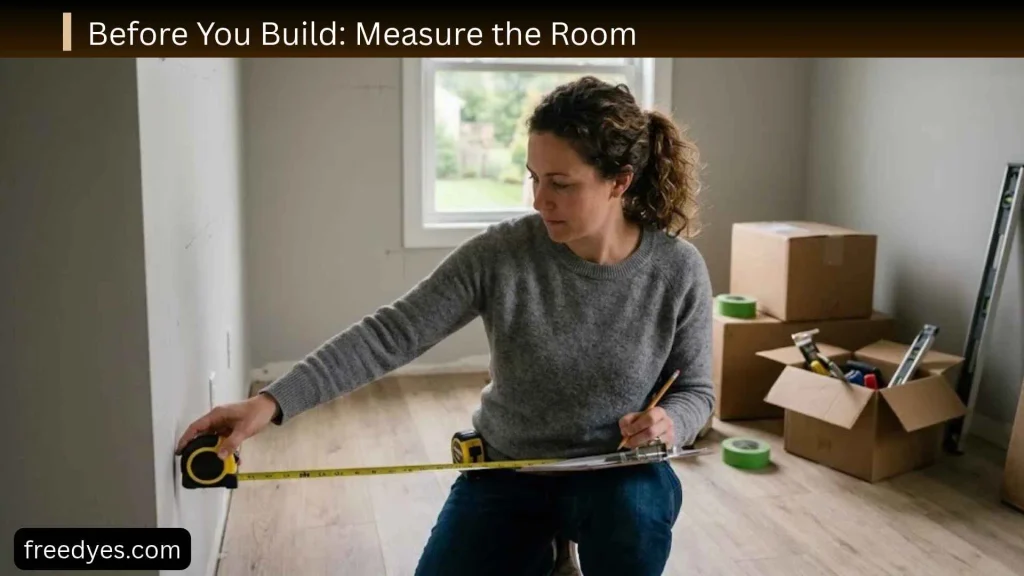
This is the step that can save the most time and money.
Measure Both Walls
For an L-shaped nook, measure each wall separately.
Don’t assume the corner is perfectly square.
Measure:
- Floor-to-wall length
- Baseboard-to-baseboard length
- Available depth
- Window dimensions
- Trim dimensions
Older walls can vary enough to affect a built-in installation.
Mark the Footprint With Painter’s Tape
Before cutting lumber, tape the proposed bench and table footprint directly onto the floor.
Then test it.
Walk through the area.
Sit where the bench will be.
Pull a chair out.
Pretend to open the refrigerator.
Open the dishwasher.
Open nearby cabinet doors.
If the taped layout feels cramped, don’t start building yet.
Change the dimensions while everything still exists only on the floor.
Check Appliances and Doors
Pay particular attention to:
- Refrigerator doors
- Dishwasher door
- Oven door
- Pantry door
- Drawers
- Cabinet doors
- Nearby room entrances
A breakfast nook shouldn’t make the kitchen harder to use.
Check Outlets and Heating
Before closing the bench against a wall, identify:
- Electrical outlets
- Floor outlets
- Heating vents
- Radiators
- Baseboard heaters
- Plumbing access
Do not permanently cover an outlet or block a heating system without planning an appropriate solution.
Example DIY Breakfast Nook Plan
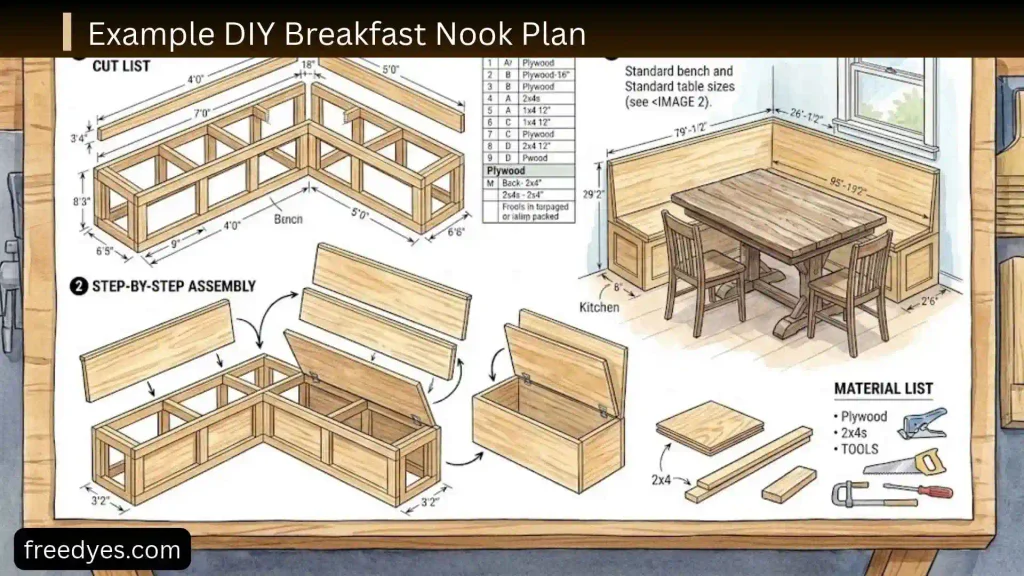
For a beginner-friendly project, a straight bench is the easiest place to start.
For an L-shaped nook, use the same basic construction method twice and connect the two sections.
Example Finished Dimensions
Use these as a starting design:
- Bench length: 72 inches
- Bench depth: approximately 18 inches
- Finished seat height: approximately 18 inches
- Cushion: approximately 3 inches
- Table: compact dining height
- Storage: hinged compartments beneath the seat
These are example dimensions, not a universal plan. Reduce the length if your wall is shorter, and adjust the frame height according to the actual cushion you purchase.
Materials
For a basic framed bench, you may need:
- 2×4 lumber
- ¾-inch plywood for the seat
- Thin plywood or panel material for the front
- Wood screws
- Construction adhesive
- Wood glue
- Hinges if using lift-up storage
- Wood filler
- Sandpaper
- Primer
- Paint or stain
- Trim
- Foam cushion
- Upholstery fabric
The exact quantity depends on the size of your nook.
Tools
Useful tools include:
- Tape measure
- Pencil
- Speed square or framing square
- Level
- Stud finder
- Drill/driver
- Circular saw
- Clamps
- Sanding equipment
- Sawhorses or work surface
You don’t necessarily need a table saw.
If you don’t have one, you can use a circular saw with a straightedge or have sheet goods cut at a home-improvement store.
How to Build a DIY Breakfast Nook Bench
Step 1: Calculate the Frame Height
Start with the desired finished seat height, not the frame height.
For example:
18-inch finished seat height − 3-inch cushion − ¾-inch plywood = approximately 14¼ inches for the frame.
This is only an example because cushions compress differently and seat construction varies.
If your cushion is 4 inches thick, your frame needs to be lower.
Step 2: Build the Base Frame
Construct a rectangular frame from 2×4 lumber.
The frame should have:
- Front rail
- Back rail
- End supports
- Intermediate supports
For longer benches, add additional vertical supports so the seat doesn’t flex excessively.
Don’t build a long unsupported plywood surface and expect the plywood alone to provide the strength of the finished bench.
Step 3: Add Vertical Supports
Install vertical pieces between the upper and lower portions of the frame.
Space them according to the bench length and construction method.
The purpose is to transfer the seated load through the frame rather than relying on the plywood top.
Step 4: Check the Frame Before Covering It
Use a level.
Check:
- Front-to-back level
- Side-to-side level
- Corner alignment
- Stability
- Wall position
Correct mistakes now.
It is much easier to fix an uneven frame before plywood and trim are attached.
Step 5: Add Storage Dividers
If you want storage beneath the seat, divide the interior into practical compartments.
You can leave the storage open or create separate bays.
For a beginner build, open compartments or hinged seat lids are generally simpler than building full drawers.
Step 6: Secure the Bench Where Appropriate
If the design is a permanent built-in, attach the structure appropriately to the wall framing.
Locate studs before deciding where to place fasteners.
Do not treat drywall anchors as the primary structural attachment for a bench that people will sit on.
The appropriate fastening method depends on the wall construction and the bench design.
Step 7: Add the Plywood Seat
Cut the plywood to match the finished bench.
If the bench has separate storage compartments, decide whether you want:
- One large hinged lid
- Several smaller lids
- Fixed seat sections
- Removable panels
Multiple smaller lids can be easier to lift than one very large, heavy panel.
Step 8: Add the Front Panels
Cover the frame with your chosen panel material.
Thin plywood can work well when the front will be painted.
Leave planned access points where necessary.
Step 9: Add Trim
Trim can hide seams and give the bench a more finished appearance.
Use it around:
- Front panel
- Top edge
- Side panels
- Wall transition
Matching nearby baseboards can help the bench look more integrated.
Step 10: Sand and Finish
Fill visible holes.
Sand rough edges.
Apply primer if painting.
Then apply the chosen finish.
Let the finish cure according to the product instructions before putting the cushion and table into regular use.
How to Build a DIY Breakfast Nook With Storage
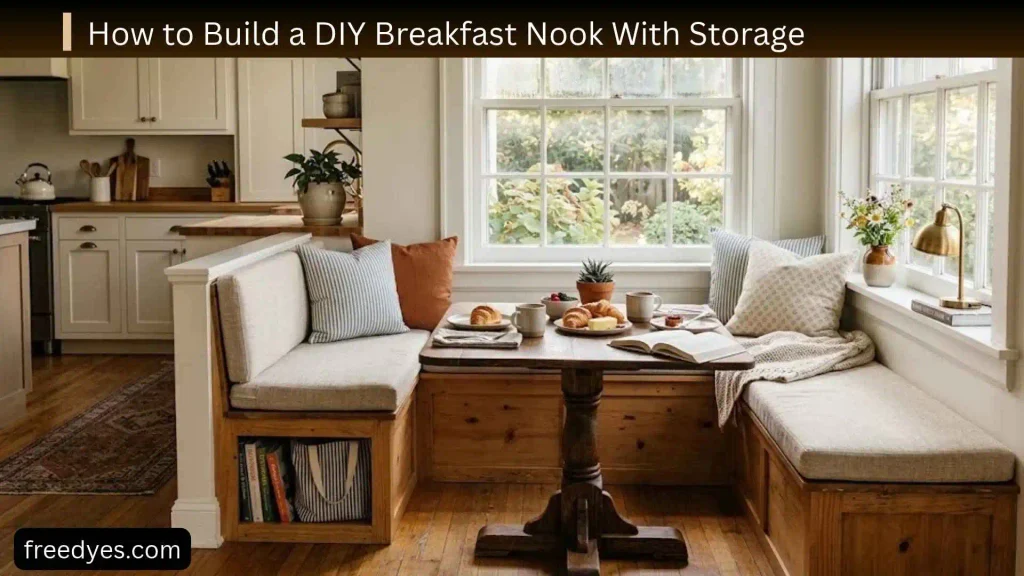
Storage is one of the best reasons to choose a built-in bench.
Lift-Up Seat Storage
This is often the simplest built-in storage solution.
The seat becomes the lid.
Store items such as:
- Table linens
- Seasonal kitchen items
- Serving pieces
- Children’s supplies
- Extra cushions
Use appropriate hinges and make sure the lid can open without hitting the wall, window trim, table, or nearby furniture.
Open Cubby Storage
Open cubbies are easier to build.
Add baskets if you want to hide the contents.
This option works especially well when you want the storage to remain accessible.
Drawer Storage
Drawers offer excellent everyday access, but they’re more complicated.
You need to account for:
- Drawer slides
- Drawer depth
- Front-panel thickness
- Internal clearance
- Hardware
- Alignment
For a first breakfast nook project, hinged storage is usually simpler.
How to Build an L-Shaped Breakfast Nook
An L-shaped nook is essentially two bench sections joined at a corner.
Build Each Section Independently
Instead of trying to construct the entire L shape as one complicated frame, build the long and short sections separately.
This makes:
- Measuring easier
- Leveling easier
- Installation easier
- Storage access easier
Test the Corner
Dry-fit the two sections before permanently attaching them.
Check for:
- Wall irregularities
- Baseboard interference
- Uneven corners
- Cushion overlap
- Table clearance
Don’t assume a 90-degree room corner is actually 90 degrees.
Decide Which Cushion Goes Where
For an L-shaped nook, you can use:
- Two separate seat cushions
- One long cushion plus one short cushion
- Custom corner cushions
Two separate cushions are often easier to remove and replace.
How to Choose a Table for Your DIY Breakfast Nook
The table should match the shape of the seating.
Round Table
A round table is particularly useful in compact spaces.
There are no corners to bump into while moving around the nook.
Rectangular Table
A rectangular table works well with a straight bench and provides a larger usable surface.
It can be especially practical for homework, family meals, or serving multiple dishes.
Square Table
A square table works best when the seating area is relatively symmetrical.
In a tight corner, however, its corners can make movement more difficult.
Pedestal Table
A pedestal table can be an excellent choice for bench seating because it reduces the number of table legs competing with people’s knees.
Always check the table base, not just the tabletop dimensions.
A tabletop can fit perfectly while the pedestal or legs make the seating uncomfortable.
How to Make a Breakfast Nook Comfortable
Choose the Right Cushion Thickness
A cushion should provide enough support without making the finished seat excessively high.
Remember:
Cushion thickness changes your final seat height.
Consider a Slightly Angled Back
A completely vertical back is easy to build.
A slightly angled back can feel more relaxed.
Fine Homebuilding uses a modest back angle in its built-in example and notes that it can improve comfort.
You don’t have to complicate the frame if you don’t want to.
A simple solution is to use a comfortable loose back cushion against a sturdy back.
Avoid Making the Seat Too Deep
A deep bench might look luxurious but can force shorter users to sit forward.
If you want a deeper bench, use the back cushion and back angle to maintain a comfortable sitting position.
Make the Cushion Removable
A removable cover is especially useful in a breakfast area.
Food, coffee, juice, and children’s messes are inevitable.
A washable fabric cover can make maintenance much easier.
DIY Breakfast Nook for a Small Kitchen
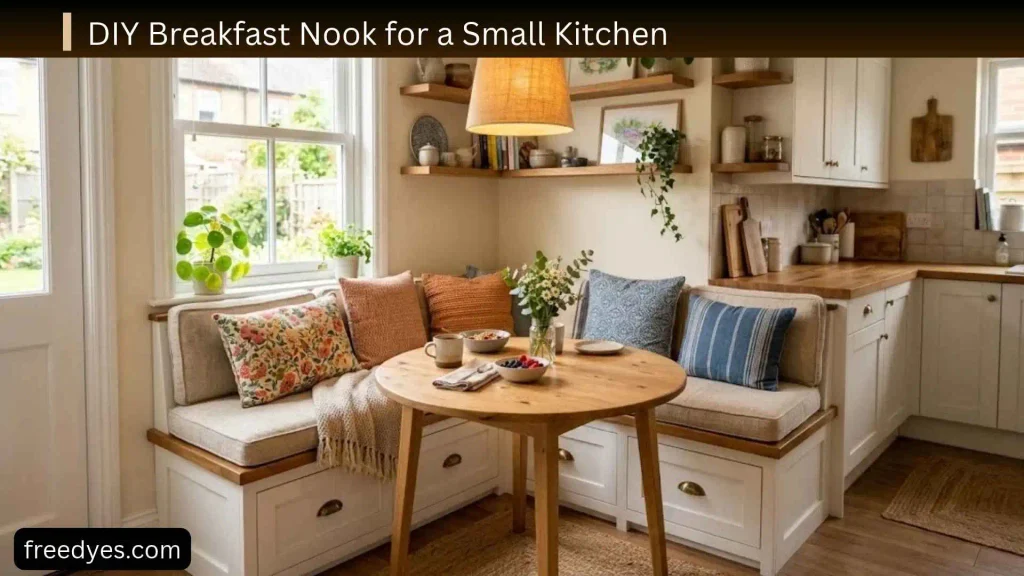
A small kitchen doesn’t automatically rule out a breakfast nook.
Use an Unused Corner
An L-shaped bench can turn two short walls into seating.
Use a Small Round Table
A round table can make movement around the nook easier.
Use One Bench and Two Chairs
You don’t need benches on every side.
One wall bench plus two movable chairs can create the nook effect while keeping the room flexible.
Use a Narrower Bench Carefully
Reducing bench depth saves floor space, but don’t reduce it so much that the seating becomes uncomfortable.
Test the depth with painter’s tape and a temporary cushion before building.
Use a Freestanding Storage Bench
If a permanent build isn’t practical, use a suitable seating-rated storage bench.
Add a cushion and small table.
This gives you most of the function without permanent construction.
DIY Breakfast Nook Without Building a Bench
Not every DIY project needs a circular saw.
For the easiest version:
- Choose a sturdy bench designed for seating.
- Position it against the wall.
- Add a properly sized cushion.
- Place a compact table in front.
- Add one or two chairs.
- Use trim or coordinated paint to make the pieces feel connected.
Do not use a lightweight storage cube or decorative shelving unit as seating unless it is specifically designed and rated for that purpose.
This approach is especially useful for beginners and renters.
How to Make a DIY Breakfast Nook Look Built In
A simple bench can look surprisingly custom with a few finishing details.
Match the Baseboard
Continue or visually coordinate the existing baseboard with the bench.
Add a Finished Front
Plain plywood can look unfinished.
Trim, beadboard, paneling, or a clean painted face can give the bench a more intentional appearance.
Hide Construction Seams
Use appropriate trim and filler where necessary.
Don’t rely on paint alone to hide large gaps.
Coordinate the Table
The table doesn’t have to match the bench exactly.
A coordinated wood tone, paint color, or hardware finish is often enough.
Keep the Styling Practical
A breakfast nook is a working part of the kitchen.
Don’t fill the seating area with so many pillows and accessories that people can’t comfortably sit down.
DIY Breakfast Nook on a Budget
You don’t have to spend equally on every component.
Low-Budget Approach
Reuse:
- Existing table
- Existing chairs
- Paint
- Simple bench materials
Spend most of the budget on the bench and cushion.
Mid-Range Approach
Add:
- Custom foam
- Better upholstery
- Storage
- Trim
- New table
Higher-End Approach
Consider:
- Custom cabinetry
- Drawers
- Premium upholstery
- Integrated lighting
- Custom tabletop
- Decorative wall treatment
Prioritize structure and comfort before decorative upgrades.
A beautiful breakfast nook with an uncomfortable bench is still a poor DIY project.
Common DIY Breakfast Nook Mistakes
Building the Frame Too High
Problem: The cushion makes the finished seat too tall.
Solution: Calculate the finished height before cutting the frame.
Making the Bench Too Deep
Problem: Your feet don’t sit comfortably on the floor.
Solution: Test the intended depth with painter’s tape and temporary seating.
Forgetting Table Leg Clearance
Problem: Your knees hit the table base.
Solution: Test the table with the actual bench before final placement.
Blocking a Cabinet or Appliance
Problem: The nook looks good but prevents the kitchen from functioning normally.
Solution: Open every nearby door and appliance before building.
Covering a Vent
Problem: The bench interferes with heating or airflow.
Solution: Identify floor and wall vents before fixing the bench in place.
Building Directly From Wall Measurements
Problem: The bench doesn’t fit because the walls aren’t perfectly square.
Solution: Measure at multiple points and dry-fit the frame.
Making One Huge Storage Lid
Problem: The lid becomes heavy and awkward.
Solution: Divide storage into multiple sections when practical.
Skipping the Test Layout
Problem: You discover clearance problems after construction.
Solution: Tape the entire footprint on the floor first.
DIY Breakfast Nook Troubleshooting
The Finished Seat Is Too High
Check the cushion thickness.
If the wooden frame was designed without accounting for the cushion, the easiest solution may be to modify the base rather than simply accepting an uncomfortable height.
The Table Feels Too Close
Move the table temporarily and sit down.
Check where your knees naturally land.
If the table legs are causing the problem, changing the table base may work better than simply moving the entire table.
The Bench Doesn’t Sit Flush Against the Wall
Check whether:
- Baseboard is interfering
- The wall bows
- The corner isn’t square
- The bench was cut too long
Don’t force the structure against an uneven wall.
The Cushion Slides Forward
Check the cushion dimensions and surface.
A properly fitted cushion usually stays more securely than an undersized one.
For a persistent problem, use an appropriate non-slip solution designed for upholstery or seating.
The Storage Lid Won’t Open Fully
Check for:
- Wall clearance
- Window trim
- Table position
- Cushion thickness
- Hinge placement
Test the opening movement before permanently attaching the hardware.
The Bench Wobbles
Check:
- Frame joints
- Leveling
- Wall attachment
- Uneven floor
- Missing supports
A built-in bench should feel solid when someone sits down.
How to Make a Breakfast Nook Safer and More Durable
A breakfast nook is seating, not just decoration.
Build the frame and attachments for the actual loads they will experience.
Use Proper Structural Connections
Use suitable fasteners for the materials and wall construction.
Support Long Spans
Long benches need adequate internal support.
Round or Ease Sharp Edges
Especially around:
- Bench corners
- Table edges
- Trim
This can make the nook more comfortable in a busy kitchen.
Protect High-Traffic Surfaces
Choose a durable finish for areas that will receive frequent contact.
Keep Storage Hardware Secure
Hinges and other moving hardware should be appropriate for the lid size and weight.
Frequently Asked Questions
Is a DIY breakfast nook difficult to build?
A simple straight bench can be manageable for a beginner with basic tools. An L-shaped storage bench is more involved because it requires more accurate measuring, framing, finishing, and installation.
How deep should a breakfast nook bench be?
About 18 inches of usable seat depth is a practical starting point. The final depth should account for cushions and backrests. Detailed built-in guides commonly use approximately 18 inches of seat depth.
How high should a breakfast nook bench be?
Aim for approximately 18 inches from the floor to the top of the finished cushion, then adjust the frame according to the actual cushion thickness.
How thick should a breakfast nook cushion be?
A practical starting range is about 2–4 inches, but cushion firmness and construction matter just as much as thickness.
How much space do I need for a breakfast nook?
It depends on the shape, number of seats, table size, and surrounding circulation. Compact straight or L-shaped arrangements can work in smaller rooms, while U-shaped designs require substantially more floor area.
How long should a breakfast nook bench be for four people?
As a planning estimate, allow roughly 24 inches of bench length per adult, meaning around 72–96 inches may be needed depending on the table, corner arrangement, and desired comfort.
Can I build a breakfast nook without a table saw?
Yes. A circular saw with a straightedge can handle many sheet-good cuts, and some home-improvement stores can make basic plywood cuts for you.
Can I make a breakfast nook with IKEA cabinets?
You can use suitable cabinet or storage components as part of a breakfast nook, but only use units that are appropriate for the loads and construction method involved. Don’t assume every storage cabinet is safe to sit on.
Is a round table better for a small breakfast nook?
Often, yes. A round table can eliminate sharp corners and make movement easier in a compact area. However, the table base still needs to provide adequate legroom.
Should a breakfast nook bench be attached to the wall?
A permanent built-in often benefits from appropriate wall attachment, but a freestanding nook can work well when flexibility is more important.
Can I add storage under a breakfast nook bench?
Yes. Hinged seats, drawers, and open cubbies are the main options. Hinged storage is generally simpler to construct than drawers.
How do I make a breakfast nook comfortable?
Start with the correct seat height and depth. Then choose a supportive cushion, provide enough table clearance, and avoid making the bench unnecessarily deep.
Can I build a breakfast nook under a window?
Yes, but measure the window sill, trim, curtains, and any heating equipment first. The finished bench should work with the existing window rather than blocking or damaging it.
What is the easiest DIY breakfast nook?
The simplest approach is a suitable freestanding storage bench, cushion, compact table, and one or two chairs. For a true built-in, a straight framed bench is easier than an L-shaped or U-shaped design.
Final Thoughts
A successful DIY breakfast nook starts with measurements, not decoration.
Before cutting wood, tape the proposed bench and table onto the floor. Check walking paths, appliance doors, cabinets, windows, outlets, vents, and the position of the table legs.
For a beginner-friendly built-in, a straight or L-shaped bench with approximately an 18-inch finished seat height and around 18 inches of usable seat depth is a useful starting point. Adjust the frame when you know the actual cushion thickness rather than treating those numbers as fixed rules.
If storage is important, hinged seat panels provide a relatively straightforward way to use the empty space underneath. If woodworking isn’t your strength, a suitable seating-rated storage bench can create the same basic layout with much less construction.
Most importantly, solve comfort, structure, and clearance before styling the space. Once the bench sits correctly, the table fits comfortably, and the kitchen still functions normally, paint, cushions, trim, and accessories can turn the project into a cozy breakfast nook that genuinely works for everyday life.