Need to remove a stubborn sticker, price tag, label, or sticky glue residue but don’t have Goo Gone on hand? A simple DIY Goo Gone made with oil and baking soda can be a useful starting point for small adhesive-removal jobs.
The basic idea is simple: oil helps loosen many sticky residues, while baking soda adds mild scrubbing action. A commonly used starting ratio is 2 parts oil to 1 part baking soda. However, homemade adhesive removers do not work equally well on every sticker or surface, so the goal is to use the smallest amount necessary and test the surface first. A published test of an oil-and-baking-soda mixture found it useful for some sticker residue, while another more recent test found it much less effective on larger or stubborn remnants.
Important: DIY Goo Gone is not the same formula as commercial Goo Gone. It is a simple homemade alternative for suitable, small adhesive messes—not a universal adhesive remover.
DIY Goo Gone at a Glance
| Detail | What to know |
| Main ingredients | Oil and baking soda |
| Starting ratio | 2 parts oil to 1 part baking soda |
| Best for | Small amounts of sticker and label residue |
| Best surfaces | Compatible, nonporous hard surfaces |
| Preparation | About 1 minute |
| Application | Apply, allow to soften, wipe gently |
| Cleanup | Wash away oily residue with dish soap |
| Main caution | Always test the surface first |
The quick recipe
Mix:
- 2 tablespoons oil
- 1 tablespoon baking soda
Stir until you have a soft, spreadable paste.
For a tiny job, use 1 tablespoon oil + ½ tablespoon baking soda instead. This smaller ratio has also been used in a published DIY sticker-removal test.
What You Need to Make DIY Goo Gone
Oil
Use a common household oil such as:
- Olive oil
- Vegetable oil
- Canola oil
- Coconut oil
Olive oil is convenient because it is easy to spread. Coconut oil can also work, but it becomes firm when cool, so it may need to soften before mixing.
Baking Soda
Baking soda gives the mixture a little texture so you can gently work loosened adhesive away.
It is important to remember that baking soda is still mildly abrasive. More scrubbing does not mean better results. On delicate finishes, excessive rubbing can cause dulling or surface damage.
Tools
You only need:
- Small bowl
- Spoon
- Soft cloth or paper towel
- Optional plastic scraper for suitable hard surfaces
- Dish soap for final cleanup
What Is the Best DIY Goo Gone Ratio?

A useful starting formula is:
2 parts oil + 1 part baking soda
For example:
- 2 tablespoons oil
- 1 tablespoon baking soda
The mixture should look like a soft paste, not a liquid and not a dry powder.
If it is too oily, add a small amount of baking soda.
If it is crumbly, add a few drops of oil.
There is no single ratio that works perfectly for every adhesive because sticker materials and adhesives vary. Some tests have found oil-and-baking-soda mixtures effective for small residue, while others found the method slow or ineffective on stubborn remaining material.
How to Make DIY Goo Gone
Step 1: Measure the Oil
Add 2 tablespoons of oil to a small bowl.
Step 2: Add Baking Soda
Add 1 tablespoon of baking soda.
Step 3: Mix Into a Paste
Stir until the ingredients are evenly combined.
You want a paste that stays where you put it instead of immediately running across the surface.
Step 4: Adjust the Texture
If the paste is:
- Too runny: add a little baking soda.
- Too dry: add a few drops of oil.
- Easy to spread: use it as is.
There is no need to make a large batch for a small cleaning job.
How to Use DIY Goo Gone
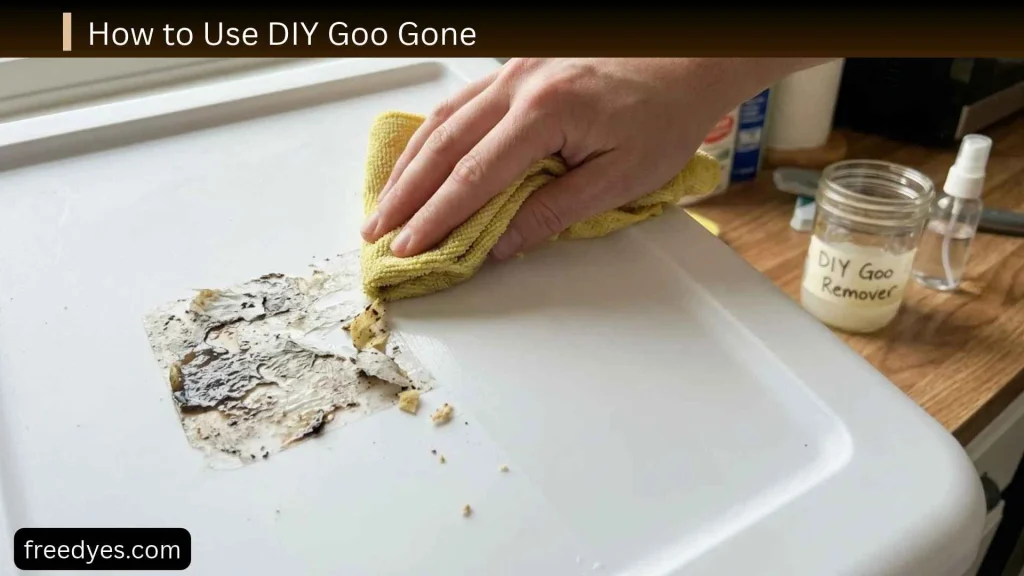
The method works best when you remove as much of the sticker as possible before treating the remaining adhesive.
Step 1: Peel Off the Sticker
Lift a corner and slowly remove the paper, vinyl, or label.
If the sticker comes off easily, remove as much as possible before applying anything.
Step 2: Apply a Small Amount
Spread a thin layer of DIY Goo Gone over the remaining sticky residue.
You do not need to cover a large area.
Step 3: Let It Soften the Adhesive
Start by leaving the mixture on the residue for about 5–15 minutes on a compatible hard surface.
This is a starting range rather than a guaranteed time. Some adhesives soften quickly, while old or thick residue may require another application.
Step 4: Wipe Gently
Use a soft cloth or paper towel to rub the residue gently.
Work in small areas rather than spreading the adhesive over a larger section.
Step 5: Scrape Only When Appropriate
For compatible hard surfaces, a plastic scraper can help lift softened adhesive.
Avoid metal blades on surfaces that can scratch, and never assume a scraper is safe simply because the material underneath looks hard.
Step 6: Wash the Surface
After the adhesive is gone, wash the area with warm water and dish soap when the surface permits.
This removes the oily film left behind by the homemade mixture.
Commercial Goo Gone also recommends wiping adhesive away and washing hard surfaces afterward.
How to Remove Sticker Residue With DIY Goo Gone
DIY Goo Gone is most useful when the sticker itself has already been removed and you’re left with the annoying sticky layer underneath.
Use this process:
- Peel away the sticker.
- Remove loose pieces with your fingers.
- Apply a thin layer of the oil-and-baking-soda paste.
- Let it sit for several minutes.
- Wipe gently.
- Repeat if needed.
- Wash the surface with dish soap.
- Dry and inspect the finish.
Do not keep scrubbing if the surface begins to look dull, cloudy, discolored, or otherwise different.
What Can DIY Goo Gone Remove?
This homemade mixture can be worth trying for:
- Sticker residue
- Price-tag adhesive
- Label glue
- Tape residue
- Packaging adhesive
- Sticky residue left on jars
- Small amounts of gummy adhesive
It is most appropriate for thin or moderate residue on compatible surfaces.
It should not be treated as a solution for every type of glue.
DIY Goo Gone vs different adhesives
| Sticky mess | DIY Goo Gone suitability |
| Sticker residue | Good starting option |
| Price-tag glue | Good starting option |
| Paper-label residue | Often worth trying |
| Tape residue | May help |
| Thick dried adhesive | May require another method |
| Super glue | Not the right first choice |
| Silicone sealant | Not the right first choice |
| Construction adhesive | Not the right first choice |
| Hot glue | Usually better removed with a material-specific approach |
The key distinction is that “sticky residue” and “every kind of glue” are not the same problem.
DIY Goo Gone for Glass

Glass is one of the easiest surfaces to consider for this method because it is smooth and nonporous.
For a glass jar:
- Peel away the label.
- Apply a small amount of the paste to the remaining glue.
- Wait several minutes.
- Wipe gently.
- Repeat if necessary.
- Wash thoroughly with dish soap.
- Rinse and dry.
This is particularly useful for jars, bottles, mirrors, and other compatible glass items.
DIY Goo Gone for Ceramic
Glazed ceramic can be a good candidate for an oil-and-baking-soda mixture.
However, don’t assume every ceramic finish is identical.
Be more cautious with:
- Hand-painted ceramics
- Antique pieces
- Decorative finishes
- Metallic detailing
- Valuable collectibles
Always test an inconspicuous spot first.
DIY Goo Gone for Metal
Smooth metal surfaces may tolerate the mixture, but the finish matters.
For example, painted metal and polished decorative metal should be treated more cautiously than plain, unfinished-looking metal.
Use very light pressure and wipe the surface clean afterward.
DIY Goo Gone for Plastic
Some hard plastics can tolerate oil and baking soda, but plastic is not one universal material.
Different plastics and finishes can react differently to cleaners.
If you want to try it:
- Choose a hidden area.
- Apply a tiny amount.
- Leave it briefly.
- Wipe it away.
- Check for discoloration, dullness, tackiness, or other changes.
Do not continue if the plastic changes appearance.
Even commercial Goo Gone recommends pre-testing plastic surfaces and notes that some plastics can be affected by its products.
Where You Should Not Use DIY Goo Gone

The fact that the ingredients are common household products does not mean the mixture is safe for every material.
Unfinished Wood
Avoid using an oil-based paste on unfinished wood.
Oil can penetrate porous wood and leave a darker or greasy-looking area.
Commercial Goo Gone also specifically excludes unfinished wood from its recommended surfaces.
Leather and Suede
Do not experiment with this mixture on valuable leather or suede.
These materials can be difficult to restore once their appearance or texture changes.
Commercial Goo Gone likewise lists leather and suede among surfaces where its product should not be used.
Rubber
Avoid using the mixture on rubber unless you know the specific material is compatible.
Commercial adhesive removers can also have restrictions on rubber.
Unsealed Stone
Porous stone can absorb oils.
Avoid experimenting with an oil-based adhesive remover on unsealed stone.
Fabric
DIY Goo Gone is not the best first choice for clothing or upholstery because oil can create a new stain.
Use a method designed for the specific fabric instead.
Delicate or Valuable Finishes
Use extra caution with:
- Antiques
- Collectibles
- Heirlooms
- Delicate painted surfaces
- Specialty finishes
- Valuable furniture
When the item is valuable, don’t use it as the test surface.
DIY Goo Gone for Jars and Bottles
Jars are one of the most common reasons people search for a homemade Goo Gone recipe.
For a glass jar:
Remove the label first
Peel off as much paper as possible.
Treat the remaining glue
Apply a thin layer of the paste directly to the adhesive.
Give it time
Allow the mixture to work rather than immediately attacking the residue with aggressive scrubbing.
Wipe and repeat
If some glue remains, repeat the process.
Wash thoroughly
Use dish soap and warm water to remove both the adhesive and oil.
For food-related items, make sure the surface is thoroughly washed before reuse.
DIY Goo Gone Without Baking Soda
If you don’t want the mild abrasive action of baking soda, you can try plain oil on a surface known to tolerate it.
Apply a small amount of oil to the adhesive, allow it time to soften the residue, and wipe with a soft cloth.
Then wash away the oil with dish soap.
This method has one advantage: there is no baking soda to provide abrasive action.
However, it is not automatically safer for every surface because oil itself can stain or penetrate porous materials.
DIY Goo Gone Without Oil
Oil is an important part of this particular homemade method because it helps loosen many sticky residues.
If you don’t have oil, don’t simply replace it with another random household ingredient and assume the recipe will work the same way.
For difficult adhesive, a purpose-made adhesive remover or a method suited to the specific surface may be more appropriate.
Best DIY Goo Gone Method by Situation
| Your problem | Best starting approach |
| Sticker on a glass jar | Oil + baking soda |
| Price tag on glazed ceramic | Oil + baking soda |
| Small label residue on hard plastic | Spot-test, then try carefully |
| Tape residue on suitable metal | Small amount + gentle wiping |
| Thick old adhesive | Soften gradually and reassess |
| Fabric adhesive | Use a fabric-specific method |
| Unfinished wood | Avoid oil-based paste |
| Leather or suede | Avoid |
| Valuable antique | Use a tested material-specific method |
| Super glue | Use a method designed for super glue |
This approach is more useful than treating every sticky mess as though it needs the same remover.
DIY Goo Gone Troubleshooting
The Sticker Won’t Come Off
Possible reason: The adhesive is still holding strongly.
Try this: Remove as much of the sticker as possible first. Then treat the remaining adhesive rather than covering the entire intact sticker with paste.
The Residue Is Still Sticky
Possible reason: The adhesive needs more time or another application.
Try this: Apply another thin layer and allow it to sit for several minutes before wiping again.
The Paste Is Too Runny
Cause: Too much oil.
Fix: Add a small amount of baking soda and mix again.
The Paste Is Crumbly
Cause: Too much baking soda.
Fix: Add a few drops of oil until the mixture becomes spreadable.
The Adhesive Is Spreading Around
Cause: Too much product or too much rubbing.
Fix: Use a smaller amount and work on a small section at a time.
The Surface Is Greasy
Cause: Oil remains after the adhesive has been removed.
Fix: Clean the surface with dish soap and warm water if the material permits.
The Surface Looks Dull
Possible cause: Too much rubbing or an incompatible finish.
Fix: Stop scrubbing immediately. Wipe away the mixture and inspect the surface.
Do not keep rubbing in an attempt to make the residue disappear.
Nothing Is Happening
The adhesive may simply not respond well to an oil-and-baking-soda method.
Instead of repeatedly applying more paste, identify the adhesive and surface and choose a more appropriate removal method.
How to Remove Very Stubborn Sticker Residue
If the residue does not disappear after one application, don’t automatically use more force.
Try this progression:
- Remove as much sticker material as possible.
- Apply a thin layer of DIY Goo Gone.
- Wait about 5–15 minutes.
- Wipe gently.
- Use a plastic scraper if the surface allows it.
- Clean the area with dish soap.
- Inspect the surface.
- Repeat once if the finish remains unchanged.
If repeated attempts do little, stop rather than increasing pressure or abrasion.
A stubborn adhesive is usually easier to solve with the right method than with increasingly aggressive scrubbing.
Common DIY Goo Gone Mistakes

Using Too Much Product
A thick layer does not necessarily remove adhesive faster.
Start small.
Scrubbing Too Hard
Baking soda adds mild abrasive action. Excessive rubbing can damage some finishes.
Skipping the Spot Test
This is one of the easiest mistakes to prevent.
Test first.
Using It on Unfinished Wood
The oil can soak into porous wood.
Assuming Every Plastic Is the Same
Plastic types and finishes vary.
Leaving the Oil Behind
Removing the glue is only half the job. Clean the oily film afterward.
Making a Large Batch
There is generally no reason to prepare a large quantity for occasional sticker removal.
Make what you need.
Assuming It Works on Every Glue
It doesn’t.
DIY Goo Gone is most useful for common sticky residue, not every adhesive chemistry.
DIY Goo Gone vs Commercial Goo Gone
A homemade mixture and commercial Goo Gone should not be treated as interchangeable products.
| Feature | DIY Goo Gone | Commercial Goo Gone |
| Ingredients | Household oil + baking soda | Formulated adhesive-removal product |
| Cost | Very low | Higher |
| Preparation | Must be mixed | Ready to use |
| Small sticker residue | Often useful | Designed for this purpose |
| Difficult adhesive | May struggle | Formulated for broader adhesive jobs |
| Surface directions | You must test carefully | Manufacturer provides surface guidance |
| Consistency | Varies | Consistent formulation |
Commercial Goo Gone states that its Original product is designed for adhesive and other sticky messes and provides specific surface restrictions and pre-testing instructions.
That doesn’t mean you need a commercial product for every small sticker. It simply means the homemade mixture should be understood for what it is: a simple DIY alternative with limitations.
How to Make DIY Goo Gone More Effective
Remove the Sticker Before Treating the Glue
Don’t make the homemade mixture do a job that your fingers can do first.
Peel away loose sticker material.
Use a Thin Layer
A small amount is easier to control and creates less cleanup.
Give It Time
Let the oil work on the adhesive rather than immediately scrubbing.
Work in Small Areas
If you’re cleaning a large object, treat one section at a time.
Use the Least Aggressive Tool
Start with:
- Soft cloth
- Your fingers
- Plastic scraper if appropriate
Avoid jumping straight to abrasive or sharp tools.
Clean the Surface Afterwards
Dish soap and warm water can remove the oily film when appropriate for the material.
DIY Goo Gone Safety Tips

- Always test an inconspicuous area first.
- Keep the mixture away from eyes and mouth.
- Wash your hands after cleaning.
- Do not use the mixture on materials you have not established as compatible.
- Keep it away from children and pets.
- Avoid using excessive pressure or abrasion.
- Keep oily materials away from open flames and excessive heat.
- If you’re cleaning a food-contact item, wash it thoroughly afterward.
- Do not use a valuable or antique item as your first test surface.
Commercial Goo Gone also instructs users to pre-test surfaces and lists materials such as silk, leather, suede, rubber, unfinished wood, drywall, and unsealed stone among surfaces to avoid for its Original product. Those restrictions reinforce an important point for homemade versions: surface compatibility matters more than the fact that the ingredients are common household products.
Frequently Asked Questions
What is the easiest DIY Goo Gone recipe?
Mix 2 parts oil with 1 part baking soda to create a soft paste. For a small job, try 2 tablespoons of oil with 1 tablespoon of baking soda.
Does DIY Goo Gone remove sticker residue?
It can help with many common sticker and label residues, especially on compatible hard surfaces. It is not effective for every adhesive.
What oil is best for DIY Goo Gone?
Olive, vegetable, canola, and coconut oil are reasonable household options. The most important consideration is whether the surface can safely tolerate the oil.
Can I use olive oil to remove sticker residue?
Yes, olive oil can be used as the oil component of this homemade method on compatible surfaces.
Can I use coconut oil?
Yes. If the coconut oil is solid, soften it enough to mix and spread.
Can I use DIY Goo Gone on glass?
Glass is generally one of the better surfaces to consider for this method. Test first, use a small amount, and wash away the oily residue afterward.
Can I use DIY Goo Gone on plastic?
Some hard plastics may tolerate it, but plastics vary. Test a hidden area first.
Can I use DIY Goo Gone on wood?
Do not use an oil-based mixture on unfinished wood. Finished wood is a separate situation and should be tested carefully.
Can I use DIY Goo Gone on clothes?
It is not the best first choice because the oil can create another stain. Use a fabric-specific adhesive-removal method instead.
Can I use DIY Goo Gone on leather?
It is best to avoid experimenting with an oil-and-baking-soda paste on leather.
How long should DIY Goo Gone sit?
Start with approximately 5–15 minutes on a compatible hard surface. If it isn’t working, repeat carefully rather than scrubbing aggressively.
Why does DIY Goo Gone need baking soda?
The oil helps loosen adhesive, while baking soda provides mild abrasive action that can help lift softened residue.
Can I make DIY Goo Gone without baking soda?
Yes. You can try plain oil on a compatible surface, but remember that oil can still stain or penetrate porous materials.
Is DIY Goo Gone the same as Goo Gone?
No. Homemade Goo Gone is a simple oil-and-baking-soda mixture. It is not a duplicate of the commercial formula.
Does DIY Goo Gone remove every type of glue?
No. It is primarily useful for common sticky residue. Strong or specialized adhesives may require a different method.
How do I remove the oily residue afterward?
Wash the treated surface with dish soap and warm water when appropriate for that material, then rinse and dry.
Final Thoughts
DIY Goo Gone is worth trying when you have small amounts of sticker, label, or tape residue on a compatible hard surface and want a simple homemade option.
Start with 2 parts oil and 1 part baking soda, apply a thin layer, allow it time to soften the adhesive, wipe gently, and wash away the oily residue afterward.
The most important part is not making a large batch or scrubbing harder. It is choosing the right surface and using the least aggressive method that works.
For stubborn or specialized adhesives, or for delicate and valuable materials, a material-specific adhesive remover is a better choice than repeatedly experimenting with a homemade mixture.