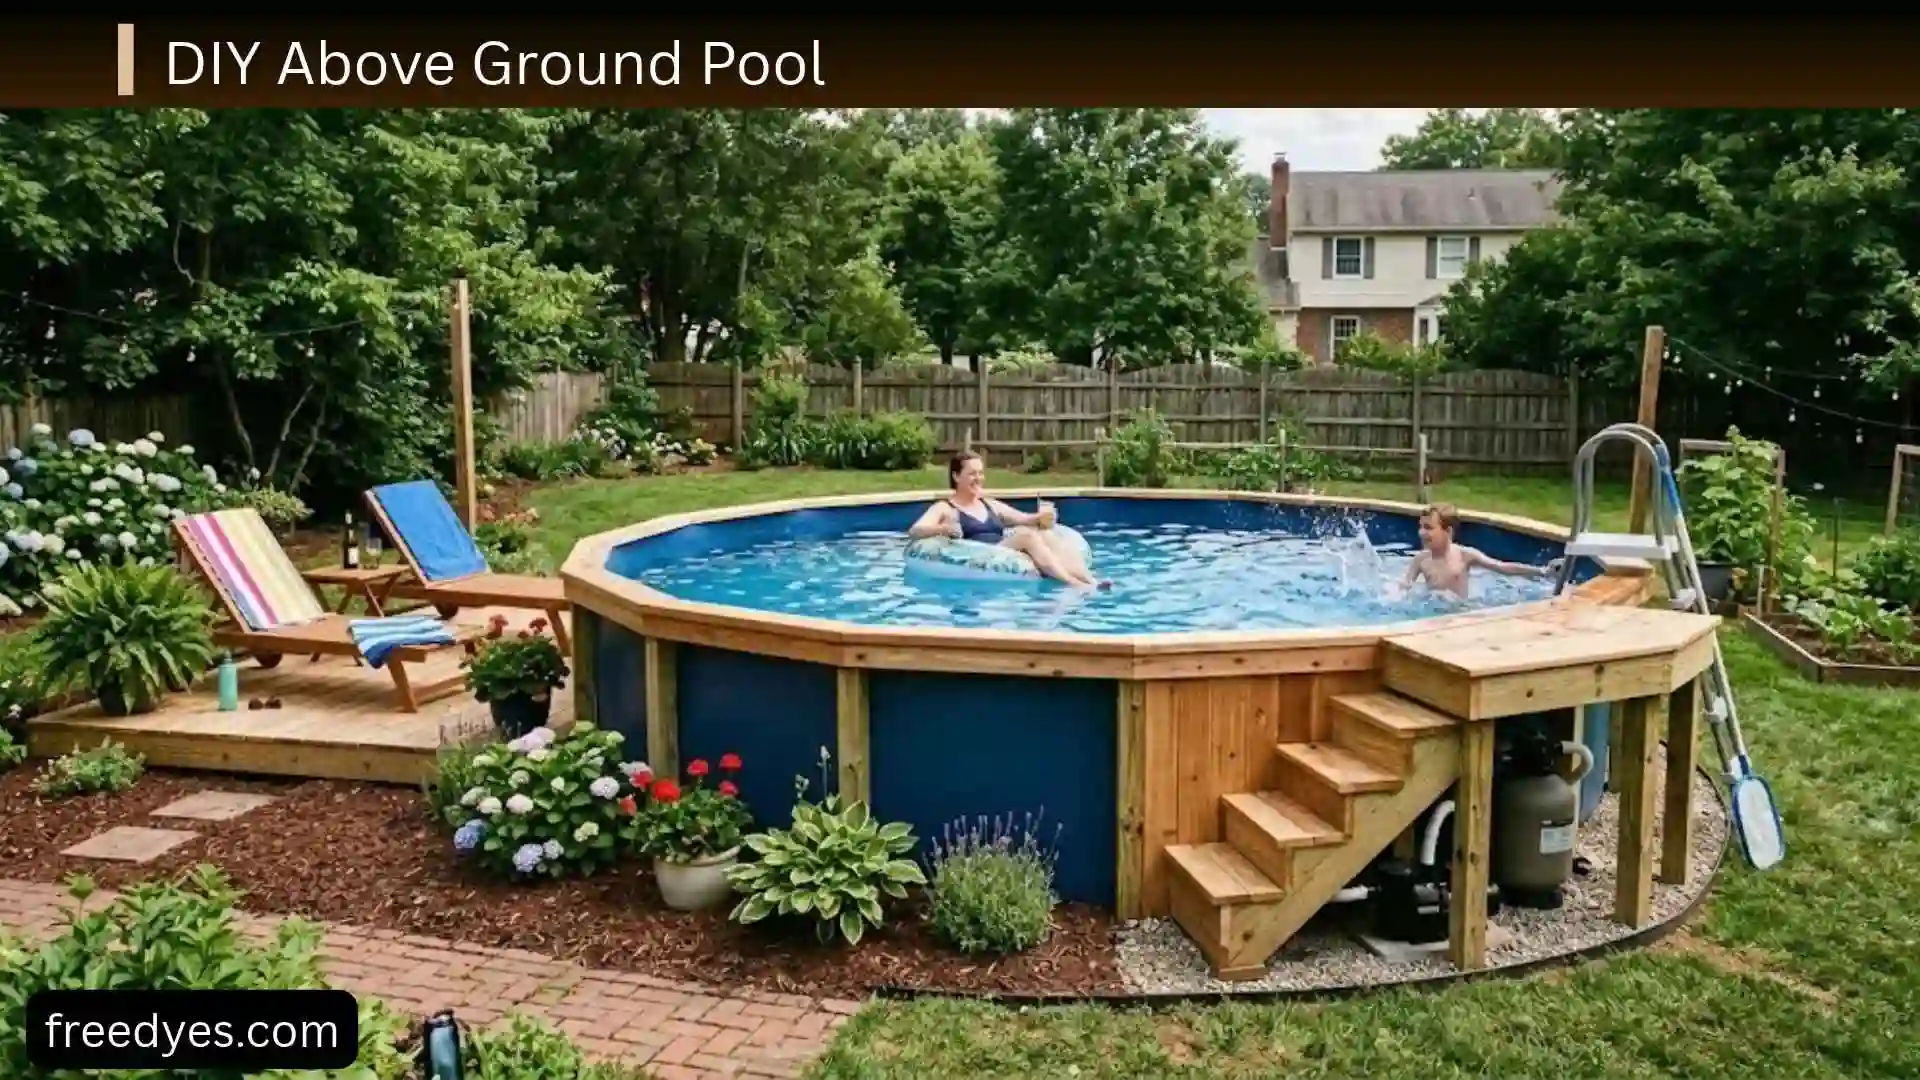
A DIY above ground pool is one of the easiest and most affordable ways to create a fun backyard retreat without the high cost of an in-ground installation. Whether the goal is to cool off during hot summer days, give kids a safe place to play, or build a relaxing outdoor space, a well-planned DIY project can make it happen. With the right materials, careful preparation, and step-by-step guidance, anyone with basic tools and a little patience can build a pool that looks great and lasts for years.
This guide covers everything needed to plan, build, maintain, and enjoy a DIY above ground pool while avoiding common mistakes that could lead to extra time and expense.
Can You Install an Above Ground Pool Yourself?
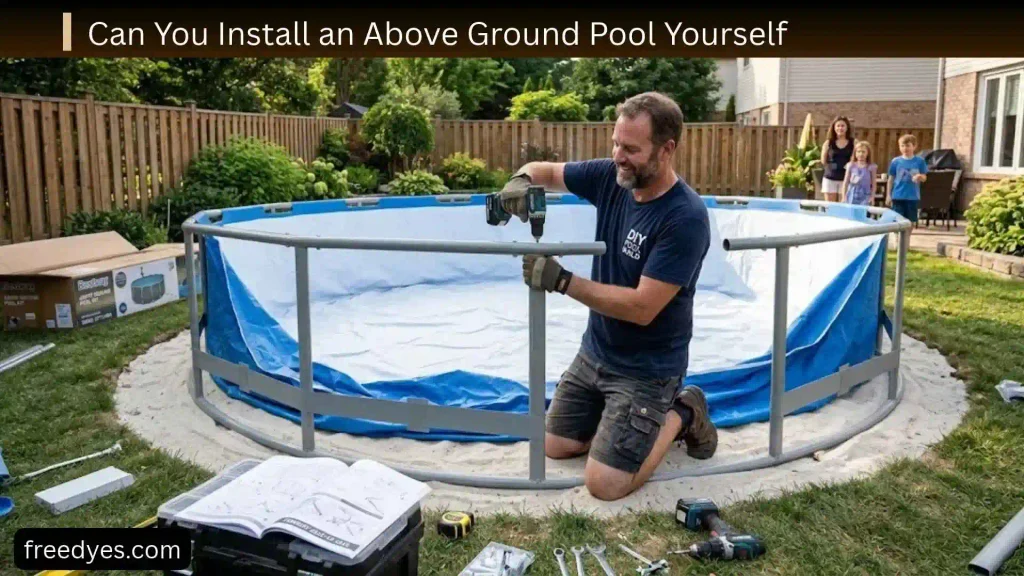
Yes, many homeowners can install a manufactured above-ground pool themselves if they have a suitable location, enough help, the necessary tools, and the ability to follow the manufacturer’s instructions carefully.
The difficulty depends heavily on the pool and the yard.
A small frame-style pool on an already suitable surface may be relatively straightforward. A large rigid-wall pool on a sloping yard can become a major construction project.
Professional training guidance for above-ground pool installation treats site layout, removal of grass and topsoil, excavation, leveling, base preparation, compaction, wall assembly, and liner installation as separate stages.
When DIY makes sense
DIY installation is more realistic when:
- The yard has a suitable location.
- The ground can be prepared without major excavation.
- You have enough space around the pool to work safely.
- You can follow detailed instructions.
- You have help for awkward or heavy components.
- The electrical portion can be handled safely and legally.
- Your local requirements allow the work you plan to perform yourself.
When professional help is a better choice
Consider professional assistance when:
- Your yard has a substantial slope.
- Major excavation is necessary.
- Retaining walls are involved.
- The ground is unstable or heavily filled.
- Drainage is a serious problem.
- Underground utilities are uncertain.
- The pool is unusually large or complicated.
- You need electrical work outside your qualifications.
- Local regulations require licensed work.
- You are unsure whether the structure can safely be installed in your chosen location.
DIY installation vs. building a pool from scratch
These are not equivalent projects.
Installing a manufactured pool means assembling components that were designed to work together. Building a pool from ordinary lumber, pallets, plywood, blocks, or other materials means designing the entire structure yourself.
For most homeowners, DIY installation of a manufactured pool is the more practical option.
DIY Above Ground Pool at a Glance
| Factor | What to expect |
| Difficulty | Easy to advanced, depending on pool and site |
| Most important stage | Ground preparation |
| Biggest beginner mistake | Installing on an uneven or unstable surface |
| Main equipment | Pool, liner, pump, filter, plumbing, ladder/access system |
| Best approach | Follow the specific manufacturer’s instructions |
| Main safety concerns | Drowning, structural problems, electrical hazards, slips, entrapment |
| Cheapest approach | Simplify accessories without compromising the foundation or safety |
| Professional help | Best for difficult excavation, drainage, structural, or electrical work |
Above-ground residential pool standards address design, equipment, installation, operation, and safety, which reinforces that these pools should be treated as engineered products rather than improvised backyard containers.
Choose the Right Above Ground Pool
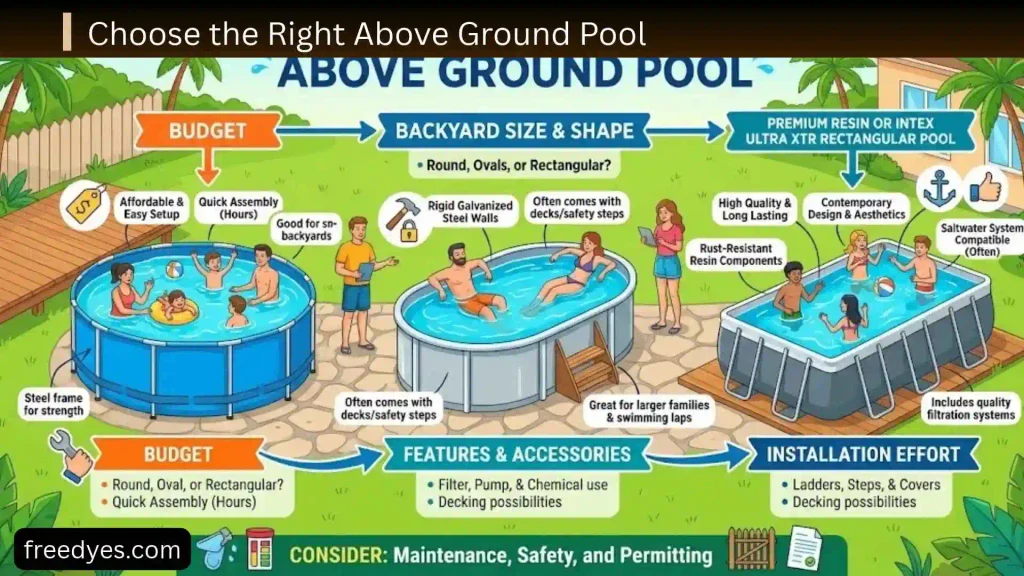
The easiest DIY installation starts with choosing a pool that matches your yard and your experience.
Soft-sided and frame pools
Soft-sided and frame-supported pools are often attractive to people who want a simpler setup.
Potential advantages include:
- Lower initial cost
- Faster assembly
- Easier seasonal storage for some models
- Less complicated structural assembly
However, the supporting frame and prepared surface still matter. A flexible pool does not eliminate the need for a stable, suitable installation area.
Rigid-wall pools
Rigid-wall pools generally involve more components and a more substantial installation process.
They may require:
- More careful site preparation
- Wall assembly
- Tracks or supports
- A more carefully installed liner
- Additional structural components
They can be a good long-term choice, but they are not necessarily the best first DIY project for a difficult yard.
Round vs. oval vs. rectangular pools
A round pool is often easier to lay out because its footprint is straightforward.
Oval and rectangular pools can provide different swimming and backyard-layout advantages, but their installation may involve more complicated framing and support arrangements.
Don’t choose the shape only because it looks attractive in a product photo. Measure the actual space available in your yard first.
Choose the size based on your entire setup
Don’t measure only the advertised pool dimensions.
You also need room for:
- The pump and filter
- Plumbing
- Ladder or entry system
- Maintenance access
- People walking around the pool
- Drainage
- Safety barriers where required
- Future landscaping or a deck
A pool that technically fits your yard may still leave you with an inconvenient or unsafe maintenance area.
Plan the Pool Location Before You Buy
Choosing the location is one of the most important decisions in a DIY above-ground pool project.
Check the slope
A yard that looks almost flat can still have a noticeable difference in elevation across the pool footprint.
Don’t judge the site only by eye.
Measure the area and determine where the high and low points are before buying materials for the base.
Check drainage
Think about where rainwater naturally travels.
Avoid creating a situation where water constantly collects around the pool or underneath its prepared base.
Also consider:
- Downspouts
- Roof runoff
- Heavy rainfall
- Irrigation
- Nearby slopes
- Soil erosion
- Water draining from neighboring areas
A level pool site is not much help if water repeatedly washes away or saturates the foundation area.
Locate underground utilities
Before digging, determine where underground services are located.
This becomes particularly important if site preparation requires excavation.
Professional installation training specifically includes checking for existing underground and overhead services as part of planning the work.
Consider sunlight
Sun exposure can affect comfort and water temperature.
A sunny location may be pleasant for swimming, but you should also think about:
- Shade during the hottest part of the day
- Nearby trees
- Falling leaves
- Tree roots
- Privacy
- Wind exposure
Leave enough room around the pool
You need space to:
- Walk around the pool
- Clean it
- Reach equipment
- Remove or replace components
- Access the ladder
- Deal with emergencies
- Maintain landscaping
Check local requirements
Before installation, check local building, zoning, electrical, drainage, and pool-safety requirements.
Rules can vary considerably by location, pool type, depth, property, and installation method.
Never assume that a rule you read online applies automatically to your municipality.
How to Prepare the Ground for an Above Ground Pool
Ground preparation is the foundation of the entire project.
If the site is poorly prepared, an expensive pool can develop problems even if the assembly itself was done correctly.
Professional installation guidance includes removing grass and topsoil, excavating to the required level, and preparing and compacting the base to the specified level.
Remove grass, roots, and organic material
Don’t simply place the pool on top of an ordinary lawn unless your specific pool instructions explicitly allow the installation method.
Grass, roots, sticks, stones, and other debris can create uneven areas beneath the pool.
Organic material can also change over time as it decomposes.
Clear the intended footprint and prepare it according to the pool manufacturer’s requirements.
Find the highest point
One of the most useful rules for site preparation is to identify the highest part of the pool footprint.
If one side is high and the other is low, beginners often think they can simply add loose soil to the low side.
That can be problematic because loose fill may settle under the enormous load of a filled pool.
Where practical, leveling by removing high areas is generally more reliable than simply building up one side with loose material.
Level the entire footprint
Don’t check only the center of the pool.
The complete footprint matters.
Depending on the pool design, you may need to pay special attention to:
- The perimeter
- Wall supports
- Tracks
- Uprights
- Base plates
- The center floor area
Your pool manual should determine the exact preparation requirements.
Why leveling matters
A pool contains a tremendous amount of water.
For perspective, water weighs about 1 kilogram per liter. A pool containing several thousand gallons can therefore place many tons of water on its supporting surface.
That is why “almost level” isn’t necessarily good enough.
An uneven installation can contribute to:
- An uneven waterline
- Liner stress
- Movement
- Structural stress
- Poor appearance
- Problems with supports or walls
Compact the prepared surface when required
If your installation method uses soil or fill, the material needs to be appropriately prepared and compacted according to the pool design and local/site requirements.
Don’t assume that simply spreading dirt with a shovel creates a stable foundation.
Don’t use loose fill to hide a major slope
If your yard slopes significantly, don’t try to solve the problem by dumping soil on the low side and placing the pool on top.
A major change in elevation may require a more substantial site-preparation solution.
That’s one of the situations where professional advice can be worthwhile.
What Should You Put Under an Above Ground Pool?
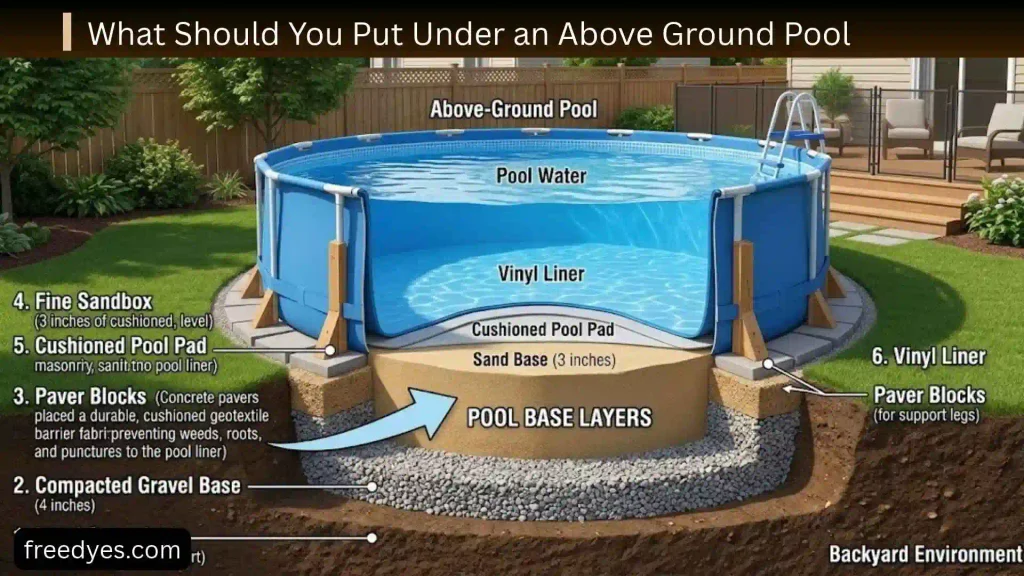
There isn’t one universal base material that is correct for every above-ground pool.
The right solution depends on the pool construction, manufacturer instructions, site conditions, and installation method.
Prepared soil
Some pool systems can be installed on appropriately prepared ground.
The important part is not simply the word “soil.” The surface needs to meet the manufacturer’s requirements for levelness, stability, cleanliness, and support.
Sand
Sand is commonly associated with above-ground pools because it can create a smooth surface and help protect certain liners.
However, sand is not a magic solution for a badly sloped or unstable yard.
If the underlying site is poor, adding sand doesn’t automatically solve the structural problem.
Pool pads
A purpose-made pool pad can provide a protective layer between the prepared base and the liner.
Potential benefits include:
- Smoother contact
- Protection from small imperfections
- Reduced abrasion
- Additional liner support
Use a product compatible with your specific pool.
Foam or specialized underlayment
Some pools use foam or specialized underlayment systems.
These products can provide cushioning and protection, but compatibility matters.
Follow the pool manufacturer’s recommendations rather than assuming that any foam board or insulation product is suitable.
Concrete
Concrete can provide a very stable surface for some pool systems.
But concrete is not automatically appropriate for every above-ground pool.
Before using it, verify that:
- The pool is designed for that type of base.
- The surface meets the manufacturer’s requirements.
- Drainage is properly considered.
- The finished surface is suitable for the liner and structure.
What to avoid
Avoid using random materials simply because they are inexpensive.
Be especially cautious about:
- Sharp rocks
- Construction debris
- Uncompacted fill
- Rotting organic material
- Unstable pavers
- Improvised materials that aren’t compatible with the pool
How to Install a DIY Above Ground Pool
The exact procedure differs between pool models, so the manufacturer’s manual should always take priority.
The following is a general workflow rather than a replacement for model-specific instructions.
Step 1: Prepare the site
Finish the ground preparation before bringing the pool into the final assembly stage.
Confirm:
- The site is suitable.
- The footprint is correctly positioned.
- The base is prepared.
- The surface is free of damaging debris.
- Drainage has been considered.
Step 2: Mark the footprint
Use the manufacturer’s dimensions to mark the pool location.
Double-check measurements before installing anything permanently.
This is the stage where it is much easier to fix an error.
Step 3: Install the required base
Install the base or underlayment specified by the manufacturer.
Don’t substitute a material simply because another pool owner used it.
Step 4: Assemble the pool structure
Lay out components so you can identify them before assembly.
Keep fasteners and parts organized.
Follow the manufacturer’s assembly sequence rather than improvising.
For rigid-wall pools, small mistakes in the early stages can become much harder to correct later.
Step 5: Install the liner
Handle the liner carefully.
Keep it away from:
- Sharp tools
- Rocks
- Fasteners
- Rough surfaces
- Shoes that could damage it
Position it according to the instructions.
Step 6: Install the pump and filter
The pump and filter are responsible for circulating and cleaning the water.
Follow the equipment instructions for:
- Hose connections
- Filter installation
- Valves
- Skimmer connections
- Return connections
Step 7: Connect the plumbing
Check every connection before filling.
Make sure hoses are properly seated and clamps or fittings are installed as specified.
Step 8: Add the ladder and access equipment
Install the entry system according to its instructions.
Check that it is stable before use.
Step 9: Begin filling
Don’t simply turn on a hose and walk away.
Watch the pool as it fills.
The early filling stage is an important opportunity to identify problems before the pool becomes fully loaded.
Step 10: Check the structure while filling
Look for:
- Movement
- Unexpected leaning
- Shifting supports
- Major liner wrinkles
- Uneven waterline
- Leaks
- Abnormal wall movement
If something looks structurally wrong, stop filling and investigate.
Don’t assume that adding more water will fix the problem.
How to Install an Above Ground Pool Liner Without Wrinkles
Liner installation is one of the stages where patience pays off.
Prepare the surface first
The smoother and cleaner the prepared surface is, the easier it is to position the liner correctly.
Position the liner carefully
Follow the manufacturer’s instructions for orientation and attachment.
Don’t stretch the liner aggressively to force it into place.
Smooth the floor before the water gets deep
As water enters the pool, use the appropriate method recommended by the manufacturer to remove manageable wrinkles.
Once there is a significant amount of water in the pool, correcting floor wrinkles becomes much more difficult.
Fill gradually
Watch the liner and pool walls as the water rises.
If something looks wrong, stop before the problem becomes harder to correct.
Stop if the pool starts shifting
A visibly moving or leaning structure is not a normal installation adjustment.
Stop filling and determine the cause.
How to Set Up the Pump and Filter
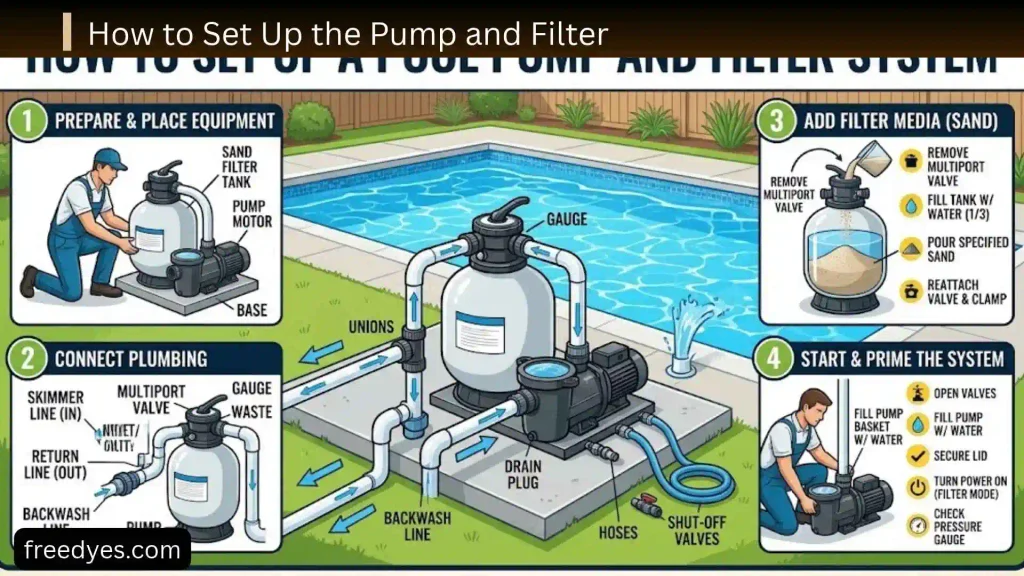
The circulation system normally includes several important components.
Pump
The pump moves water through the filtration system.
Filter
The filter removes suspended particles from circulating water.
Different pool systems may use different filter technologies.
Skimmer
The skimmer helps collect debris from the surface of the water.
Return
The return sends filtered water back into the pool.
Hoses and fittings
These connect the circulation components.
Every connection should be checked for leaks.
Don’t oversimplify pump problems
Poor water circulation isn’t always solved by buying a bigger pump.
The problem could involve:
- Blocked hoses
- Air entering the system
- A dirty filter
- Incorrect connections
- Equipment damage
- Incorrect valve positions
Follow the equipment manufacturer’s troubleshooting instructions.
Electrical Safety for a DIY Above Ground Pool
Pool electricity deserves special caution.
Electrical safety is specifically recognized in pool safety standards alongside hazards such as drowning, sanitation, and entrapment.
Don’t improvise electrical connections
Never assume that a convenient outdoor outlet or extension cord is automatically appropriate for pool equipment.
Follow the equipment instructions and applicable electrical requirements.
Use appropriate ground-fault protection where required
Pool equipment may require specialized protection.
The exact installation requirements depend on your jurisdiction and equipment.
Keep electrical equipment protected from water
Don’t place electrical connections where splashing, flooding, or poor drainage could create a hazard.
Know when to hire an electrician
If the installation requires new circuits, hardwiring, changes to your electrical system, or work beyond your qualifications, use a qualified electrician.
This is not the place to experiment.
How Much Does a DIY Above Ground Pool Cost?
The purchase price of the pool is only one part of the budget.
Your real project cost may include:
| Expense | Why it matters |
| Pool | Main structure |
| Ground preparation | Clearing, leveling, excavation |
| Base material | Supports the pool according to the installation method |
| Pool pad | May protect the liner |
| Pump/filter | Water circulation and filtration |
| Plumbing | Connects circulation equipment |
| Ladder | Provides access |
| Cover | Helps protect the pool |
| Water | Initial fill and future top-ups |
| Chemicals | Water sanitation and balance |
| Electrical work | May be necessary depending on equipment and site |
| Drainage | Important for difficult yards |
| Landscaping | Improves appearance |
| Deck | Optional but can become a major expense |
| Tools | May be necessary for site preparation |
Why DIY doesn’t always mean cheap
DIY can reduce labor costs, but it doesn’t eliminate the cost of materials, equipment, preparation, safety, or mistakes.
The cheapest installation isn’t necessarily the cheapest project in the long run.
A poorly prepared site can create expenses that exceed what you saved by cutting corners.
Cheap DIY Above Ground Pool Ideas
If you’re trying to keep costs down, focus on simplifying the extras rather than compromising the foundation.
Choose an appropriately sized pool
A smaller pool may require less:
- Water
- Chemical treatment
- Site preparation
- Equipment
- Landscaping
Do simple site cleanup yourself
If the work is safe and within your abilities, you may be able to handle basic clearing and preparation yourself.
Keep landscaping simple
You don’t need an elaborate resort-style backyard.
Try:
- Gravel
- Potted plants
- Simple edging
- Outdoor chairs
- Solar lighting
- A basic privacy screen
Reuse suitable outdoor furniture
Existing weather-resistant furniture can save money without affecting the pool’s structural installation.
Avoid false savings
Don’t cut costs by skipping:
- Proper site preparation
- Required safety equipment
- Appropriate filtration
- Necessary electrical protection
- A compatible liner or base
- Required barriers
Saving money is useful only when the saving doesn’t create a bigger problem later.
DIY Above Ground Pool Deck Ideas
A deck can make an above-ground pool look more integrated into the backyard.
Simple platform
A small platform beside the pool can create space for:
- Towels
- Chairs
- Steps
- Pool accessories
Partial deck
Instead of surrounding the entire pool, build a smaller deck on one side.
This can provide much of the visual benefit without the cost of a full wraparound design.
Wraparound deck
A larger deck can make an above-ground pool resemble a more permanent backyard feature.
However, it also introduces additional structural and building considerations.
Pallet-style appearance
You can use a rustic visual style for nearby furniture and decorative areas, but don’t assume ordinary pallets are automatically suitable as a structural pool deck.
A deck supporting people needs to be designed and built for the loads and conditions involved.
Think about wet conditions
Pool decks should account for:
- Slipping
- Water exposure
- Drainage
- Structural stability
- Access
- Local building requirements
DIY Above Ground Pool Landscaping Ideas
You can make a pool area attractive without spending a fortune.
Gravel border
A properly planned gravel area can create a clean transition between the pool and the rest of the yard.
Potted plants
Containers give you flexibility and can be moved or replaced without disturbing the pool site.
Privacy screening
Consider:
- Outdoor screens
- Fencing
- Trellis-style features
- Suitable plants
Make sure privacy features don’t interfere with required safety barriers or emergency access.
Outdoor seating
A few well-positioned chairs can make a basic pool area feel intentional.
Lighting
Low-voltage or solar outdoor lighting can improve the atmosphere around the pool.
Any electrical installation near a pool should follow applicable safety requirements.
Create an equipment zone
Don’t leave hoses, chemicals, and maintenance equipment scattered around the pool.
A small organized storage area can make the backyard look dramatically cleaner.
How to Make an Above Ground Pool Look Better
An above-ground pool doesn’t have to look like an object dropped into the middle of the lawn.
Coordinate the surroundings
Choose complementary:
- Furniture
- Lighting
- Landscaping
- Privacy features
- Deck materials
Hide visual clutter not safety equipment
Organize pumps, hoses, cleaning tools, and storage where practical.
Never conceal equipment in a way that blocks ventilation, maintenance access, drainage, or safety.
Add a defined pool area
A clear transition using suitable landscaping, decking, or outdoor surfaces can make the pool feel like part of the overall backyard design.
Keep the area uncluttered
A clean poolside space often looks more expensive than one filled with unnecessary decorations.
How to Fill a DIY Above Ground Pool Safely
Filling the pool is not the end of installation.
It is another inspection stage.
Watch the waterline
The waterline can reveal problems with the site’s level.
A noticeable difference may indicate that something needs to be investigated.
Check the walls
Watch for:
- Bulging
- Leaning
- Shifting
- Unusual movement
Check the liner
Look for:
- Major wrinkles
- Pulling
- Unexpected movement
- Damage
Check fittings
Inspect around:
- Skimmer
- Return fittings
- Pump connections
- Filter connections
If water is escaping unexpectedly, stop and investigate.
How to Balance and Maintain a DIY Above Ground Pool
Pool maintenance becomes much easier when you treat it as a routine rather than waiting for a visible problem.
Test the water
Use an appropriate test method to monitor water chemistry.
Your exact target ranges should come from reliable pool guidance and the instructions for the products you’re using.
Maintain sanitizer
Sanitizer helps control unwanted biological growth in the water.
Don’t guess at chemical quantities.
Follow the product label and pool guidance.
Monitor pH
Water that is outside the recommended pH range can affect swimmer comfort, sanitation performance, and equipment.
Keep the filter operating as instructed
Filtration and circulation are essential parts of maintaining clear water.
Remove debris
Leaves, insects, dirt, and other debris can quickly accumulate.
Skimming and cleaning regularly reduces the workload on the filtration system.
Watch the water level
Water naturally changes due to:
- Evaporation
- Splashing
- Rain
- Maintenance
- Leaks
An unusual drop deserves investigation.
A Simple DIY Above Ground Pool Maintenance Schedule
Every day or whenever the pool is used
- Look over the pool.
- Remove obvious debris.
- Check for unusual leaks or structural changes.
- Keep the pool area clear.
Several times per week
- Test water as needed.
- Check circulation.
- Skim the surface.
- Inspect the filter system.
Weekly
- Clean the pool more thoroughly.
- Check equipment.
- Review water chemistry.
- Inspect hoses and visible connections.
Seasonally
Depending on your climate and pool type:
- Prepare the pool for the swimming season.
- Inspect components.
- Follow the manufacturer’s closing or winterization procedure.
- Protect equipment appropriately.
DIY Above Ground Pool Troubleshooting
| Problem | Possible cause | What to check first |
| Pool looks uneven | Poor site preparation | Check the level of the installation area |
| Waterline is noticeably uneven | Pool/site isn’t level | Stop and investigate before continuing |
| Liner has wrinkles | Poor positioning or floor preparation | Correct them early during filling |
| Water is cloudy | Chemistry or circulation problem | Test water and check filtration |
| Water level keeps dropping | Leak, evaporation, or splashing | Inspect fittings and liner |
| Pump has weak flow | Blockage, air, filter, or equipment issue | Follow pump/filter troubleshooting |
| Algae develops | Sanitation or circulation problem | Test water and correct the underlying issue |
| Pool shifts | Site or structural problem | Stop use/filling and investigate |
| Base becomes wet or soft | Drainage or water problem | Find and correct the water source |
| Hose connection leaks | Loose/damaged connection | Inspect fitting and seal |
Don’t ignore structural problems
Cloudy water can often be addressed through maintenance.
A pool that is visibly moving, leaning, or changing shape is different.
If the structure is behaving unexpectedly, stop and determine why before continuing to use or fill it.
Can You Bury an Above Ground Pool?
Not automatically.
A standard above-ground pool should not simply be buried because you like the appearance of a semi-inground pool.
The structural conditions change when soil is placed against the outside of a pool wall.
A pool designed to hold water pressure from the inside is not automatically designed to withstand the additional external pressure of surrounding soil.
Some pool systems may be specifically designed for partially recessed or different installation configurations, but that must be confirmed for the exact product.
Never assume that a standard above-ground pool can be buried safely just because someone online has done it.
Can You Build an Above Ground Pool From Scratch?
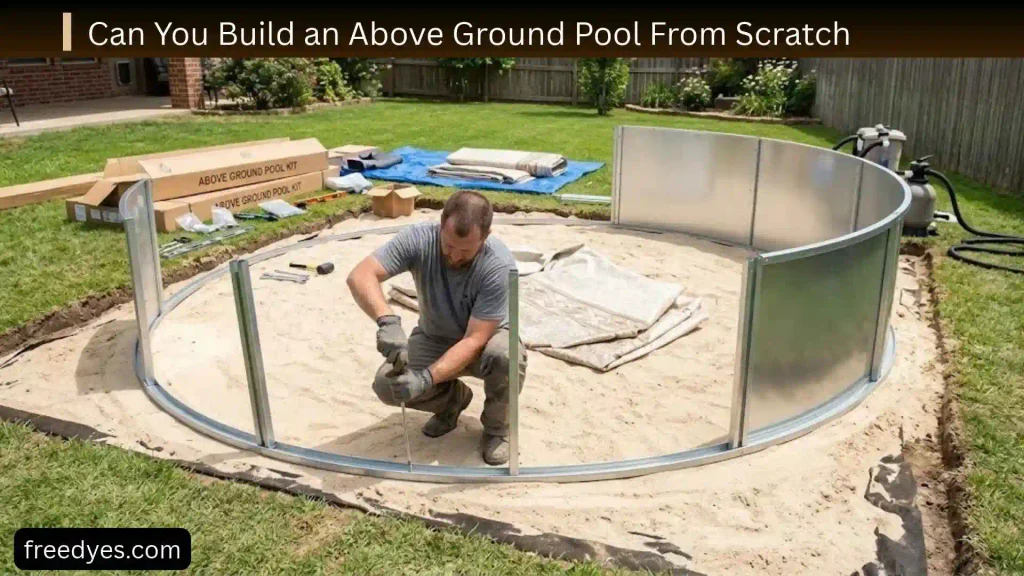
Technically, people can construct custom pools, but that doesn’t mean an improvised homemade pool is a sensible beginner DIY project.
Why homemade pool structures are different
A structural pool needs to handle:
- Water pressure
- Structural loads
- Waterproofing
- Ground movement
- Drainage
- Access
- Filtration
- Electrical safety
- Swimmer safety
A wooden box lined with plastic is not automatically equivalent to a manufactured swimming pool.
What about pallet pools?
Pallets can be useful for decorative projects and furniture, but that doesn’t make them appropriate structural pool walls.
What about plywood pools?
Plywood can deteriorate, deform, leak, or fail if it is used in an unsuitable structural configuration.
What about retaining-wall-style pools?
These require particularly careful structural design.
If you want a custom pool rather than a manufactured above-ground pool, professional structural design is much more appropriate than copying an internet project without understanding its engineering.
Common DIY Above Ground Pool Mistakes
Installing on uneven ground
This is one of the most serious mistakes because the problem begins underneath the pool.
Trying to fix a major slope with loose soil
Fill can settle.
A temporary-looking solution can become a long-term structural problem.
Assuming sand fixes everything
Sand can be useful in some installation systems, but it doesn’t compensate for a fundamentally unsuitable site.
Ignoring drainage
Water around the pool can undermine prepared areas and create maintenance problems.
Skipping the manufacturer’s instructions
Different pool designs use different structural systems, liners, supports, and equipment.
Filling before checking the liner
Once the pool contains substantial water, correcting liner problems becomes much harder.
Connecting equipment incorrectly
Pump and filter systems depend on correct plumbing and connections.
Treating electrical work as ordinary DIY
Pool-related electrical work deserves specialized attention.
Forgetting equipment access
Don’t position the pool so tightly against a wall or fence that you can’t reach the equipment.
Installing too close to structures
Consider maintenance, drainage, access, local setbacks, and emergency requirements before choosing the final position.
Ignoring local requirements
A pool can be physically installed and still fail to meet local requirements.
Burying an unsuitable pool
Don’t modify the installation configuration unless the manufacturer specifically allows it and the site meets the necessary requirements.
DIY Above Ground Pool Safety Checklist
Pool safety should be considered part of installation, not something added after the project is complete.
Residential pool standards address hazards including drowning, electrical safety, sanitation, and entrapment.
Before using the pool, consider:
- Is access controlled appropriately?
- Are required barriers in place?
- Is the ladder secure?
- Are children supervised?
- Is the pool area free from unnecessary trip hazards?
- Are electrical systems properly protected?
- Are pumps and filters installed according to their instructions?
- Is the surrounding area adequately drained?
- Are chemicals stored safely?
- Is the pool cover appropriate for its intended use?
- Do household members know basic emergency procedures?
- Are pets prevented from accidentally entering the pool when appropriate?
Don’t rely on the height of an above-ground pool alone as a child-safety strategy.
DIY Above Ground Pool vs. Professional Installation
| Consideration | DIY | Professional |
| Labor cost | Lower | Higher |
| Control over schedule | High | Depends on contractor |
| Learning required | More | Less |
| Simple site | Often suitable | Still an option |
| Difficult slope | Challenging | Better suited |
| Major excavation | More demanding | Usually preferable |
| Electrical work | Limited by your qualifications | Qualified specialist |
| Custom structural work | Not ideal for beginners | Better suited |
| Troubleshooting responsibility | Mostly yours | Contractor may assist |
| Peace of mind | Depends on your experience | Potentially higher |
The right answer isn’t always “DIY.”
The better question is:
Which parts of this project can I safely and competently handle myself?
You might prepare a simple site yourself while hiring a professional for electrical work or major excavation.
When You Should Not DIY an Above Ground Pool
Consider professional assistance if:
- The yard has substantial elevation changes.
- A retaining wall is required.
- The site has poor soil.
- Drainage is complicated.
- The pool needs a specialized foundation.
- Underground services are uncertain.
- Electrical work is beyond your qualifications.
- The pool requires structural modification.
- Local regulations require professional work.
- You’re unsure whether the pool can safely be installed in your chosen configuration.
There is no prize for doing every part yourself.
A smart DIY project is one where you know when to stop.
Frequently Asked Questions About DIY Above Ground Pools
Can I install an above ground pool myself?
Yes. Many manufactured above-ground pools are designed with owner assembly in mind, but difficulty varies considerably. Site preparation, pool size, construction type, equipment, and local requirements all matter.
What is the best base for an above ground pool?
There is no single base that is best for every pool. The correct choice depends on the pool design and manufacturer instructions. Common approaches include prepared ground, sand systems, pool pads, specialized underlayment, and concrete for compatible pool systems.
Can I put an above ground pool directly on grass?
You should not assume that ordinary grass is an acceptable foundation. Grass, roots, debris, and uneven ground can interfere with a stable installation. Follow the specific site-preparation instructions for your pool.
Does an above ground pool have to be level?
Yes, proper leveling is fundamental to a safe installation. The exact acceptable tolerances and preparation method depend on the pool design and manufacturer.
Can I install an above ground pool on a slope?
A slight site variation may be manageable through appropriate preparation, but a significant slope can require substantial excavation or other work. Don’t simply build up the low side with loose soil.
Is sand enough to level an above ground pool?
No. Sand should not be treated as a substitute for properly preparing an unsuitable or severely sloped site. Its use should follow the pool manufacturer’s instructions.
Can an above ground pool sit on concrete?
Some pools can be installed on concrete, while others have different base requirements. Confirm compatibility with your exact model before choosing concrete.
How much does a DIY above ground pool cost?
The total depends on the pool, site preparation, base, equipment, water, chemicals, electrical work, landscaping, and optional additions such as a deck. The pool’s purchase price alone does not represent the complete project cost.
Do I need a deck for an above ground pool?
No. A deck is optional for many setups. A simple ladder and prepared poolside area can provide access without a deck.
How can I make an above ground pool look better?
Focus on the area around it. Simple landscaping, privacy screening, coordinated outdoor furniture, lighting, clean storage, and a carefully designed deck can make a basic pool look much more integrated into the backyard.
Can I bury an above ground pool?
Not unless the specific pool is designed and approved for that type of installation. Don’t assume a standard above-ground pool can safely withstand soil pressure around its walls.
Can I build an above ground pool myself from wood?
A custom structural pool is a much more complicated engineering project than assembling a manufactured pool. Ordinary wood construction shouldn’t be assumed to be structurally suitable for containing a large volume of water.
How do I know if my pool is shifting?
Watch for unusual wall movement, leaning, displaced supports, an increasingly uneven waterline, or other changes in the pool’s shape. If you see a serious structural change, stop filling or using the pool and investigate the cause.
Why is my above ground pool water cloudy?
Common possibilities include inadequate filtration, poor circulation, or water chemistry that needs adjustment. Test the water and check the filtration system before adding chemicals blindly.
How do I prevent wrinkles in an above ground pool liner?
Start with a properly prepared surface, position the liner carefully, and smooth manageable wrinkles before the water becomes deep. Follow your pool manufacturer’s specific liner instructions.
How often should I maintain my above ground pool?
Maintenance depends on usage, weather, water conditions, and equipment. Regular visual inspections, water testing, cleaning, and filter maintenance are much easier than waiting until the water becomes visibly dirty or the equipment stops working.
Final Thoughts
A DIY above ground pool can be an excellent backyard project when you approach it as an installation project rather than simply an assembly job.
The most important work happens before the pool is filled.
Choose an appropriate location. Check drainage. Prepare the entire footprint carefully. Make sure the ground and base meet the pool manufacturer’s requirements. Assemble the structure exactly as instructed. Take your time with the liner. Check the pool while it fills. Set up filtration correctly. Treat electrical safety seriously. And don’t ignore local pool, building, zoning, or safety requirements.
If you want to save money, save it on unnecessary decoration before you save it on the foundation or safety.
And if your goal is to build a pool completely from scratch, recognize that you’re moving from a straightforward DIY installation into a structural construction project. In that situation, professional engineering and appropriate building expertise can be far more valuable than following a homemade design from the internet.
The best DIY pool isn’t necessarily the cheapest or the biggest one.
It’s the one that is properly planned, correctly supported, safely installed, and easy for you to maintain.