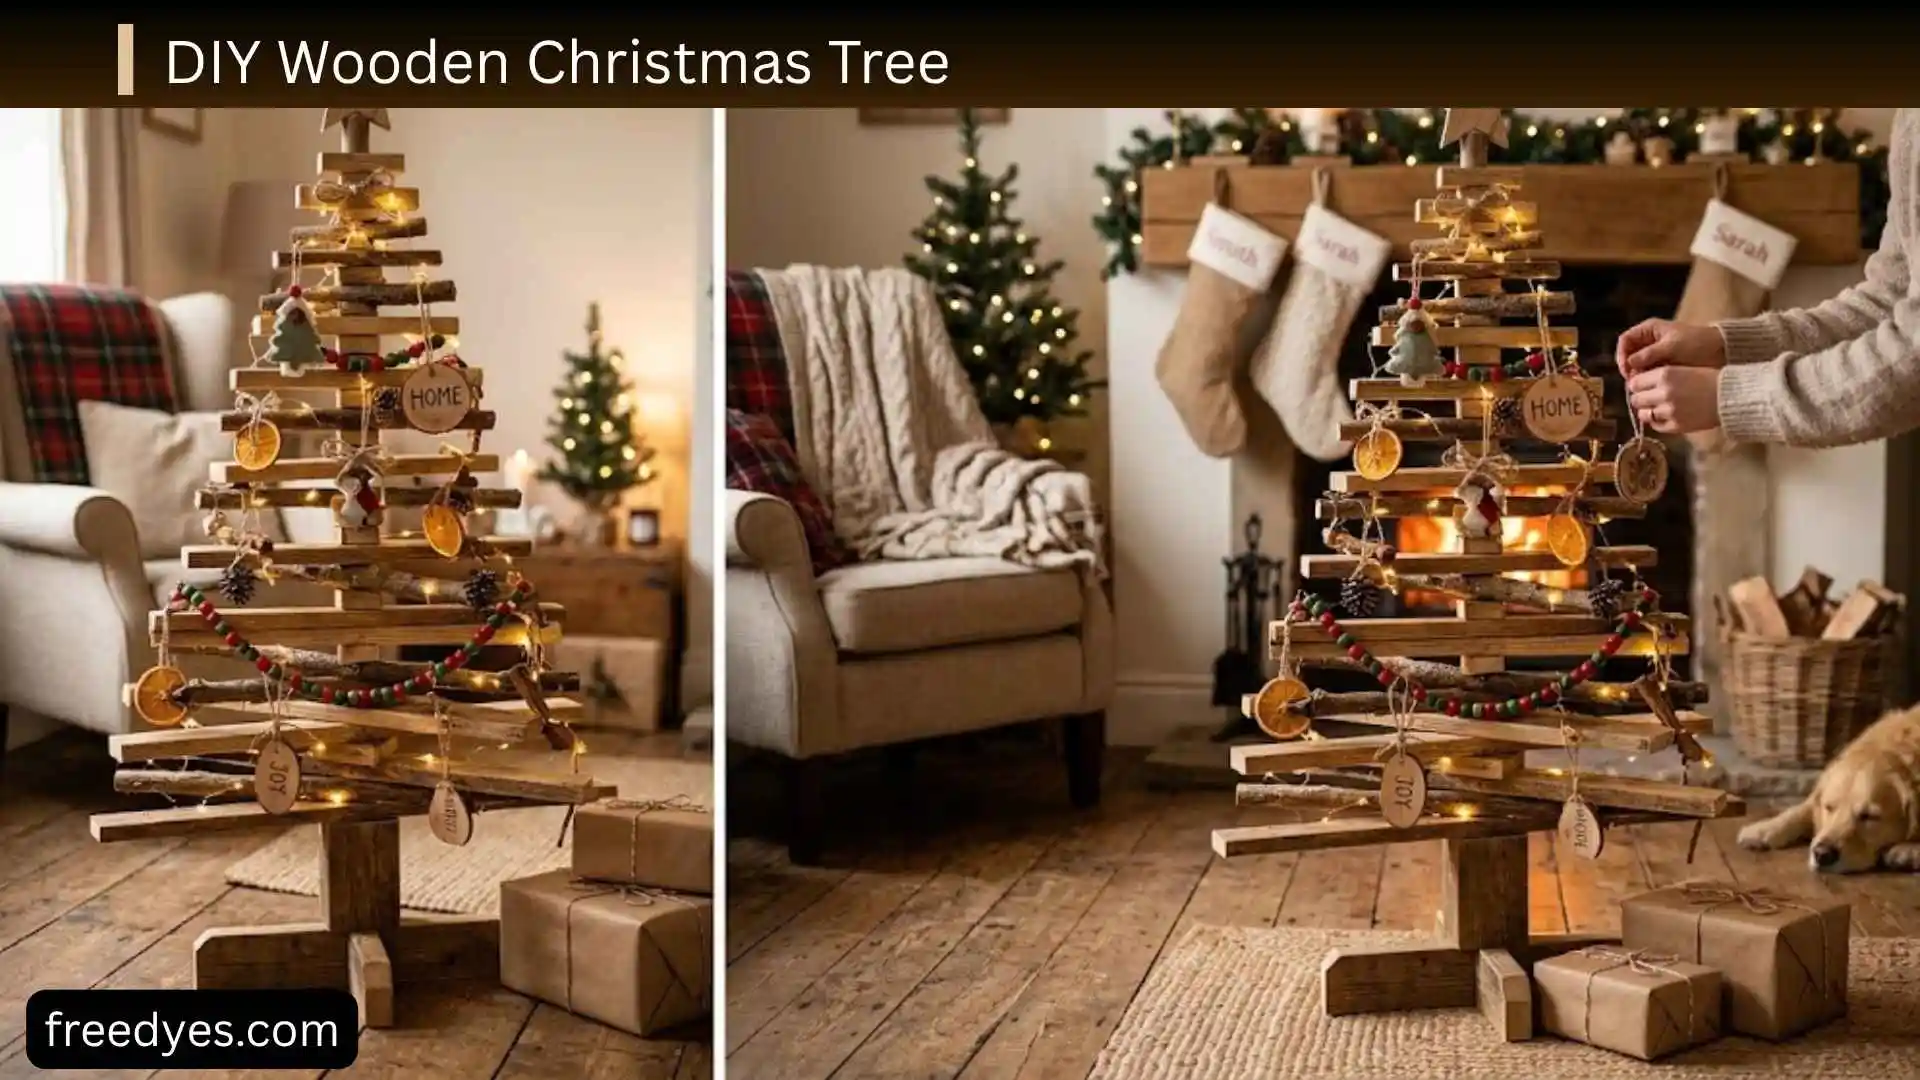
I am always looking for creative ways to make Christmas feel more personal, and a DIY wooden Christmas tree is one of my favorite holiday projects. Instead of buying expensive decorations, I can create a beautiful wooden tree that matches my style, fits my space, and becomes a decoration I look forward to using every year. Whether I am decorating a living room, front porch, entryway, or tabletop, this project adds a warm, rustic touch that store-bought décor often can’t match.
In this guide, I am sharing everything I have learned about making a DIY wooden Christmas tree. I’ll walk through simple designs, the tools and materials I use, step-by-step building instructions, decorating ideas, budget-friendly tips, and common mistakes to avoid. Whether I am a beginner or an experienced DIYer, I can create a wooden Christmas tree that is unique, durable, and perfect for the holiday season.
Best DIY Wooden Christmas Tree Designs at a Glance
Not every wooden Christmas tree needs to be built the same way. The best design depends on your space, tools, budget, and decorating style.
| Design | Best For | Skill Level | Main Advantage |
| Layered board tree | Beginners | Easy | Simple straight cuts |
| Pallet wood tree | Rustic décor | Easy–Moderate | Uses reclaimed wood |
| Plywood silhouette | Modern décor | Moderate | Clean, solid shape |
| Scrap wood tree | Budget projects | Easy | Uses leftover materials |
| Tabletop tree | Small spaces | Very Easy | Takes little room |
| Shelf tree | Ornaments | Moderate | Provides display space |
| Outdoor porch tree | Exterior décor | Moderate | Designed for outdoor use |
| Branch tree | Natural décor | Easy | Organic appearance |
| No-power-tool tree | Beginners | Easy | Minimal equipment |
If you want the easiest project, start with the layered board design described in this guide.
Why Make a DIY Wooden Christmas Tree?
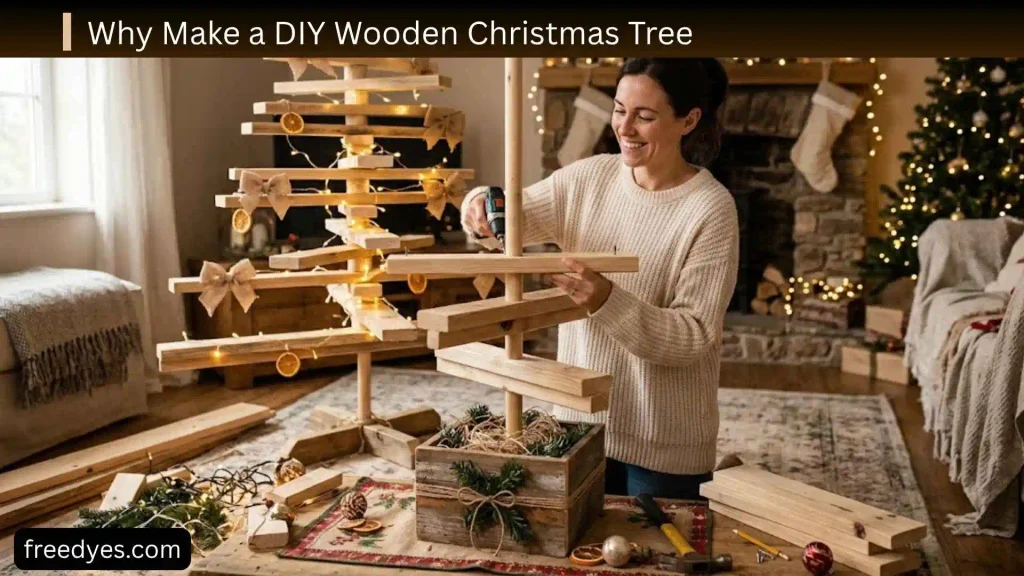
A wooden Christmas tree has several advantages over traditional holiday décor.
It Saves Floor Space
A wooden tree can be narrow and placed against a wall or in a corner. A flat or layered design can give you the appearance of a Christmas tree without taking up as much room as a full artificial tree.
It Can Be Reused
Once built and properly stored, a wooden tree can come out every Christmas. You can repaint it or change the decorations when your style changes.
It Can Be Customized
You control:
- Height
- Width
- Shape
- Wood type
- Finish
- Color
- Lighting
- Decorations
- Base design
That makes it easier to create a tree that fits your home instead of adapting your décor around a standard product.
It Works With Scrap Wood
Small pieces of leftover lumber can become tabletop trees, while longer boards can be used for larger versions.
It Does Not Shed Needles
For people who want Christmas décor without the cleanup associated with a live tree, wood provides a simple alternative.
Which DIY Wooden Christmas Tree Should You Build?
Use your goal to choose the design.
Choose a Layered Board Tree If You Want the Easiest Project
This design uses several boards of different lengths arranged from longest at the bottom to shortest at the top.
It is a good choice for beginners because most cuts are straight.
Choose a Pallet Wood Tree If You Want Rustic Character
Reclaimed boards can provide knots, nail holes, weathering, and color variation.
The imperfections become part of the design rather than something you have to hide.
Choose a Plywood Tree If You Want a Modern Look
A plywood silhouette creates a cleaner shape and can be painted almost any color.
Choose a Tabletop Tree If You Have Limited Space
Small wooden trees work well on:
- Mantels
- Shelves
- Kitchen counters
- Console tables
- Desks
- Bedside tables
Choose an Outdoor Tree If You Need Porch or Yard Décor
An outdoor version needs more attention to the base, finish, moisture, and wind than an indoor tree.
Choose a No-Power-Tool Design If You Are a Beginner
Use pre-cut boards, thin wooden strips, branches, or other pieces that require little or no cutting.
Easy DIY Wooden Christmas Tree Plan
For the main project, we’ll use a simple layered-board design.
The finished tree is approximately 4 feet tall, although you can easily scale it up or down.
Finished Project Details
Project type: Freestanding wooden Christmas tree
Approximate height: 4 feet
Approximate maximum width: 28–30 inches
Skill level: Beginner to intermediate
Build time: About 1–3 hours, depending on preparation and finish
Best location: Indoor display or protected porch
Main material: Straight wooden boards
Finish: Paint, stain, or natural wood
Assembly: Screws or appropriate wood fasteners
The exact dimensions can be adjusted to fit your space.
Materials for the Wooden Christmas Tree
You will need:
- Several straight wooden boards
- One longer board for the central support
- Two boards for the base
- Exterior-rated screws if the tree will be outdoors
- Wood glue if appropriate for your construction
- Sandpaper
- Paint, stain, or clear finish
- Paintbrush or applicator
- Measuring tape
- Pencil
- Straightedge
- Drill
- Saw
- Safety glasses
For a decorative indoor tree, ordinary suitable lumber can work well.
For outdoor use, choose materials and finishes appropriate for exterior exposure.
Simple Cut List
The following cut list creates a roughly 4-foot layered tree.
| Part | Quantity | Approximate Length |
| Bottom branch | 1 | 28 inches |
| Branch 2 | 1 | 25 inches |
| Branch 3 | 1 | 22 inches |
| Branch 4 | 1 | 19 inches |
| Branch 5 | 1 | 16 inches |
| Branch 6 | 1 | 13 inches |
| Branch 7 | 1 | 10 inches |
| Branch 8 | 1 | 7 inches |
| Top branch | 1 | 5 inches |
| Central support | 1 | About 42 inches |
| Base feet | 2 | About 16–18 inches |
These dimensions are a starting point rather than a universal formula. Board width and thickness will affect the finished appearance.
If your boards are unusually wide or narrow, adjust the number of rows and spacing rather than forcing the measurements to remain identical.
How to Scale the Tree to a Different Size
One advantage of this design is that it can be resized.
For a smaller tree, reduce the length of every branch proportionally.
For example, if you want a tree around half the size, you can use approximately half-length branches and a shorter central support.
For a taller tree, increase the branch lengths and strengthen the base accordingly.
The wider and taller the tree becomes, the more important stability becomes. A large outdoor tree should not simply be treated as a scaled-up tabletop project.
How to Build a DIY Wooden Christmas Tree
Step 1: Measure Your Space
Before cutting anything, measure the location where the tree will stand.
Record:
- Maximum height
- Maximum width
- Available depth
- Distance from walls
- Clearance around doors and walkways
For an outdoor tree, also consider whether wind can reach it from the side.
Step 2: Draw Your Design
Lay out the tree on paper.
Place the longest board at the bottom and gradually shorten each board toward the top.
Try to keep the reduction in length visually consistent.
The goal is a smooth triangular silhouette.
Step 3: Inspect the Wood
Check each board for:
- Rot
- Deep cracks
- Loose pieces
- Protruding nails
- Staples
- Excessive warping
- Sharp splinters
- Unknown stains or contamination
Set aside questionable pieces instead of trying to make every board usable.
Step 4: Mark the Cuts
Use a measuring tape and pencil to mark each branch.
Write the length directly on each board after marking it.
This prevents confusion once several pieces have been cut.
Step 5: Cut the Boards
Make the cuts carefully.
For a beginner-friendly layered tree, straight cuts are sufficient.
You do not need complicated angles for the basic design.
If you are using power tools, wear appropriate eye protection and follow the tool manufacturer’s safety instructions.
Step 6: Sand Every Piece
Sand the faces and edges of the boards.
You do not need to remove every rustic imperfection.
The purpose is to eliminate dangerous splinters, rough edges, and sharp points while keeping the character of the wood.
Pay special attention to the edges children may touch while decorating.
Step 7: Dry-Fit the Tree
Before attaching anything, place all the boards on the floor.
Start with the longest branch.
Then arrange the shorter branches above it.
Step back and look at the overall shape.
This is the easiest time to replace a board that looks too wide, too warped, or visually out of place.
Step 8: Attach the Branches
Position the central support behind the branches.
Center each branch as carefully as possible.
Attach the boards to the support using suitable fasteners.
For thicker or longer boards, use fastening methods appropriate to the wood and expected load.
If you are using screws, pre-drilling can help reduce splitting, especially near board ends.
Step 9: Create the Base
The base is one of the most important parts of the project.
A simple cross-foot arrangement can provide a wider footprint than the trunk alone.
Position the two base pieces perpendicular to each other and attach them securely to the central support.
The exact dimensions should increase with tree size.
A tall tree needs a more substantial base than a tabletop tree.
Step 10: Check Stability
Place the unfinished tree on a flat surface.
Gently test it from different directions.
It should remain upright without needing a wall for support.
If it tips easily, stop and improve the base before adding decorations.
Step 11: Finish the Wood
You can now:
- Leave it natural
- Apply clear finish
- Stain it
- Paint it green
- Paint it white
- Use a two-tone finish
- Create a distressed look
- Add decorative lettering
Let the finish dry fully according to the product instructions before decorating.
How to Build a Pallet Wood Christmas Tree
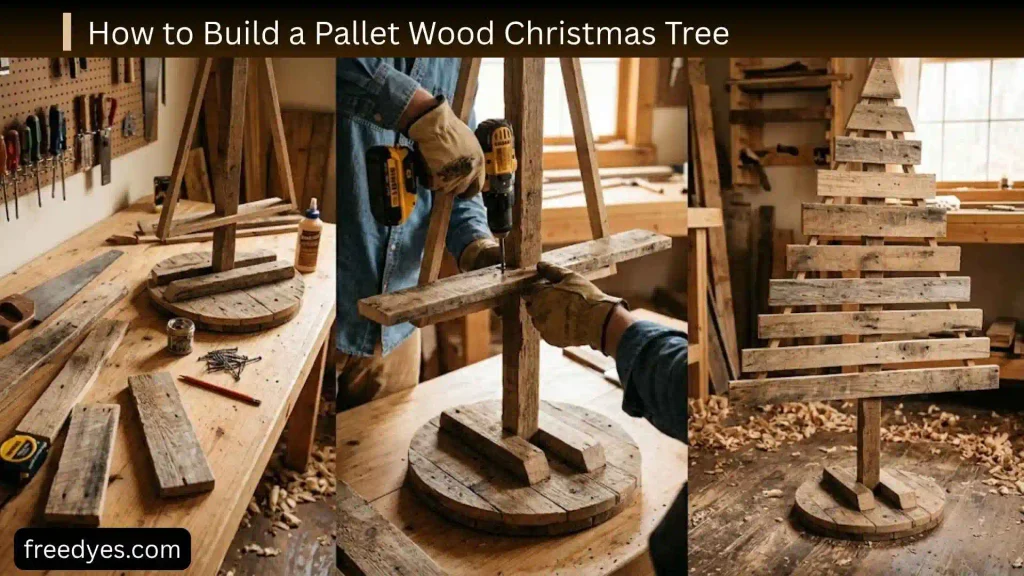
Pallet wood is a popular material for rustic Christmas projects because the boards often have a weathered appearance.
However, do not assume every pallet is appropriate for an indoor craft.
Choose Pallet Wood Carefully
Avoid boards that have:
- Unknown chemical contamination
- Oil stains
- Strong chemical odors
- Serious mold
- Extensive rot
- Severe insect damage
- Excessive cracking
- Numerous dangerous fasteners
Look at the condition and markings of the pallet rather than assuming that all pallets are equally suitable.
Dismantle Pallets Carefully
Pallets often contain nails and can split during disassembly.
Use appropriate protective equipment and work carefully.
If boards are difficult to remove without destroying them, choose a different method rather than forcing them apart.
Let Damp Wood Dry
If the wood has been exposed to rain or moisture, allow it to dry thoroughly before finishing.
Wet or damp wood can create problems with coatings and can change shape as it dries.
Sort Boards by Quality
Save the straightest, cleanest boards for the visible portions of the tree.
Shorter or less attractive pieces can sometimes be used higher up where they have less visual impact.
Create a Layered Shape
Arrange the pallet boards from longest at the bottom to shortest at the top.
Attach them to one or two vertical support boards on the back.
This creates an open, rustic tree rather than a solid triangular shape.
Sand Thoroughly
Pallet wood can have rough edges and hidden splinters.
Sand the areas that will be touched and inspect the boards again before bringing the tree indoors.
DIY Wooden Christmas Tree From Scrap Wood
You do not need an entire pallet or a new bundle of lumber.
Look around your workshop or storage area for:
- Leftover boards
- Fence pickets
- Shelf offcuts
- Thin strips
- Plywood scraps
- Old crate boards
- Wooden dowels
- Branches
- Paint stirrers
- Small pieces of construction lumber
Use Matching Boards for a Clean Look
If your scraps are similar in width and thickness, arrange them into a symmetrical design.
Use Different Boards for a Rustic Look
Different wood species, stains, and textures can create an intentionally varied appearance.
The important thing is to make the variation look deliberate.
DIY Wooden Christmas Tree From Fence Boards
Fence pickets can work particularly well for smaller decorative trees.
They are often narrow enough for simple projects and can be cut into progressively shorter pieces.
Before using old fence boards, inspect them carefully for:
- Rot
- Splitting
- Old coatings
- Insect damage
- Excessive weathering
For a new project, unused fence boards can provide a predictable starting point.
DIY Plywood Christmas Tree
Plywood is ideal when you want a clean, modern silhouette.
Draw the Shape
Use a straightedge to create a symmetrical tree.
You can make a classic triangular tree or use a stepped geometric shape.
Cut the Silhouette
Cut carefully along your marked outline.
The quality of the edge matters because it will be highly visible.
Sand the Edges
Plywood edges can be rough after cutting.
Sand them thoroughly before painting or finishing.
Add a Base
A simple slot-in base can allow the tree to stand upright.
Alternatively, attach a wider wooden foot to the bottom.
Decorate the Surface
Plywood works well with:
- Paint
- Stencils
- Vinyl lettering
- Wood-burning designs
- Small hooks
- Ornament holes
- LED lights
DIY Wooden Christmas Tree Without Power Tools
You can make a wooden Christmas tree without owning a jigsaw or circular saw.
Option 1: Use Pre-Cut Boards
Buy boards that are already cut to size.
Then assemble them into a layered tree.
Option 2: Use Small Wooden Pieces
Craft sticks, paint stirrers, dowels, and small strips can create tabletop trees.
Option 3: Use Branches
Collect suitable fallen branches and arrange them from longest to shortest.
Attach them to a vertical support to create a natural tree shape.
Option 4: Make a Simple Stack
Use pre-cut rectangular pieces of wood.
Stack them from longest to shortest with small spacers between each piece.
This creates a stylized tree without complicated cutting.
DIY Wooden Christmas Tree for Outdoors
An outdoor wooden Christmas tree needs more planning than an indoor version.
The biggest challenges are:
- Moisture
- Wind
- Temperature changes
- Sunlight
- Dirt
- Ground contact
- Stability
Choose Outdoor-Suitable Materials
Use wood appropriate for exterior exposure and a finish intended for outdoor use.
The goal is to reduce moisture absorption and slow deterioration.
Protect the End Grain
Cut ends can absorb moisture more readily than finished faces.
Give special attention to exposed end grain when applying your chosen exterior finish.
Keep Wood Off Wet Ground
Do not allow the bottom of the tree to sit directly in standing water.
A raised or appropriately designed base can help reduce unnecessary moisture exposure.
Build a Wider Base
A porch tree should stand independently rather than simply leaning against a wall.
The taller the tree, the more important the footprint becomes.
Consider Wind
A lightweight tree can behave like a sail during strong winds.
For exposed locations, consider a suitable anchoring method.
Do not rely on decorative weight alone if the tree is tall or placed somewhere windy.
Use Outdoor-Rated Lights
If you add lights outside, make sure the lighting and electrical components are rated for outdoor use.
Keep connections protected from moisture according to the manufacturer’s instructions.
DIY Wooden Christmas Tree for a Porch
A porch tree can be made more decorative than a simple yard tree.
Consider adding:
- Warm white lights
- A wooden star
- Red ribbon
- Pinecones
- Artificial greenery
- Metal ornaments
- A small welcome sign
Keep the decoration proportional to the tree.
A small porch tree can quickly look crowded if large ornaments are added to every branch.
DIY Wooden Christmas Tree for Small Spaces
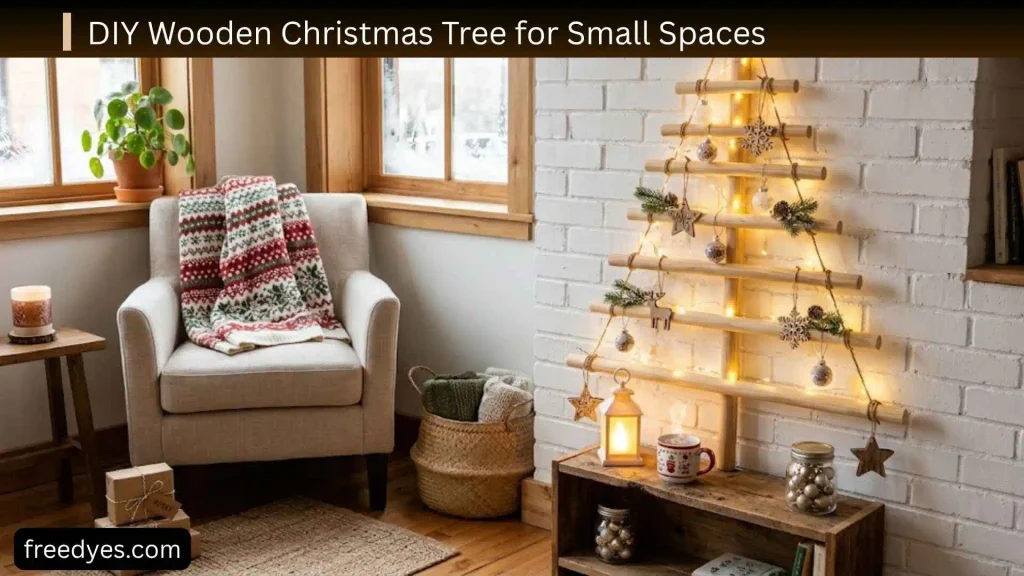
A wooden tree is particularly useful when floor space is limited.
Tabletop Tree
Make a tree between roughly 12 and 24 inches tall for shelves, counters, and tables.
Narrow Floor Tree
Reduce the width while keeping most of the height.
This works well beside furniture or in a narrow entryway.
Wall-Mounted Tree
A flat plywood silhouette can be mounted against a wall.
Make sure the mounting hardware is appropriate for both the tree’s weight and the wall material.
Corner Tree
A narrow triangular design can fit into a corner where a traditional tree would be difficult to place.
Rustic Wooden Christmas Tree Ideas
Rustic style works naturally with reclaimed wood.
Try:
- Natural wood
- Dark stain
- Whitewash
- Burlap
- Twine
- Wooden stars
- Pinecones
- Warm lights
- Red accents
Don’t sand away every mark.
Small knots, nail holes, and color differences can contribute to the rustic appearance.
Farmhouse Wooden Christmas Tree Ideas
For farmhouse décor, use a simple color palette.
Good combinations include:
- White and natural wood
- Black and white
- Green and brown
- White and red
Add a small wooden sign, simple lettering, plaid ribbon, or metal-style ornaments.
Modern Wooden Christmas Tree Ideas
A modern design usually benefits from clean lines and fewer decorations.
Try:
- Smooth plywood
- Matte paint
- Natural wood
- Black
- White
- Soft green
- Minimal ornaments
- Hidden hardware
The tree itself becomes the decoration.
Minimalist Wooden Christmas Tree
A minimalist tree may need almost no decoration.
A simple wooden silhouette with a few warm lights can be enough.
Avoid adding multiple competing colors.
Instead, choose one finish and one decorative element.
Scandinavian-Inspired Wooden Christmas Tree
For a lighter natural look, use pale wood and simple decorations.
Try:
- Natural timber
- Small wooden stars
- White ornaments
- Neutral ribbon
- Warm lighting
- Small amounts of greenery
Leave some of the wood exposed rather than covering the entire surface.
How to Decorate a Wooden Christmas Tree With Lights
Lights can make a plain wooden tree look completely different at night.
Wrap the Lights Around the Branches
This works particularly well with layered trees.
Place Lights Behind the Tree
For an open design, placing lights behind the branches can create a soft glowing outline.
Use Small Light Clips
Clips can help keep the light strand organized without adding permanent hardware.
Keep the Wiring Organized
Avoid loose loops that can snag on decorations.
For outdoor trees, use lighting specifically designed for outdoor conditions.
Wooden Christmas Tree With Ornaments
If you want to hang ornaments, consider adding small hooks or eyelets.
Place heavier ornaments lower on the tree.
Small and lightweight ornaments can be used higher up.
This also helps maintain stability.
Wooden Christmas Tree With a Star
A wooden star is one of the easiest ways to finish the top.
You can:
- Cut one from scrap plywood
- Assemble small wooden strips
- Paint it gold
- Leave it natural
- Stain it dark
- Add lights around it
Make sure the star is securely attached and does not make the top unnecessarily heavy.
Personalized Wooden Christmas Tree
A handmade tree becomes even more meaningful when you add personal details.
Ideas include:
- Family name
- Year
- Initials
- Short Christmas message
- Names of family members
- Small wooden ornaments
- Hand-painted designs
- Family tradition symbols
You could also add one new personalized ornament each year.
How to Make a Wooden Christmas Tree Look More Expensive
A polished appearance usually comes from good proportions rather than expensive materials.
Keep the Branches Consistent
The lengths should decrease gradually.
Use a Consistent Finish
If you want a clean appearance, avoid mixing too many unrelated colors.
Sand the Visible Edges
Even rustic trees look better when dangerous splinters are removed.
Keep the Base Proportional
A tiny base under a large tree can make the entire project look unstable.
Avoid Overdecorating
A few well-chosen decorations can have more impact than covering every inch.
Plan the Hardware
If screws will remain visible, place them consistently.
Otherwise, position fasteners where they are less noticeable.
How to Make a Wooden Christmas Tree Without Cutting a Large Triangle
Some beginners are uncomfortable making a large silhouette cut.
You don’t need one.
The layered-board design is an easier alternative.
Use progressively shorter boards:
28 → 25 → 22 → 19 → 16 → 13 → 10 → 7 → 5 inches
The eye naturally reads the arrangement as a Christmas tree.
This approach also creates a lighter, more open structure than a solid plywood tree.
How to Make the Tree More Stable
Stability is particularly important for tall trees and outdoor displays.
Widen the Base
A wider footprint makes tipping less likely.
Keep Heavy Decorations Low
Don’t place heavy objects near the top.
Strengthen the Central Support
A tall tree needs a support appropriate to its size and weight.
Test Before Decorating
Do the stability test while the tree is still unfinished.
It is much easier to fix the base before adding lights and ornaments.
Anchor Outdoor Trees When Necessary
For exposed locations, use an appropriate anchoring method rather than relying only on the tree’s own weight.
How to Waterproof a Wooden Christmas Tree
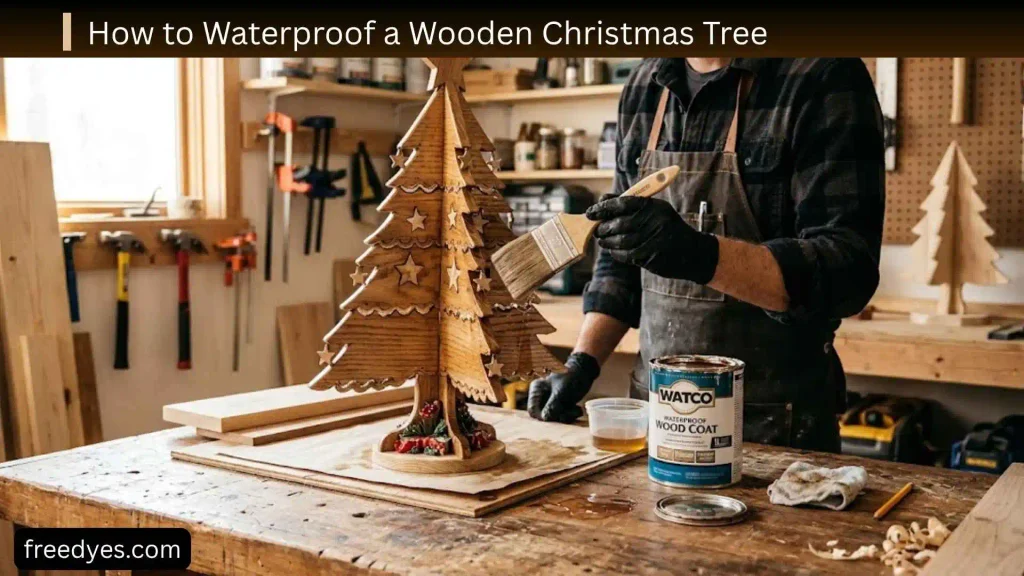
There is no single finish that makes every piece of wood permanently waterproof.
For an outdoor tree, the goal is to reduce moisture absorption and protect the surface with a finish intended for exterior use.
Before Finishing
Make sure the wood is clean and sufficiently dry.
Sand the Surface
Remove loose fibers and rough areas.
Apply an Exterior-Appropriate Finish
Follow the application instructions for the specific product.
Pay Attention to End Grain
Don’t concentrate only on the front face.
Cut ends and joints deserve attention as well.
Inspect It Each Year
Outdoor wood can change with weather exposure.
Look for:
- Cracks
- Peeling finish
- Rot
- Loose fasteners
- Warped boards
Repair problems before the next holiday season.
How Much Does a DIY Wooden Christmas Tree Cost?
The cost depends heavily on what you already have.
Nearly Free Version
Use:
- Scrap wood
- Leftover screws
- Existing paint
- Old decorations
This can cost very little beyond your time.
Basic New-Lumber Version
You may need to purchase:
- Lumber
- Fasteners
- Sandpaper
- Finish
Decorated Version
Adding lights, ornaments, ribbon, and a decorative star increases the total.
A good way to control the budget is to build the tree first and use decorations you already own.
DIY Wooden Christmas Tree on a Budget
Before buying materials, check what you already have.
Look for:
- Leftover lumber
- Old shelves
- Fence pickets
- Scrap plywood
- Unused paint
- Spare screws
- Old Christmas lights
- Previous holiday decorations
Designing the tree around available materials is usually cheaper than choosing a complicated design and then buying every component.
Common DIY Wooden Christmas Tree Problems
Even simple woodworking projects can go wrong.
Problem: The Wood Splits
Possible cause: A fastener is too close to the board end.
Solution: Pre-drill when appropriate and avoid placing fasteners too close to vulnerable edges.
Problem: The Tree Leans
Possible cause: The base is too narrow or uneven.
Solution: Check the base on a flat surface and widen or reinforce it.
Problem: The Branches Look Uneven
Possible cause: The boards were positioned by eye.
Solution: Use a spacer block or ruler to establish consistent gaps.
Problem: The Tree Looks Too Wide
Possible cause: The branch lengths decrease too slowly.
Solution: Shorten the upper boards or increase the difference between rows.
Problem: The Tree Looks Too Thin
Possible cause: The branch lengths decrease too quickly.
Solution: Use smaller length changes between neighboring rows.
Problem: The Finish Looks Uneven
Possible cause: Different boards absorb stain differently.
Solution: Test your finish on scrap wood before applying it to the entire project.
Problem: The Outdoor Tree Develops Cracks
Possible cause: Moisture and temperature changes.
Solution: Inspect the finish and exposed wood, improve protection where appropriate, and replace severely damaged pieces.
How to Make a Wooden Christmas Tree Safer
Sand Splinters
Every board should be checked before use.
Check Hardware
Make sure screws, nails, hooks, and other hardware are secure.
Avoid Sharp Decorative Pieces
Especially if children or pets will be around the tree.
Use Safe Lighting
Inspect light cords before use and use lighting appropriate for the location.
Avoid Open Flames
Do not put candles or other heat-producing objects directly on or next to a wooden Christmas tree.
Flameless LED candles are a much safer decorative choice.
Secure Tall Trees
A tall tree should not be allowed to fall easily if someone bumps it.
DIY Wooden Christmas Tree Ideas for Kids
Woodworking tools should be handled by adults or appropriately trained older users.
Children can still participate in safer parts of the project.
They can help with:
- Choosing paint colors
- Decorating
- Adding paper ornaments
- Painting wooden pieces
- Making a star
- Creating personalized decorations
- Selecting where decorations go
For a family project, adults can handle cutting and drilling while children take part in the creative stages.
How to Make a Wooden Christmas Tree Without a Saw
If you don’t want to cut wood at all, choose materials that are already the right size.
Possible options include:
- Pre-cut craft boards
- Wooden craft sticks
- Paint stirrers
- Small dowels
- Prepared wooden strips
- Fallen branches that already have useful lengths
Arrange them into a tree shape and attach them to a vertical support.
For a tabletop project, this can be much easier than constructing a large floor tree.
How to Store a Wooden Christmas Tree
Good storage protects your project between seasons.
Remove Decorations
Take off lights, ornaments, ribbon, and removable hardware.
Clean the Surface
Remove dust and debris.
Let It Dry
Never store a damp outdoor tree in an enclosed space.
Inspect It
Check for loose screws, damaged boards, or peeling finish.
Store It Somewhere Dry
Avoid prolonged exposure to moisture when the tree is not being used.
Protect the Finish
If the tree has a delicate painted surface, avoid stacking heavy objects directly against it.
How to Maintain an Outdoor Wooden Christmas Tree
At the end of every holiday season, inspect:
- Base joints
- Screws
- Support boards
- Finish
- End grain
- Bottom edges
- Signs of rot
- Warping
- Cracking
Repair small problems before storing the tree.
A little maintenance can prevent a minor problem from becoming a major structural issue.
Five Easy Wooden Christmas Tree Designs to Try
1. Layered Board Tree
Best for beginners who want a straightforward construction method.
2. Pallet Wood Tree
Best for rustic and reclaimed décor.
3. Plywood Silhouette
Best for a modern, painted appearance.
4. Branch Tree
Best for natural, inexpensive decoration.
5. Shelf Tree
Best for displaying ornaments and small Christmas decorations.
DIY Wooden Christmas Tree Design by Budget
Almost Free
Use scrap wood and decorations you already own.
Low-Cost
Buy inexpensive boards and use leftover paint.
Mid-Range
Use better-quality lumber, exterior finish, decorative hardware, and new lights.
Decorative Statement Tree
Use carefully selected wood, a custom finish, lighting, ornaments, and a more substantial base.
The best-looking tree is not necessarily the most expensive one. Proportion, finish, and consistency often make a larger difference.
DIY Wooden Christmas Tree Design by Location
Living Room
Choose a finished indoor tree with coordinated decorations.
Entryway
Use a narrow tree that doesn’t interfere with movement.
Kitchen
A small tabletop tree works well.
Bedroom
Choose a compact tree with warm lighting.
Porch
Use a stable outdoor construction and weather-appropriate finish.
Yard
Build a sturdy structure and consider wind exposure before adding decorations.
How to Choose the Right Wood
Pine
Good for simple indoor projects because it is relatively easy to cut and finish.
Cedar
Useful when you want a naturally attractive appearance and a material suitable for certain outdoor applications.
Plywood
Good for modern silhouettes and painted designs.
Reclaimed Lumber
Best when you want rustic character and already have suitable boards.
Fence Boards
Useful for small and medium decorative projects, especially when the boards are straight and in good condition.
The best material is not simply the cheapest. Choose wood based on the tree’s size, location, appearance, and expected exposure.
What to Do With Uneven Scrap Wood
Uneven boards don’t automatically have to be discarded.
You can:
- Sort them by width
- Use the straightest boards for the bottom
- Use shorter pieces higher up
- Trim only the worst sections
- Create an intentionally irregular rustic tree
However, structural pieces such as the central support and base should be sound and strong.
How to Make a Wooden Christmas Tree Look Handmade Instead of Messy
There is a difference between rustic and unfinished.
A rustic tree can have:
- Knots
- Natural grain
- Small dents
- Slight color variations
But it should still have:
- Safe edges
- Secure joints
- A stable base
- Intentional proportions
- A consistent overall shape
The goal is to preserve character without sacrificing construction quality.
A Simple Wooden Christmas Tree Gift Idea
A small handmade tree can also become a Christmas gift.
Make a tabletop version and personalize it with:
- The recipient’s name
- A family initial
- The year
- A favorite color
- A small wooden star
- A short holiday message
This works particularly well when you want to make several gifts from the same basic design.
Frequently Asked Questions
What is the easiest DIY wooden Christmas tree to make?
A layered tree made from progressively shorter boards is one of the easiest designs because it can be constructed with mostly straight cuts.
How many boards do I need for a wooden Christmas tree?
It depends on the size and design. A simple layered tree can use around eight to ten branch pieces plus a central support and base. Smaller trees may need fewer pieces.
What is the best wood for a DIY Christmas tree?
For indoor projects, common lumber such as pine can be practical. For outdoor projects, choose wood and finishes appropriate for exterior exposure. Reclaimed wood is useful when you want a rustic appearance.
Can I make a wooden Christmas tree from pallet wood?
Yes, suitable pallet boards can be used for rustic Christmas trees. Inspect the wood carefully, remove dangerous hardware, and sand rough surfaces before using it.
Is pallet wood safe for an indoor Christmas tree?
Not every pallet should be assumed suitable for indoor use. Avoid wood with unknown contamination, chemical stains, severe mold, rot, or other concerning conditions.
Can I make a wooden Christmas tree without power tools?
Yes. Use pre-cut boards, small wooden strips, branches, or craft wood. A layered design with ready-cut pieces is one of the simplest options.
How do I make a wooden Christmas tree stand up?
Build a sufficiently wide base and make sure the central support is securely attached. Tall or outdoor trees may also need additional anchoring.
Can a wooden Christmas tree be used outside?
Yes. Use suitable materials, an exterior-appropriate finish, a stable base, and secure lighting. Outdoor trees should also be inspected regularly for weather damage.
How tall should an outdoor wooden Christmas tree be?
There is no universal height. Choose a size appropriate for your porch or yard, then increase the base and structural support as the tree becomes taller.
How do I protect a wooden Christmas tree from rain?
Use wood and finishes appropriate for outdoor exposure, protect exposed end grain, keep the tree from sitting in standing water, and inspect the finish regularly.
Can I make a wooden Christmas tree from scrap wood?
Yes. Scrap wood is excellent for small and rustic trees. Sort pieces by size and condition before deciding how to use them.
Can I paint a wooden Christmas tree?
Yes. You can use green, white, black, red, or any color that works with your décor. Allow the finish to dry completely before decorating.
Do I have to use screws?
Not necessarily. Depending on the design and materials, appropriate nails, brads, glue, or other woodworking fasteners may work. Choose a fastening method suitable for the size and weight of the tree.
How do I make the branches look evenly spaced?
Create a small spacer block and use it between rows during assembly. This is more reliable than estimating each gap by eye.
How do I make a wooden Christmas tree look more rustic?
Use reclaimed or naturally textured wood, preserve some character marks, and consider a natural stain, whitewash, or distressed finish.
How do I make a wooden Christmas tree look modern?
Use smooth plywood or consistent lumber, clean lines, a limited color palette, and minimal decorations.
Can I put Christmas lights on a wooden tree?
Yes. LED string lights are a practical option for decorative wooden trees. Make sure outdoor lighting is rated for outdoor use when applicable.
Final Thoughts
A DIY wooden Christmas tree doesn’t have to be complicated or expensive. The simplest version can be made from a handful of boards arranged from longest to shortest, while more elaborate versions can include shelves, lights, personalized decorations, or weather-resistant construction for the porch.
If you’re new to woodworking, start with the layered-board design. It gives you a recognizable Christmas tree shape without requiring complicated joinery or a large triangular cut.
If you already have reclaimed lumber, try a pallet or scrap-wood version. If you prefer a clean modern look, plywood is an excellent option. For small homes and apartments, a tabletop or narrow tree can provide plenty of holiday character without taking over the room.
The most important things to get right are proportion, stability, safe construction, and appropriate finishing. Once those are handled, the decorative part is completely up to you.
A well-built wooden Christmas tree can become more than a seasonal craft. It can become a reusable part of your Christmas décor that you bring out every year, repaint when your style changes, and personalize with new decorations over time.