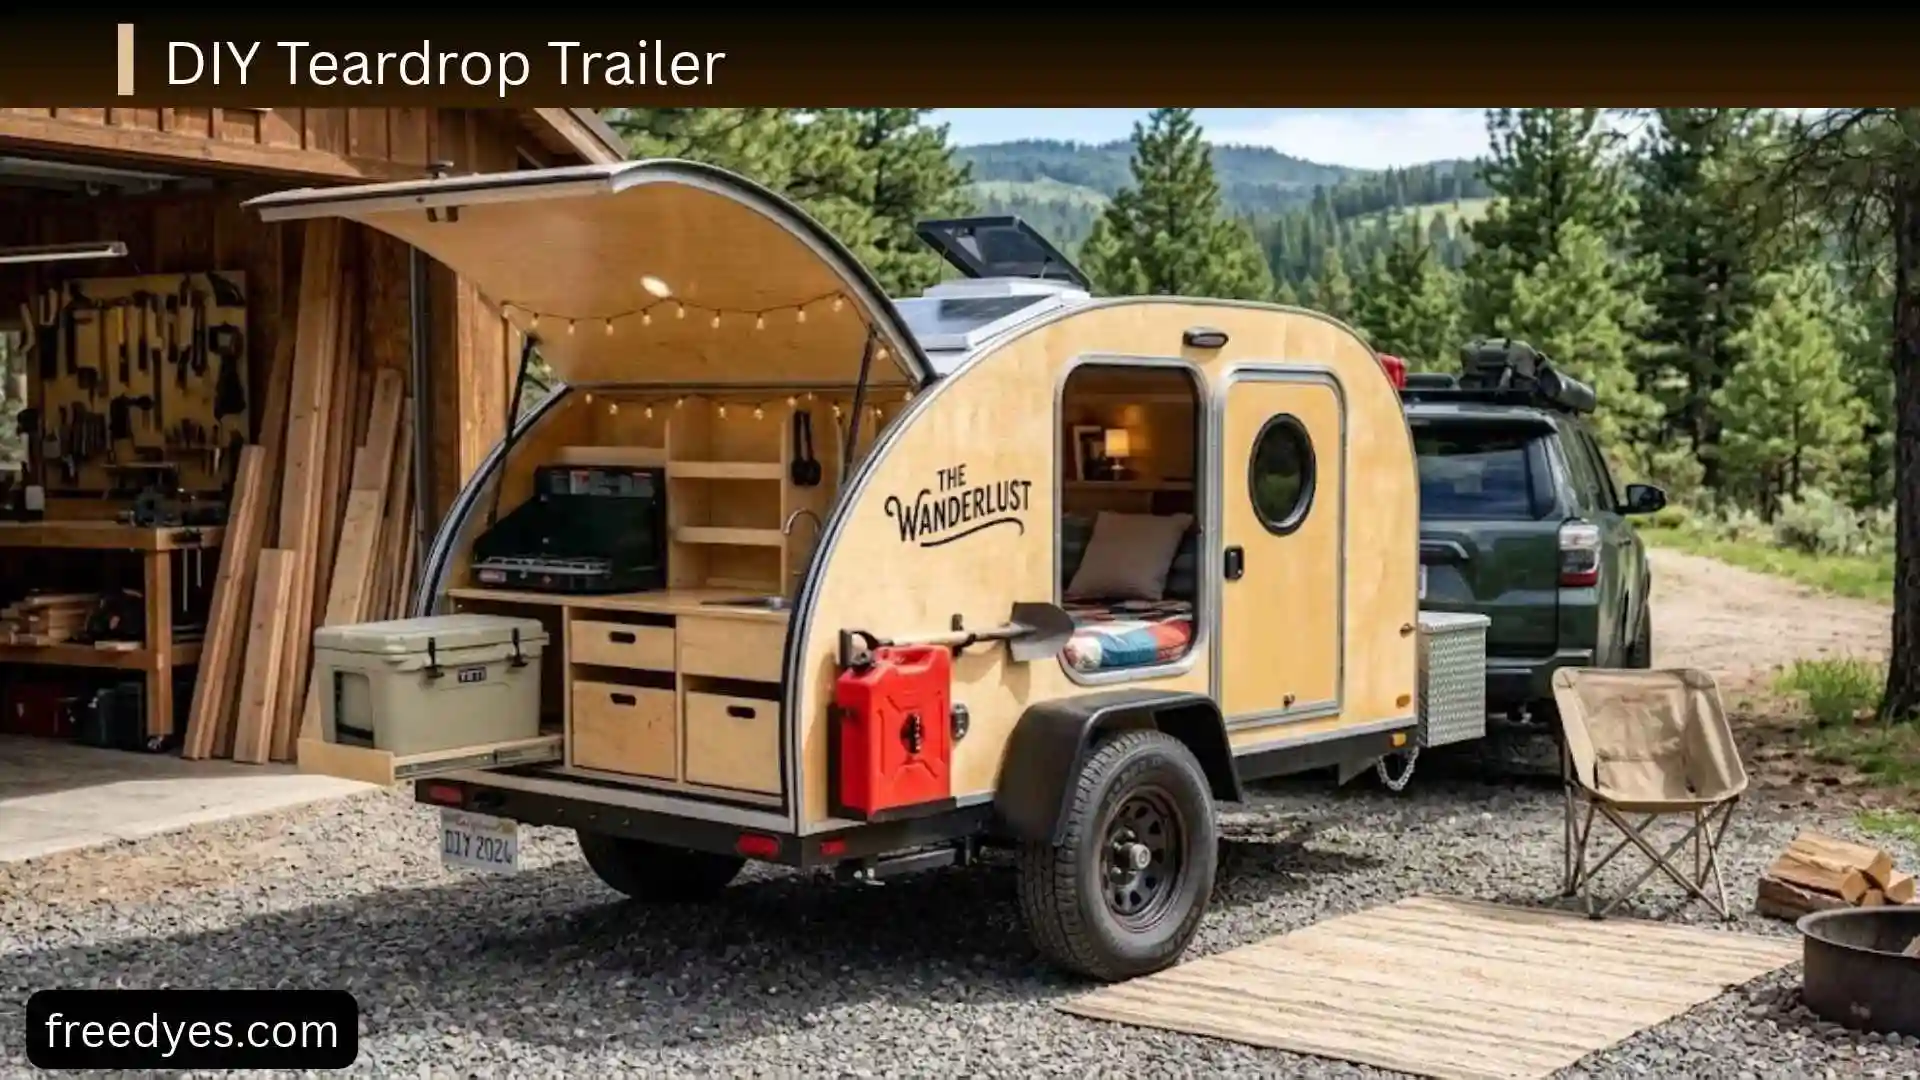
Building a DIY teardrop trailer can be one of the most rewarding camper projects you can take on. A small teardrop gives you a dry sleeping space, basic storage, and the option to add a compact rear kitchen without the size and complexity of a full camper.
But there is an important difference between building a wooden camping box and building a trailer that is safe to tow.
The successful approach is to plan the tow vehicle, loaded weight, trailer frame, axle, body, doors, hatch, electrical system, waterproofing, and final inspection as one connected project.
This guide walks through that process from the first measurements to the final road test. It also explains how to choose between a 4×8 and 5×8 design, how to plan your weight budget, where beginners commonly make mistakes, what parts are usually better purchased than fabricated, and how to create a practical teardrop without adding unnecessary weight or complexity.
Important: The dimensions and construction concepts in this article are planning examples, not certified engineering drawings. Trailer frames, axles, couplers, brakes, electrical systems, and structural connections must be selected according to the actual components, manufacturer specifications, and laws that apply where the trailer will be registered and operated.
DIY Teardrop Trailer at a Glance
| Planning factor | What to decide |
| Trailer size | Usually begin by comparing compact 4×8 and 5×8 layouts |
| Main purpose | Sleeping only, weekend camping, or full galley |
| Frame | Manufactured, used utility trailer, bolt-together, or custom |
| Construction | Wood, composite, aluminum, or hybrid |
| Sleeping arrangement | Single, double, or queen-size mattress depending on design |
| Electrical | Basic 12V, solar-assisted, or larger off-grid system |
| Kitchen | None, simple rear galley, or full galley |
| Weight target | Determined from tow vehicle and component ratings |
| Build difficulty | Intermediate overall, with safety-critical trailer work requiring extra care |
| Biggest planning risk | Adding weight and features without tracking the final loaded trailer |
| Biggest waterproofing risk | Doors, windows, roof penetrations, seams, and rear hatch |
| Most important first step | Determine what your tow vehicle can legally and safely handle |
A DIY teardrop becomes much easier to plan when you make these decisions before buying plywood.
Is a DIY Teardrop Trailer Worth Building?

For the right builder, yes.
A homemade teardrop allows you to control the layout, sleeping area, storage, galley, electrical system, insulation, exterior appearance, and equipment.
You can also build around your actual camping habits rather than paying for features you never use.
The downside is that the project involves much more than woodworking.
You may need to understand:
- Trailer frames
- Suspension
- Axles
- Wheels and tires
- Weight distribution
- Electrical wiring
- Waterproofing
- Structural reinforcement
- Hardware
- Exterior finishes
- Trailer lighting
- Registration requirements
- Towing safety
A commercial teardrop can arrive ready to use. A DIY trailer requires you to become responsible for the quality of the construction and the compatibility of the components.
Who Should Build a DIY Teardrop Trailer?
A DIY build is a good fit if you:
- Enjoy detailed projects
- Have a safe workspace
- Can measure and cut accurately
- Are willing to learn trailer-specific systems
- Have enough time for testing and corrections
- Are comfortable buying safety-critical components rather than improvising them
- Can verify the finished trailer before towing
Who Should Consider Buying or Using a Kit?
A manufactured or kit-based approach may make more sense if:
- You need the trailer immediately
- You have little DIY experience
- You don’t have a suitable workspace
- You don’t have time for repeated fitting and finishing
- You aren’t comfortable working around trailer running gear
- You don’t understand the local registration process
You don’t have to build every component yourself for the project to count as a DIY camper.
Start With Your Tow Vehicle, Not the Trailer
One of the most common mistakes is designing a beautiful trailer first and asking whether the tow vehicle can handle it afterward.
Reverse that process.
Start with the tow vehicle.
Check the manufacturer’s information for:
- Maximum trailer weight
- Maximum tongue or hitch load
- Hitch rating
- Required hitch equipment
- Maximum combined weight where applicable
- Brake requirements
- Tire and loading limitations
Then decide how much trailer you can realistically build.
Why the Loaded Weight Matters
The finished trailer will weigh more than the bare frame and wooden shell.
Your camping weight can include:
- Mattress
- Bedding
- Battery
- Solar equipment
- Water
- Food
- Cooking equipment
- Cooler or refrigerator
- Clothing
- Tools
- Spare tire
- Chairs
- Camping equipment
- Personal gear
A trailer that seems light during construction can become substantially heavier after it is packed.
Do not design around an optimistic empty-shell weight. Design around the trailer as you expect to use it.
Can a Beginner Build a DIY Teardrop Trailer?
Yes, but beginner-friendly does not mean risk-free.
Woodworking portions can be learned relatively easily. Trailer-specific components require more attention.
A useful way to think about difficulty is:
| Area | Difficulty |
| Basic woodworking | Beginner to intermediate |
| Creating sidewall profiles | Intermediate |
| Insulation | Beginner |
| Interior finishing | Beginner to intermediate |
| Cabinet building | Intermediate |
| Electrical planning | Intermediate |
| Waterproofing | Intermediate |
| Trailer frame fabrication | Intermediate to advanced |
| Suspension and axle work | Advanced for inexperienced builders |
| Weight distribution | Requires careful planning |
| Legal compliance | Depends on location |
If you are new to trailer construction, buying a suitable manufactured frame can remove one of the most demanding parts of the project.
Current teardrop-plan resources commonly emphasize the frame as the foundation of the build and offer either custom-built or bolt-together approaches.
Choose Your Teardrop Trailer Size
The two common starting points worth comparing are 4×8 and 5×8.
These dimensions describe the approximate trailer platform or body footprint; the actual usable interior will be smaller after accounting for wall construction and framing.
4×8 Teardrop Trailer
A 4×8 design can be attractive when:
- You want a compact trailer
- Storage space is limited
- Towing simplicity is important
- You prefer a minimalist camper
- You don’t need a large galley
The tradeoff is interior width.
A narrow trailer can be perfectly functional for sleeping, but adding cabinets, large bedding, or two adults changes how much usable space remains.
5×8 Teardrop Trailer
A 5×8 design gives you more width to work with.
It may make sense when you want:
- More sleeping room
- More shoulder space
- Additional storage
- A more comfortable galley
- More interior flexibility
Commercial DIY plan examples commonly use 5×8 footprints, but their finished weights and construction details vary significantly by design. For example, one current plan set describes a 5×8 design, while another lists a specific 5×8 camper at approximately 1,200 lb dry; those figures should be treated as design-specific, not as universal weights for every 5×8 trailer.
4×8 vs. 5×8: Which Is Better?
| Feature | 4×8 | 5×8 |
| Interior space | More compact | More comfortable |
| Material requirements | Potentially lower | Potentially higher |
| Storage | Limited | More flexible |
| Sleeping area | Compact | Easier to design spaciously |
| Weight potential | Can be lower | Can be higher |
| Best for | Minimalist campers | Comfort-focused campers |
| Main concern | Limited width | Added weight and complexity |
Neither size is automatically better.
The best size is the one that fits your tow vehicle, sleeping requirements, storage needs, and weight target.
Choose the Right Trailer Frame
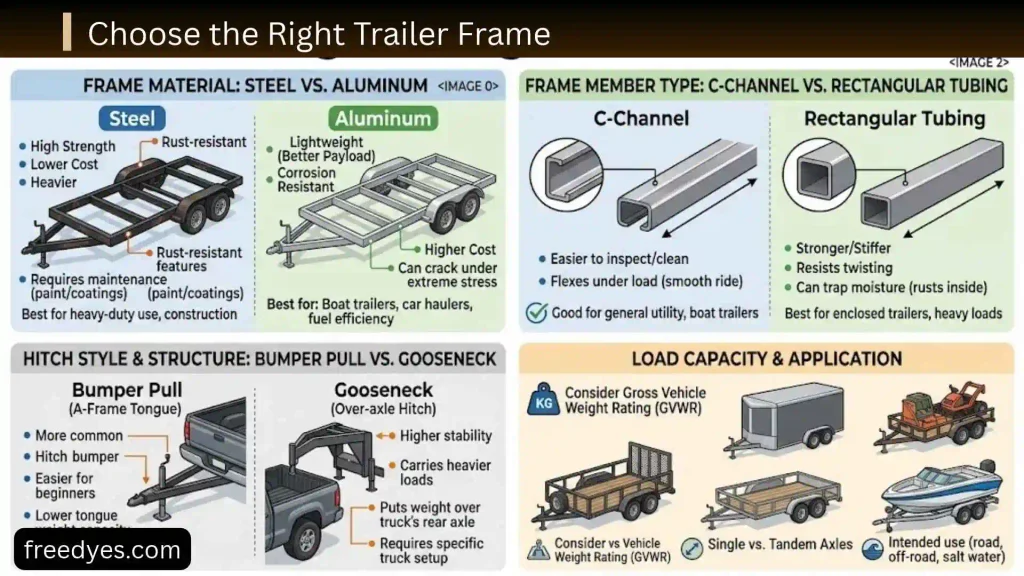
The frame is the foundation of the camper.
You have three practical starting paths.
Option 1: Buy a Suitable Manufactured Frame
This is often the simplest choice for a first build.
Advantages include:
- Less fabrication
- No frame welding if you choose a bolt-together design
- Existing running gear
- Easier starting point
- Less time spent fabricating structural components
However, you still need to confirm that the frame is appropriate for the finished camper and its loaded weight.
Option 2: Modify a Suitable Utility Trailer
An existing utility trailer can provide a useful starting platform.
Before using one, inspect:
- Frame condition
- Rust
- Welds
- Axle
- Bearings
- Tires
- Coupler
- Lights
- Suspension
- Deck condition
- Load rating
A used trailer that looks inexpensive can become expensive if the running gear needs replacement.
Option 3: Build a Custom Frame
A custom frame gives you the most control.
You can design:
- Overall dimensions
- Crossmember placement
- Body mounting points
- Axle location
- Storage areas
- Ground clearance
- Galley arrangement
But custom frame fabrication also increases the consequences of inaccurate design or poor welding.
If you are not experienced with structural trailer fabrication, consider having safety-critical fabrication performed or inspected by someone qualified.
How to Choose an Axle and Suspension
The axle is not simply a piece of hardware you select after the body is complete.
It needs to work with the expected loaded trailer weight and the rest of the running gear.
Consider:
- Axle capacity
- Suspension type
- Hub compatibility
- Wheel size
- Tire load rating
- Brake compatibility
- Ground clearance
- Replacement parts availability
Common suspension approaches include leaf springs and torsion-style systems.
Leaf Spring Suspension
Advantages can include:
- Familiar design
- Widely available replacement parts
- Straightforward servicing
- Easy-to-understand construction
Torsion Suspension
Potential advantages include:
- Compact packaging
- Independent suspension characteristics
- Fewer conventional leaf-spring components
The correct choice depends on the trailer design and the components available to you.
Do not choose an axle solely because its capacity number looks large. The complete running gear must be compatible with the trailer’s actual loaded weight and intended use.
Understand Tongue Weight Before You Build
Tongue weight is the downward load the trailer applies to the hitch.
It matters because your trailer isn’t balanced only by its total weight.
Imagine two trailers with identical total weight.
One has much of its mass near the front.
The other has a large amount of heavy equipment at the rear.
They can behave very differently behind the tow vehicle.
Why Rear Galley Weight Matters
A teardrop’s galley is often at the rear.
You may also put:
- Cooler
- Battery
- Water
- Cooking equipment
- Cabinets
- Spare tire
in that area.
Adding heavy equipment behind the axle can dramatically change the trailer’s balance.
Some current teardrop builders specifically modify axle placement to account for rear galley weight, illustrating why axle position cannot simply be copied from one trailer to another.
How to Approach Weight Distribution
Before construction:
- Draw the trailer from the side.
- Mark the axle location.
- Mark the sleeping area.
- Mark the galley.
- Mark the battery.
- Mark water storage.
- Mark spare tire.
- Mark large equipment.
- Estimate the weight of each item.
- Review where the heavy items will sit.
Then verify the completed trailer using appropriate weighing equipment.
Do not rely on visual balance alone.
Create a DIY Teardrop Trailer Weight Budget
Create your weight budget before cutting the walls.
| Component | Estimated weight |
| Trailer frame | ____ |
| Axle and suspension | ____ |
| Wheels and tires | ____ |
| Floor | ____ |
| Sidewalls | ____ |
| Roof | ____ |
| Exterior skin | ____ |
| Doors and windows | ____ |
| Insulation | ____ |
| Interior panels | ____ |
| Cabinets | ____ |
| Mattress | ____ |
| Battery | ____ |
| Electrical equipment | ____ |
| Solar equipment | ____ |
| Water | ____ |
| Galley equipment | ____ |
| Spare tire | ____ |
| Camping equipment | ____ |
| Estimated camping weight | ____ |
This worksheet is more useful than choosing a weight number first and hoping the finished trailer stays below it.
Why DIY Trailers Become Overweight
Weight often sneaks in through many small decisions.
For example:
- Thicker plywood
- Heavy flooring
- Solid hardwood cabinets
- Large battery
- Large solar system
- Refrigerator
- Multiple water tanks
- Heavy countertop
- Extra windows
- Decorative hardware
- Roof racks
- Spare equipment
Each item seems reasonable by itself.
Together they can change the trailer substantially.
DIY Teardrop Trailer Materials
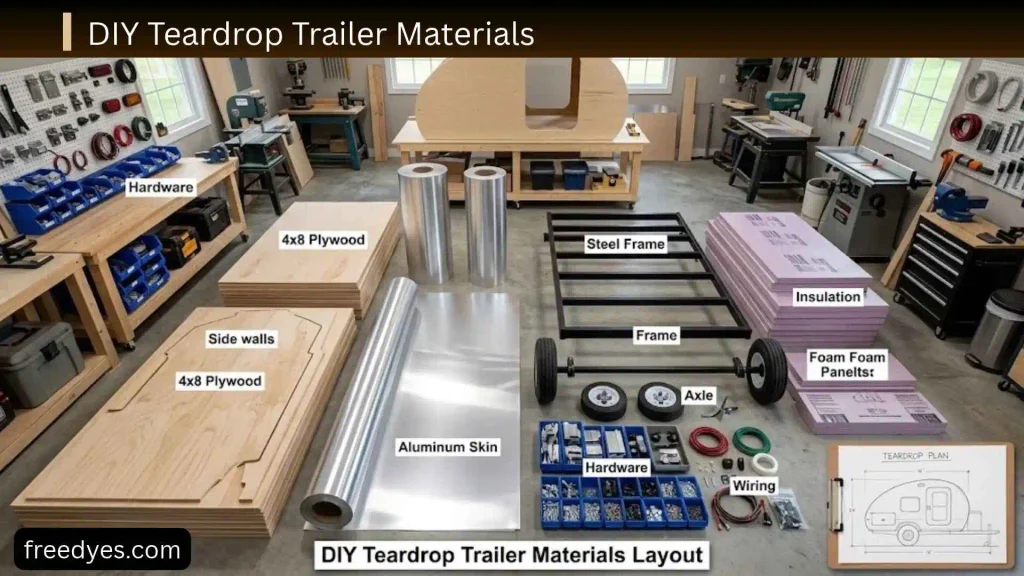
Your exact materials depend on your construction method, but a typical wood-based build may involve:
Structural materials
- Plywood
- Dimensional lumber or lightweight framing
- Adhesive
- Structural screws
- Bolts and washers
- Corner reinforcement
Exterior materials
- Aluminum sheet or another suitable weather-resistant skin
- Exterior sealant
- Edge trim
- Weather stripping
- Exterior fasteners
Interior materials
- Thin plywood or paneling
- Lightweight trim
- Cabinet material
- Flooring
- Mattress platform
Trailer components
- Frame
- Axle
- Suspension
- Coupler
- Safety chains
- Wheels
- Tires
- Fenders
- Trailer lighting
- Wiring
- Brake components where required
Camping components
- Mattress
- Ventilation
- Lighting
- Battery
- Optional solar equipment
- Storage
- Galley equipment
Tools You May Need
A typical wood-focused build may require:
- Tape measure
- Square
- Clamps
- Drill
- Screwdriver bits
- Circular saw
- Jigsaw
- Sander
- Router if your design requires it
- Level
- Caulking tools
- Measuring and marking tools
A custom welded chassis may require an entirely different tool set.
You don’t need to own every tool. Renting or borrowing specialized equipment can make more sense than purchasing tools you will rarely use again.
DIY Teardrop Trailer Plans: What a Good Plan Should Include
If you’re creating your own plans, don’t stop at a side-profile drawing.
A useful plan should include:
- Overall length
- Overall width
- Interior dimensions
- Floor dimensions
- Sidewall profile
- Roof shape
- Door opening
- Window locations
- Hatch opening
- Frame attachment points
- Axle information
- Cabinet dimensions
- Mattress dimensions
- Electrical routing
- Battery location
- Vent location
- Galley layout
- Material list
- Hardware list
- Cut list
Current commercial plan sets demonstrate how much information readers may expect from a true “plans” resource: some provide complete cut lists, hardware lists, wiring diagrams, CAD models, and step-by-step instructions rather than only a few dimensions.
That is an important standard to aim for if your article uses the word plans.
Example DIY Teardrop Trailer Layout
For a simple starting design, imagine a compact 5×8 platform.
The front portion contains:
- Sleeping area
- Mattress
- Small storage compartments
The center section contains:
- Main interior sleeping space
- Ventilation
- Optional electrical storage
The rear contains:
- Galley
- Storage
- Battery or equipment location where appropriate
- Rear hatch
This is a planning example, not a universal blueprint.
Before finalizing dimensions, draw the actual mattress, walls, cabinets, doors, hatch, and equipment to scale.
How to Build a DIY Teardrop Trailer
The safest way to approach the build is in phases.
Step 1: Finalize the Layout
Draw the trailer before cutting anything.
Show:
- Frame
- Floor
- Sidewalls
- Roof
- Mattress
- Doors
- Windows
- Hatch
- Cabinets
- Battery
- Water
- Galley
- Ventilation
This catches conflicts while changes are still cheap.
Step 2: Prepare the Frame
Inspect the frame carefully.
Check:
- Squareness
- Welds or fasteners
- Corrosion
- Axle installation
- Suspension
- Wheel clearance
- Coupler
- Safety-chain attachment
- Lighting
Do not cover the frame with the body until you’re satisfied with its condition and dimensions.
Step 3: Build the Floor
The floor is the connection between the chassis and camper body.
Plan for:
- Structural support
- Moisture protection
- Insulation where appropriate
- Fastening to the frame
- Access for wiring
Dry-fit everything before permanently attaching it.
Step 4: Build the Sidewalls
Create one accurate sidewall template first.
This is one of the best places to save time.
Once the first profile is correct, transfer it to the second wall.
Pay particular attention to:
- Door opening
- Wheel clearance
- Roof curve
- Hatch curve
- Interior height
- Cabinet locations
Step 5: Add Framing and Insulation
Keep the structure strong without adding unnecessary material.
Use framing where loads or fasteners require it.
Don’t fill every available space with heavy lumber simply because it is easy to find.
Step 6: Install Interior Wall Panels
Interior panels can be installed after the wall structure is prepared.
Before closing the walls, photograph and document:
- Wire locations
- Cable routes
- Reinforcement
- Fastener locations
- Future mounting points
This information can save a lot of frustration later.
Step 7: Build the Roof
The roof needs to follow the intended profile while remaining structurally supported.
Plan in advance for:
- Vent
- Wiring
- Roof accessories
- Exterior skin
- Sealant
- Drainage
Every roof penetration becomes a future waterproofing point.
Step 8: Install the Exterior Skin
The exterior skin protects the camper from weather.
Common approaches include aluminum or other suitable exterior systems.
The important principle is not the material name alone.
The complete system must work together:
skin + seams + trim + sealant + fasteners + edge treatment
Step 9: Install Doors and Windows
Doors require accurate openings.
Check:
- Opening dimensions
- Squareness
- Hinge clearance
- Latch location
- Weather seal
- Drainage
- Interior clearance
Don’t install a door simply because the opening “looks close.”
Step 10: Build the Rear Hatch
The hatch needs to match the body profile.
This is one of the areas where careful templating matters most.
Current teardrop hatch guidance emphasizes that hatch design affects sealing, hardware selection, fit, and safety; the correct dimensions depend on the particular trailer design rather than one universal cut list.
Step 11: Install the Interior
Add:
- Mattress platform
- Mattress
- Storage
- Lighting
- Ventilation
- Electrical components
- Trim
Avoid filling the interior with unnecessary heavy furniture.
Step 12: Finish the Galley
A simple galley can include:
- Counter
- Storage
- Cooler
- Water container
- Cooking area
- Lighting
- Small drawers
Keep heavy items low and think about how their placement affects overall balance.
How to Waterproof a DIY Teardrop Trailer
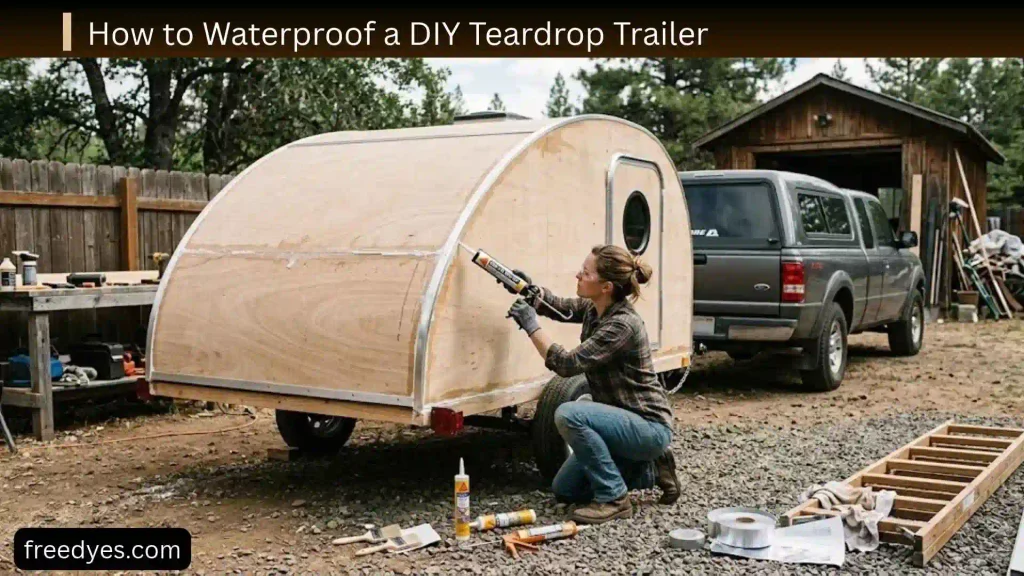
Waterproofing isn’t one step.
It’s a system.
Potential leak locations include:
- Roof seams
- Windows
- Doors
- Hatch
- Trim
- Fasteners
- Wiring penetrations
- Roof vents
- Exterior joints
- Floor edges
Seal the Edges
Plywood edges can be especially vulnerable.
Use a suitable sealing and finishing system appropriate for your chosen materials.
Protect Every Penetration
Any hole through the exterior creates an opportunity for water to enter.
Before drilling:
- Confirm why the hole is needed.
- Check what is behind it.
- Plan the sealing method.
- Protect the opening.
- Seal the hardware appropriately.
Don’t Depend on Caulk Alone
A waterproof trailer is not created by covering every seam with a large amount of sealant.
Good waterproofing comes from:
- Correct overlaps
- Proper trim
- Good seals
- Controlled drainage
- Appropriate materials
- Correct fasteners
- Careful installation
How to Test a DIY Teardrop Trailer for Leaks
Before your first camping trip:
- Close the doors and hatch.
- Inspect all seals.
- Expose the exterior to controlled water.
- Check the interior carefully.
- Inspect corners and floor edges.
- Mark any moisture.
- Allow the area to dry completely.
- Correct the actual source.
- Repeat the test.
Do not cover a leak with more sealant without finding out where the water is entering.
DIY Teardrop Trailer Insulation
Insulation has two jobs:
- Reduce heat transfer.
- Help create a more comfortable interior.
But insulation also takes space.
A very thick wall may improve thermal performance while reducing interior width.
Consider:
- Climate
- Wall thickness
- Roof thickness
- Condensation
- Ventilation
- Material weight
Ventilation Matters Too
A small trailer can become humid quickly.
Two people breathing inside a small enclosed cabin can produce substantial moisture.
Plan for:
- Roof ventilation
- Windows
- Air movement
- Drying wet gear outside when possible
Insulation without ventilation does not solve condensation by itself.
DIY Teardrop Trailer Electrical System
Keep your electrical system as simple as your camping needs allow.
Basic 12V System
A minimalist setup might power:
- Interior lights
- USB charging
- Ventilation fan
- Small 12V accessories
Solar-Assisted System
Solar can help recharge a battery during off-grid camping.
But your solar system should be designed around actual energy consumption rather than choosing a large panel simply because more solar sounds better.
Larger Electrical System
If you want:
- Refrigerator
- Inverter
- Larger appliances
- More electronics
your battery, wiring, protection, charging and energy requirements become more complicated.
Electrical Safety
Use appropriately rated:
- Wire
- Fuses
- Circuit protection
- Connectors
- Switches
- Battery equipment
Protect wiring from abrasion and moving components.
Keep electrical components accessible for inspection and repair.
If you are unfamiliar with trailer electrical systems, get qualified assistance rather than guessing at wire sizing, protection or mains-voltage connections.
DIY Teardrop Trailer Water System
You don’t need a complicated plumbing system.
Simplest Option
Use a removable water container.
Advantages:
- Cheap
- Easy to replace
- Easy to clean
- Little permanent plumbing
- Minimal weight
Intermediate Option
Add a small pump or controlled water dispenser.
More Advanced Option
Use:
- Permanent tank
- Pump
- Sink
- Drain
- Waste container
The more plumbing you add, the more weight, maintenance and freeze protection you need to consider.
For many weekend campers, a removable water system is enough.
DIY Teardrop Trailer Galley Ideas
A galley should serve your actual camping habits.
Minimal Galley
Consider:
- Counter
- Cooler
- Storage bin
- Small water container
- Basic cooking equipment
Full Galley
You might add:
- Sink
- Pump
- Drawers
- Refrigerator
- Dedicated cookware storage
- Larger counter
But every feature has consequences.
A refrigerator requires power.
A sink requires water.
A large counter adds weight.
Cabinetry adds material.
A larger galley also affects trailer balance.
Build the smallest galley that does everything you actually need.
DIY Teardrop Trailer Storage Ideas
Small trailers require intentional storage.
Useful areas include:
- Under-bed storage
- Headboard compartments
- Overhead shelves
- Galley cabinets
- Exterior bins
- Door pockets
- Small floor compartments
Don’t Build Storage Just Because You Can
Empty cabinets are not free.
They require:
- Plywood
- Framing
- Hardware
- Finish
- Weight
A few well-designed storage areas are often better than an entire wall of cabinets.
DIY Teardrop Trailer Mattress and Sleeping Area
The mattress is one of the most important components because the trailer’s primary purpose is sleeping.
Before constructing the interior, choose the mattress size.
Then work outward.
Check:
- Mattress width
- Mattress length
- Wall thickness
- Door location
- Shoulder room
- Headroom
- Storage
- Ventilation
A common mistake is building the shell first and discovering that the desired mattress no longer fits comfortably.
How to Keep a DIY Teardrop Trailer Lightweight
Lightweight construction is mostly about making good decisions repeatedly.
Choose Materials Carefully
Avoid using oversized structural material everywhere.
Control Cabinet Weight
Use lightweight panels where appropriate.
Minimize Unnecessary Hardware
Every hinge, bracket, fastener and accessory adds something.
Limit Features
Ask:
Will I actually use this?
If the answer is no, don’t automatically build it.
Weigh Components During Construction
If possible, keep a running weight record.
That makes it easier to spot a problem before the trailer is finished.
DIY Teardrop Trailer Cost Breakdown
There isn’t one universal DIY teardrop price.
Your cost depends on:
- Frame
- Axle
- Running gear
- Wood
- Exterior skin
- Doors
- Windows
- Sealants
- Electrical
- Battery
- Solar
- Mattress
- Galley
- Hardware
- Tools
Budget Build
Focus on:
- Existing suitable frame
- Simple body
- Minimal electrical
- Basic mattress
- Simple storage
- Minimal galley
Mid-Range Build
Add:
- Better doors
- Better windows
- Insulation
- More refined interior
- Battery system
- More substantial galley
Feature-Heavy Build
Add:
- Solar
- Large battery
- Refrigerator
- Extensive cabinetry
- Premium windows
- Complex electrical equipment
- Additional exterior accessories
The important lesson is that the shell is only one part of the total project cost.
Where to Save Money on a DIY Teardrop Trailer
Good places to save:
- Decorative trim
- Paint choices
- Nonessential accessories
- Interior decoration
- Storage containers
- Used but appropriate camping equipment
Poor places to save:
- Tires
- Coupler
- Safety chains
- Bearings
- Brakes where required
- Structural fasteners
- Electrical protection
- Waterproofing
- Damaged or questionable trailer components
Save money on appearance before saving money on safety-critical components.
What to Build and What to Buy
You don’t need to fabricate everything.
| Component | DIY or Buy? | Practical approach |
| Frame | Either | Buy if you’re inexperienced with fabrication |
| Axle | Buy | Use a properly rated manufactured component |
| Coupler | Buy | Safety-critical component |
| Wheels | Buy | Match to hub and load requirements |
| Tires | Buy | Use appropriate load-rated tires |
| Doors | Either | Purchased doors can simplify sealing |
| Windows | Buy | Purpose-built camper/utility windows are easier to weather-seal |
| Cabinets | DIY | Excellent area for customization |
| Bed platform | DIY | Simple to customize |
| Galley | DIY | Easy to match to your camping style |
| Interior trim | DIY | Good place to personalize |
| Electrical components | Buy | Use properly rated components |
| Exterior skin | Either | Depends on tools, budget and design |
This approach often produces a better trailer than trying to prove that every part can be homemade.
DIY Teardrop Trailer Without Welding
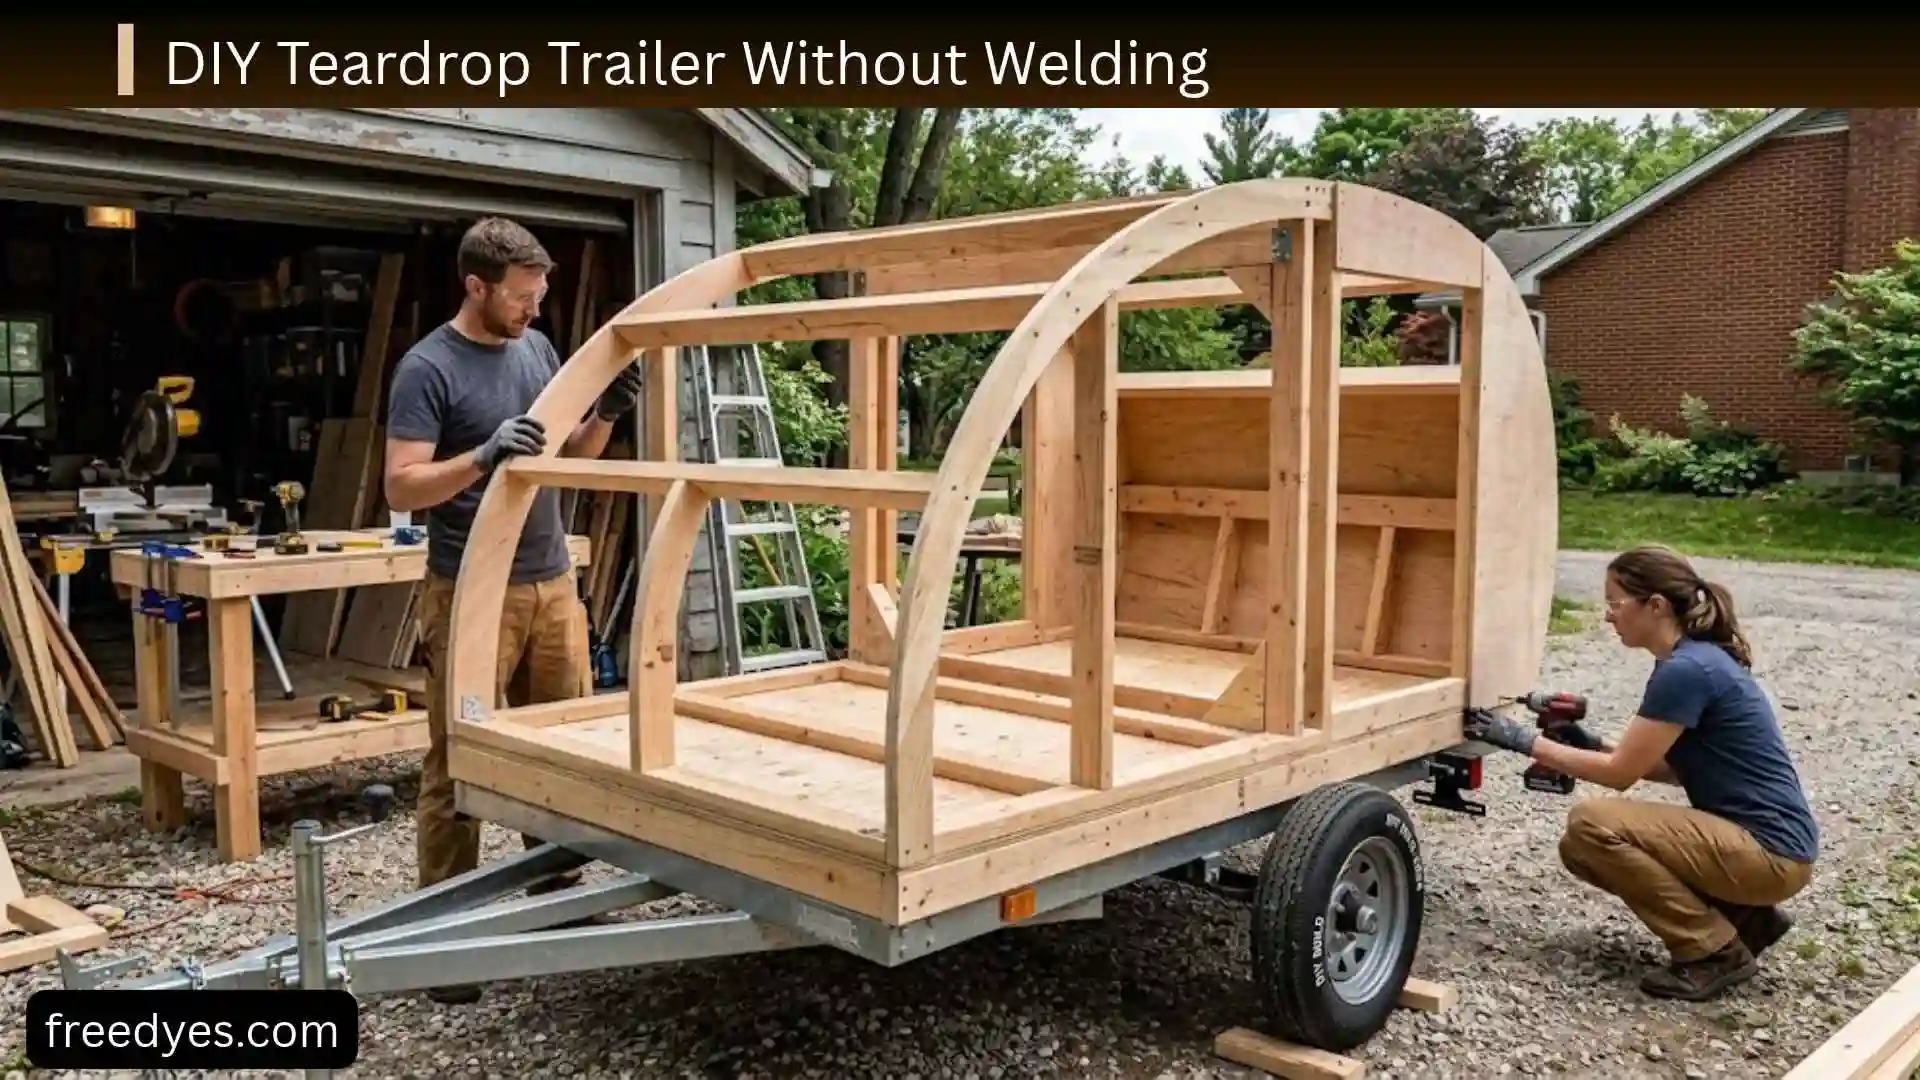
A no-weld build is possible when you start with a suitable manufactured or bolt-together trailer frame.
Some current plan systems specifically use bolt-together frames to avoid welding during chassis construction.
The advantage is obvious:
- Lower equipment requirement
- Easier for beginners
- Less metal fabrication
- Faster chassis preparation
But no-weld does not mean no safety considerations.
You still need to verify:
- Fastener installation
- Frame compatibility
- Axle mounting
- Coupler
- Safety chains
- Load capacity
- Running gear
- Body attachment
DIY Teardrop Trailer With 2×4 Framing
2×4 lumber is easy to find and easy to work with.
But using standard dimensional lumber everywhere can make the trailer unnecessarily heavy.
Before using it throughout the build, ask:
- Is the full thickness necessary?
- Is the member structural?
- Can a lighter material perform the same role?
- Will the added weight affect the finished trailer?
A material being inexpensive and strong doesn’t automatically make it the best material for a lightweight trailer.
The Simplest DIY Teardrop Trailer
If your goal is simply to sleep comfortably while traveling, start with the minimum.
A minimalist teardrop could consist of:
- Suitable trailer frame
- Floor
- Weather-resistant shell
- Mattress
- Door
- Ventilation
- Basic lighting
- Small storage
- Simple rear storage or galley
You don’t need to begin with:
- Full kitchen
- Large refrigerator
- Huge battery
- Inverter
- Permanent plumbing
- Multiple solar panels
- Heavy cabinets
You can always add carefully selected upgrades later if the finished trailer’s weight and balance allow them.
Common DIY Teardrop Trailer Mistakes
Building Before Measuring the Mattress
Problem: Interior becomes too narrow or short.
Solution: Choose the mattress before finalizing interior dimensions.
Choosing the Frame Too Late
Problem: Body dimensions don’t match the chassis.
Solution: Select and verify the frame before finalizing the cabin.
Ignoring Loaded Weight
Problem: The completed trailer is much heavier than expected.
Solution: Track component weights throughout the build.
Putting Too Much Weight at the Rear
Problem: Weight distribution changes dramatically.
Solution: Plan heavy components before construction and verify the finished trailer.
Making the Hatch Too Heavy
Problem: Difficult operation, hardware stress and potential failure.
Solution: Keep hatch construction efficient and use appropriate hardware.
Creating Too Many Exterior Holes
Problem: More potential leak points.
Solution: Consolidate equipment and minimize unnecessary penetrations.
Using Too Much Wood
Problem: Strong but unnecessarily heavy construction.
Solution: Use material where structural support actually requires it.
Skipping Testing
Problem: Problems appear on the first camping trip.
Solution: Test waterproofing, electrical systems, doors, hatch and trailer running gear before traveling.
DIY Teardrop Trailer Troubleshooting
| Problem | Possible cause | First thing to check |
| Hatch rubs | Misalignment or body flex | Hinge line and opening |
| Hatch leaks | Poor seal compression | Entire perimeter seal |
| Door sticks | Opening isn’t square | Door frame and hinges |
| Trailer feels unstable | Weight distribution issue | Loaded weight and balance |
| Trailer becomes heavy | Too many materials/features | Weight worksheet |
| Interior gets damp | Poor ventilation | Roof vent and airflow |
| Battery drains quickly | High electrical consumption | Actual daily energy use |
| Galley is difficult to use | Poor layout | Counter height and storage |
| Cabinets feel weak | Insufficient mounting | Reinforcement and fasteners |
| Water enters around hardware | Unsealed penetration | Fastener and sealant interface |
How to Build a Better Rear Hatch
The hatch deserves extra planning because it moves, seals against weather, and often contains or opens access to the galley.
Before construction, decide:
- Where the hinge will sit
- How far the hatch opens
- Where the seal will compress
- Where the gas struts or support system will mount
- How heavy the finished hatch will be
- Where the galley equipment will sit
Support the hatch securely during installation.
Never rely on an untested prop, strut or temporary support while working beneath a heavy hatch.
How to Make a DIY Teardrop Trailer Look Professional
A professional appearance comes from consistency more than expensive materials.
Focus on:
- Straight trim
- Even gaps
- Consistent fastener spacing
- Clean sealant lines
- Smooth edges
- Properly fitted doors
- Symmetrical lighting
- Simple interior colors
- Hidden wiring
- Clean cabinet edges
The Biggest Visual Upgrade
Spend time getting the exterior profile right.
A smooth sidewall curve and clean roof transition can make a basic trailer look dramatically more finished.
How to Test the Trailer Before Your First Trip
Don’t make your first tow a long-distance camping trip.
Start with a controlled inspection.
Step 1: Verify the Weight
Measure the finished trailer appropriately.
Record:
- Total weight
- Loaded camping weight
- Tongue/hitch load where appropriate
Step 2: Inspect the Running Gear
Check:
- Tires
- Wheels
- Bearings
- Suspension
- Axle
- Coupler
- Safety chains
Step 3: Check Lights
Verify every required light.
Step 4: Check Doors and Hatch
Open and close everything.
Look for:
- Binding
- Loose hardware
- Poor seals
- Unexpected movement
Step 5: Check Electrical
Verify:
- Fuses
- Lights
- Fan
- Battery
- Charging
- Connections
Step 6: Perform a Controlled Road Test
Start with a short trip in a suitable area.
Pay attention to:
- Tracking
- Braking
- Noise
- Vibration
- Movement
- Temperature
- Any unusual behavior
Stop and inspect if something doesn’t feel right.
DIY Teardrop Trailer Safety Checklist
Before towing, check:
- Trailer weight is known or reasonably verified
- Loaded weight is appropriate for the tow vehicle
- Tongue/hitch load is appropriate
- Coupler is correctly secured
- Safety chains are attached correctly
- Tires are suitable and properly inflated
- Wheels and lug hardware are secure
- Bearings/suspension are inspected
- Required brakes are functional
- Required lights work
- Battery is secured
- Electrical wiring is protected
- Doors are latched
- Hatch is latched
- Exterior accessories are secure
- Nothing can move around inside
- Trailer registration and required documentation are complete
Trailer regulations vary by jurisdiction. Check the requirements where your trailer will be registered and operated before construction is finalized.
DIY Teardrop Trailer vs. Buying One
| Factor | DIY | Buy |
| Upfront project time | High | Low |
| Customization | Excellent | Limited by model |
| Learning opportunity | Excellent | Low |
| Construction risk | Your responsibility | Manufacturer responsibility |
| Layout flexibility | High | Moderate |
| Tools required | Often substantial | Minimal |
| Build satisfaction | Very high | Lower |
| Immediate use | No | Yes |
| Weight control | You control design | Fixed by model |
| Repair knowledge | You learn everything | Depends on owner |
DIY makes the most sense when the process itself is part of the goal.
Best DIY Teardrop Trailer Layout for Different Campers
For a Solo Camper
Prioritize:
- Compact mattress
- Small storage
- Lightweight construction
- Minimal electrical system
For a Couple
Prioritize:
- Comfortable mattress
- Adequate interior width
- Ventilation
- Easy entry and exit
- Clothing storage
For a Weekend Camper
Prioritize:
- Simple galley
- Cooler storage
- Basic battery
- Easy-access gear storage
For an Off-Grid Camper
Prioritize:
- Energy consumption
- Battery capacity
- Solar generation
- Water
- Ventilation
- Repairability
Don’t add off-grid equipment until you know what you actually need to power.
How to Plan a DIY Teardrop Trailer in Phases
Phase 1: Planning
Decide:
- Tow vehicle
- Trailer size
- Mattress
- Layout
- Target loaded weight
- Camping style
Phase 2: Chassis
Choose:
- Frame
- Axle
- Suspension
- Wheels
- Tires
- Coupler
Phase 3: Body
Build:
- Floor
- Sidewalls
- Roof
- Exterior shell
Phase 4: Openings
Install:
- Doors
- Windows
- Hatch
- Ventilation
Phase 5: Interior
Add:
- Mattress platform
- Storage
- Panels
- Trim
- Lighting
Phase 6: Electrical
Install:
- Battery
- Protection
- Wiring
- Lights
- Charging
- Optional solar
Phase 7: Galley
Add only the equipment you actually need.
Phase 8: Testing
Perform:
- Weight check
- Leak test
- Electrical test
- Hardware inspection
- Road test
This phased approach prevents the common mistake of treating the trailer as one enormous project.
What Not to DIY on a Teardrop Trailer
Some parts are better purchased or professionally handled.
Be especially cautious about improvising:
- Couplers
- Axles
- Critical suspension components
- Safety chains
- Brake components
- Tires
- Structural welds
- Mains-voltage electrical systems
- Gas systems
A DIY project should mean customized, not necessarily homemade from raw materials.
Questions to Ask Before You Start Building
Before buying plywood, answer these questions:
- What vehicle will tow the trailer?
- What is its verified towing capability?
- What loaded trailer weight am I targeting?
- Will one or two people sleep inside?
- What mattress will I use?
- Do I need a galley?
- Do I need permanent water?
- Do I need solar?
- What electrical equipment will I actually use?
- Will I camp in hot, cold, wet or dry conditions?
- Do I need insulation?
- Do I need off-road capability?
- Will I weld the frame?
- What parts should I buy instead of fabricate?
- What trailer laws apply where I live?
- How will I weigh the completed trailer?
- How will I test it before a long trip?
If you can’t answer these questions yet, you’re probably not ready to cut the walls—and that’s a good thing.
Planning is cheaper than rebuilding.
Frequently Asked Questions About DIY Teardrop Trailers
Can I build a DIY teardrop trailer without welding?
Yes, depending on the design. Starting with an appropriate manufactured or bolt-together frame can eliminate the need to fabricate a welded chassis. Current teardrop plan examples specifically advertise bolt-together frame approaches for builders who don’t want to weld.
Is 4×8 big enough for a teardrop trailer?
It can be, particularly for a minimalist camper. The important question is whether the resulting interior can comfortably fit your mattress, occupants, storage and required equipment.
Is 5×8 better than 4×8?
Not automatically. A 5×8 design provides more space but can also require more material and potentially increase weight. Choose based on your tow vehicle and intended use.
How much does a DIY teardrop trailer weigh?
There is no universal answer.
Two trailers with the same external dimensions can have very different weights because of differences in:
- Frame
- Walls
- Roof
- Exterior skin
- Cabinets
- Battery
- Water
- Windows
- Appliances
- Running gear
Published DIY designs illustrate this variation: current examples range from lightweight designs below 1,000 lb to specific 5×8 designs around 1,200 lb dry. These are individual design specifications, not a universal 5×8 weight range.
Can a small car tow a DIY teardrop trailer?
Possibly, but never assume it based only on trailer dimensions.
Check the specific vehicle’s manufacturer-rated towing and hitch limits, then compare them with the actual loaded trailer.
Do I need trailer brakes?
Requirements vary according to location, trailer characteristics and towing configuration.
Check the regulations applicable to your trailer rather than assuming that every teardrop has the same legal requirement.
Can I use a utility trailer as the base?
Potentially, if it is structurally suitable and compatible with the intended finished trailer.
Inspect the frame, axle, suspension, coupler, tires, wheels and load capacity before using it.
How do I stop my teardrop hatch from leaking?
Start by checking:
- Hatch alignment
- Seal compression
- Hinge area
- Corners
- Trim
- Fasteners
- Exterior seams
Don’t simply add more sealant without locating the water’s entry path.
Do I need solar power?
No.
Solar is useful when your camping style requires regular off-grid battery charging, but a simple electrical system may be enough for occasional weekend trips.
Should I build a full kitchen?
Only if you’ll use it.
A simple galley can reduce:
- Weight
- Cost
- Plumbing
- Electrical demand
- Construction time
What is the hardest part of building a teardrop trailer?
For many DIY builders, the difficult part isn’t cutting plywood.
It’s getting all the systems to work together:
weight + frame + suspension + body + doors + hatch + waterproofing + electrical + towing
That’s why planning is so important.
How can I make a DIY teardrop trailer lighter?
Start by eliminating unnecessary features.
Then evaluate:
- Plywood thickness
- Framing
- Cabinets
- Countertops
- Battery size
- Water storage
- Appliances
- Exterior accessories
Track the weight throughout construction rather than waiting until the end.
How long does it take to build a teardrop trailer?
There is no reliable universal schedule.
A simple build with a ready-made frame can be much faster than a custom chassis with a complicated interior.
Your tools, skill level, finish quality and number of features can change the timeline substantially.
Is building a teardrop trailer cheaper than buying one?
It can be, particularly when you already own tools, have a suitable workspace and can source materials economically.
But DIY does not automatically mean cheap.
Tools, mistakes, replacement materials, running gear, electrical equipment and finishing supplies can add up quickly.
Can I make an off-road teardrop trailer?
You can design a trailer for more demanding terrain, but simply installing larger tires does not automatically make a trailer suitable for serious off-road use.
The frame, suspension, ground clearance, wheels, tires, body construction and weight distribution all matter.
What should I build first?
Start with the tow vehicle, weight target, frame and layout.
Don’t start with the roof shape or interior cabinets.
What is the best beginner strategy?
For many first-time builders, a sensible approach is:
Suitable manufactured frame → simple lightweight body → purchased doors/windows → basic 12V system → minimal galley → weight verification → waterproofing test → controlled road test.
This removes some of the most difficult fabrication work while still allowing substantial customization.
Final Thoughts
A DIY teardrop trailer is more than a woodworking project.
It is a small towing system in which every major decision affects another part of the build.
A heavier galley affects weight distribution.
A larger battery affects weight and storage.
A wider body affects the frame.
A larger mattress affects interior dimensions.
A roof vent creates another waterproofing point.
More equipment creates more electrical demand.
That is why the best DIY teardrop trailer isn’t necessarily the one with the most features.
It is the one where the frame, weight, layout, structure, waterproofing, electrical system and towing requirements all work together.
Start with your tow vehicle.
Choose a realistic trailer size.
Create a weight budget.
Select the frame and running gear carefully.
Plan the mattress and layout before cutting.
Keep the galley and electrical system as simple as your actual camping needs allow.
Build the shell carefully.
Treat every exterior penetration as a waterproofing problem.
Test the finished trailer before taking it on a long trip.
And remember: you don’t have to manufacture every component yourself. Buying the safety-critical parts and concentrating your DIY effort on the body, interior and layout can produce a safer and more enjoyable camper.
A successful teardrop isn’t defined by how much of it you made from scratch.
It’s defined by whether you can confidently hitch it up, tow it safely, open the hatch at camp, climb inside, and enjoy the result.