
A DIY trash can enclosure is a practical way to hide garbage and recycling bins without buying an expensive outdoor storage cabinet. With basic lumber, exterior screws, hinges, and a few common tools, you can build a simple wooden enclosure that looks like part of your landscaping instead of a row of plastic bins.
This guide focuses on one practical design: a two-bin wooden trash can enclosure with three screened sides and a double front gate. The example enclosure is approximately 72 inches wide, 46 inches deep, and 54 inches tall, but the dimensions should be adjusted to fit your actual bins.
The most important rule is simple: measure your trash cans before cutting any wood. Bin sizes vary, and you need enough room for the lids to open, the wheels to move, and each container to roll out without scraping the enclosure.
Quick DIY Trash Can Enclosure Overview
| Project detail | Example |
| Design | Three-sided wooden enclosure with double gate |
| Capacity | 2 standard residential bins |
| Example exterior size | About 72″W × 46″D × 54″H |
| Example interior space | About 64″W × 38″D × 50″H |
| Difficulty | Beginner to intermediate |
| Build time | One full day for an experienced DIYer; longer for beginners |
| Main materials | 4×4 posts, 2×4 framing, exterior slats |
| Best surface | Concrete, pavers, gravel, or another stable outdoor base |
| Roof | Not required |
| Gate | Two hinged front doors |
| Finish | Exterior paint or stain |
| Best feature | Easy access to remove bins |
These dimensions are an example starting point, not a universal trash-can size. Some published plans use different dimensions and configurations, which is another reason to measure your own containers first.
Why This Trash Can Enclosure Design Works
A full trash-can shed can look attractive, but it also adds construction complexity. You may need a roof, additional framing, drainage details, and more complicated doors.
The design in this guide keeps things simpler.
It uses:
- Three screened sides
- Two front doors
- A sturdy frame
- Vertical wooden slats
- No permanent roof
- Enough clearance to roll the bins out
- A stable base
- Exterior-rated hardware
This makes it easier to build while still giving you the visual benefit of hiding the bins.
The open slat design also avoids turning the enclosure into a completely sealed box. That makes inspection and cleaning easier and gives the structure a lighter appearance.
Before You Build: Measure Your Trash Cans

Do not start by buying lumber.
Start with the bins.
Different municipalities and manufacturers use different container sizes, so copying someone else’s exact dimensions can result in an enclosure that looks good but does not work.
Measure each bin at its widest and deepest points.
Measure the width
Measure from the widest point on one side to the widest point on the other.
Include anything that affects the usable width, such as:
- Wheels
- Side handles
- Hinges
- Lid hardware
- Protruding edges
For two bins, add their widths together.
For example:
28 inches + 28 inches = 56 inches
Then add working clearance.
An example 64-inch interior width would leave approximately 8 inches of combined space around two 28-inch-wide bins.
Measure the depth
Measure from the front of the container to its deepest rear point.
Don’t forget handles or wheels that extend farther than the main body.
If your bin is 34 inches deep, an interior depth around 38–40 inches may provide a more comfortable working space, depending on the bin design and how you remove it.
Measure the height
Measure the bin with its lid closed.
Then open the lid completely.
The second measurement is important if you plan to add a roof, top frame, or hinged cover.
Test the removal path
This step is often overlooked.
Place the bins next to each other and physically roll them forward.
Check:
- How far the handles move
- How much the bin needs to tilt
- Whether the lid catches anything
- Whether wheels hit the side walls
- Whether both bins can be removed independently
Your enclosure should be designed around this movement.
Example Dimensions for a Two-Bin Enclosure
For this guide, we’ll use two bins that are approximately:
- 28 inches wide each
- 34 inches deep
- 45 inches tall
That gives us a practical example rather than pretending one measurement works for every household.
Example interior dimensions
Width: 64 inches
Depth: 38 inches
Height: 50 inches
Example exterior dimensions
Approximately:
72 inches wide × 46 inches deep × 54 inches high
The difference accounts for the posts, framing, and exterior boards.
If your bins are wider than the example, increase the interior width before purchasing materials.
A current DIY bin-enclosure guide similarly recommends calculating the enclosure from the actual cart dimensions and then adding clearance rather than treating published dimensions as universal.
Materials for the Example Build
For a basic two-bin enclosure, you can start with the following shopping list.
Structural lumber
- 4 × 4 exterior-rated posts — four pieces, approximately 54 inches long
- 2 × 4 exterior-rated lumber for the frame
- 1 × 6 exterior boards or fence boards for the slats
- Additional 2 × 4 lumber for the two gate frames
Hardware
- Exterior-rated screws
- Heavy-duty exterior hinges
- Exterior gate latch
- Gate handles
- Optional gate stops
- Optional post anchors
Finishing supplies
- Exterior wood stain or paint
- Exterior primer if required by the finish
- Sandpaper
- Wood filler if desired
Base materials
Depending on your location, you may also need:
- Pavers
- Gravel
- Concrete
- Post anchors
- Drainage material
Do not buy the lumber quantities blindly if your bins differ substantially from the example. The cut list below is designed around the example dimensions.
Example Cut List
A clear cut list makes a DIY project much easier because you know what you are actually building before you start cutting.
For the example 72 × 46 × 54-inch enclosure, a practical starting cut list is:
Posts
- 4 × 4 posts — 4 pieces at approximately 54 inches
Main frame
Cut 2 × 4 lumber for:
- Back top rail — approximately 64 inches
- Back middle rail — approximately 64 inches
- Back bottom rail — approximately 64 inches
- Left side top rail — approximately 38 inches
- Left side middle rail — approximately 38 inches
- Left side bottom rail — approximately 38 inches
- Right side top rail — approximately 38 inches
- Right side middle rail — approximately 38 inches
- Right side bottom rail — approximately 38 inches
Additional 2 × 4 material will be needed for the two front gate frames.
Gate frames
For two approximately 32-inch-wide doors, make each gate slightly narrower than the available opening so it has room to swing.
Each gate can use:
- 2 vertical 2 × 4 frame pieces
- 2 horizontal 2 × 4 frame pieces
- 1 diagonal brace if needed
The exact finished gate dimensions should be determined after assembling the opening and accounting for hinge-side and latch-side clearance.
Slats
For vertical 1 × 6 boards, plan for approximately 35–40 boards for the back, side panels, and two gates, depending on the spacing you choose.
Buy a few extra boards.
Extra material is useful because:
- Some boards may have defects.
- Cutting creates waste.
- You may change the slat spacing.
- A damaged board can be replaced later.
How Much Does a DIY Trash Can Enclosure Cost?
The cost depends heavily on the lumber species, local prices, hardware, and whether you already own the tools.
A reasonable way to think about the budget is by project level rather than promising one exact price.
| Build type | Typical budget approach |
| Basic screen | Lowest material cost |
| Two-bin slatted enclosure | Moderate DIY budget |
| Painted/stained premium enclosure | Higher material and finishing cost |
| Roofed cabinet | Highest complexity and material use |
Current DIY examples show substantial variation in material requirements and design complexity, from relatively simple pressure-treated constructions to more elaborate double-bin cabinets.
For your own budget, price these categories separately:
- Structural lumber
- Slats
- Screws
- Hinges
- Latch
- Handles
- Finish
- Base or anchoring materials
If you already have a saw, drill, tape measure, and other basic tools, your out-of-pocket cost can be considerably lower than starting from zero.
Tools You Will Need
The basic version does not require specialized woodworking equipment.
Useful tools include:
- Tape measure
- Pencil
- Speed square
- Level
- Drill/driver
- Drill bits
- Circular saw or miter saw
- Clamps
- Screwdriver bits
- Hammer
- Sandpaper or orbital sander
- Shovel if installing posts
- Safety glasses
- Work gloves
A circular saw is enough for most straight cuts.
Step by Step: How to Build a DIY Trash Can Enclosure
Step 1: Choose the location
Place the enclosure somewhere convenient but visually unobtrusive.
Good locations include:
- Along the side of a driveway
- Beside a garage
- Along a side-yard fence
- Behind a landscape screen
- Near an existing service area
Before choosing the final location, consider the complete route from the enclosure to the collection point.
You don’t want a beautiful enclosure that forces you to drag heavy bins around a narrow corner every week.
Also check for:
- Gates
- Walkways
- Utility equipment
- Drainage
- Property boundaries
- Irrigation lines
- Outdoor electrical equipment
- Local waste-collection requirements
- HOA restrictions, if applicable
Step 2: Mark the footprint
Mark an approximately 72 × 46-inch footprint for the example design.
Then temporarily place the bins inside the proposed area.
Do not skip this test.
Open the lids.
Move the bins.
Roll each bin toward the front.
Open the proposed gate area.
If anything feels cramped now, it will feel even more frustrating after the enclosure is built.
Step 3: Prepare the base
A stable, reasonably level base is important.
Possible surfaces include:
- Concrete
- Existing pavers
- Compacted gravel
- A properly prepared outdoor surface
Avoid creating a low spot where rainwater collects underneath the bins.
If you are building on soil, consider drainage and stability before installing the structure.
For a permanent structure, follow appropriate local requirements for anchoring and digging.
Step 4: Install the four main posts
Position the four 4 × 4 posts at the corners.
For a surface-mounted design, use appropriate exterior-rated post anchors or another suitable anchoring method.
If the posts are going into the ground, the installation method depends on soil conditions, local weather, structure height, and local requirements.
The important thing is that the enclosure should not wobble when you push against it.
Check:
- Plumb
- Level
- Corner alignment
- Overall dimensions
Do not permanently fasten the frame until you are satisfied that the posts are correctly positioned.
Step 5: Build the back frame
Connect the rear posts using 2 × 4 rails.
Install:
- Bottom rail
- Middle rail
- Top rail
The middle rail adds support for the slats and reduces the chance of boards flexing.
Check the frame for square.
A simple way to check a rectangular frame is to measure both diagonals. If the diagonal measurements are equal, the frame is generally square.
Step 6: Build the side frames
Connect the front and rear posts on each side.
Use top, middle, and bottom rails.
At this stage you should have a sturdy three-sided rectangular frame.
Before attaching the slats, step back and confirm:
- The structure is level
- The posts are vertical
- The opening is the intended width
- The bins still fit inside
Step 7: Attach the slats
Install the 1 × 6 boards vertically.
You can use narrow or moderate gaps between the boards.
Even spacing gives the enclosure a cleaner appearance.
A small gap also makes the structure feel less visually heavy than a completely solid wall.
Use exterior-rated fasteners appropriate for your lumber and outdoor conditions.
Do not overtighten screws to the point where the boards are damaged.
Step 8: Build the two front gates
The gates are the most important moving parts.
Build two rectangular frames.
Each gate should be light enough to operate comfortably but rigid enough not to twist.
Attach the vertical slats to the gate frames.
If a gate is relatively wide or heavy, add a diagonal brace to help resist sagging.
The diagonal brace should be arranged to support the gate frame rather than simply being added as decoration.
Step 9: Install the hinges
Attach the hinges to the gate frame first or position them carefully according to the hinge design.
Then mount the gate to the enclosure.
Use exterior-rated hinges sized appropriately for the weight of the gate.
Do not assume two tiny decorative hinges are enough simply because the gate is made from thin boards.
After installation, open and close each gate repeatedly.
Check for:
- Sagging
- Rubbing
- Uneven gaps
- Hinge movement
- Excessive weight
Step 10: Install the latch
Install a latch where it is easy to reach.
The two doors should meet cleanly without requiring force to close.
A simple exterior gate latch is usually enough for a basic enclosure.
If animals are a concern in your area, consider a latch that provides more positive closure.
Step 11: Add gate stops
A small gate stop can prevent the doors from swinging too far in one direction.
This is particularly useful in windy areas.
A stop also protects the hinges and helps the doors close in a predictable position.
Step 12: Sand the enclosure
Sand rough areas before applying the finish.
Pay particular attention to:
- Gate edges
- Corners
- Cut ends
- Hand-height areas
- Slat edges
- Around the handles and latch
The enclosure should be comfortable to touch and free of unnecessary splinters.
Step 13: Apply an exterior finish
Choose a finish intended for the wood and outdoor exposure.
You can:
- Stain it
- Paint it
- Leave suitable wood unfinished if appropriate for the material and climate
If painting, follow the coating manufacturer’s preparation and application instructions.
Pay special attention to exposed end grain and areas likely to stay wet.
How to Build a Trash Can Enclosure Gate That Doesn’t Sag
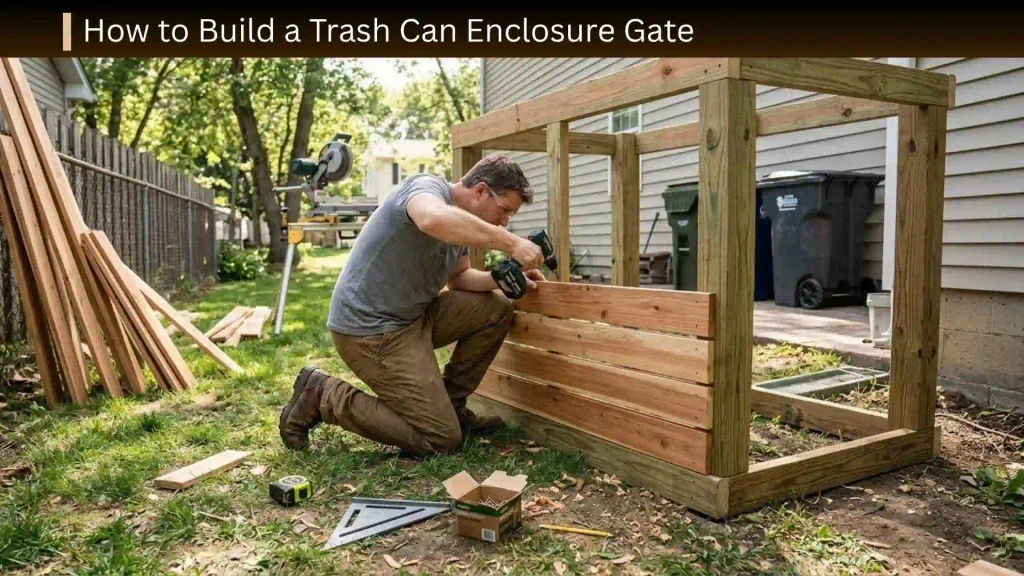
A sagging gate is one of the most common problems with outdoor DIY enclosures.
The basic problem is leverage.
A wide, heavy door places considerable stress on the hinge side.
To reduce sagging:
Keep the gate reasonably light
Don’t add unnecessary layers of heavy lumber.
Build a rigid frame
The frame should resist twisting.
Use appropriate hinges
Choose exterior hinges designed for the weight and size of the door.
Add diagonal support when appropriate
A properly positioned diagonal brace can help keep the gate square.
Don’t make the opening unnecessarily wide
If one huge gate isn’t necessary, two smaller gates can be easier to operate.
For a two-bin enclosure, double doors also allow you to remove one bin without opening a massive door.
How Much Clearance Should You Leave Around Trash Cans?
There is no universal clearance number because bins vary.
However, the principle is straightforward:
The enclosure should be larger than the bins in every direction where movement occurs.
Think about three types of clearance.
Side clearance
You need enough room for:
- Wheels
- Handles
- Hands
- Slight movement
Front clearance
The front opening needs to accommodate the actual path of the bin as you roll it out.
Vertical clearance
The lid must be able to open if you want to access the bin without removing it.
A current example guide uses several inches of clearance beyond the actual bin dimensions and specifically recommends calculating internal dimensions before adding wall and framing thickness.
Don’t treat that number as a universal rule. Instead, use it as a reminder that zero-clearance construction is a bad idea.
Should a Trash Can Enclosure Have a Roof?
Not necessarily.
For a first DIY project, I recommend starting without a roof.
Advantages of no roof
- Easier construction
- Lower material cost
- Easier access
- Better ventilation
- No roof-drainage design
- Simple bin removal
When a roof makes sense
A roof may be useful if:
- You want a shed-like appearance.
- You want additional weather protection.
- The enclosure is in a highly visible location.
- You want lift-up access from the top.
However, a roof introduces another important requirement:
The bin lid must still open.
Before adding a roof, open the bin lid fully and measure its highest point.
How to Build a Roofed Trash Can Enclosure
If you decide to add a roof, keep the design simple.
A basic roof can consist of:
- A top frame
- Sloped supports
- Exterior roof boards or another suitable roofing material
- Adequate overhang
- Drainage direction
A sloped top is generally more practical than a perfectly flat surface because rainwater needs somewhere to go.
Do not create a roof that traps water against the wood.
If you build a roofed structure, also consider wind exposure and anchoring.
Cheapest DIY Trash Can Enclosure
If your main goal is simply to hide the bins, you don’t need to build a miniature shed.
The cheapest approach is usually a three-sided screen.
Use:
- Four structural posts
- Simple horizontal rails
- Fence boards or exterior slats
- Basic exterior screws
- Minimal hardware
Skip:
- Roof
- Decorative trim
- Expensive hardware
- Complicated doors
If the enclosure is hidden behind a fence and only one side is visible, you can also concentrate your decorative effort on the visible surfaces.
DIY Trash Can Enclosure Using Fence Pickets
Fence pickets can be useful for the visible portion of the enclosure because they are readily available in many home-improvement stores and are designed for outdoor use.
They can be installed:
- Vertically
- Horizontally
- With narrow gaps
- With wider decorative gaps
Make sure the frame provides adequate support.
Do not rely on thin fence boards alone to carry the structural load of a large gate.
DIY Trash Can Enclosure for a Small Yard
Small yards require a different strategy.
Instead of building a deep cabinet, use the minimum footprint that still lets you remove the bins.
Possible approaches include:
Narrow side screen
Place the bins against an existing wall or fence and screen only the exposed sides.
Short-return enclosure
Use a back panel with short side walls rather than a full-depth structure.
Two-door front
Two smaller doors can make a tight space easier to use.
Removable front screen
If daily access is limited, a removable panel may be enough.
The important thing is not to sacrifice bin movement simply to save a few inches.
DIY Trash Can Enclosure for Three Bins
Three bins require more planning because the total width becomes significant.
For example, if each bin is 28 inches wide:
28 + 28 + 28 = 84 inches
That is already 7 feet before adding clearance.
Instead of simply making the entire enclosure wider, consider:
- Three separate bays
- Two doors instead of one
- Individual front access
- A wider double-door opening
- A shared rear screen
If your recycling or yard-waste container is a different size, calculate the enclosure from the largest combination rather than assuming all three bins match.
How to Hide Trash Cans Without Building a Full Enclosure
If a complete structure feels excessive, you have other options.
Privacy screen
A simple three-panel screen can hide the bins from the main viewing angle.
Fence extension
If your existing fence is close to the bins, extending the fence line may be enough.
Decorative lattice
Lattice can create visual separation without the bulk of solid panels.
Landscaping
Plants can soften the appearance of the enclosure, although they should not block access to the bins.
Combination approach
A low-cost enclosure plus landscaping often looks more integrated than a large enclosed cabinet.
How to Make a Trash Can Enclosure Look Modern
You don’t need complicated woodworking to create a modern appearance.
Try:
- Straight vertical slats
- Consistent spacing
- Minimal trim
- Simple rectangular posts
- Dark exterior hardware
- A single finish color
- Clean gate lines
The key is consistency.
A simple structure with carefully spaced boards often looks better than an elaborate structure with uneven details.
How to Match the Enclosure to Your House
One of the easiest ways to make a DIY trash enclosure look intentional is to coordinate it with something already on the property.
Match:
- Fence color
- Deck stain
- Exterior trim
- Gate style
- Wood direction
- Hardware finish
If the existing fence has horizontal boards, horizontal enclosure boards may blend better.
If the house uses vertical siding, vertical slats can create a more cohesive appearance.
Should a Trash Can Enclosure Be Completely Solid?
Usually, it doesn’t need to be.
A fully solid box can look heavier and may make cleaning and inspection more difficult.
Slatted sides offer several advantages:
- Visual screening
- Air movement
- Easier inspection
- Less material
- Lighter appearance
However, slat spacing should still prevent the bins from being visually exposed more than you want.
How to Keep a Trash Can Enclosure Clean

The enclosure surrounds waste containers, so cleaning should be part of the design.
Make sure you can:
- Sweep beneath the bins
- Remove leaves
- Reach the rear of the containers
- Hose appropriate surfaces
- Pull every bin completely outside
- Inspect corners
Avoid creating a narrow cavity behind the bins that cannot be reached.
If your enclosure sits directly on soil, leaves and debris can accumulate underneath it. A stable surface such as pavers or properly prepared gravel can make maintenance easier.
How to Reduce Trash Can Odors
An enclosure won’t eliminate odors by itself.
The main odor-control steps are still basic waste management:
- Keep bin lids closed.
- Use properly sealed bags where appropriate.
- Clean spills promptly.
- Don’t leave garbage bags outside the containers.
- Keep the enclosure ventilated.
- Wash the bins when necessary.
- Remove waste according to your normal collection schedule.
A slatted enclosure can provide airflow, but it should not be treated as an odor-control system.
How to Keep Animals Out
If wildlife is a concern, focus on the bins themselves as well as the enclosure.
Use:
- Securely closed lids
- A positive gate latch
- Clean surfaces
- No loose food waste around the enclosure
- Minimal unnecessary openings near the ground
Do not make the enclosure so tightly sealed that you cannot inspect or clean it.
If local wildlife is persistent, follow local waste-management guidance rather than assuming the wooden enclosure alone will solve the problem.
How to Protect the Wood From Weather
Outdoor wood is exposed to:
- Rain
- Snow
- Humidity
- Sunlight
- Temperature changes
- Soil moisture
The most vulnerable areas often include:
- Cut ends
- Bottom edges
- Ground-contact areas
- Horizontal surfaces
- Screw holes
- Gate joints
Use lumber and fasteners appropriate for exterior conditions.
For example, published outdoor garbage-enclosure plans commonly use pressure-treated lumber and exterior-rated screws, while other designs use naturally durable woods such as cedar.
Follow the specific treatment and finishing instructions for the material you purchase.
Do You Need Concrete?
Not always.
A lightweight screen can potentially be mounted to a suitable existing surface using appropriate anchors.
A more permanent structure may need stronger anchoring.
The right method depends on:
- Enclosure height
- Roof presence
- Wind exposure
- Soil
- Surface type
- Local requirements
- Overall weight
A tall, roofed enclosure has different wind loads from a short, open slatted screen.
If you are installing posts into the ground, check for underground utilities before digging and follow applicable local requirements.
Common DIY Trash Can Enclosure Mistakes
Mistake 1: Copying a plan without measuring your bins
A published plan may have been designed for completely different containers.
Fix: Measure your bins first.
Mistake 2: Forgetting the lid
The bin fits, but the lid hits the frame.
Fix: Open the lid completely before finalizing the height.
Mistake 3: Making the gate too small
The container cannot roll through the opening.
Fix: Test the removal path before building the gate.
Mistake 4: Making the enclosure too tight
The wheels and handles scrape the walls.
Fix: Add practical clearance.
Mistake 5: Building one giant door
The door becomes heavy and difficult to control.
Fix: Use two smaller gates where appropriate.
Mistake 6: Using weak hinges
The gate begins to sag.
Fix: Use properly sized exterior-rated hinges.
Mistake 7: Forgetting the ground
The structure settles or the gate starts dragging.
Fix: Start with a stable, reasonably level base.
Mistake 8: Blocking utility access
The enclosure looks great until someone needs to reach a utility component.
Fix: Check the site before permanent installation.
Mistake 9: Making it completely sealed
The structure becomes difficult to inspect and clean.
Fix: Consider a slatted design.
Mistake 10: Adding too much decoration
Extra trim increases cost and construction time without necessarily improving function.
Fix: Spend your budget on the frame, gate, fasteners, and finish first.
Troubleshooting a DIY Trash Can Enclosure
The trash bin doesn’t fit
Don’t force it.
Check which dimension is causing the problem.
If the width is the issue, widen the opening or remove and reposition slats.
If the depth is the problem, increase the interior depth.
If the lid is hitting, increase vertical clearance.
The gate is rubbing
Check:
- Post alignment
- Hinge position
- Gate squareness
- Ground level
- Seasonal movement
A gate that rubs only at the bottom may indicate settling or insufficient ground clearance.
The gate is sagging
Check the hinges first.
Then check whether the gate frame has twisted.
A diagonal brace or stronger framing may help, depending on the design.
The enclosure moves in strong wind
Inspect:
- Post anchoring
- Base connection
- Gate latch
- Overall frame rigidity
Do not simply add weight to the structure without understanding why it is moving.
The boards are warping
Outdoor wood naturally responds to moisture and temperature.
Use suitable exterior lumber, allow appropriate spacing, and follow the material manufacturer’s recommendations.
The enclosure looks too bulky
Try:
- Wider slat spacing
- Fewer decorative elements
- A lighter finish
- Lower visual mass
- Matching the existing fence
The enclosure looks unfinished
A simple top trim board, consistent spacing, clean corners, and a quality exterior finish can make a large difference.
Safety Tips for Building a Trash Can Enclosure
Wear eye protection whenever cutting, drilling, or sanding.
Use appropriate hearing protection when operating loud power tools.
Keep hands away from saw blades and follow the instructions for each tool.
When cutting treated or exterior lumber, follow the product’s safety recommendations.
Use exterior-rated fasteners appropriate for the lumber.
Be careful when lifting long boards and heavy posts.
If digging, check for underground utilities first.
After construction, inspect the enclosure for:
- Sharp screw points
- Splintered wood
- Loose hardware
- Unstable posts
- Pinch points around gates
- Protruding fasteners
Children should not use the enclosure as a climbing structure.
What to Check Before Using the Finished Enclosure
Don’t immediately consider the project finished when the last screw goes in.
Perform a practical test.
Test 1: Open both gates
Make sure they swing freely.
Test 2: Roll out the first bin
Check the wheels and handles.
Test 3: Roll out the second bin
Make sure removing one container doesn’t make the other inaccessible.
Test 4: Open every lid
Check for contact with the frame.
Test 5: Close the gates
Make sure the latch works without forcing the doors.
Test 6: Check the ground
Make sure the gate does not drag.
Test 7: Check the structure
Push lightly against the frame to make sure it is stable.
Test 8: Check collection-day access
Imagine doing the entire process while carrying a full trash bag.
If something is inconvenient now, fix it before you consider the project complete.
Easy One-Day Version
If you need a simple enclosure quickly, eliminate unnecessary features.
Build:
- Four posts
- Three framed sides
- Vertical slats
- Two basic front gates
- Simple latch
- No roof
- No decorative trim
Focus your time on:
- Accurate measurements
- Square framing
- Strong gate construction
- Proper anchoring
- Smooth operation
A simple enclosure that works well is better than an elaborate enclosure that is difficult to use.
When a Full Trash Can Shed Makes More Sense
A larger enclosed shed may be worth considering if you want:
- A roof
- Lift-up lids
- Weather protection
- More visual concealment
- Separate compartments
- A more furniture-like appearance
However, that also increases:
- Material requirements
- Construction time
- Weight
- Hardware needs
- Ventilation considerations
- Drainage requirements
- Anchoring requirements
If your main goal is simply to hide two bins, a three-sided enclosure is usually the simpler starting point.
DIY Trash Can Enclosure Design Ideas
Modern slatted enclosure
Use narrow vertical slats, simple posts, and a dark finish.
Best for: contemporary homes.
Rustic wood enclosure
Use wider boards, natural stain, and simple black hardware.
Best for: traditional or rustic landscaping.
Fence-matching enclosure
Copy the existing fence’s board direction and finish.
Best for: making the enclosure blend into the yard.
Minimal screen
Use only enough wood to block the bins from the primary viewing angle.
Best for: small yards and low budgets.
Three-bin station
Create separate spaces for trash, recycling, and yard waste.
Best for: households with multiple large containers.
Frequently Asked Questions
What is the easiest DIY trash can enclosure?
A three-sided wooden screen with a simple front gate is one of the easiest designs. It uses fewer materials than a roofed cabinet while still hiding most of the bins.
How big should a DIY trash can enclosure be?
Measure the actual bins first. For the example in this guide, the interior space is approximately 64 inches wide, 38 inches deep, and 50 inches high for two bins around 28 × 34 × 45 inches each.
Your required dimensions may be different.
How much space should I leave around a trash can?
Leave enough clearance for wheels, handles, lid movement, and removal. The exact amount depends on your container. Avoid designing the enclosure so tightly that the bin scrapes the walls.
Can I build a trash can enclosure from fence pickets?
Yes. Fence pickets can work well as decorative slats when attached to a properly built structural frame.
What is the cheapest way to hide trash cans?
A simple three-sided privacy screen is generally less complicated than a complete cabinet. Using straightforward framing and inexpensive exterior boards can reduce material costs.
Should a trash can enclosure have a bottom?
Not necessarily. Many designs sit on concrete, pavers, gravel, or another stable surface. A bottom can make cleaning more complicated if it traps water and debris.
Can I build a trash can enclosure without concrete?
Potentially, depending on the size and design. A lightweight enclosure on an appropriate existing surface can use suitable anchors. Taller or roofed structures may require more substantial anchoring.
Should I completely enclose my garbage cans?
You can, but a completely sealed structure isn’t always necessary. A slatted enclosure can provide visual screening while keeping the structure lighter and easier to inspect.
How do I keep my trash can enclosure from blowing over?
Use appropriate anchoring for the structure, surface, and local conditions. A roofed enclosure generally requires more attention to wind than a short open screen.
How do I keep animals out of the enclosure?
Keep the trash-can lids securely closed, use a positive gate latch, clean spills promptly, and avoid unnecessary openings. The enclosure should supplement good waste-storage practices rather than replace them.
How do I stop a wooden trash enclosure from rotting?
Use suitable exterior lumber, appropriate fasteners, keep wood away from constant moisture where possible, provide drainage, and use an exterior finish when appropriate for the material.
How wide should the trash can enclosure gate be?
The opening should be wide enough for the largest bin to roll through without catching its wheels, handles, or lid. Test the actual bin through the proposed opening before permanently installing the gate.
Can I put a roof over my trash cans?
Yes, but the roof must provide enough clearance for the lids to open and the bins to be removed. A sloped roof can also help direct rainwater away from the structure.
How do I build an enclosure for three trash cans?
Start by adding the widths of all three containers, then add working clearance. Consider multiple gates or separate bays so that one bin doesn’t block another.
Is a trash can enclosure worth building?
For many homeowners, yes. It can improve the appearance of a driveway or side yard while giving the bins a dedicated storage location. The main benefit comes from designing it around easy access rather than simply hiding the containers.
Final Thoughts
A successful DIY trash can enclosure should do more than hide ugly bins.
It should make your normal routine easier.
Before cutting any lumber, measure the bins, open their lids, and test how they move. Then build the enclosure around those measurements.
For a first project, the three-sided slatted enclosure with two front gates is a strong starting point. It is simpler than a full shed, provides plenty of visual screening, and keeps the bins accessible on collection day.
If you want to keep the cost down, skip the roof and decorative extras. Spend your effort on the parts that matter most: accurate dimensions, a sturdy frame, strong gate hardware, proper anchoring, and a surface that is easy to clean.
Most importantly, don’t copy a published dimension blindly. Your bins, yard, collection system, weather, and available space determine the right enclosure size.
A little planning before the first cut can save you from the most frustrating DIY outcome of all: a beautiful trash-can enclosure that makes taking out the trash harder.