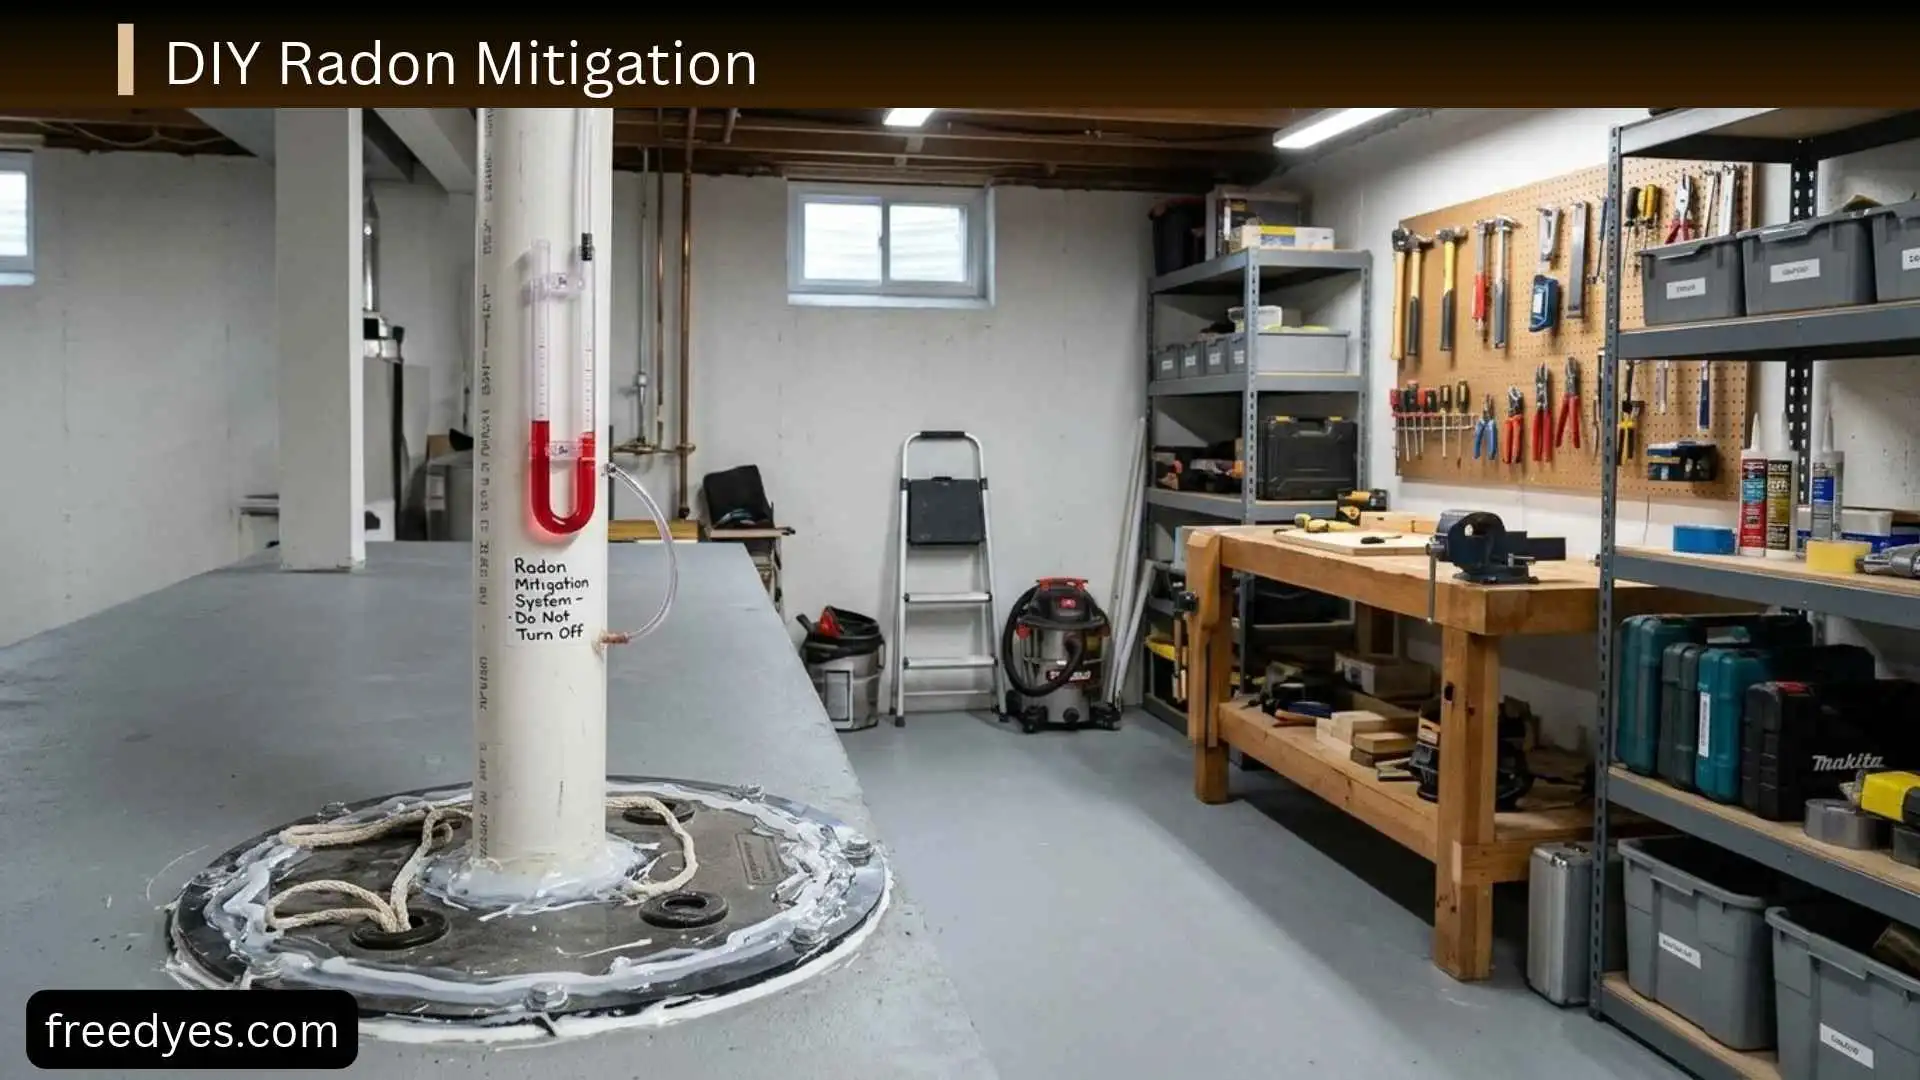
I never expected an invisible gas to become one of the biggest concerns in my home until I learned about radon. At first, I assumed fixing the problem would require expensive professional services, but I quickly discovered that some homeowners can successfully complete a DIY radon mitigation project with the right knowledge, tools, and preparation. If you’re like me and want to understand how the process works before spending thousands of dollars, you’re in the right place.
In this guide, I am going to walk you through everything you need to know about DIY radon mitigation from understanding what radon is and why it matters to learning the basic steps, potential challenges, and safety considerations. Whether you’re trying to lower radon levels on a budget or simply exploring your options before hiring a professional, this article will help you make informed decisions and determine whether a do-it-yourself approach is the right choice for your home.
Can You Really Mitigate Radon Yourself?
You can perform some radon-reduction work yourself, but it is important to distinguish between DIY radon reduction measures and a complete radon mitigation system.
What homeowners can usually do themselves
Depending on your home’s construction and your level of experience, reasonable DIY tasks can include:
- Performing an initial radon test
- Performing follow-up testing
- Inspecting the basement, crawl space, or lowest occupied level
- Locating visible foundation cracks
- Checking gaps around suitable utility penetrations
- Inspecting a sump pit and cover
- Sealing appropriate cracks and openings
- Documenting existing pipes or mitigation components
- Monitoring an existing mitigation system
- Keeping records of test results and repairs
These tasks can help reduce potential entry routes and give you useful information about the building.
What usually requires professional expertise
A complete active system can involve:
- Determining where suction should be applied
- Creating suction beneath a slab
- Designing multiple suction points when necessary
- Routing vent piping correctly
- Selecting an appropriate radon fan
- Connecting electrical components
- Managing pressure relationships
- Safely terminating the exhaust
- Diagnosing poor system performance
- Verifying that the system has actually reduced radon
For a home with high or persistent radon, professional installation is the safer choice. CDC guidance specifically recommends qualified professionals for high radon levels.
Where DIY work becomes risky
The line between ordinary home maintenance and radon mitigation becomes important when your project starts changing the pressure relationship between the soil and the house.
A poorly designed system may not collect soil gas effectively. It may also create unintended air pathways or fail to address major areas of the building.
The goal is not simply to move air.
The goal is to control soil gas before it enters the living space.
Test Your Home Before Trying to Fix Radon
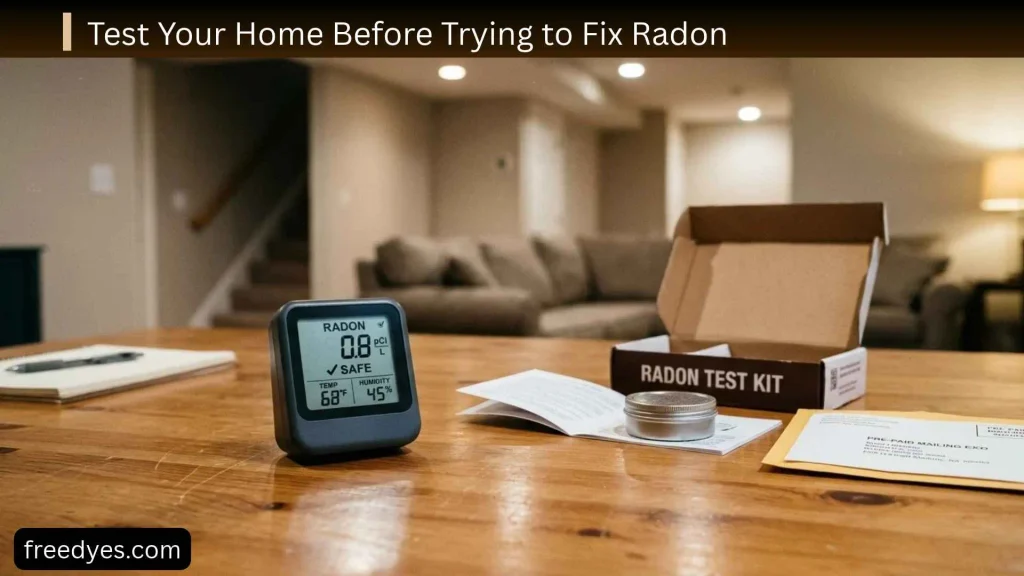
The first rule of DIY radon mitigation is simple:
Test before you start making changes.
Testing is the only way to determine whether a home has elevated radon. DIY test kits are available, although homeowners can also use professional testing services.
Why testing comes first
Without a baseline measurement, you cannot tell whether a repair helped.
For example, suppose you seal several basement cracks and then feel that the basement smells fresher. That does not tell you whether the radon concentration has changed.
A follow-up radon test does.
Short-term and long-term testing
Short-term tests can provide results relatively quickly, while long-term tests provide a better picture of average exposure over an extended period.
If an initial short-term test is above 4 pCi/L, CDC guidance recommends a second test and uses the results to determine whether professional mitigation is needed. A long-term test can also provide a better representation of longer-term conditions.
Follow the instructions supplied with your specific testing device carefully.
Where should you test?
The appropriate testing location depends on how your home is used.
If the basement or lower level is regularly occupied—or may become a bedroom, office, or other living space—it deserves particular attention.
CDC recommends testing before major changes that would cause people to spend more time on a lower level and testing again after renovations that could change radon levels.
Understand Your Radon Test Result
Your test result should determine what you do next.
Below 2 pCi/L
A result below 2 pCi/L is relatively low, but radon is not considered to have a completely safe exposure level.
Continue sensible monitoring, particularly after major renovations or if the lowest level of the home becomes more heavily occupied.
Between 2 and 4 pCi/L
This is a range where additional reduction can be worth considering.
CDC notes that action can be taken to reduce radon even when the result is below 4 pCi/L.
This is an appropriate point to inspect the home, address suitable openings, improve relevant conditions, and consider whether a mitigation system is warranted.
At or above 4 pCi/L
This is the important action threshold used in EPA and CDC guidance.
If testing confirms a level at or above 4 pCi/L, contact a qualified radon professional about installing a radon reduction system rather than relying solely on DIY sealing or ventilation.
Very high or persistent results
The higher the result—or the longer it remains elevated—the less sense it makes to experiment with minor fixes.
If several tests continue to show high levels, move toward professional diagnosis and mitigation.
DIY Radon Mitigation Decision Guide
Before picking up a caulking gun or drilling into concrete, use this simple decision process.
Step 1: Has the home been tested?
If no, test first.
Step 2: Is the result below 2 pCi/L?
Continue monitoring and retest when appropriate.
Step 3: Is the result between 2 and 4 pCi/L?
Consider reasonable reduction measures and retesting.
Step 4: Is the result 4 pCi/L or higher?
Contact a qualified professional about a properly designed mitigation system.
Step 5: Is the result still high after repairs?
Do not keep adding random fixes.
At that point, the important question is not “What else can I seal?”
It is:
“What is the appropriate mitigation design for this house?”
Inspect Your Home Before Starting DIY Radon Work
A careful inspection can tell you much more than simply looking for cracks.
Inspect the foundation
Look for:
- Cracks in concrete floors
- Foundation-wall cracks
- Construction joints
- Gaps around pipes
- Utility penetrations
- Floor drains
- Sump pits
- Openings around support structures
- Exposed soil
- Crawl-space connections
- Existing radon piping
Radon can enter through small openings and through several different pathways. EPA explains that pressure differences between the home and surrounding soil can contribute to radon entering a building.
Inspect the lowest level first
Radon often becomes a bigger concern in areas closest to the ground.
Start with:
- Basement
- Crawl space
- Slab-on-grade areas
- Rooms connected to those spaces
A finished basement should not be ignored simply because the walls and floor are covered.
Make a simple entry-point map
Before making repairs, sketch the basement or crawl space.
Mark:
- Cracks
- Sump pits
- Drains
- Pipes
- Utility penetrations
- Existing vents
- Existing radon pipes
- Areas of exposed soil
This simple map can help you avoid forgetting important pathways.
Seal Appropriate Cracks and Openings
Sealing is one of the most accessible DIY tasks, but it needs to be understood correctly.
What you can consider sealing
Depending on the material and condition, homeowners may be able to seal:
- Suitable cracks in concrete floors
- Suitable foundation-wall cracks
- Gaps around utility penetrations
- Certain construction joints
- Other obvious soil-to-house openings
CDC recommends sealing cracks in floors and walls with appropriate materials as one way to help reduce radon.
Choose the sealant for the actual surface
Do not assume that every household caulk is appropriate for every foundation repair.
Consider:
- Concrete condition
- Crack size
- Movement
- Moisture
- Interior versus exterior location
- Manufacturer instructions
For larger, moving, leaking, or structurally concerning cracks, professional assessment may be more appropriate than simply filling them.
Why sealing alone may not solve high radon
This is one of the most important points in the entire article.
Sealing visible cracks is not the same thing as installing a complete radon mitigation system.
EPA technical guidance explains that sealing alone can be difficult because homes can have numerous hidden or inaccessible soil-gas entry routes.
A house may have a perfectly sealed visible crack and still have elevated radon because soil gas is entering somewhere else.
Check the Sump Pit
Sump areas deserve special attention in homes with basements.
Inspect the sump opening
Look for:
- An open pit
- A damaged cover
- Gaps around the cover
- Pipes passing through the opening
- Existing radon piping
A sump can sometimes be incorporated into a radon mitigation strategy, but it should not be treated as a universal solution.
Do not block drainage
Never permanently close or modify a sump arrangement without understanding its drainage function.
A sump system may protect the home from groundwater, and restricting it can create a completely different problem.
If the sump is already part of a mitigation system, avoid changing it until you understand how that system is designed.
Evaluate Crawl Spaces
Crawl spaces can require a different strategy from basements.
Look for exposed soil
An exposed crawl-space floor can provide direct contact between indoor air and soil beneath the building.
Inspect:
- Exposed earth
- Existing vapor barriers
- Torn or displaced plastic
- Unsealed seams
- Foundation penetrations
- Connections between crawl space and living areas
- Existing suction piping
Do not assume opening vents solves radon
Opening crawl-space vents or basement windows can temporarily change indoor air concentrations, but natural ventilation is not considered a permanent radon mitigation strategy. CDC specifically describes natural ventilation as temporary rather than a substitute for mitigation.
Consider the crawl-space membrane
If a crawl space has exposed soil, a properly installed ground-cover or membrane strategy may be part of an overall radon-control approach.
However, complicated crawl spaces are often better evaluated by a qualified professional because the membrane, seams, walls, and suction system have to work together.
Understand the Difference Between Radon Reduction and Mitigation
These terms are related but should not be treated as identical.
DIY radon reduction
This can include:
- Testing
- Sealing suitable openings
- Addressing obvious pathways
- Improving certain building conditions
- Monitoring
- Retesting
These actions may reduce exposure but do not necessarily create a complete mitigation system.
Active radon mitigation
An active system generally uses suction to reduce soil-gas pressure beneath or around the building and route soil gas safely outdoors.
Active soil depressurization is an established mitigation approach for existing homes.
This is why a complete system should be designed around the building rather than assembled from unrelated parts.
How a Radon Mitigation System Works
The basic concept is easier to understand than the actual installation.
Sub-slab suction
In a suitable home, a suction point is created beneath the concrete slab.
A pipe connects the suction area to a fan.
The fan draws soil gas from beneath the structure and exhausts it outside.
This changes the pressure relationship so that soil gas is less likely to move into the living space.
Why suction matters
Simply giving soil gas another pipe is not enough.
The system must create the appropriate pressure conditions beneath the building.
The effectiveness of a suction system can depend on how easily air moves through the material beneath the slab and on the home’s construction. EPA technical guidance notes that the number and placement of suction points can vary substantially depending on sub-slab conditions.
Sump suction
In some homes, a sump can be incorporated into the mitigation system.
This depends on the sump’s design and the building’s subsurface conditions.
Do not assume every sump can simply be converted into a radon suction point.
Drain-tile suction
Some homes have drainage systems beneath or around the slab.
When appropriate, those systems can sometimes be incorporated into radon mitigation.
The exact approach depends on how the drainage system is constructed.
Block-wall suction
Some foundation walls contain hollow block cavities that can potentially act as radon pathways.
These systems require specialized assessment and are not generally a simple DIY repair.
Sub-membrane depressurization
For certain crawl spaces, suction can be applied beneath an appropriate soil-cover membrane.
This differs from sub-slab suction because the building has exposed or accessible soil rather than a conventional concrete slab.
DIY Radon Mitigation by Foundation Type
Your foundation is one of the biggest factors determining what kind of mitigation may work.
Basement with a concrete slab
A basement may have:
- Concrete slab
- Floor drains
- Sump pit
- Foundation walls
- Utility penetrations
- Cracks
- Finished rooms
DIY work can focus on inspection, documentation, and appropriate sealing.
If the radon result is elevated, a professional can determine whether sub-slab suction or another method is appropriate.
Crawl-space home
Crawl spaces can involve:
- Exposed soil
- Ground-cover membranes
- Foundation walls
- Pier supports
- Plumbing
- Limited access
The mitigation approach can be more complicated than in a simple slab basement.
Slab-on-grade home
A slab-on-grade house does not provide the same easy access to the soil beneath the building that some basements do.
That does not mean it cannot be mitigated.
It means the mitigation design needs to account for the actual slab and subsurface conditions.
Mixed-foundation home
A home might contain:
- A basement
- Crawl space
- Garage slab
- Slab-on-grade addition
In these homes, treating one area may not address every potential pathway.
A professional assessment becomes particularly useful when several foundation types connect to one another.
Can You Install a Radon Fan Yourself?
This is one of the most common DIY questions.
The important answer is:
A radon fan is one component of a mitigation system, not the mitigation system itself.
Why a regular exhaust fan is not enough
A bathroom or attic exhaust fan is designed for general ventilation.
A radon mitigation fan is used as part of a soil-gas collection and pressure-control system.
Using an ordinary fan does not automatically create effective sub-slab depressurization.
Why fan location matters
A mitigation fan must be positioned and connected as part of a properly designed system.
The system needs to prevent contaminated soil gas from being discharged into occupied areas.
The exhaust must be routed to an appropriate outdoor location.
Electrical work is another consideration
Installing or powering a fan can involve electrical work.
If you are not qualified to perform that work safely and legally, use a qualified electrician or radon professional.
A running fan does not prove success
This is worth remembering:
A fan can be running while the mitigation system is still performing poorly.
The ultimate test is whether the radon concentration has been reduced appropriately.
DIY Radon Mitigation Materials and Tools
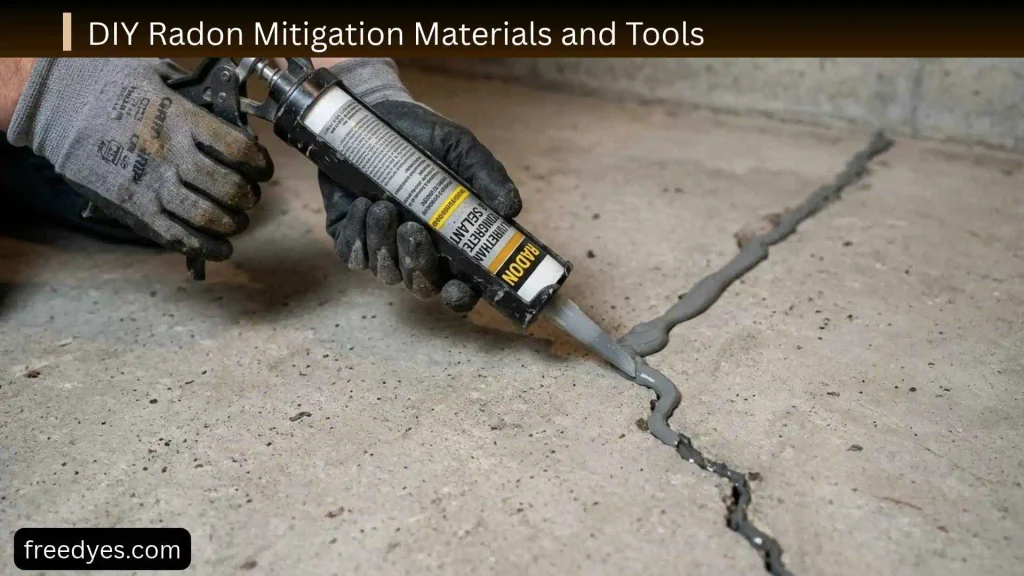
You do not need a large collection of specialized equipment to perform basic homeowner-level work.
Basic DIY supplies
For inspection and supporting repairs, you may need:
- Radon test kit
- Flashlight
- Gloves
- Eye protection
- Cleaning supplies
- Measuring tape
- Suitable crack sealant
- Caulking tools
- Notebook or phone for documenting repairs
Components used in active systems
Professional mitigation systems can involve:
- Gas-tight vent piping
- Radon-rated fan
- Suction-point components
- Pipe fittings
- System warning devices
- Appropriate discharge components
- Electrical connections
- Sealing materials
The exact components depend on the building.
Do not buy the fan first
This is a useful rule for DIY homeowners:
Do not start with the fan. Start with the diagnosis.
Buying components before understanding the foundation can leave you with a system that looks complete but does not control soil gas effectively.
How Much Does DIY Radon Mitigation Cost?
There is no single DIY radon mitigation price because the project can range from a simple inspection and sealing job to a complicated mitigation installation.
Basic testing
Initial testing is generally one of the least expensive steps.
You may choose a DIY test kit or professional testing.
Basic sealing
If you are addressing a few suitable cracks or gaps, material costs can be relatively modest.
However, labor savings do not necessarily mean sealing will solve the radon problem.
Crawl-space work
Crawl-space projects can become more expensive because they may involve:
- Ground-cover materials
- Sealing seams
- Working in difficult spaces
- Preparing suction points
- Addressing moisture
- Professional installation
Active mitigation
A complete system can require:
- Pipe
- Fan
- Fittings
- Electrical work
- Drilling
- Sealing
- Exterior routing
- Testing
CDC notes that radon-reduction costs vary according to how the home was built and the extent of the radon problem.
Where DIY can actually save money
DIY savings are most realistic when you handle tasks such as:
- Testing
- Inspection
- Cleaning
- Documentation
- Minor appropriate sealing
- Preparing access areas
Trying to save money by designing a complex active system without sufficient knowledge can create a more expensive problem if the system fails.
How to Tell If Your DIY Radon Work Worked
Do not judge the result by appearance.
A sealed crack looks fixed.
That does not prove the radon problem is fixed.
Retest the home
CDC recommends testing again after repairs to determine whether radon levels have actually decreased.
Compare:
Original result → repairs → follow-up result
This gives you evidence rather than assumptions.
Keep a repair log
Record:
- Original test date
- Original result
- Areas repaired
- Materials used
- Date of repair
- Follow-up test date
- Follow-up result
- Any mitigation-system changes
This becomes particularly valuable if you later sell the house.
Check an existing mitigation system
If your home already has a mitigation system, inspect it periodically for obvious problems.
Look for:
- Damaged piping
- Loose connections
- Unusual fan noise
- Warning-device changes
- Visible physical damage
- Disconnected components
Do not assume that a quiet fan or a spinning fan automatically means the system is effective.
Why Is My Radon Level Still High?
Sometimes homeowners perform repairs and see little change.
That does not necessarily mean the test was wrong.
The visible crack was not the main entry route
Radon can enter through multiple pathways.
Fixing one opening may have little effect if other pathways remain.
The home needs active mitigation
A home with substantially elevated radon may require soil depressurization rather than relying on sealing.
The foundation is complicated
Multiple foundation types can make mitigation more challenging.
The testing conditions changed
Radon levels can vary with conditions inside and around a home.
That is another reason to follow testing instructions carefully and compare appropriate tests rather than drawing conclusions from isolated readings.
The mitigation system is poorly designed
If an active system is already installed but radon remains high, it may need professional evaluation.
Possible issues include:
- Inadequate suction
- Poor suction-point location
- Multiple untreated areas
- Pipe leakage
- Incorrect system configuration
- Fan problems
Do not automatically install a larger fan.
The correct solution may involve changing the system design rather than increasing fan power.
What If the Radon Level Went Down and Then Came Back?
A changing radon result does not automatically mean your test was faulty.
Radon concentrations can vary.
Possible factors include:
- Seasonal changes
- Weather
- Building pressure
- Changes in ventilation
- Renovation
- Foundation changes
- Mitigation-system problems
If results fluctuate significantly, use appropriate follow-up testing and consider professional assessment rather than repeatedly applying random repairs.
What Not to Do When Mitigating Radon
Some DIY approaches sound logical but can create false confidence.
Do not assume sealing every crack solves the problem
Sealing is useful, but it may not address hidden pathways.
Do not use a bathroom fan as a radon system
A general exhaust fan is not automatically an effective soil-gas mitigation system.
Do not vent radon into an enclosed area
A mitigation system must discharge soil gas safely outdoors.
Do not block drainage openings
A drainage system can have an important function unrelated to radon.
Do not ignore electrical safety
Fan installation can involve electrical work.
Do not rely on open windows permanently
Ventilation can temporarily change radon concentrations but is not a substitute for a properly designed mitigation system.
Do not skip the follow-up test
If you cannot demonstrate that the radon concentration decreased, you cannot confidently say the project worked.
DIY Radon Mitigation Safety Tips
Radon mitigation combines building work with a health-related environmental hazard, so safety should come before saving money.
Protect yourself during basic repairs
Use appropriate:
- Gloves
- Eye protection
- Ventilation when required by product instructions
- Dust protection when working with concrete or similar materials
Check before drilling
Never drill blindly into a slab, wall, or ceiling.
Consider:
- Plumbing
- Electrical wiring
- Structural components
- Drainage
- Embedded utilities
Be careful around combustion appliances
Changes in building pressure can interact with combustion appliances and ventilation systems.
If your proposed work could change pressure relationships in the building, professional assessment is advisable.
Do not perform electrical work beyond your ability
If the mitigation system requires electrical installation or modification and you are not qualified, hire an appropriate professional.
Stop when the problem becomes complicated
DIY is useful when you understand what you are doing.
There is no benefit in continuing simply because you started.
When Should You Stop DIY Work and Hire a Professional?
A professional is the better choice when:
- Radon is confirmed at or above 4 pCi/L
- Results remain elevated after reasonable DIY measures
- Your home has multiple foundation types
- The crawl space is difficult to access
- The foundation has unusual construction
- You need an active suction system
- Multiple suction points may be necessary
- Electrical work is required
- You cannot determine the likely entry pathways
- An existing mitigation system is not reducing radon
- You are unsure whether a repair could affect drainage or combustion safety
CDC specifically states that high radon levels require technical knowledge and special skills and advises relying on qualified professionals for these repairs.
How to Choose a Radon Mitigation Professional
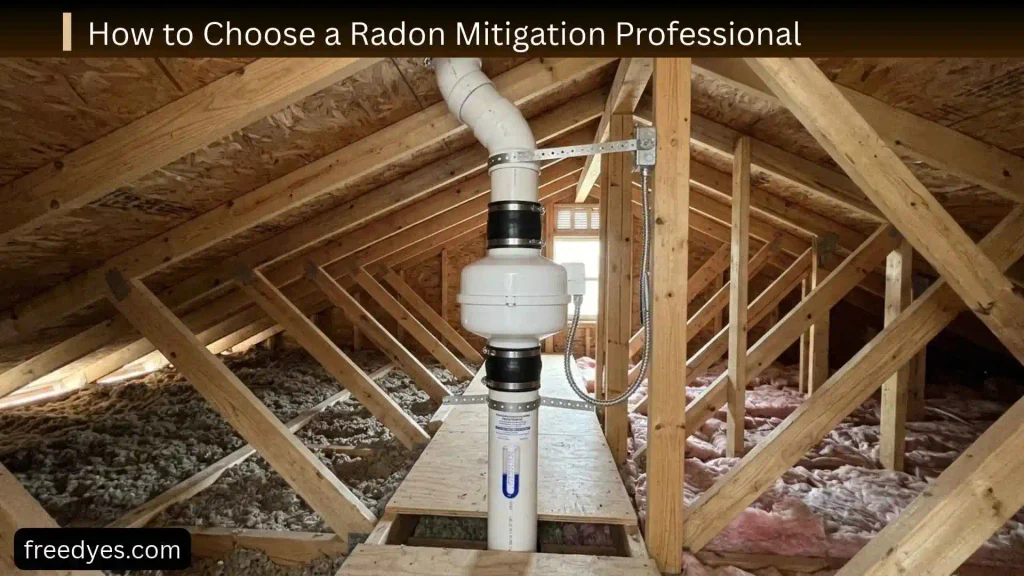
If you need professional help, do not choose solely by price.
Ask about qualifications
Ask whether the contractor is appropriately qualified or certified for radon work in your area.
EPA points homeowners toward recognized radon proficiency organizations and state radon coordinators when looking for qualified service providers.
Ask what system they recommend
A good contractor should be able to explain:
- Where suction will occur
- Why that location was selected
- How many suction points may be required
- Where the fan will go
- Where the exhaust will terminate
- How the system will be tested
- What maintenance will be needed
Get more than one estimate when practical
For significant work, compare several qualified contractors.
Do not automatically select the cheapest proposal.
A low price is not useful if the system does not adequately reduce radon.
How to Maintain a Radon Mitigation System
A mitigation system is not something you should install and forget.
Check the system visually
Look for:
- Damaged pipes
- Loose connections
- Physical impact
- Unusual fan noise
- Changes in the warning device
- Signs of water or weather damage
Understand the warning device
If the system has a pressure or operation indicator, learn what normal operation looks like.
A warning should not be ignored simply because the fan appears to be running.
Retest periodically
EPA and CDC guidance emphasizes follow-up testing after mitigation or repairs. CDC recommends testing again after repairs to verify that radon levels have been reduced.
DIY Radon Mitigation for a New Home
New construction can use radon-resistant features designed to reduce the likelihood of radon entering the home.
Common radon-resistant features
EPA describes features such as:
- Gas-permeable layers
- Plastic sheeting
- Sealed openings
- Radon vent piping
- Electrical provisions for a future fan
These features can make it easier to activate a passive system if testing later shows elevated radon.
Do not assume a new house is radon-free
A new home can still have elevated radon.
Age does not determine whether a house has a radon problem.
Testing remains important.
Real-World DIY Radon Scenarios
Thinking through examples can make the decision process easier.
Scenario: The basement tests at 1.5 pCi/L
This is a relatively low result.
The homeowner can document the result and continue appropriate monitoring.
If the basement later becomes a bedroom or home office, retesting is sensible.
Scenario: The basement tests at 3 pCi/L
This is below the EPA action level but not a reason to ignore radon completely.
The homeowner can inspect the foundation, address appropriate openings, and consider additional reduction measures.
Retesting helps determine whether conditions remain acceptable.
Scenario: The home tests at 7 pCi/L
This is no longer a situation where sealing a few cracks should be treated as the complete solution.
The homeowner should contact a qualified radon professional about an appropriate mitigation system.
Scenario: The home already has a passive radon pipe
Testing should determine whether the passive system is sufficient.
If elevated radon is confirmed, the system may potentially be activated with a fan as part of an appropriate mitigation design. EPA describes this type of approach for radon-resistant construction.
Scenario: The fan is running but radon is still high
Do not assume that increasing fan size will solve the problem.
The system should be professionally evaluated for suction, routing, entry pathways, and overall design.
DIY Radon Mitigation Checklist
Use this checklist before calling the project finished.
Before starting
- Test the home
- Record the result
- Identify the lowest occupied levels
- Determine the foundation type
- Inspect the basement or crawl space
- Map obvious entry points
During DIY work
- Seal appropriate cracks
- Address suitable openings
- Inspect the sump
- Check crawl-space conditions
- Avoid blocking drainage
- Follow product instructions
- Avoid unsafe electrical work
- Document what you changed
After the work
- Retest the home
- Compare the new result with the baseline
- Record the follow-up result
- Investigate persistent high readings
- Consider professional mitigation when appropriate
Frequently Asked Questions About DIY Radon Mitigation
Can I install a radon mitigation system myself?
Some experienced homeowners may have the skills to perform portions of an installation, but a complete active mitigation system requires proper design. For confirmed high radon, EPA and CDC guidance supports using a qualified professional.
Can I reduce radon by sealing basement cracks?
Sealing appropriate cracks can reduce potential entry pathways, but it should not be assumed to solve a high-radon problem by itself. Multiple hidden pathways may remain.
Can I mitigate radon without a fan?
Some passive and supporting measures can reduce radon, but an active soil-suction system is a common approach for existing homes with elevated radon. Whether a fan is needed depends on the home’s construction and test results.
Can I use a bathroom exhaust fan for radon?
No. A bathroom exhaust fan is not automatically a radon mitigation system. Effective radon mitigation requires controlling soil gas and the pressure relationship beneath or around the home.
How do I mitigate radon in a basement?
Start with testing and a foundation inspection. Seal appropriate openings as a supporting measure, then have a qualified professional evaluate an active mitigation approach if radon is elevated.
How do I mitigate radon in a crawl space?
A crawl-space solution may involve sealing and an appropriate ground-cover membrane combined with sub-membrane suction. The exact approach depends on the crawl-space construction and connection to the living area.
How many suction points does a radon system need?
There is no universal number. The required number and location can depend on the size and construction of the building and how easily soil gas moves beneath the slab. EPA technical guidance notes that suction requirements can vary considerably between homes.
Does opening basement windows reduce radon?
Opening windows can temporarily alter indoor radon concentrations, but natural ventilation is not considered a permanent mitigation strategy.
Why does my radon level change from day to day?
Radon concentrations can vary because of changing conditions inside and around a building. Compare appropriate tests rather than relying on a single unusual reading.
Why is my radon level higher after rain?
Weather and changes in soil conditions can influence how soil gas moves toward and into a building. If you notice repeated unusual readings, use appropriate follow-up testing and consider professional assessment.
Can a running radon fan still have a problem?
Yes. A running fan only tells you that the fan is operating. It does not prove that the system is creating adequate suction or reducing radon throughout the building.
How long does a radon mitigation system last?
A properly installed system can remain functional for many years, but components can wear out or become damaged. Regular visual checks, attention to warning devices, and periodic radon testing are important.
Should I retest after sealing cracks?
Yes. Testing after repairs is the only practical way to determine whether your changes actually reduced radon. CDC specifically recommends retesting after repairs.
What should I do if my radon level is 4 pCi/L or higher?
Contact a qualified radon professional about a radon reduction system. EPA and CDC use 4 pCi/L as the level at which professional mitigation should be pursued.
Is there a completely safe radon level?
No known completely safe level has been established. The practical goal is to reduce radon exposure as much as reasonably possible.
Can a new house have high radon?
Yes. Radon can occur in new and old buildings. EPA recommends testing new homes and considering radon-resistant construction features.
Can DIY radon mitigation save money?
It can save money on appropriate homeowner-level tasks such as testing, inspection, documentation, and some minor repairs. However, attempting complex mitigation without adequate knowledge can lead to an ineffective system and additional costs.
Final Thoughts
DIY radon mitigation is best approached as a process of testing, understanding, reducing, verifying, and knowing when to stop.
Start with a reliable radon test rather than guessing. Inspect the foundation and identify obvious entry pathways. Seal appropriate cracks and openings as supporting measures, but do not assume that visible sealing is a complete solution.
If the radon concentration is confirmed at or above 4 pCi/L, move toward a properly designed mitigation system and qualified professional assistance rather than experimenting with increasingly complicated DIY fixes.
The most important part of any radon project is not how many cracks you filled or whether a fan is running.
It is whether reliable follow-up testing shows that radon levels have actually been reduced.